Friday 24 February 2012

Cumin & Lemon Cookies


I have some news.

I’ve been avoiding telling you for a while. I’m not entirely sure why. I guess I’m worried that you will be disappointed.


The truth is that since I finished my finals – even as I was tucking away each folder as my exams progressed – I’ve been missing the topics I studied, missing the medieval world and words.

Though I always enjoyed my course, the bug only truly bit in those last few months as everything started to slot into place, to create a bigger picture. I actually enjoyed revising, happy in the knowledge that I was going to be a pastry chef and nobody would care what grade I got – so I could learn the topics I loved and take risks as I scrawled out essay after essay.

Then my results far exceeded my expectations and opened doors I hadn’t even noticed. And so, even before I started at Cordon Bleu, I started to think about possibly returning to university.


At first I wanted to study part-time (after I had finished at CB), while I set up a business selling wedding cakes. I'd been drawing up careful plans of the business I wanted to create for many months by then, looking at many of the practicalities and dreaming about designs. I had a lot of ideas. A lot of opinions.

Under 'Any plans for the future?' in my college yearbook, I wrote: "My dream at the moment is to set up a bespoke wedding cake business". Now I look back and note that even then I included 'at the moment'. Tellingly, I didn't mention it here.


On our very first day at Cordon Bleu the chef asked what we hoped to do when we left. I stood there in the then-unfamiliar kitchen, a strip of my back chilled by leaning on the frosty marble, surrounded by my new classmates (the infamous Group G), waiting my turn. When it came, I didn't mention anything about wedding cakes. I spoke about this blog and about writing, recipes and photography. Maybe it was the nerves, maybe I knew by then.

So I can comfortably say now that I have put that dream to one side. I would love to make a wedding cake one day - but I don't want to make my living out of it.


As the months ticked by and my wedding cake plans started to crumble, I became more and more serious about studying again. In January I sent in three applications to study full time – I recently received two unconditional offers (I’m waiting on the last result).

So now I know that when the leaves fall and autumn arrives, I will be studying again. I will get to immerse myself back in the bewitching world of medieval languages, culture, history, religion, art and above all, literature. I’m incredibly excited.


This all leads to the final choice I've recently made – this one is only a few weeks old. I have decided to not take the third certificate at Cordon Bleu. I’m therefore leaving at the end of this term (the end of March).

I'm really content with the choices I've made. I hope you will be happy for me too, even though it means stepping away from pastry for the moment. I don’t know where life will lead me, what paths I’ll take, so maybe I will still spend some of my time in a professional kitchen of some kind. I'd like to try it out. I have every intention of continuing to blog - my love of eating, cooking, writing and taking photographs hasn't changed.

I will always be grateful for the support, encouragement and enthusiasm you - my readers and friends - have shown towards me, the course and this blog.


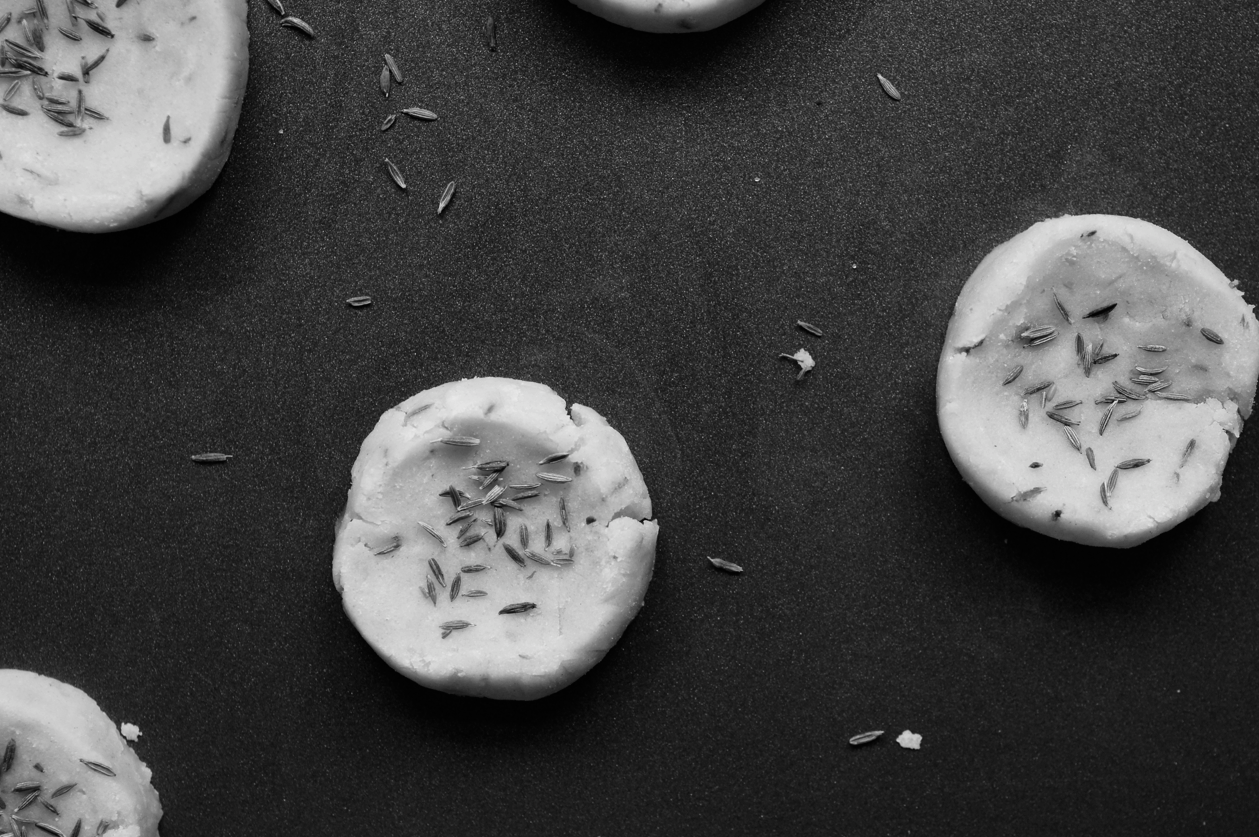
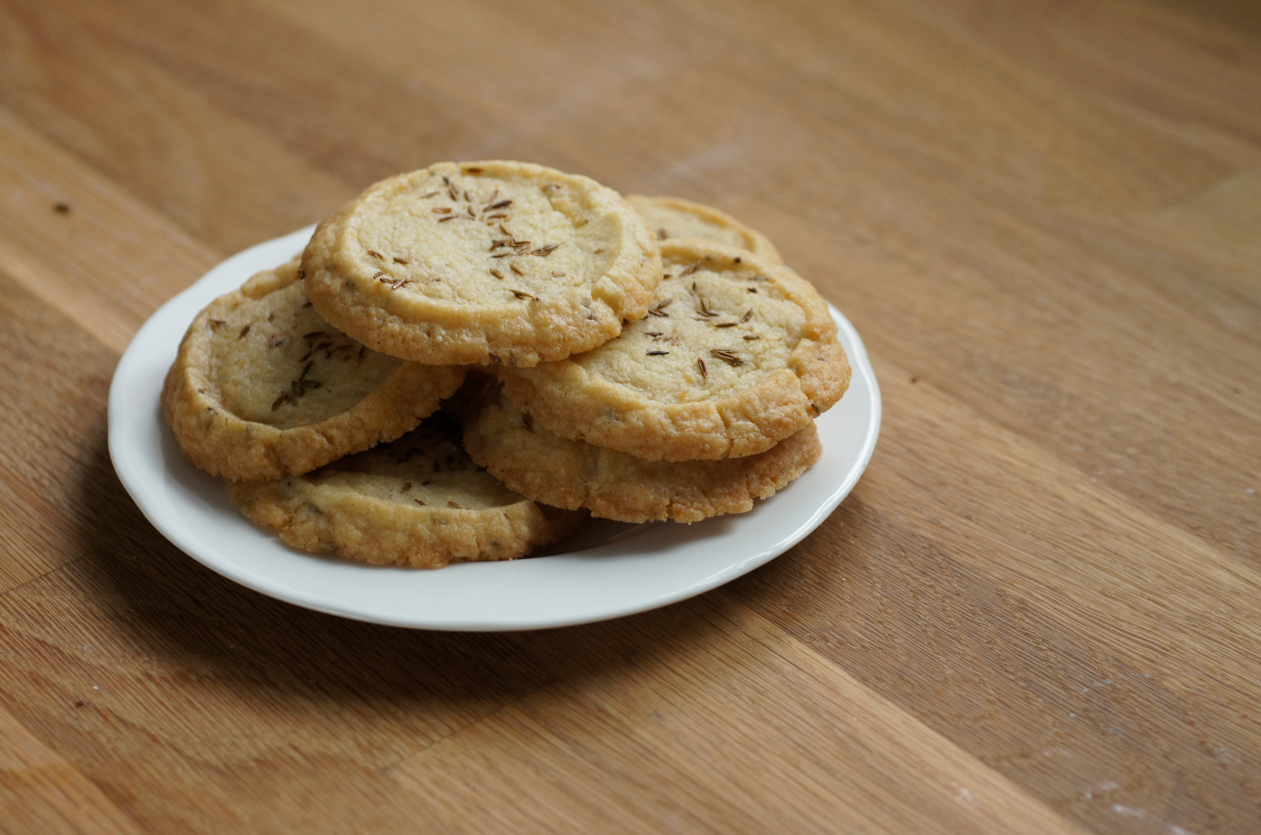
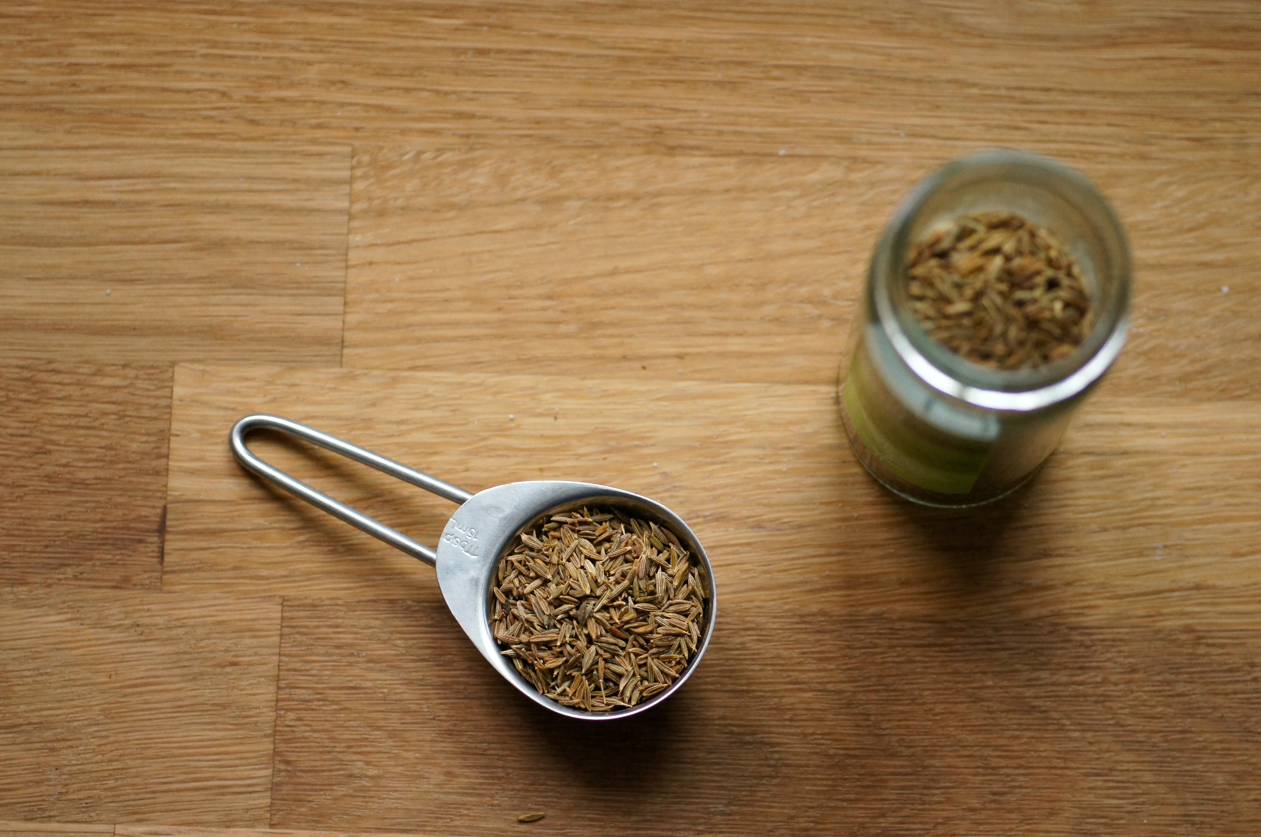
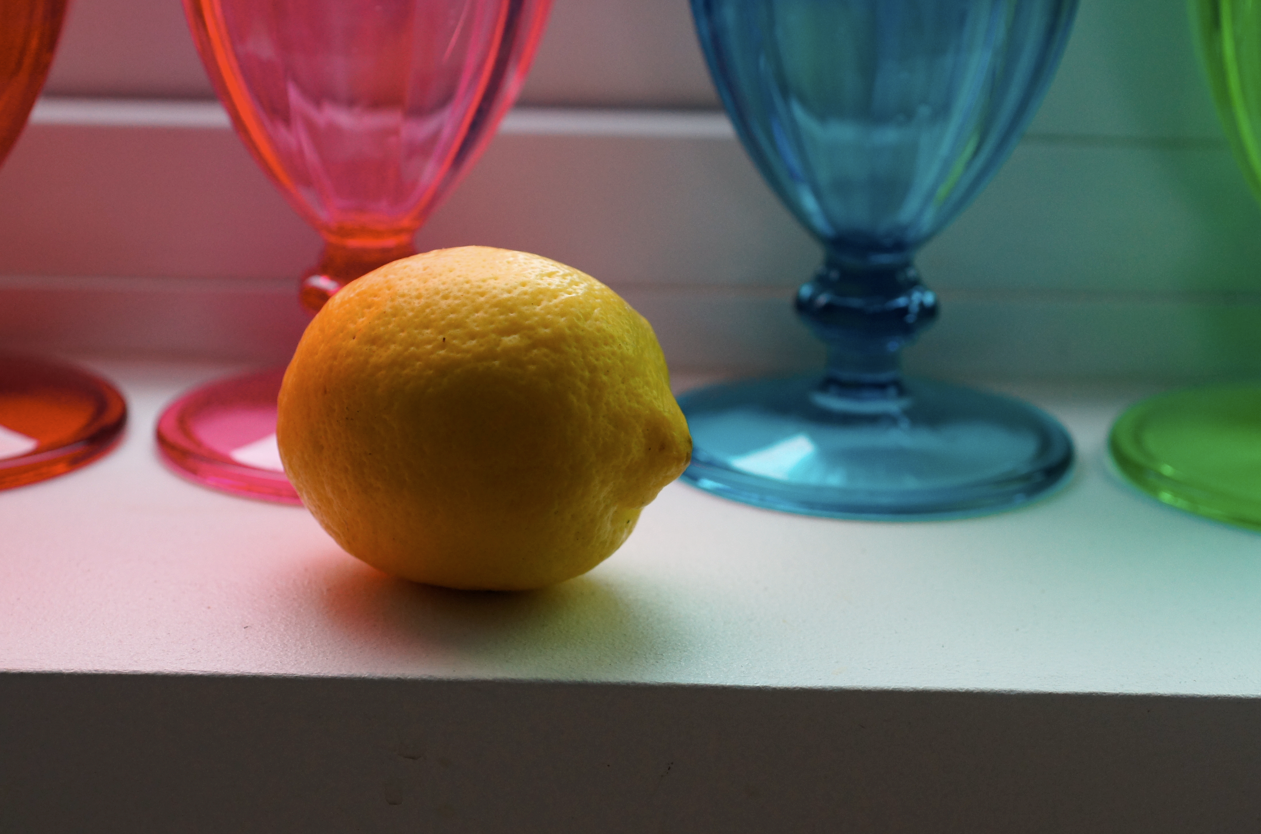
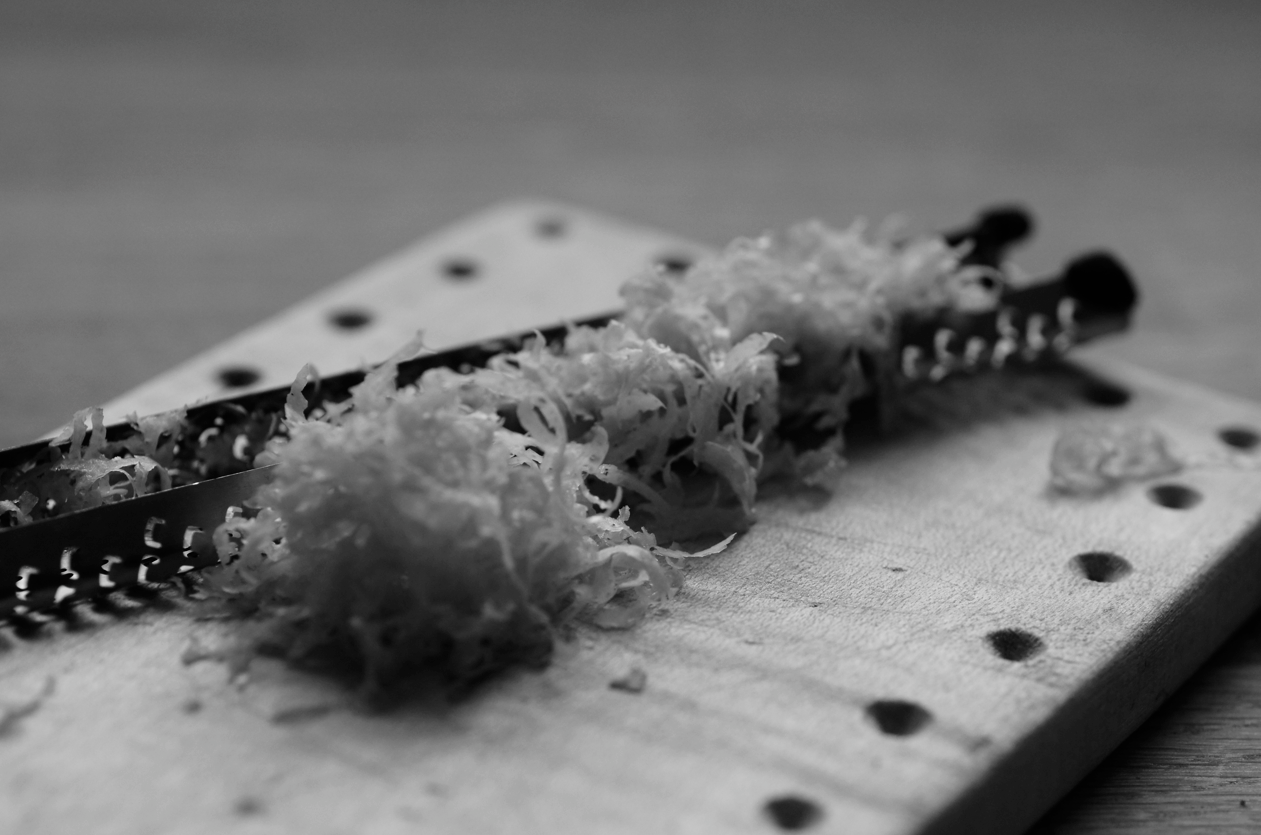
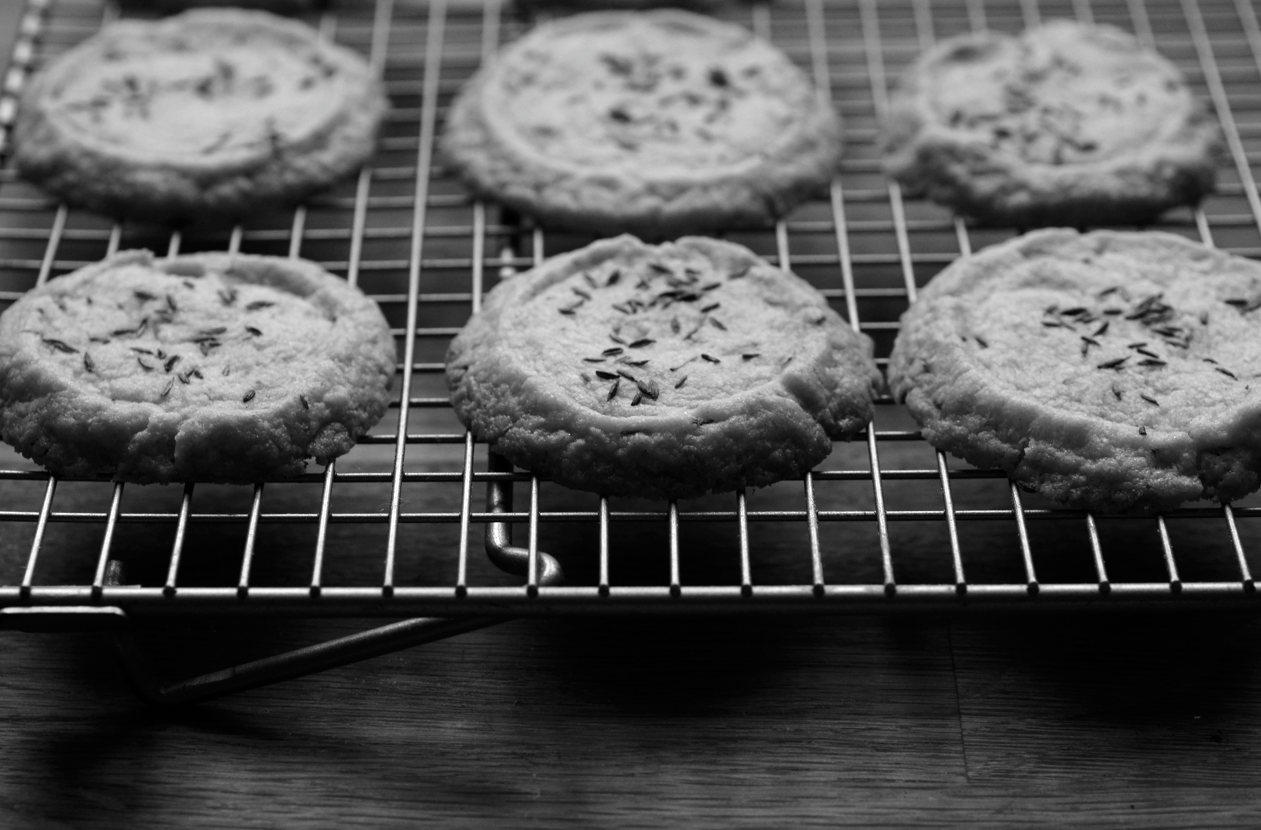
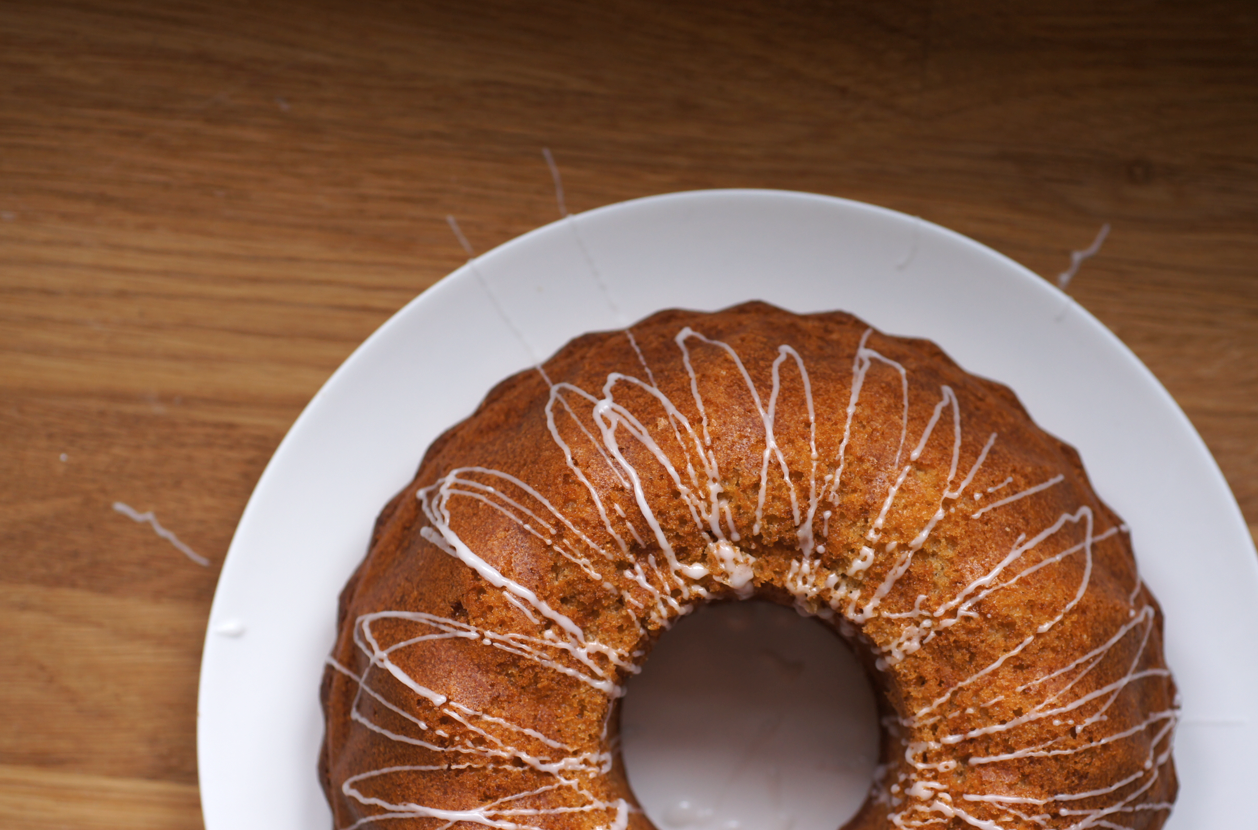
These cookies taste incredibly familiar and unusual all at once. The timeworn sweet flavours of butter, sugar and lemon intermingle with cumin, the second most used spice in the world after black pepper (according to wiki, anyway...). I love the little stripy seeds in savoury dishes - particularly mixed with olive oil and salt then tossed with cauliflower florets and roasted.

When I saw the recipe I knew I had to try it - though I have to admit I was a little skeptical. I'm a convert. They're chewy while warm but crisp when cool - a buttery riot of flavour.


I didn't change anything major in the recipe (by Hugh Fearnley-Whittingstall in the Guardian) and as it's online I decided to not write it out - you can find it at the bottom of this article.

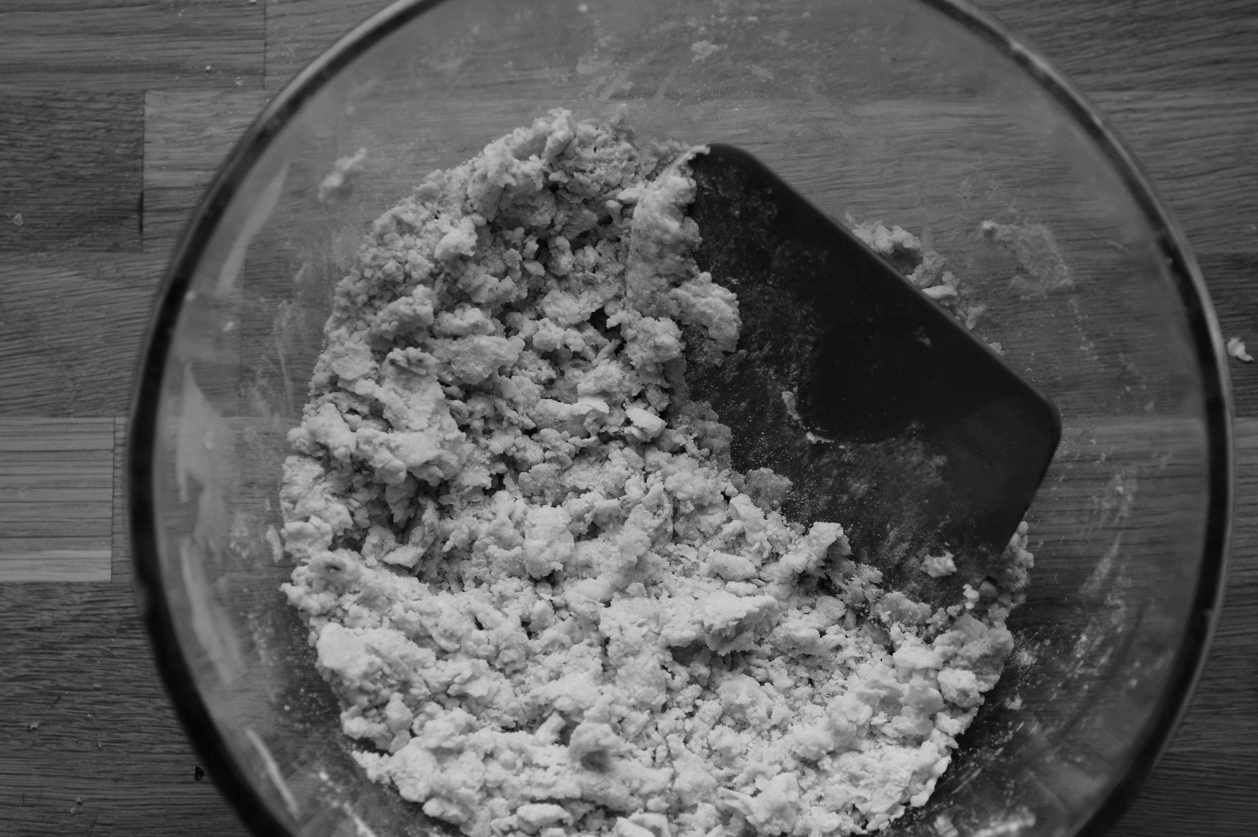
Make sure you cream the butter very well - I did mine for quite a while in the stand mixer. I then cut the flour in by hand to make sure it didn't toughen. I rolled mine into a sausage, chilled it, sliced it and pressed it onto a sheet (leaving the rim you can see) - another time I'll make it longer and thinner as these were a bit big. I think another time I'll also reduce the cumin to 2 teaspoons and put it all in the mix itself, though the seeds do look pretty on top. I only baked half the dough - I've frozen the other half in slices.

Sunday 19 February 2012

Crêpes Suzette


Do you like to play with fire? If so, this is the recipe for you.

Do you like soft and wispy crêpes? Buttery caramel sauces? Bright and seasonal citrus? If so, you should make this dish.


It's pancake day or Strove Tuesday this week. As I've already written about my favourite brown butter crêpe recipe and made a Dusky Caramel and Raspberry Crêpe Cake, I thought I would try something new.

Crêpes Suzette is a traditional French dish. Depending on who you believe, it was either developed in 1896 for the Prince of Wales and his female companion 'Suzette' by the chef Charpentier at Monte Carlo or - more likely - discovered at Restaurant Paillard in Paris in 1889 and named after an actress.

They're also made by Mrs Patmore in Downton Abbey, which adds a little glamour and yet another excuse to try them.


I served these with homemade cinnamon ice cream. I use David Lebovitz's fantastic recipe - you shatter a load of whole cinnamon quills into the base and steep it all overnight. The flavour is incredible. It works really well with a lot of wintery desserts so I try to keep a tub in the freezer.

I haven't written the recipe out as this is already a long one and I've probably written about too many Perfect Scoop recipes as it is. I really recommend you buy the book, I love it and use it all the time. (But, ahem, you can find the cinnamon recipe online in both US and metric here).


I know the recipe seems very long. It's not actually that complicated but I wanted to make sure everything was clear and you could work quickly and smoothly through it. If you prepare everything in advance - I made the crêpes and measured everything else - it's really easy to do with guests and they'll love the dramatic flames.

I've tried this using bought orange juice with a squeeze of lemon instead of fresh juice and it was nearly as good (I still served it with a slice of orange). The first batch of crêpes were half wholemeal but I preferred them with just plain for this. I've also tried it with both navel and blood oranges - both were delicious. I've made two batches of crêpes and four sets of the dish in the last three days - it's that good.

I don't think it's traditional to serve this with slices of orange or with ice cream but I think they finish the dish beautifully. The fresh orange brightens the taste and adds texture. The ice cream gives a creamy temperature contrast and the cinnamon melds beautifully with the caramel and citrus.


Crêpes Suzette
(Crêpes adapted from Delia's Complete Cookery Course, sauce adapted from Matthew Fort and Raymond Blanc here)

For the crêpes:
15g butter
55g plain flour
1 egg
100ml milk
25ml water
extra butter for frying

For the sauce & to serve:
2 big oranges
1/4 lemon
60g caster sugar
50g butter
good splash of Cointreau or Grand Marnier
2 scoops of cinnamon ice cream (optional)

Melt the butter in a big, heavy-bottomed frying pan. Keep heating until the butter foams up and dies down and is full of rusty flecks. Pour into a bowl to cool.

Weigh the flour into a mixing bowl and whisk it to get rid of any lumps. Make a well in the centre and break the egg into it. Start whisking the egg into the flour, slowly incorporating more from around the edges. Once you have a thick paste (about half the flour will still be there), start adding the milk. Keep whisking and incorporating splashes of milk and more of the flour until you have a smooth batter. Whisk in the cooled butter. Add most of the water, reserving a little to adjust if needed.

Heat the frying pan up again and add a little bit of butter. Either transfer the crêpe mix to a jug or find a ladle. Once the pan is smoking hot turn the heat down a bit. Pour some of the mix into the pan at an angle and swirl quickly. Flip when starting to brown at the edges. Once browned on the bottom too, remove to a plate lined with a piece of kitchen paper. Repeat until you've got four crêpes you're happy with (you should have batter for about 6). You can now keep them covered in cling film in the kitchen paper (I dampen the top piece) for a few hours or proceed immediately.

Slice one of the oranges so that you have two slices from the middle to serve fresh, and two ends to juice. Carefully pull the peel off the two slices and set aside. Juice the rest of the orange, the other orange and the lemon into a measuring jug. You should have about 150ml of liquid.

Clean the pan that you made the crêpes in. Have everything ready - a whisk, some tongs or a fork to maneuver the crêpes, the butter, the juice, the crêpes, the alcohol, a small frying pan to heat it, matches, the garnishes, plates.

Scatter the sugar evenly over the surface of the pan. Heat over medium-high heat, shaking the pan slightly every now and then to maintain an even layer. Once the sugar has melted and begins to caramelise, scrape the sides down and swirl lightly so that the sugar colours evenly. Once it has reached a deep golden colour, take off the heat, add the butter all at once and whisk until smooth and frothy. Add the juice in two goes, whisking well between each - it may clump up a bit but will melt down in a minute. You'll have quite a bit of liquid.

Return to the heat. Add the first crêpe to the pan, then carefully turn it over with the tongs/fork, making sure it's totally soaked. Fold in half, then into quarters and move to the side of the pan. Repeat with the next three crêpes until the pan is full of the four quarters. Let the crêpes soak and the sauce reduce a little over the heat for about 1 minute, until you have a deep golden syrupy sauce. Transfer the crepes to the plates with some extra sauce. Add the orange slice and ice cream.

Turn off most of the lights in your kitchen. Quickly add a splash of alcohol to the small frying pan and heat until vapours start rising. Light a match and touch it just inside the pan. Blue flames will erupt - watch for the flickers of gold. Pour over the two plates while still flaming and serve immediately.

(Serves 2)

Wednesday 15 February 2012

Salted Caramel Brownies


Velvety and rich. Utterly decadent. Seductive.

I'm not sure you can even call these brownies - they're so soft and smooth they're almost truffles.


A few weeks ago I found myself in Paul A. Young's Soho shop. As well as buying a box of his chocolates to sample (they were excellent), I bought a brownie. A salted caramel, cocoa nib and white chocolate brownie.

It was so rich, so precious, that I ate it over two days. A slither with tea. A corner for pudding.


The craving set in the moment I ate the last chunk. I had to make some myself.

My quest was made considerably easier by the fact that I'd been given Paul A. Young's book for my 21st birthday. The book has a recipe for bing cherry and coconut brownies. A bit of tweaking and salted caramel and cocoa nib perfection was mine.


I didn't fancy adding in the white chocolate but if you do, I'd go for about 50g of chunks strewn across the top before you swirl. I made double the caramel recipe below to have some spare for another night (and to counteract the inevitable spoons that somehow find their way into my mouth).

I know cocoa nibs aren't always easy to find (I came across some in Whole Foods) but if you can they work brilliantly here - a slightly bitter crunch against all that silky sweet chocolate and caramel.

My friend Becky came over for bread and brownies last night. When we bit into the first pieces our chatter stopped and silence fell. For a few minutes we sat quietly on the sofa, caught by the flavours, exploring the texture. You know food is good when conversation stops and you lose track of your words.


Salted Caramel Brownies
(adapted from Paul A Young's Adventures with Chocolate)

For the caramel:
75g white caster sugar
50ml double cream
10g unsalted butter
1/8 tsp fleur de sel/good sea salt

For the brownie:
100g unsalted butter
150g caster sugar
100g light brown sugar
75g golden syrup
275g quality 70% dark chocolate
4 eggs
70g plain flour
small handful of cocoa nibs

Tip the sugar into a big heavy-bottomed pan in an even layer. Place over medium-high heat. Wait until the edges start to liquify then gently start to move the sugar around onto the wet spots to try and get it to melt evenly - don't stir it. Don't worry if it starts to clump a little, it will melt down later. Keep gently moving the unmelted sugar into the liquid bits until you just have a liquid. Keep cooking until it reaches a deep golden-bronze, almost the colour of a penny. Immediately take off the heat and whisk in about 1/3 of the cream to stop the caramel cooking. Keep pouring and whisking until all the cream is incorporated. Add the butter in chunks and the salt and stir until smooth. Pour into a bowl to cool - at the moment it will pour easily off the spoon in thin ribbons.

Preheat the oven to 160C/325F. Line a 8-9" 20-23cm square tin (that's at least 2.5cm tall) with paper. Add the butter, caster sugar, brown sugar and syrup to the (scraped out, empty) caramel saucepan. Heat until everything is melted together then beat until smooth. Take off the heat then add all the chocolate. Stir until melted and uniform. Lightly whisk the eggs in a small bowl then incorporate them into the mix. Finally add the flour and beat throughly until very smooth and glossy. Pour into the prepared tin.

By now your caramel should be gloriously thick, as in the picture above. Spoon fairly evenly over the mix then use a knife to lightly swirl it through. Scatter the cocoa nibs over the top.

Bake for 20 minutes then take out and leave to cool. Once cool, put into the fridge overnight or the freezer until frozen solid. Slice up with a sharp knife dipped into hot water and cleaned between each cut. Serve cold, warm or at room temperature - up to you!

(Makes about 16-20 small but rich squares)

NOTE 19/02 - I've found these freeze really well and come out perfect & ready to eat if you like them cold - they've generally firmed over time. I think the flavours have intermingled and improved too.


Three more caramel posts:
Caramel Popcorn
Cider Caramel, Sautéed Apples & Cinnamon Ice Cream
Butterfly Salted Caramel Cake

Thursday 9 February 2012

Grapefruit Olive Oil Cake


As I was dusting off my bundt tin this morning, I realised that the last time I'd used it was to make the Ginger Root Bundt Cake. In that post, I wrote about taking my friend Helen for a bon voyage lunch at Dinner. I gave her a slice of the cake on that blustery November day.

Chance has it that today we had our welcome home lunch, as she flew in yesterday from Hong Kong. So I wrapped a slice of this up for her and took it with me - a full circle of cake, literally and metaphorically.


Once again we had a delicious lunch. We followed the foodie hordes to the tiny Pitt Cue Co in Soho, which opened a few weeks ago after running a very successful food truck last summer. They say it's the best American style BBQ in London. I had some incredibly tender pork ribs (the St Louis ribs) with some creamy mash, a little slaw, some pickles and a hunk of charred sourdough. I was covered in sauce and made an absolute mess.

Despite being stuffed we shared the bourbon and salted caramel sticky toffee pudding & ice cream. It was seriously good, probably the best I've ever had. Their dessert menu doesn't seem to be fixed, but if you go and they mention it - pounce.


This bundt was born out of my desire to try baking with grapefruit, mainly inspired by Kaitlin. I've commented on several of her posts like this or this saying I really should try it out. So here I am.

Before this my main use for grapefruit was eating it for breakfast. Usually I jazz it up by sprinkling caster sugar over the top and blasting it with the blow torch to create a crackly caramel topping. I made this cake early this morning (as I had to make and photograph it before the aforementioned lunch) so I had the other grapefruit (as you can see in the 2nd photo) and remaining yogurt for breakfast, which felt quite neat.

This recipe popped up in my reader a few days ago. It's from a beautiful blog, The Yellow House. I particularly liked that you start by rubbing the zest into the brown sugar to release the oils (as in the photo above). In the end, it's a very light and fluffy cake. It's not very sweet but, as Sarah said, quite "zingy and earthy". The fruity olive oil comes through clearly, as does the characteristic grapefruit. I can smell the wholemeal flour (is that weird? Do other people smell it even if they can't taste it?).

I think it would be perfect as part of a weekend brunch spread - or for second breakfast, elevensies or afternoon tea (yes, I do eat like a hobbit).


Grapefruit Olive Oil Cake
(adapted from the The Yellow House, who adapted from Melissa Clark)

2 grapefruit
180g light brown sugar
50-100ml plain yogurt
3 eggs
180ml extra virgin olive oil
115g plain flour
85g wholemeal flour
1 1/2 tsp baking powder
1/4 tsp bicarbonate of soda
1/4 tsp salt
2 tbsp icing sugar

Preheat the oven to 180C/350F. Carefully butter the bundt mould (especially the bottom), dust with flour then tap to remove the excess. Zest both grapefruit into a big bowl. Add the sugar and rub the two together as if you're making pastry (this releases the oils from the zest) and make sure there are no lumps. Sift the flours, baking power, bicarbonate and salt together into another bowl.

Juice one grapefruit into a measuring cup - hopefully this will be between 65-100ml (if not add some from the other fruit). Top up with the yogurt to 165ml. Add to the zest/sugar mix and whisk until combined. Pour in the olive oil, whisk, then add the eggs and whisk again until silky smooth. Tip the flour into the bowl and fold in with the whisk until everything is combined - don't overwork. Pour into the tin and put into the oven. Bake until golden brown and a skewer/toothpick comes out clean from the middle - mine took 35 minutes, but it could be up to about 50.

Leave to cool on a rack for 10 minutes or so then turn out - I put a plate or rack on top then flip over. You might need to give it a tap. Stir the icing sugar with a bit of leftover grapefruit juice until it's thick and smooth. Drizzle over the top of the cooled cake.

(Serves about 6-8)

Saturday 4 February 2012

Bread & Butter Pudding


When I first started getting interested in photography, about five years ago, my grandfather handed me his camera. It's a Nikkormat (Nikon) FT from somewhere between 1965-7.

I thought it looked incredibly cool but didn't really know what to do with it. I had no concept of exposure at that point, having only ever used a digital point-and-shoot. I took a film but when I had it developed the envelope contained a discouraging sheet of blanks.

It moved from house to house, shelf to shelf, collecting dust. In one move, it was accidentally dropped and the rewind mechanism sheared off.


I finally got around to taking it to the specialists a few weeks ago for a full service and several repairs. When I finally got it back home again, I managed to complete the alien process of loading film after studying the manual. I took my first 24 exposures in 24 hours, rushing it to the developers as soon as possible.

Thankfully all 24 came out. I made mistakes and they're not perfect - but I was thrilled. The feeling of opening that envelope was priceless.

I can't wait to experiment with photographing food (and friends and places and...) on film. The photos below are a sample of my first film - a shot of the park in the afternoon light and one of my orchid (I thought I'd killed it by leaving it over Christmas but the one of the two remaining buds suddenly burst open that day).

Aside from the fascinating process - being forced to work without electronic gizmos and screens, the proper shutter noise, the agonizing wait to see how they've turned out - I love the character of film. I can't quite put my finger on what it is, but there's something special.


We made brioche in class this week. I intentionally left some to go stale just so I could make this pudding. The bread needs to be stale so that it doesn't disintegrate into a soggy mess when soaked.


I've left this recipe open to adaption. I made it with my marmalade as that's what I had to hand - I didn't add any extra peel/dried fruit. I brûléed a few of the peaks with some cinnamon-infused caster sugar after I'd taken it out of the oven for some crunch and flavour. The dusting of icing sugar was for purely aesthetic purposes.

I also really like the classic version with nutmeg, currants or sultanas and maybe a bit of quality mixed peel. Chocolate chips could sex it up. Try out different combinations and see what you like.

This is a proper pudding. Winter days were made for proper puddings.


Bread & Butter Pudding
(adapted from Delia's Complete Cookery Course)

Base:
4-8* slices of stale white bread (such as brioche)
unsalted butter, to spread
175ml milk
25ml cream
20g sugar
little lemon zest
2 eggs

Additions:
currants/sultanas/fruits/chopped chocolate etc - handful/approx 30g
sprinkle of spices - nutmeg, cinnamon etc
marmalade/jam/maybe lemon curd - few tbsps
icing or caster sugar to dust/caramelize

Start by buttering one or both sides of the bread, depending on how decadent you're feeling. If you're using jam or marmalade, sandwich the slices with a slick of the preserve. Cut in half into triangles. Stick into a dish (mine was about , standing up or propped up against each other.

In a jug mix the milk, cream, sugar and zest together. In another bowl break up the eggs. Whisk the two liquids together. Pour all over the bread. It seems like there's too much liquid but don't worry. Leave to sit for 15-20 minutes.

Preheat the oven to 180C/350F. Sprinkle with any currants/etc. I also dusted the bread poking out with a little cinnamon sugar. Pop into the oven and bake for 30-40 minutes - the custard should be golden brown and set and the bread should be crispy on top. You can caramelize some caster sugar on the bread with a blow torch or dust with icing sugar - or both!

I find this is best eaten warm.

* Depends on size - mine were very small so I used 8, normal loaves you'll need 4-6.

(Serves 2-4)

ShareThis