This is my very first Daring Bakers challenge. I've been thinking about joining their illustrious ranks for a while, but had never quite made the leap. It's exciting to be part of something like this, and I hope it'll push me to try new things.
Before this challenge I had heard tell of graham crackers/wafers in relation to cheesecakes but I had never heard of Nanaimo bars. It was great to finally find out what graham wafers are like - they're very different to the digestives I've been told to replace them with in recipes. As a result of knowing nothing about the Nanaimo bars I had no idea how they would taste - so didn't feel able to fiddle with the flavours too much.
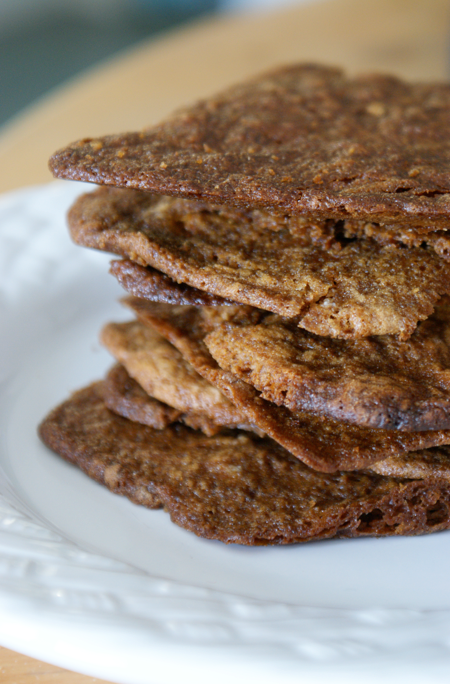
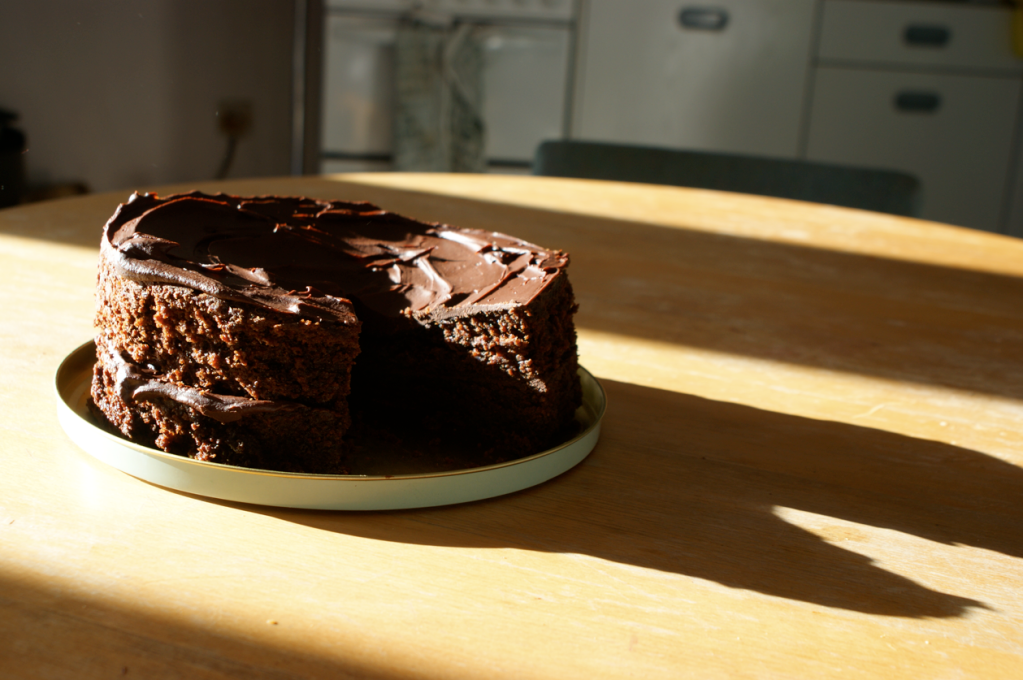
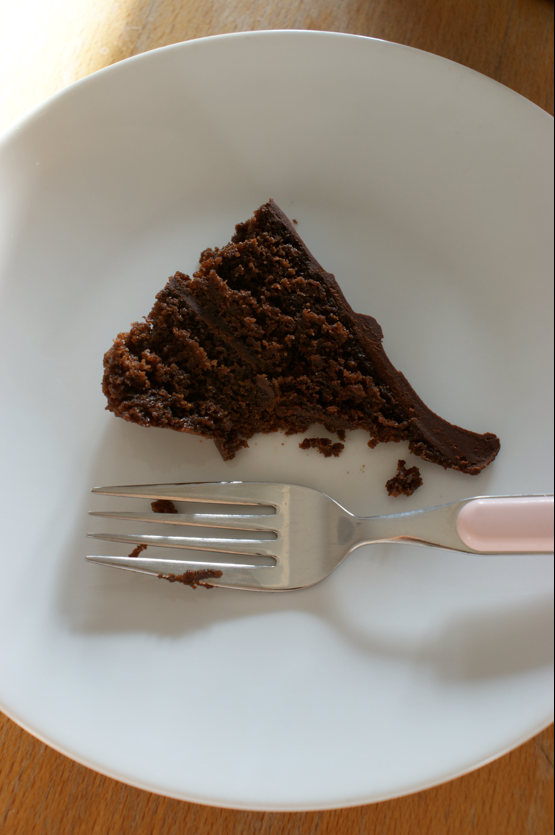
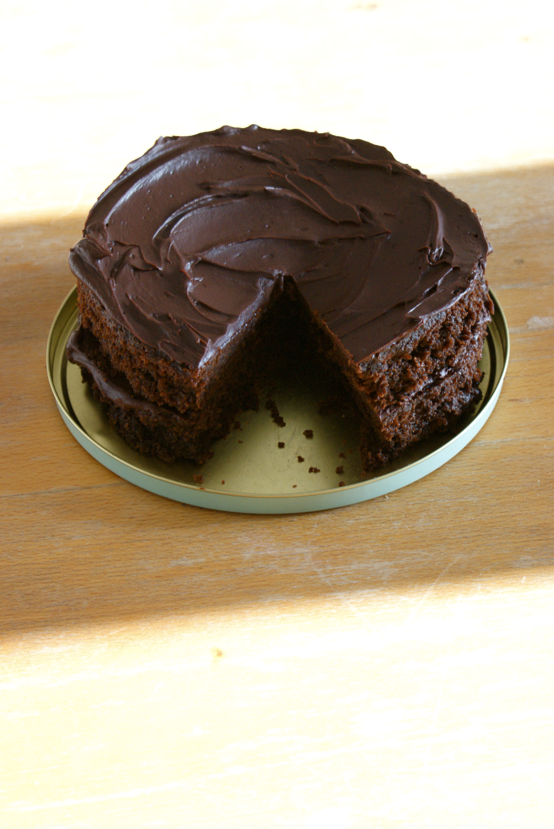
I was quite worried about this as I've always had problems when converting recipes from other countries in other weight systems and so on. And so the problems came: my graham cracker 'dough' was pourable. Somehow, something was quite wrong. My best guess is that I missed something when I was adding up the flour quantities as I didn't make them gluten-free. I chilled the dough for a few hours and it thickened quite a bit. Once rolled out with lots and lots of flour I had to scrape each one off and squish them back into squares on the parchment. Still, once chilled and then baked they tasted lovely.
The bars themselves were far too sweet for me. I halved the icing sugar recommended and added some brown sugar to add some taste and yet I still couldn't deal with how sweet it all was. I don't really like coconut and rice krispies didn't feel right so I used toasted pecans and increased the almonds.

The January 2010 Daring Bakers’ challenge was hosted by Lauren of Celiac Teen. Lauren chose Gluten-Free Graham Wafers and Nanaimo Bars as the challenge for the month. The sources she based her recipe on are 101 Cookbooks and www.nanaimo.ca.
Graham Wafers
160g plain flour
200g dark brown sugar
1 tsp baking soda
3/4 tsp salt
100g butter
80ml honey
75ml full milk
1 tbsp vanilla extract
Combine flour, sugar, baking soda and salt in a bowl (or better, a food processor). Add the the butter and use a knife to cut through (or pulse on the processor) until the consistency of a course meal with no lumps of butter. In a small bowl whisk together the honey, milk and vanilla then add to the flour mixture. Bring together into a dough. Dust a surface with flour and pat dough into a rectangle about 1 inch thick. Wrap in clingfilm and chill until firm - for about two hours or overnight. Divide the dough into two and put the other half back in the fridge.
Sift an even layer of flour over the surface and roll the dough out into a rectangle about 1/8 inch thick. The dough is sticky so flour as necessary. Cut into 4 by 4 inch squares then gather any scraps together. Place on a tray lined with baking parchment. Put them in the fridge and chill until firm - about half an hour. Repeat with the other half of the dough. Preheat the oven to 180C/350F. Prick the wafers with a fork or toothpick. Bake for about 10-12 minutes till slightly firm to touch. Remove to rack to cool.
When ready to make the crumbs either blast in the processor or place in a sealed plastic bag and bash with a rolling pin.
Nanaimo Bars
For the bottom:
115g butter
50g soft brown sugar
5 tbsp cocoa
1 large egg, beaten
160g graham wafer crumbs
90g whole almonds
95g pecans
For the middle layer:
115g butter
40ml double cream
2 tbsp custard powder
100g icing sugar
35g soft brown sugar
For the chocolate topping:
115g dark chocolate (72%)
28g butter
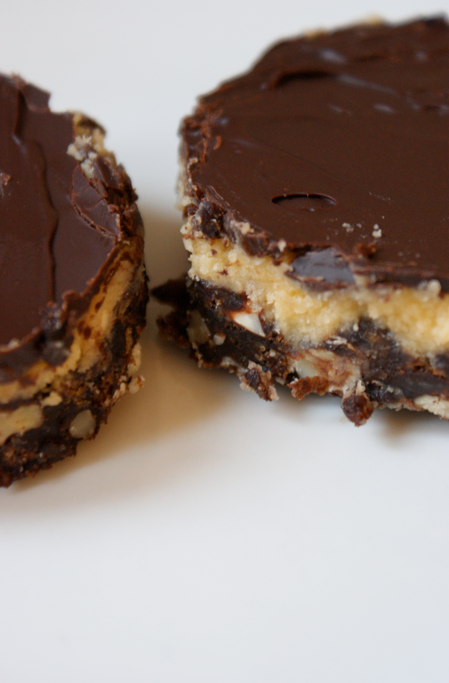
For the bottom layer melt the butter, sugar and cocoa together in a double-boiler (I thought it might be easier to melt at least some of the butter before adding the sugar and cocoa). Add the beaten egg and stir to cook and thicken and then remove from the heat. Toast the all the chopped nuts. Stir in the crumbs and nuts. Press firmly into a pan (8" by 8") then pop into the fridge.
For the middle, cream the butter, cream, custard powder and sugars together well. Beat until light in colour and then spread over the bottom layer. Put back into the fridge.
When ready for the topping, melt the chocolate and butter in a double boiler and then put aside to cool. When room temperature pour over the middle layer and spread around. Chill then cut into small squares or other shapes.