Friday 30 July 2010

Apricot and Pistachio Crumbles with Vanilla Ice Cream


Although I typically think of crumbles as winter desserts, these apricot and pistachio crumbles are serious contenders for my favourite summer pudding. I can't stop making them. Or eating them.


Mum came back with a load of fresh apricots from the market the other day. Apricots are big business in our valley - there are dozens of farms that line the bottom and sell their produce in little stalls by the road.  They're gorgeous. I love seeing all the fruit trees on the mountain side, sharing with the wine vines, heavy with bright fruit.

Apricot crumble seemed like a great way to use some of them up. The combination with pistachios is wonderful, so I incorporated them into the topping (which is divine in itself).


Of course you cannot have crumble without ice cream. I like vanilla with most of mine - this is a light 'Philidelphia' style ice cream that's perfect for summer. In the autumn I want to try cinnamon ice cream with apple crumble.

I discovered that a melon baller makes perfect little portions for individual ramekins - cute, eh.


I also make a bigger one each time (I've made this recipe twice in the past ten days... who is for lunch-pudding and supper-pudding?). Because I can't get enough. You could do the whole recipe in one bigger dish, too.

The apricots go gooey and sweet and keep their stunning colour. The pistachios meld beautifully with the flavour of the apricots and the ice cream is light, full of vanilla and just completes the picture.


Apricot and Pistachio Crumble
(heavily adapted from Delia's Complete Cookery)

10 apricots
75g plain flour
40g butter
40g brown sugar
40g pistachios
1/2 tsp baking powder
pinch of fleur de sel

Preheat the oven to 180C/360F. Put the plain flour and baking powder into a bowl and mix them up. Add the butter and rub it in until it looks like crumbs. Stir in the brown sugar and salt. Roughly chop up the pistachios and stir them in too. Get your dishes together and slice up the apricots and arrange them in the dishes. Sprinkle a tablespoon or so of sugar over them, or more they're a bit sour. Spoon over the topping evenly. Put into the oven and bake for about 45 minutes or until golden brown and bubbling around the edges.

(Serves 6 - easily doubled)


Vanilla Ice Cream
(from Lebovitz's The Perfect Scoop)

500ml double cream
250ml whole milk
150g caster sugar
pinch of salt
1 vanilla pod
3/4 tsp vanilla extract

Pour half the cream and the milk into a saucepan with the sugar and salt. Scape the vanilla seeds from the pod and add them, along with the pod itself. Warm until the sugar has completely dissolved. Take off the heat and stir in the other half of the cream and the vanilla extract. Pour into a jug and chill throughly (overnight if possible). Just before churning, give it a good stir and remove the vanilla pod (you can rinse and dry it for another use, such as vanilla sugar). Freeze according to your maker instructions.

(Makes about 1 litre)

Tuesday 27 July 2010

Swiss Roll Ice Cream Cake


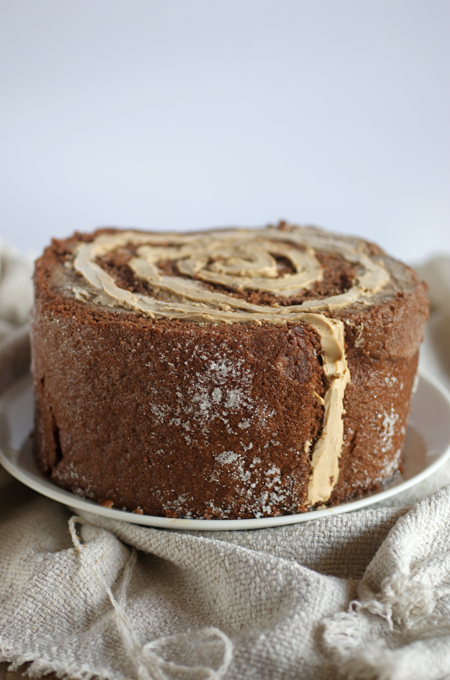
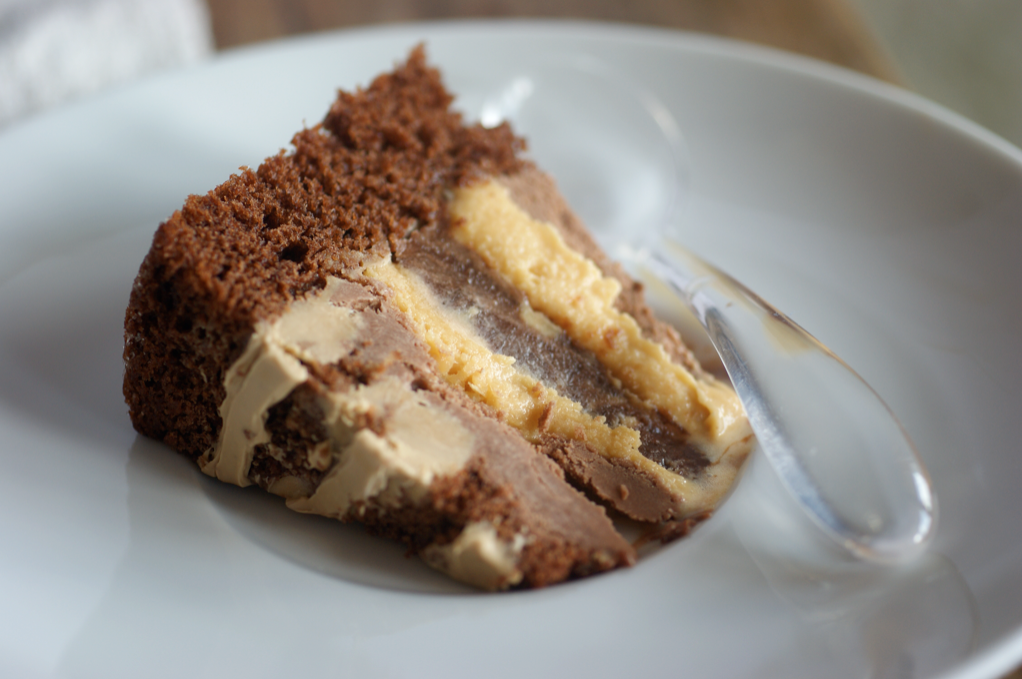
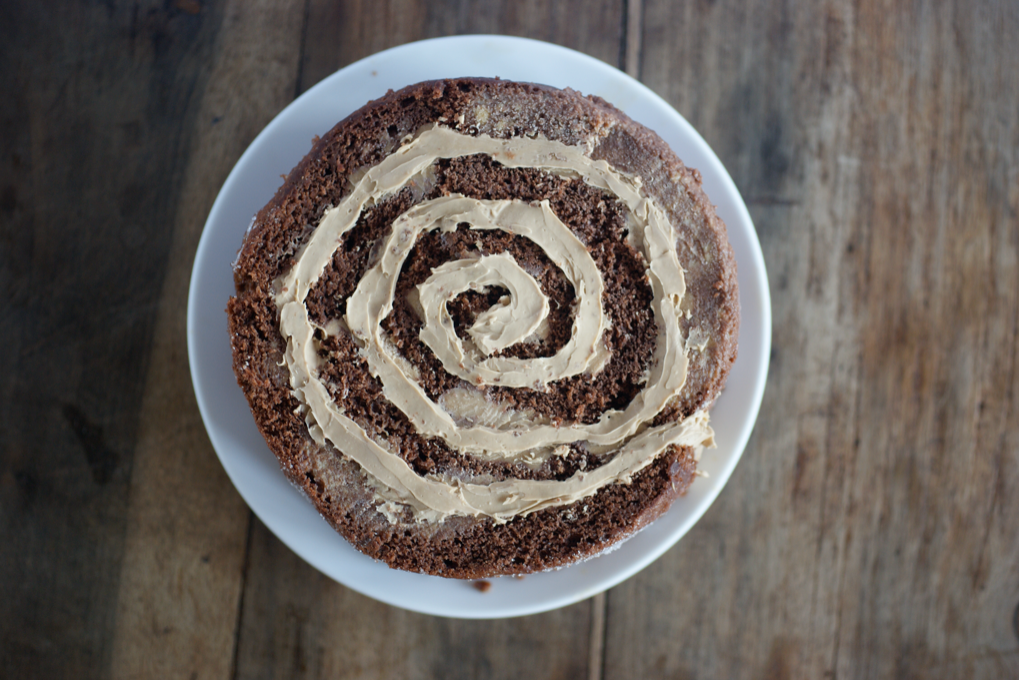
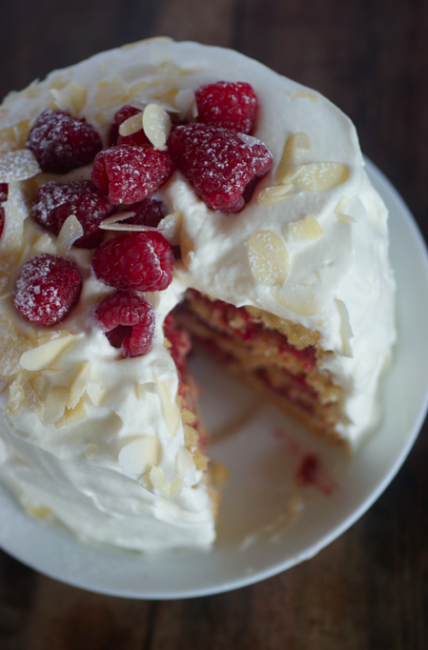
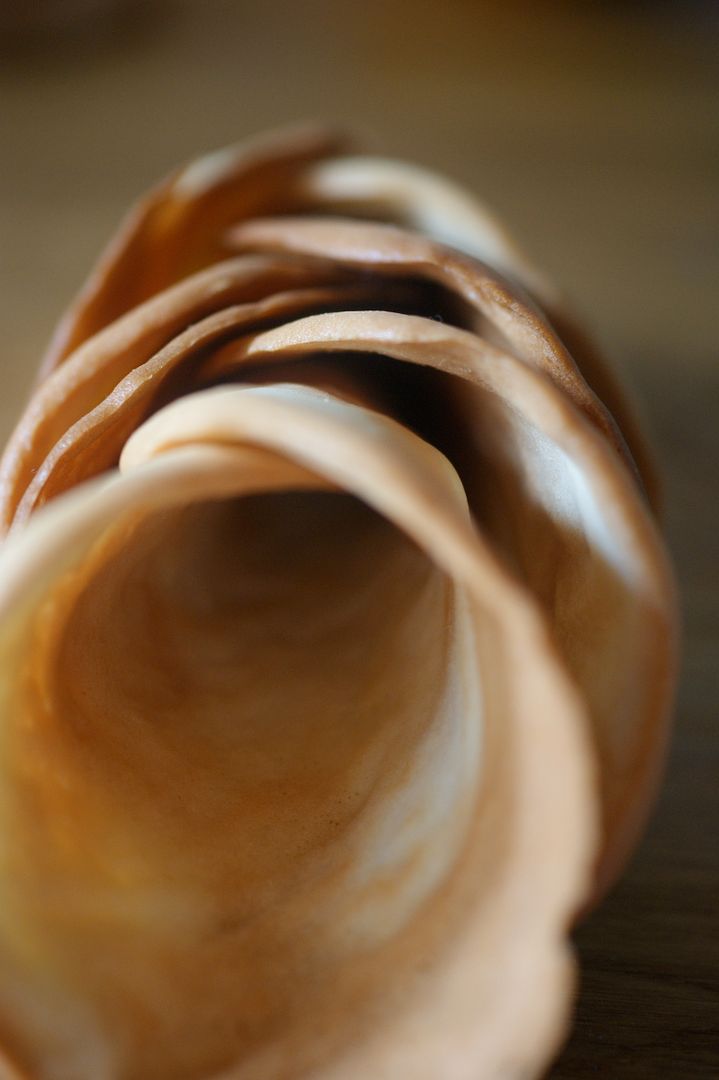
I loved this challenge - though I made more mistakes than I would have liked.  Instead of making a bowl shaped dessert lined with individual slices of swiss roll, I decided to make what looks like one big slice of swiss roll. It's a dark chocolate and espresso roll filled with coffee marscarpone cream...


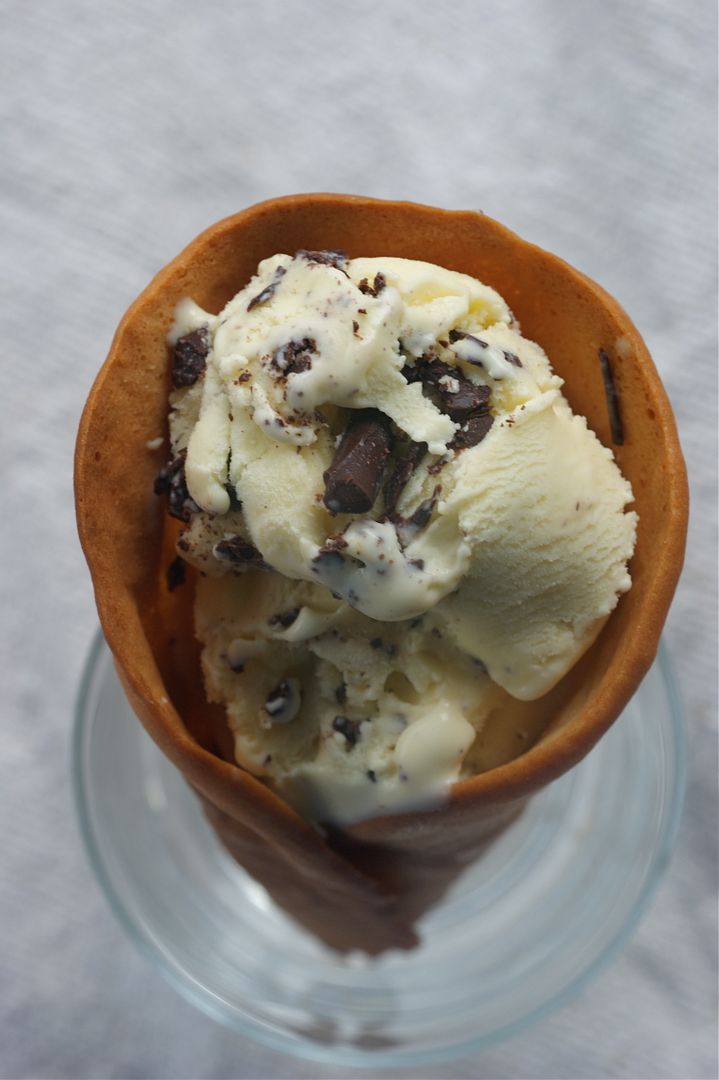
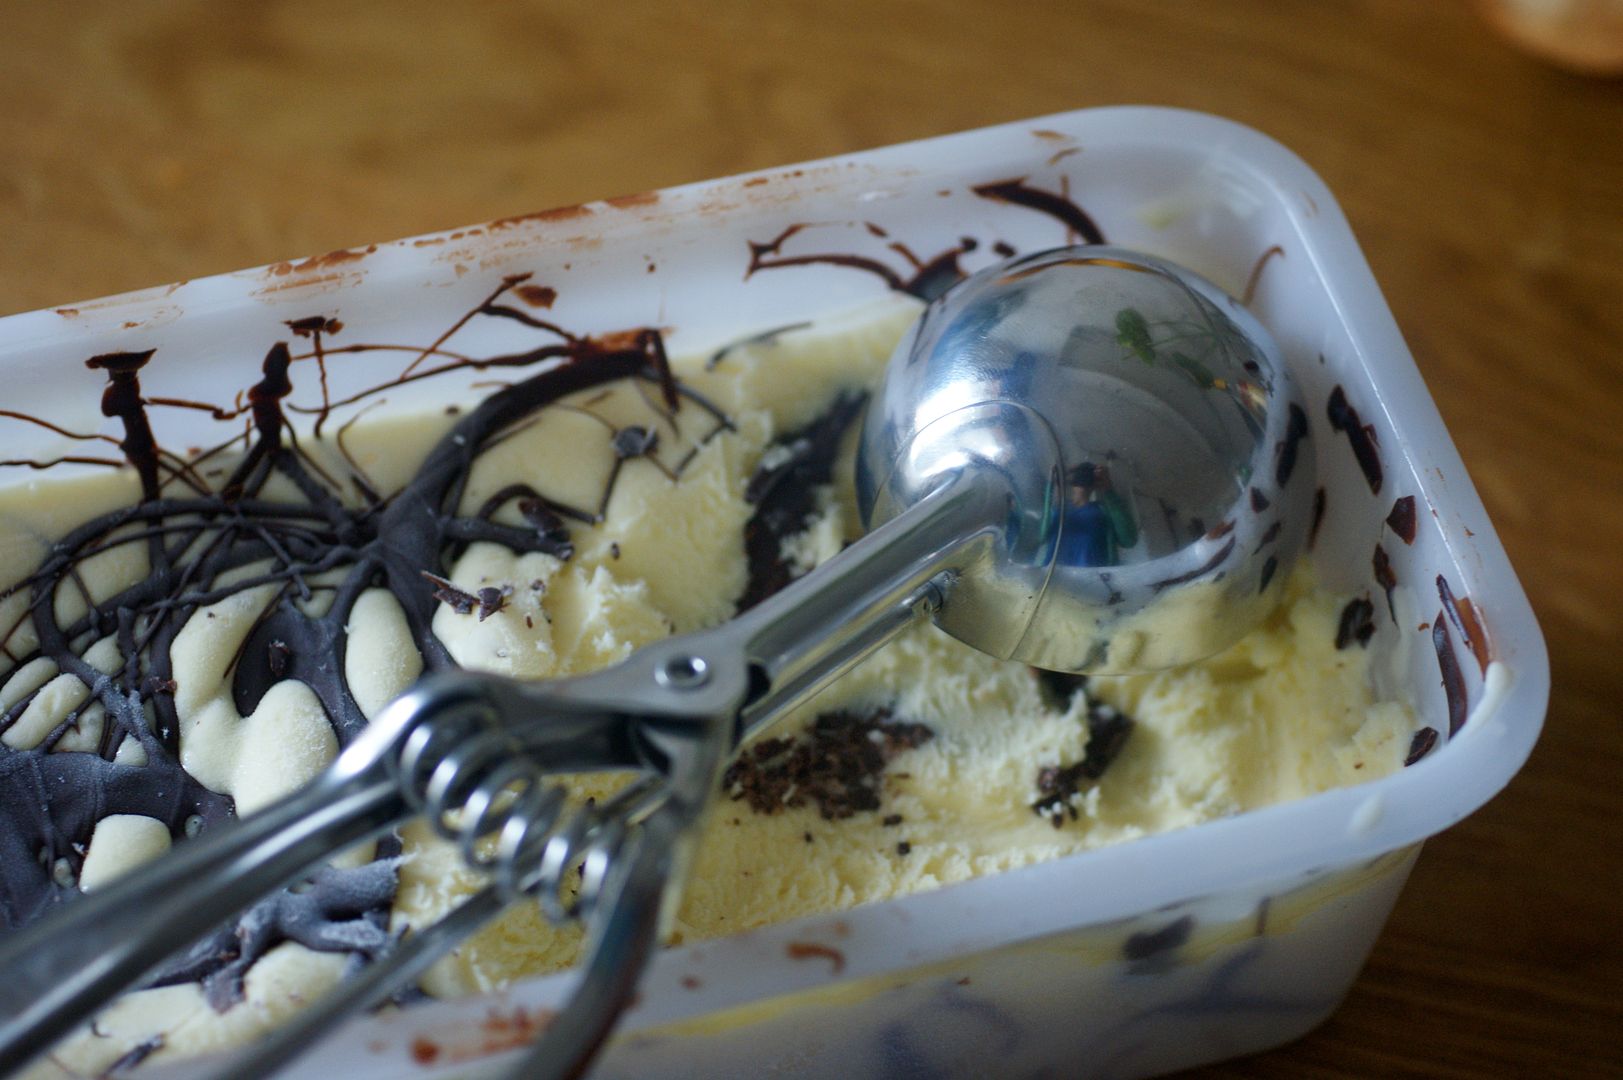
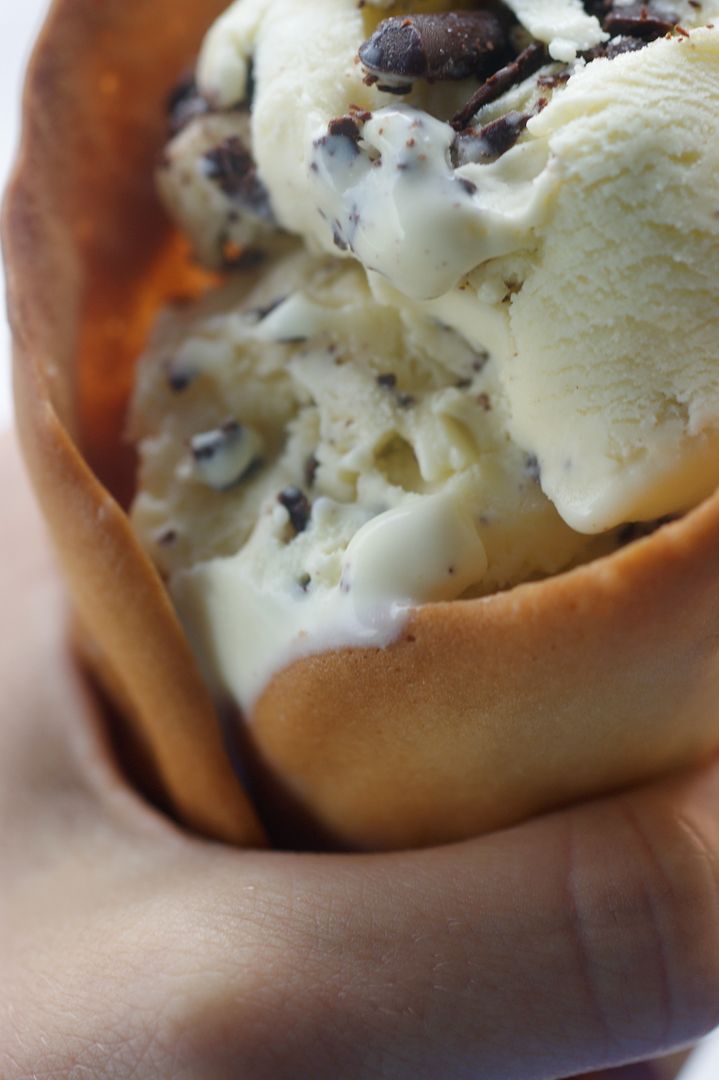
But what's inside? Well, working from the top down, we have dark chocolate and brown sugar ice cream, fleur de sel caramel ice cream, hot fudge sauce with a hint of coffee and then more caramel ice cream and then more chocolate ice cream. Yum. 

(Also, that's sugar from rolling it on the outside, not frost!)

The odd thing about this was that I spent ages planning it and thinking of how I could make sure it rolled smoothly round the edge, how I could make the swirl look perfect on top... and then when it came down to it, I rushed and fudged several things. Very annoying. 


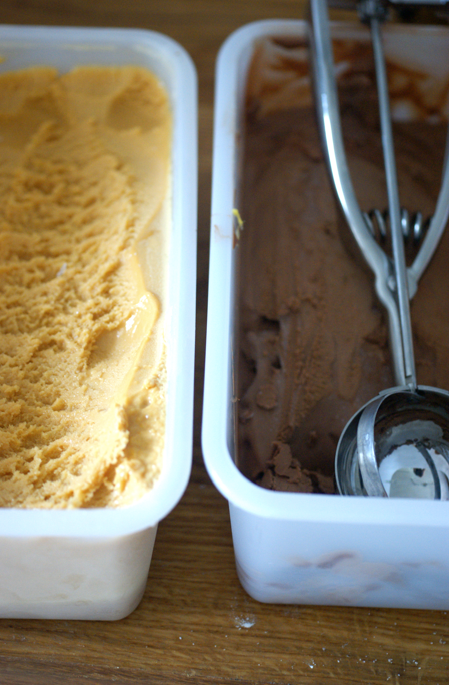
The brown sugar and dark chocolate ice cream is an adaption of the Rich Chocolate Ice Cream I made before. It's smooth and rich without being overwhelming. 

The fleur de sel caramel ice cream is taken from David Lebovitz's blog, here - I didn't have salted butter so I used unsalted and added a whole teaspoon of fleur de sel. I made the whole recipe but half would have more than adequate for this cake.  I contemplated writing the recipe out below, but decided that David's instructions are so good you might as well get them at his site. This ice cream is so so delicious, if a little gloopy for these purposes. Still, yum. Yum. Make it!


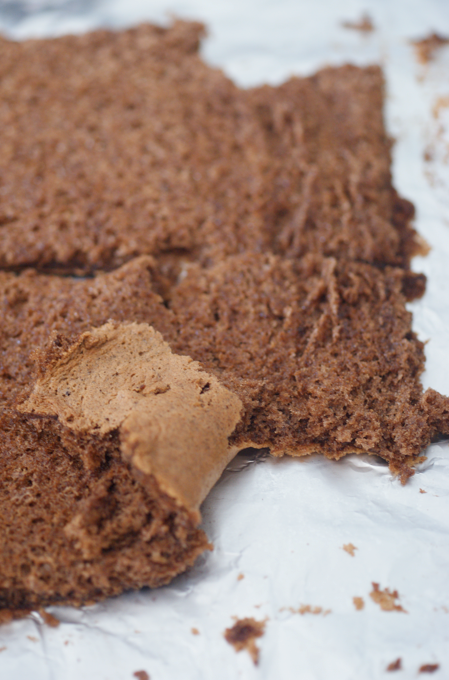
As I was making a chocolate roll, I tried the original recipe from the challenge. Unfortunately it didn't really work for me - it was thin and floppy and didn't taste of much. This was almost definitely my fault, but I decided to go for a different recipe as I didn't have time to mess up again. I went for Delia's Swiss Roll recipe, adapting it by adding cocoa powder and espresso.  I also couldn't face not creaming the butter and sugar first, although it's an all-in-one recipe. It's very different from the DB recipe and much more like a normal cake - it has butter and egg yolks etc. 


Thankfully this recipe worked out well, though it was a little bit thick. Once I had tipped it out onto the sugared paper, I cut it in half lengthways. Then I rolled it into the cake tin I had prepared with cling film. Unfortunately I wasn't really concentrating and it cracked slightly in a few places. 

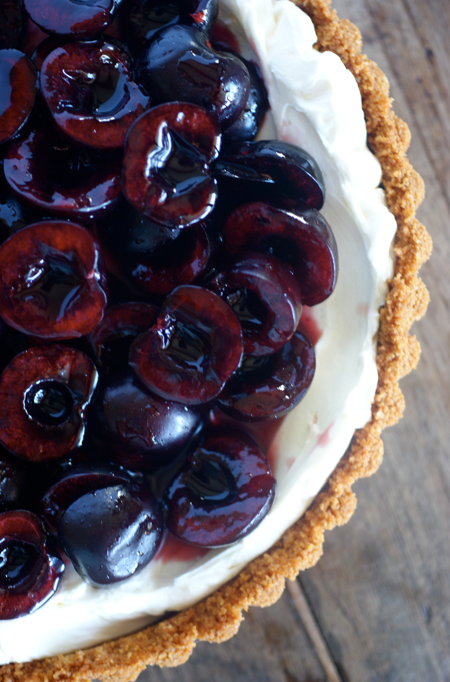
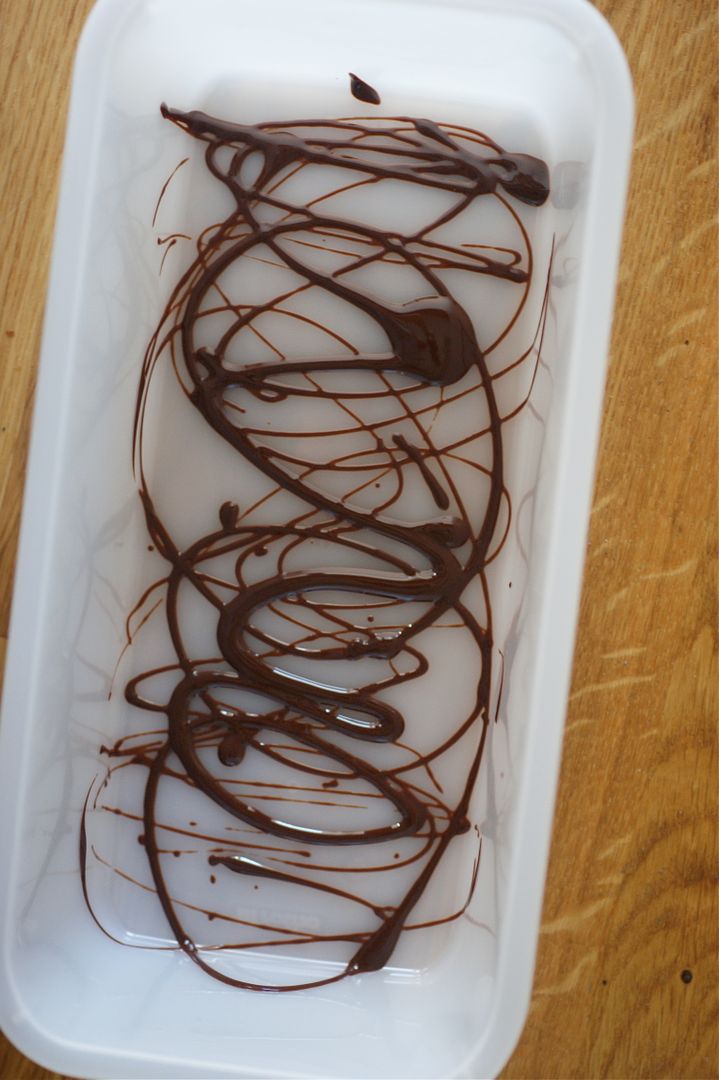
I then cut small strips from the other half and started rolling them around to create the top of the slice, adding the marscarpone as I went.  Then it went into the freezer for a half an hour or so to set before I added the layers of ice cream and the hot fudge, chilling well between each addition. 


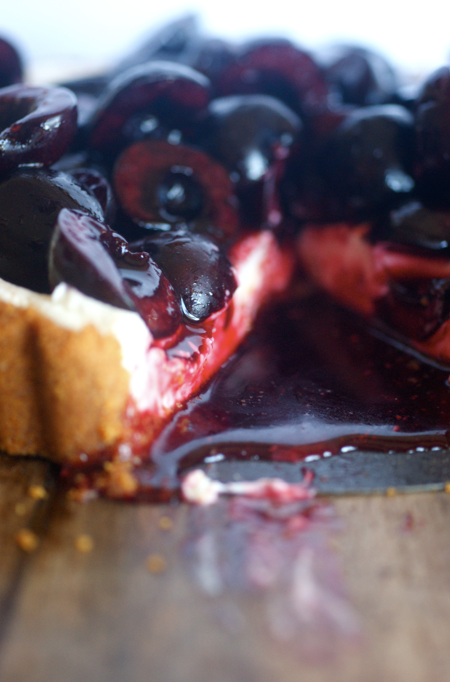
Unfortunately, with the first layer of the caramel ice cream, I let it melt a bit too much before spooning (pouring...) it in. It spread through to the bottom of the cake and soaked parts of it, resulting it in not looking as pretty as hoped and my having to use another lot of ice cream as the rest had melted away. It also screwed up the look of the swirl on the top, taking out some of the definition. As a result, I had to pipe/smooth another layer of marscarpone on the top of the cake.


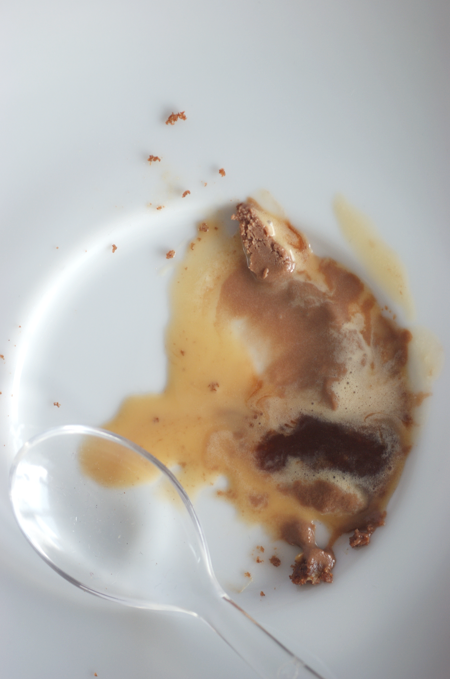
Above was the moment of truth... when I realised how much damage I had done by adding the ice cream when it was too liquid. Rookie mistake, I know. 

Still, this tasted fantastic and I was really pleased with the flavour profile. I'd like it to look a lot neater. All in all, though, a great challenge - I was already making lots of ice cream but I wouldn't have thought of making this without Sunita and the DB's.
The July 2010 Daring Bakers’ challenge was hosted by Sunita of Sunita’s world – life and food. Sunita challenged everyone to make an ice-cream filled Swiss roll that’s then used to make a bombe with hot fudge. Her recipe is based on an ice cream cake recipe from Taste of Home.
Swiss Roll Ice Cream Cake
(Delia, David Lebovitz, my ice cream maker manual and the DB challenge recipes- see details in post)

For the brown sugar and chocolate ice cream, see this post and replace the sugar with brown sugar. 

For the fleur de sel caramel ice cream, see David's post about it, here

For the coffee marscarpone:
150g marscarpone
1 1/2 tbsp icing sugar
1 tbsp espresso powder
1 tbsp boiling water

Beat the marscarpone in a bowl a little to loosen it. Sieve over the icing sugar and beat in. Mix the boiling water and espresso powder together then add to the bowl and beat in. Put in the fridge until needed. 

For the cake:
50g softened butter
110g caster sugar
2 large eggs
90 g plain flour
20g cocoa powder
1 tsp baking powder
1 tbsp hot water
1 tbsp espresso powder

Preheat the oven to 200C/400F. Grease an then line a swiss roll tin, making sure it comes up the sides and the paper is well greased too. Put the butter and sugar into a mixer and beat until light and fluffy. Add the eggs and sift in the flour, baking powder and cocoa. Beat until just combined. Mix the hot water and espresso powder and then fold into the mixture. Spread evenly into the tin, making sure it reaches the corners. 

Bake for about 12 minutes or until it is springy to the touch in the middle. Meanwhile place a large piece of baking parchment on a surface and sprinkle with extra caster sugar. When you take the cake out of the oven, loosen the edges from the paper and then flip out onto the sugared surface. Cut all the edges off. At this point, either follow a traditional method with the coffee marscarpone, or start to line the tin with the cake for this ice cream cake. 

For the fudge sauce (half batch of DB recipe):
100g caster sugar
1 1/2 tbsp cocoa powder
1 tbsp cornflour
1 1/2 tsp espresso powder
180ml water
1/2 tbsp butter

Whisk together the sugar, cocoa, cornflour, espresso powder together with the water in a small saucepan. Stir until the sauce thickens - about 2 minutes. Stir in the butter and leave to cool. 

(Serves about 12 to 15 or more - it's very rich!)

Sunday 25 July 2010

une douce pour l'été


I have written before about recipes I have made that have changed my perceptions and changed my course in life. My Pear and Chocolate Loaf Cake was one of these. It made me realise that I could make up my own recipes and they could actually work. It opened up a whole new world of invention.  The Beautiful and the Damned Cake was another.

Now I have realised that baking and creating things with food is my passion and what I want to do with my life, these moments have become even more precious. Every time something flops, I question my choices. Do I have it in me? Will I succeed? From the very first bite, this dessert said yes.


A week or so ago, my mum and I went out for a special supper up the mountain at La Marlenaz. I had a truly wonderful duck dish with local honey and figs for main but it was my mum who won on dessert. She had 'une douce pour l'été' from the specials board, a new addition by the chef. It was, the waiter explained, a creme brulee base topped with raspberries.  It was gorgeous - warm thick creamy custard topped with a raspberry syrup and fresh raspberries. Mum begged me to try and make something similar.

When we came out to go home, there was a rainbow stretching from deep in the valley to high over the mountains - a full semicircle. It was one of the most beautiful things I've seen recently.


Around the same time, we discovered a bank of wild strawberries just outside our apartment block. I've never seen so many growing wild like this.  By the time I got to picking them yesterday, quite a few had gone over or been eaten by wildlife but I still managed to get a fairly large haul. Wild strawberries are incredible - so tiny and yet packed full of flavour. They have a slightly different taste and smell to regular strawberries, too.

My version of this dessert then started to come together - it seemed like the perfect place to showcase my  precious little strawberries.  I had thought of the original raspberries, blueberries, cherries... all of which I'm sure would be lovely, especially if you don't have wild strawberries.


My only reservation about the dessert we ate at La Marlenaz was that the custard was a little heavy and overly rich for summer.  As a result, I tried to find a fairly light creme brulee base and used fairly thin double cream. Luckily, the first one I chose worked like a dream. I took them out when they were still fairly soft and wobbly.  I added lots of gorgeous vanilla.

For my syrup I used regular strawberries as I didn't have enough wild ones. I added plenty of lemon to keep it fresh and not too sweet.


I spent the whole afternoon grinning like a cheshire cat after eating this. I felt on top of the world - I can do this! This is quite simply the best dessert I have ever made. Possibly the best thing I have ever cooked. The base is soft, creamy and packed with gentle vanilla. The syrup is just wonderful and complements the custard perfectly and the strawberries finish it all off.

I can't really describe this. It all goes to gibberish. I'm just sitting here wishing we still had some in the kitchen.


Mum declared this not only to be better than the restaurant version but the best dessert she had ever eaten. I can't imagine a compliment higher than that.


Wild Strawberry and Vanilla Creams
(custard adapted from Annie Bell's Gorgeous Desserts)

for the syrup:
65g strawberries
20 ml water
1 tbsp lemon juice
few strips of lemon peel
30g vanilla caster sugar (or regular plus 1/2 tsp essence)

Cut the strawberries up into small pieces - I cut mine into 8. Put them in a small saucepan with all the other ingredients. Put over a medium heat, stirring until the mixture starts to bubble and the sugar is dissolved. Reduce the heat to low and cook for five minutes. Remove to a pot and take out the peel. Leave to cool and then put in the fridge to rest, preferably overnight. The next day, strain the syrup, squishing the strawberries lightly.

for the custard bases:
3 egg yolks
1 1/2 tbsp vanilla sugar
1/2 vanilla pod
300 ml double cream (not too thick)

Preheat the oven to 140C (fan)/160C. Chop the vanilla pod up into 1 inch chunks. Put all the rest of the ingredients into a food processor/blender and blend to combine and cut up the vanilla pod. Sieve the mixture into a jug.  Pour into four ramekins or a small dish. Put the dish(es) into a roasting tray and fill the tray with hot (not boiling) water. Place in the oven. Bake until the custards are lightly golden and set, but still have a good wobble - you don't want these overcooked. Mine took about 50 minutes but check from about 30. Take them out of the water and leave to cool slightly. I then carefully scraped the crust off so the texture didn't interfere and the syrup could intermingle.

to assemble:
handful wild strawberries

When the custards have cooled a bit - you still want them warm to serve if possible - carefully pour the syrup over. It may try to dive down a crack but don't worry too much - the fruit will cover it up a bit and it will still taste wonderful. Top with the strawberries and serve.

(Serves 4)

Friday 23 July 2010

Vanilla Roasted Peaches


I debated for a while about posting these. There's almost no need for a recipe, they're so easy. But then I decided that they're so delicious that you should all hear about them.

We had a few nice peaches in our fruit bowl that were threatening to become overripe, so I decided to see what I could do with them. I thought about poaching them (Bree has a great recipe, here) but in the end I decided to try roasting. After roasting rhubarb and realising it's possibly one of the most delicious things on the planet, I thought peaches could do with some roasting.


I also used this pâte de vanille for the roasted rhubarb tarts I made - it's great. If you don't have some I would try maybe brushing a tiny bit of vanilla extract over the top or maybe scraping some seeds out of a pod? Not sure - but these would still be yummy without the vanilla.

I didn't skin them as I thought they would hold their shape better with them. I actually quite liked the skin  when they had been roasted but you can easily slide the flesh off and leave the skin on the plate (or do this before serving).


Roasting peaches is like turning them into mega-peaches. The peach flavour is intensified and the sugar almost caramelizes. The flesh is incredibly tender and fragrant.  I even had some with my weetabix for breakfast.

I decided to brush mine with some of the redcurrant syrup-glaze I made for my Black Cherry and Marscarpone Tart to give some moisture to the top of the peaches (and make them shiny) and I thought the redcurrant flavour would work well. It did - the almost dry taste (I can't describe it) complemented the sweet flesh really well


Vanilla Roasted Peaches

4 peaches
1 tsp pâte de vanille
4 tbsp redcurrant syrup or similar

Preheat the oven to 180C.  Cut the peaches in half and place on a baking tray, cut side upwards. Smear some vanilla over the top of each peach half. Put into the oven and roast for about 45 minutes. Cool slightly then serve with the syrup poured/brushed over.  They would be yummy with creme fraiche, cream, ice cream or similar, but I like them plain.

(Serves 4)

Wednesday 21 July 2010

Raspberry and Almond 'Bakewell' Layer Cake


My inspiration for this cake came from Bakewell Tarts. I know this is a somewhat distant interpretation, but that was my starting point. I have a note in the margin of King Richard II to prove it (I know it's criminal to let my mind wander from Shakespeare, but then this is me and cake - sometimes I just can't help it.)

The jam part of the tart was easy - the layers are sandwiched together with raspberry jam and fresh raspberries (I couldn't resist adding them). The cake caused a bit of trouble but in the end I got a sponge that still screamed ALMOND and had that satisfying dampness. I couldn't work out a way to incorporate pastry, except for making a decoration - which I decided against.


Though the original tarts don't have icing, I wanted to use some to get a proper layer cake look. I thought about an almond buttercream or similar, but I really couldn't face it in this summer heat and I also wanted something light to complement the richness of the insides. Whipped cream scented with almond seemed like the perfect answer (and I reckon traditional Bakewell Tarts would be yummy with a dollop of whipped cream on the side).

The first time I came up with a recipe to make this sponge, it was an epic fail. There was a volcano of batter-lava which went all over the oven, it was greasy and basically just plain nasty. I decided to change my base recipe to Delia's All-in-One and thankfully that time I managed to sort it out and they came out really well - light but still damp and with a clear almond taste.


A certain somebody below tried to help me by getting his nose in the way while I was making this. He then had an argument with the sieve and got a good dusting!


It all came together nicely in the end: a clear hit of almond from the cake contrasted with the rich jam and tart berries and lightened by the soft whipped cream which gave off a scent of almond. Perfect for a summer afternoon tea!

If possible, it would be best to make the cake the day before you need want to serve it to let the almond flavour develop. Just pop it in an airtight tin then assemble it when you're ready. Also, try to use a good quality almond essence/oil - it makes a difference.

I made this a 5" cake - if you want to go for a 9", I would just double everything and see how it goes! I really love making small tall layer cakes - I couldn't recommend getting small tins enough (I have 5" and 6" ones from Alan Silverwood - they're on Amazon), especially if you don't have masses of people to feed.


Raspberry and Almond Layer Cake

For the cake:
100g butter
40g light brown sugar
70g caster sugar
2 eggs
100g plain flour
20g ground almonds
1 tsp baking powder
2-3 drops almond essence

Preheat the oven to 170C. Grease two 5" tins (or one and simply bake one after another). Cream the butter and sugar together until light and fluffy. Add the eggs, flour, almonds and baking powder and beat until well combined. Add the almond essence and briefly beat in. Divide between tins and bake on a medium shelf for about 20-25 minutes or until golden and a toothpick comes out clean. Leave to cool in the tin for 5 minutes before turning out onto a wire rack to cool throughly.

To assemble:
1 medium punnet fresh raspberries
3 tbsp raspberry jam
200ml double cream
few drops almond essence
small handful of flaked almonds

Slice each cake into two. Place one cake on the serving plate, cut side up (reserve the nicest half for the top - the bottom half is often neater). Spoon on a tbsp of raspberry jam and spread - add more if you think you need it. Reserve a handful of the prettiest raspberries to decorate. Cover the jam with raspberries, slightly squished - you could cut them in half to make them go further and have a neater, more stable cake. Top with another cake and repeat, the another cake and repeat. Place your final cake on top. You may find it useful to use a few toothpicks as dowels to help the structure - just remember to take them out!

Whip the double cream until fairly stiff, then add the almond essence. You could also add a tbsp of icing sugar if you like - I prefer mine unsweetened. Whip a bit more until it forms a good beak when you remove the whisk. Spoon about half the cream on top of the cake, then start working it down the sides with a palette knife.  Add the rest of the cream when you need it. It's difficult to work with and doesn't behave particularly well, but I promise it's worth it. When you're satisfied, top with the reserved raspberries and the handful of flaked almonds. Best eaten the day you put it together because of the cream.

(Serves about 8 or so)

Monday 19 July 2010

Black Cherry and Mascarpone Tart with a Gingernut Crust


This is a stunner of a tart. It's a bit like unbaked cheesecake, which probably explains why I like it so much. Still, I promise this is different from my Cherry Cheesecake. It's darker, richer and spicier. 

In a lot of ways, I suppose this is quite a dark and sinister dessert. Your hands get stained blood-red when you pit and halve the cherries. It seems to 'bleed' redcurrant glaze when you cut it. And, of course, there's maSCARpone (this may or may not be the way I remember how to spell it...). 

Or, you know, my imagination could have been clouded by reading too many of Shakespeare's history plays - blood, back stabbing, child murders etc are getting all too everyday.  I'm reading my way through the complete works this summer and have been reading the many, many Henries, the Richards and John in the past days. I'm trying to maintain a rate of two plays and at least a few sonnets per day. It's incredibly enjoyable - I really recommend it if you have the time.  


Instead of using an apricot jam or similar as a glaze, I decided to go for something different. We bought some redcurrants recently but I hadn't really found a use for them, especially as they're quite a sour batch. In the end I made this - a simple syrup to toss the cherries in. It's a subtle addition to the flavours but I was really pleased with it. It's also very nice on its own. 


This is really quite rich - though it's a small tart it can definitely feed a fair few. Mum and I had a slice each and then she took the rest with her to a barbeque. You really want to eat it within 24 hours so try and find some helpers to eat it with!


I got the idea for this from smitten kitchen - Deb did hers with nectarines. I thought I would be different and do it with cherries, then realised that she had adapted it from using cherries. Not so original after all! I'd like to try it with peaches or the like - it would give it a refreshing edge. Maybe also fold in some whipped cream to have a lighter version, or some sour cream as Deb does. 


Black Cherry and Marscarpone Tart with a Gingernut Crust
(adapted from Smitten Kitchen, here)

For the crust:
1 batch of gingernuts (or similar)
30g butter

Preheat the oven to 170C/350F. Break the gingernuts up roughly, then put in a food processor and blend until fine. Melt the butter, then pour into the processor. Blend again until all the crumbs are coated. Tip into a 20cm tart tin with removable base. Use a measuring jug or similar to press the crumbs down and into the sides firmly. Place in the oven for about 8 minutes or until slightly darker. Cool on a wire rack. 

For the redcurrant glaze:
60g redcurrants
40g brown sugar
1 tsp stem ginger syrup
squeeze of lemon juice
20ml water

Put all the ingredients into a small saucepan. Heat at a medium temperature for until bubbling, then reduce to low for five minutes or so, slightly squishing the currants. Leave to cool, then pass through a fine sieve. 


For the filling:
200g mascarpone
150g cream cheese
30g caster sugar
zest of half a lemon
juice of half a lemon
1/2 tsp vanilla extract

Beat together marscarpone and cream cheese, then beat in the lemon juice and vanilla. Finally beat in the sugar and lemon zest.  Spread over the cooled base and put in the fridge while you fiddle with the cherries. 

To assemble:
couple of handfuls of black cherries

Pit and halve the cherries. Toss them in a few tbsps of the redcurrant glaze. Take the tart out of the fridge and top the filling with the cherries. 

(Serves 8-10)

Saturday 17 July 2010

Mint Choc Chip Ice Cream and Homemade Cones


This post combines two of the things that excited me most about making ice cream when I was given my ice cream maker for my birthday and subsequently bought The Perfect Scoop.

First: Making Mint Choc Chip Ice Cream. My childhood favourite, almost always eaten at a particular friend's house. Those pale green scoops studded with chips and piled into bowls were heaven indeed. 

Second: One of the first things that I happened to come across in The Perfect Scoop was this recipe for homemade cones. I had to make them  - I love nice crisp biscuity cones. 


I've been searching for the mint/recipe to recreate this ice cream for ages. Much as I wanted to make ice cream out of the batch of mint that went towards this Blueberry Loaf with Lemon and Mint Syrup, I didn't have an ice cream maker then. In the end, Mum bought several plants and potted them up for me and for her tea.  There are many more scoops of ice cream left in this plant pot!

Stirring the mint leaves into the cream mixture sounds like the rustling of petticoats. It's a beautiful sound.


I have to admit - I made a blunder when making this ice cream. We had a few pots of the luscious thick cream that I love so much (see here for rhapsodising) and so I used that in place of normal pourable double cream. This leant an overly rich tone to the ice cream - you could almost taste the extra fat, even though I replaced some of the cream volume with milk. It's a shame - I'll remember next time - but it's still delicious. Just not as refreshing!

Instead of using chips, I used David's method for Stracciatella, which I repeat below, where you layer the ice cream with drizzled melted chocolate. This not only looks lovely, but creates a great effect when you scoop it. 


This morning I decided that the time had come to finally make my cones. Then I re-read the recipe and remembered that I didn't have a cone mould - so I made one. Bring on the new thin cardboard Amazon packaging and tin foil! A cereal box would have worked just as well - I just cut a semicircle out then rolled it up and taped it. I love creating things like this at home. 


Making the cone batter is incredibly easy. Rolling the cones is not so easy. It took me most of the batch of six to get one to look right and I still need more practice. The cones are so tasty that I don't really mind - we ate the first failed two before the second two were out of the oven. 


I'm so excited by making these cones. There's such a world of variety to be made and devoured. I have one plan in particular that I can't wait to put in practice...

These cones filled with my lovely fresh mint ice cream streaked with dark chocolate really hit the spot as Mum and I sat outside this afternoon, watching the world go by. 


Ice Cream Cones
(from David Lebovitz's The Perfect Scoop)

60ml egg whites (about 2 eggs)
85g sugar
1/2 tsp vanilla extract
pinch of salt
90g plain flour
30g unsalted butter

Preheat the oven to 175C/350F. Melt the butter and put aside. In a medium sized bowl, stir the egg whites, sugar and vanilla together. Add the salt and 45g of the flour and beat in. Pour in the melted butter and mix well. Finally beat in the remaining flour.  This batter will keep in the fridge for about 4 days.

Line a baking sheet with greaseproof paper. Put 2 level tablespoons of batter onto the paper and spread with a spatula/spoon/palette knife into a 6"/15cm circle. Try to keep it as level and smooth as possible. On the other side of the baking sheet, repeat so you have two circles. Put into the oven for 10-15 minutes, depending on your oven - mine took about 12. When done, they should be mainly a deep golden brown, often with some lighter spots.

While they cook, assemble the thing you'll need to roll them: your conical mould, two tall glasses and probably some clean rubber gloves to protect your hands from the heat. When they're done quickly remove from the oven and place on a heatproof surface. Use a thin (metal) spatula under one of the discs and flip it over. Immediately begin rolling the disc around the mould - position the point of the mould a few mm from the bottom of the circle and wrap each side around. Press down onto the surface on the seam and pinch the bottom. When it has cooled slightly, place upright in one of the glasses. I found I then needed to return the other circle to the oven to heat up again. Repeat the process. When ready to try the next two cones, take the parchment off the hot baking sheet to spread the discs - the heat stops them spreading properly. When totally cool, put in an airtight container until you want to use them.

(Makes 6 cones)


Fresh Mint Ice Cream laced with Dark Chocolate
(From David Lebovitz's The Perfect Scoop)

250 ml whole milk
150g sugar
500 ml double cream
pinch of salt
2 cups (about 80g) mint leaves, lightly packed
5 large egg yolks

Put the milk, sugar, salt and 250ml of the double cream together in a saucepan. Whisk together and heat until hot to touch. Stir in the mint leaves the cover with a lid and remove from the heat. Let the mixture steep for about an hour at room temperature.  Strain the mixture into another medium saucepan. Really press the leaves to make sure you get as much flavour out as possible, then discard them.

Pour the rest of the cream into a medium-large bowl and set the strainer over it. Prepare an ice bath and set this bowl in it.  In another bowl, lightly whisk the egg yolks together and put the bowl close to the stove. Put the mint mixture in the saucepan back on the heat until warm - when it is ready, slowly pour about half of it into the yolks, whisking constantly. Return this yolky mixture to the pan and whisk together. Heat again, stirring constantly (use a spatula to make sure nothing sticks to the bottom), until the mixture thickens to a custard consistency and coats the back of a spoon. Pour the contents of the pan through the strainer into the bowl with the cream. Mix together and set over the ice bath. Stir until cool, then refrigerate for at least 4 hours or overnight before churning.

100g good quality dark chocolate.

While the mixture is churning, melt the chocolate. Prepare a clean box for the mixture to freeze in and then drizzle some of the chocolate off a spoon onto the bottom of the box. When the mixture has finished churning, spread about 1/3 of the ice cream over the bottom of the container and then drizzle again. Spread another 1/3 over and drizzle again, then repeat for the last bit of ice cream. Stir lightly to break it up a bit and then top with any remaining chocolate. (You can also pour a thin stream of the melted chocolate into the spout of your ice cream maker at the last minute before you stop it).

(Makes about 1 litre)

ShareThis