Perhaps I'm odd, but I find rolling out puff pastry relaxing. There's something quietly satisfying about rolling back and forth, shaping, dusting, brushing and folding the smooth, cool dough. The whole process is calming - a bit like kneading your frustration into bread, but in a gentle way. As one of my chefs used to say, you have to treat her like a lady.
Puff is admittedly much easier to pick up in a supermarket, but as well as the therapeutic benefits, I think it tastes much better freshly homemade. Quite a few of the supermarket brands - certainly all the ones I could find yesterday - are made with margarine instead of butter and need several preservatives so they can sit on the shelf. If you're making it fresh, you only need four ingredients: flour, butter, water and salt.

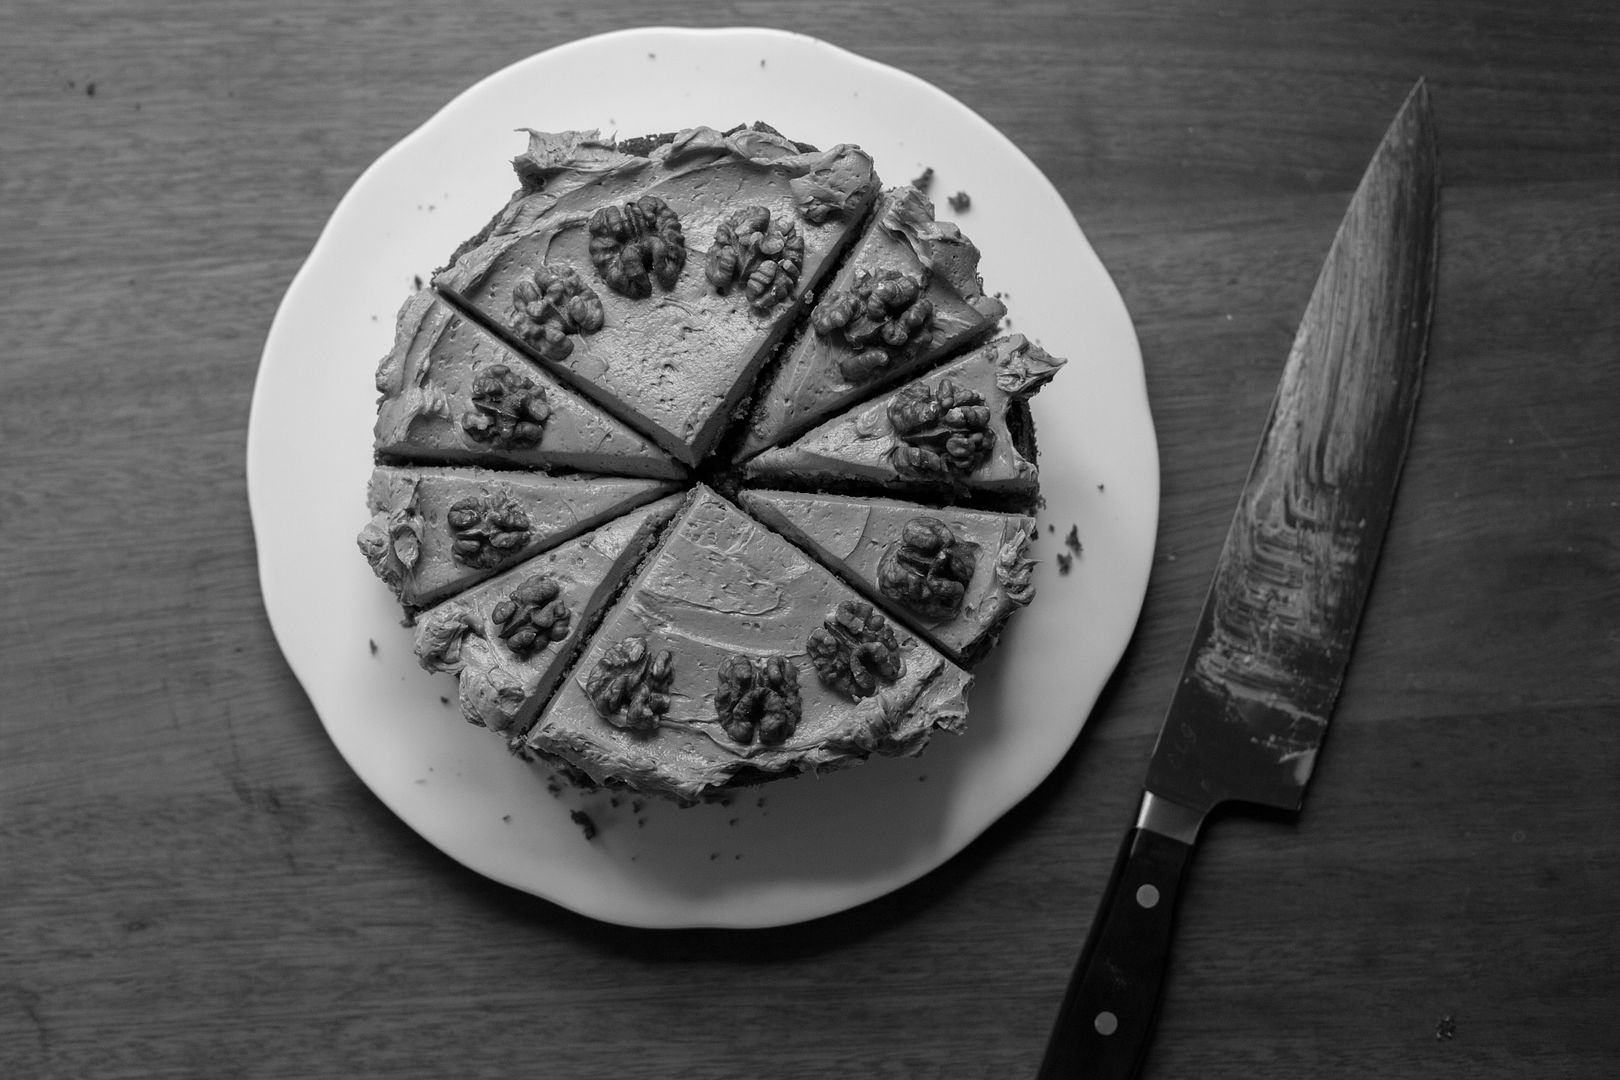
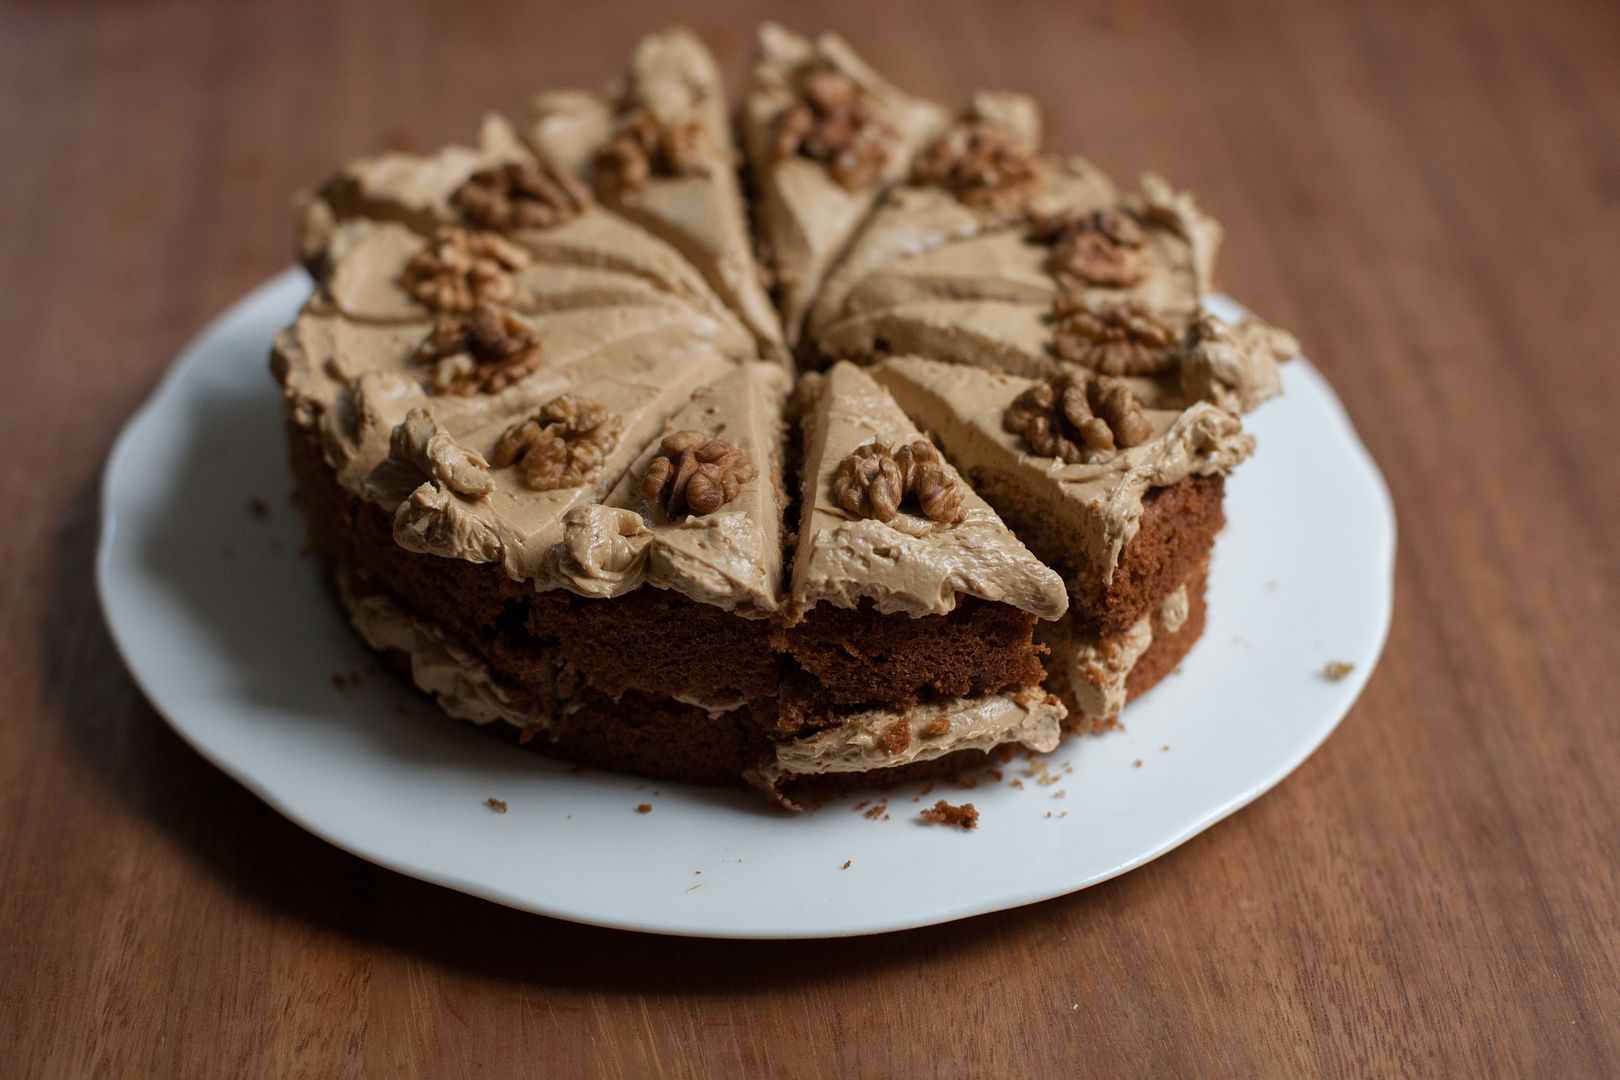
Rough puff is a term that covers a range of methods of making a puffy pastry that rises less than classic puff pastry. At one end you have flaky shortcrust, which barely rises. This method, at the other end, gives about 75% of the rise of classic (the pictures above show the rise I've got from this puff). I rarely bother to make classic now - I don't mind a rough edge to something that is meant to be homemade and I think this gives a great result for less work. Though I admit that it's still time consuming, rough puff doesn't take much active work - I reckon, aside from chilling time, it's about 20 minutes.
Puff pastry is a laminated dough, which means that you create lots of layers of incredibly thin pastry sandwiched with layers of fat. It's hard to tell when laminated pastry was first made, especially as pastry knowledge was generally assumed rather than written down in cookbooks. According to Karen Hess, the first recognisable recipe for puff pastry was recorded in The Good Housewife's Jewel, written by Thomas Dawson in 1586. Danish pastries and croissants are also made from a laminated dough, but they evolved to include yeast and other ingredients such as milk.
Classic puff has 729 layers that are about a hundredth of a millimeter thick once you've given it six turns (or, to be accurate, one inclusion and 5 turns). After one single turn of the rough puff you have 3 layers, then 9, then 27 - so if you do four turns you'll get 81, or five will give you 243.
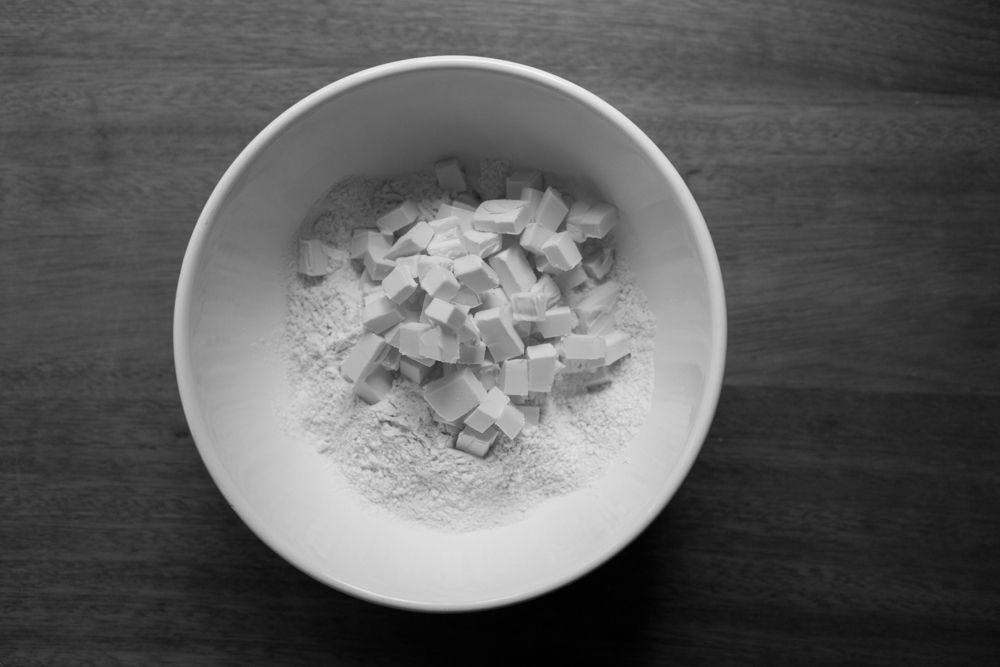
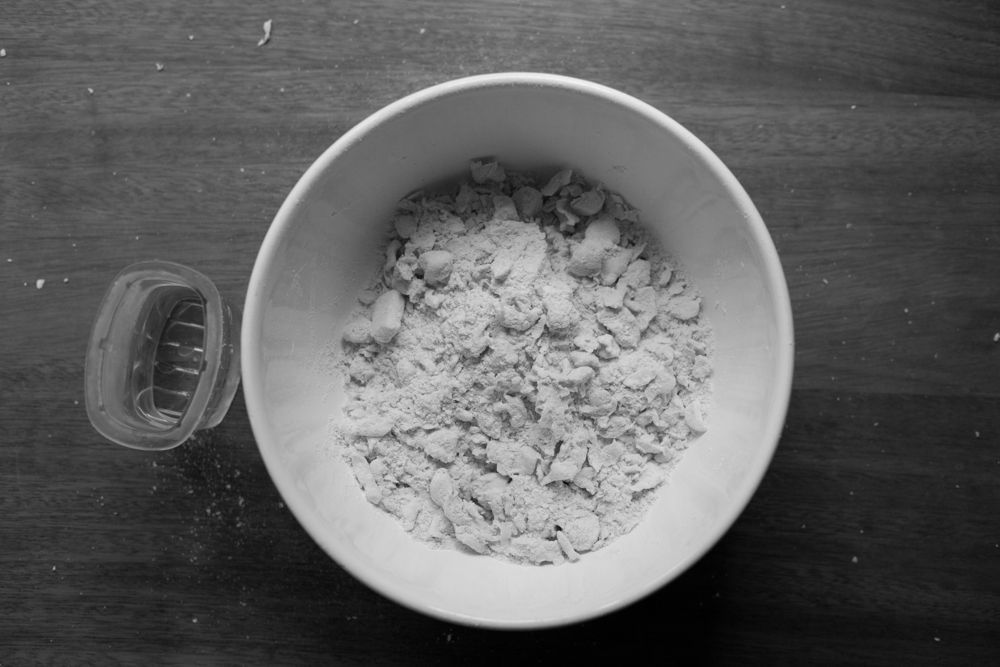
To start, sieve the flour and salt into a bowl. Chop the cold (but not totally rock solid) butter into smallish chunks and add to the bowl.
The ratio is usually the same weight of flour and butter, half the weight in water and 1 tsp of fine sea salt per 500g of flour (I originally found this ratio in Michel Roux's Pastry). I normally use 250g plain flour, 250g unsalted butter, 125ml ice cold water and 1/2 tsp fine sea salt. This makes about 630g of pastry. I usually use plain flour but some recipes call for strong or bread flour to aid the gluten development in the layers.
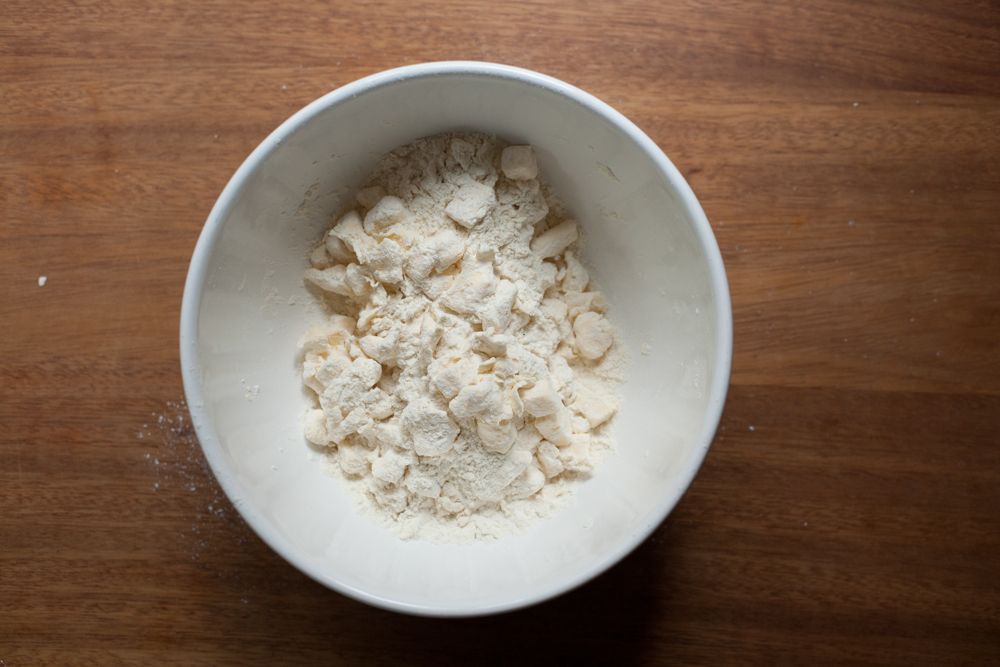
Combine the flour and salt in a bowl. Rub the butter into the flour with your hands using the same technique as regular pastry (see this foundation for a video and more), except that you want to leave lumps of butter. You do still need to rub about a third of the butter in fully, though, and you don't want the chunks to still be solid cubes (just squish them a bit). Keep going until you have something that resembles this:
When it's ready, add the cold water and bring together into a dough, then pat into a square, wrap in cling film and chill for 30 minutes. The video below shows how I do this.
Just so you know if you've never played one, my videos don't have sound - I find it intrusive when I'm just trying to look at the process, be quiet or play my own music. They're essentially moving pictures. I do them in one take from one position and don't edit much (on that note, please excuse my head bobbing into frame in the one below). I hope that it shows the process as it really happens so you can a get a clear image of what to do. If you're reading this via email subscription, the videos don't show up for some reason - you'll need to click through to the web version.
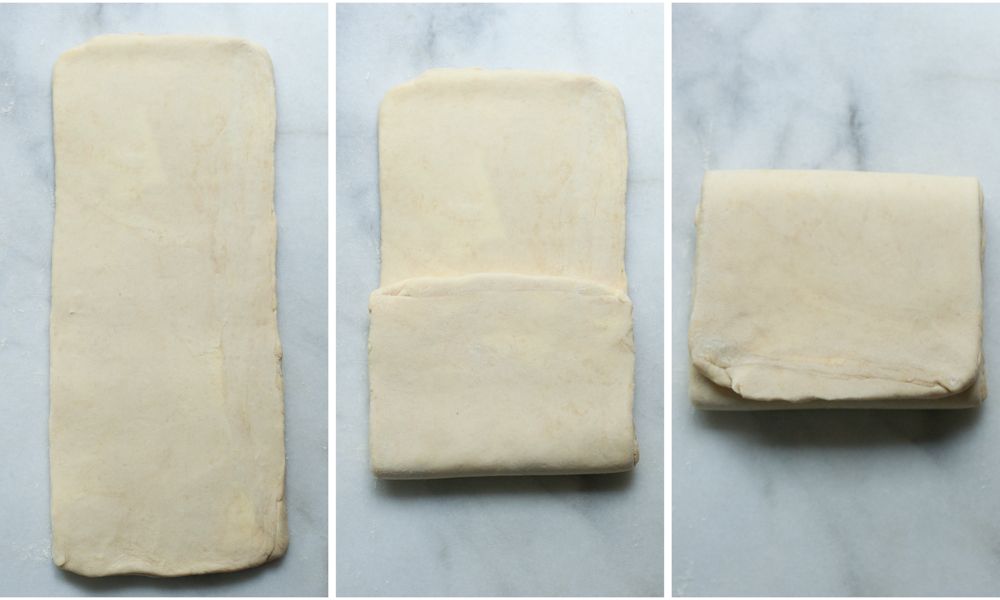
After chilling, you can do the first turn (as in the video below). Lightly flour the surface then roll the dough out evenly, keeping it as rectangular as possible - gently pat and form the sides to help keep the shape. You want a rectangle of roughly 40 x 20 cm. Don't let the pastry stick to the surface - slide your fingers underneath to check and dust again if needed. If a bit of butter opens on the surface then dab a bit of flour on it.
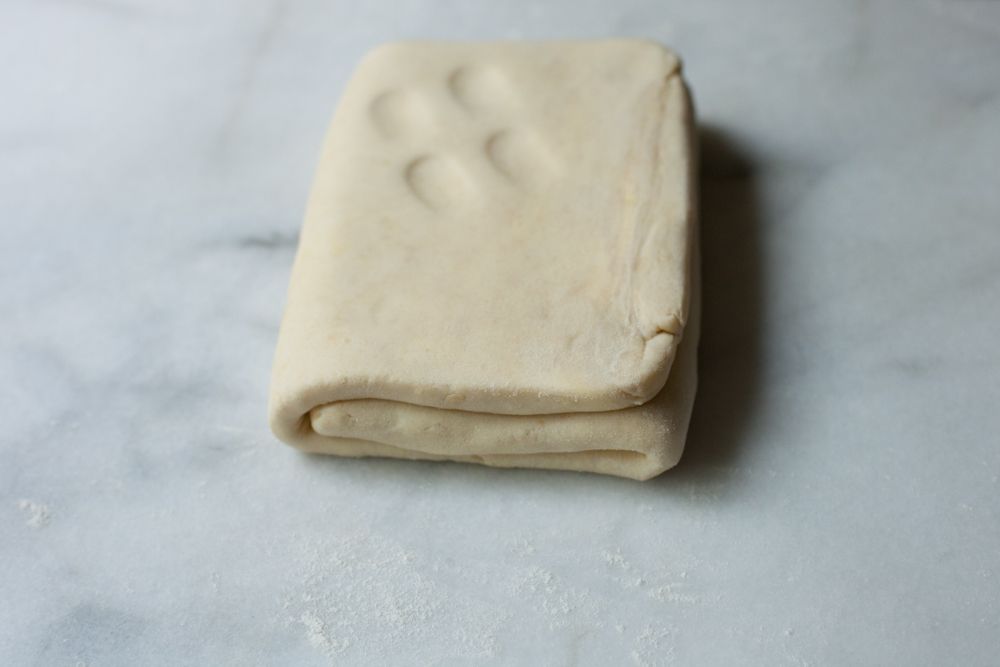
To do the turn itself, brush off any excess flour with your fingers or a soft pastry brush. Fold the bottom 1/3 of the pastry up, brush the flour off, then fold then top 1/3 down so you have a neat parcel (see the top photo in the post - it's a bit like folding a letter). The edges should line up. Use a finger to make an imprint on the dough to keep track of the number of turns. Wrap in cling film and leave to chill for 45 minutes.
I always make my turns like this - they're called single turns. There's also something called a book turn, where you fold both sides in, then bring the two double sides together, but I find it easier to focus on one type.
After the dough has chilled, do the second and third turns straight after one another (unless the dough feels warm, soft or sticky, in which case you should chill in between). Repeat the rolling out and folding process (though I usually roll to 35 x 15cm after the first turn, creating a block of 10 x 15cm) then do the same thing again. The video below shows a single turn. Always keep the spine of the block on the same side when you roll out - I have mine like a book, so the open side is on the right and my finger imprints are on the top left. The dough should start feeling silky and smooth.
Once the dough has rested for another 45 minutes, do a forth turn (which you can watch below). You can leave it at four but I often do another, as I find I get better results with five.
You need to rest the dough regularly to make it easier to work with. As you combine or roll out the dough the gluten strands are stressed as they're pulled and worked into a new shape. They adjust and relax as they chill, which means the dough is less elastic and therefore easier to stretch again as you roll it out. The butter also hardens, which helps the lamination.
Chill for at least an hour before you roll it out to use it. Don't roll the puff too thin - about 5mm seems to be the minimum. Always cut the pastry with a sharp knife and remember to stack any offcuts up flat so that the layers remain aligned. Don't egg/milk wash the sides of the pastry or let it drip down or it'll bind the layers together.
When you finally subject your laminated dough to heat, the fat in between the layers of dough melts first. Then the water in the dough begins to evaporate, creating steam, which expands in the gaps left by the melted fat. The fat stops the steam from escaping, so the dough layers push up and apart from the pressure of the steam. Finally the puffed dough structure becomes rigid, creating the finished texture, which will shatter and crackle as you bite into it.
This is the seventh post in my Foundations Series - I've decided to sprinkle a few in amongst my recipe posts this summer.
A few ideas for how to use your puff:
Galette des Rois - The reason I make puff every January. I think it's a bit of a shame I only make this once a year - you could always break tradition and make it now.
Pear Tart Tatin - I'd love to try this recipe again, I haven't made it in years.
Palmiers or Elephant Ears - I usually make these with any offcuts. I sprinkled a couple of pinches of freshly ground cardamon over a batch just about to go into the oven last week, which was lovely.
*

Finally, the Poires au Chocolat 2013 survey has now closed.
As promised, a few of my favourite stats:
- 762 readers completed the survey
- two-thirds had made a recipe
- of the 2/3, just under 60% had made three or more recipes.