Saturday 28 July 2012

Pear and Chocolate Loaf 2.0


Despite being a humble loaf, this cake always finds a way to be the centre of attention.

It was the cake this blog was named after (as well as the combination being one of my favourites - I often have a bowl of freshly chopped pear laced with melted dark chocolate for dessert) as it was the first recipe I created from scratch that I loved. It was alluded to in my very first post.

It was the cake I chose for my first blog anniversary post in 2010. In the post I admitted and announced to the world (and to myself, really) that I wanted to make baking my career and train as a pastry chef.

It was also the cake my agent, Juliet, picked to try when we were first talking about a book - thankfully she liked it.


At the beginning, it showed me that I could bake.

Ever since it has taught me that I'm human and that I have to accept my mistakes.

The first time I posted about it, on my blog anniversary, it sank. I'd foolishly opened the door early on, momentarily forgetting the consequences of alpine air on rising cake batter. I posted about it anyway, sunken pictures and all.


Then there was last week.

We've been doing lots of decorating in the past few weeks (painting several rooms, sanding and varnishing wood floors, moving heavy furniture etc etc). It's chaotic. Though the kitchen isn't being decorated, it's full of furniture from other rooms. To open the oven I have to crawl underneath my desk. So when I came to check this cake, I was on my knees on the hard tiles, head bashing against my desk, face in the oven. I realised I didn't have a toothpick or cake tester with me (and couldn't face untangling myself from the desk to find one), so I tried pressing the top and looking for the springback.

It sprang back as required, so the cake came out of the oven. It hadn't risen much but it was golden brown. After a few minutes, I messily transferred it to the wire rack, causing it to crack slightly. I cut a slice from the end and went off to sit on the floor amongst the paint pots, balancing my tea on the stepladder.

Then I went back to the kitchen. There was a pool of liquid cake under the rack, swirled with drops of melted chocolate. The middle hadn't cooked. I swore.

So. I, er, recommend checking that you get a clean tester from the middle before removing it from the oven.


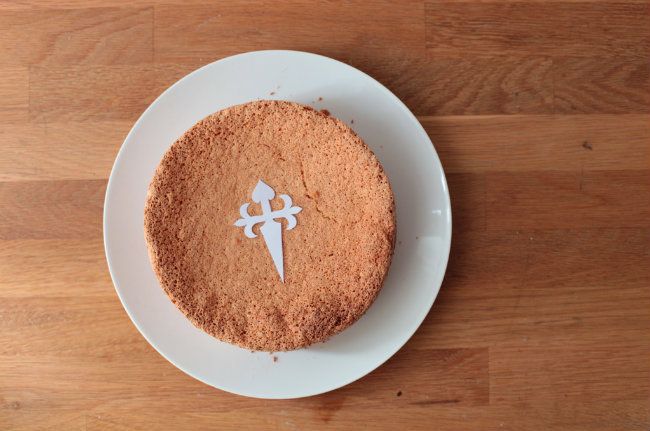
When I was working from the original recipe last week everything seemed a bit confusing and jumbled up. Instead of replacing the recipe in the orignal post (which I'd like to keep for nostalgic reasons but would rather you didn't actually bake from) I thought I'd test and write a new one. I tried it again yesterday (the loaf you see in the pictures) and made a few small changes. I've enjoyed updating my hot cross bun recipe each year (v.3 is here) so it seemed like a good plan.

To be honest, it's also because I'm achey and exhausted from all the decorating and proposal-writing and my kitchen is full of shelves and desks and chairs and my cookbooks are randomly piled under dust sheets and who knows where my notebooks are and I simply couldn't face making something new.

Hopefully it'll all be done soon (final draft of the proposal is in, so close now) and I'll have more time to bake and catch up with all the internet things that backlog so quickly (emails, comments, my google reader, etc etc). I might even have a little holiday.

(And yes, that is a Bayeux tapestry mug. I love it.)


Pear and Chocolate Loaf 2.0

1 small ripe pear
60g dark chocolate (around 70%)
125g unsalted butter, at room temperature
75g caster sugar
50g light brown sugar
2 eggs, beaten
135g plain flour
1 & 1/2 tsp baking powder
pinch of fine sea salt
1 tbsp plain yogurt

Preheat the oven to 190C/375F. Line a 8-9" loaf tin with baking parchment (or one of those liners) - fold the corners in so it fits. Peel the pear over a bowl, catching any juices. Chop into small cubes - you should have roughly 100-125g of chopped pear. Chop the chocolate up into rough chunks. Weigh the flour, baking powder and salt into a bowl.

Place the butter and both sugars into the bowl of a stand mixer (or use a mixing bowl and electric hand whisk) and cream them together until fluffy and pale. Scrape down the sides then add 1/4 of the beaten eggs and beat well until smooth. Add the next 1/4 and beat well. With the final two 1/4 additions, add a teaspoon of flour from the bowl too (this helps stop it curdling). Take the bowl off the mixer and scrape down.

Toss the pears and chocolate in the flour mixture (this helps them stay up in the mixture rather than sink as it bakes). Add to the mixer bowl and fold together until you have a stiff but uniform mixture. Add the yogurt and any leftover pear juices and fold again until combined. Spoon into the lined loaf tin and smooth over.

Add a sheet of baking parchment or foil over the top (to stop it overbrowning) then place into the oven. Bake for 30 minutes then remove the paper. Bake for a further 7 to 10 minutes until a cake tester can be removed cleanly from the centre. Leave to cool in the tin for 5 minutes then remove to a wire rack to cool - but do try a warm slice while the chocolate is gooey. The cake keeps in a tin for 2 days.

(Makes 1 loaf - about 10 slices)


Saturday 21 July 2012

Roasted Gooseberries with Honey Ice Cream


When I was a little girl, my friend H and I sold posies of flowers outside our local pub.

We would sing "po-sies for sale!" with our most charming smiles as people arrived, our wares arranged on a cloth draped over the stone wall by the entrance. We happened to both buy the same blue velvet dress with a peter pan collar from M&S and we would co-ordinate for extra effect on our unsuspecting customers. The cute factor sold. One year - I think it was when I was 7 or 8 - I made £50 over the summer.


Earlier in the day, we would meet at her house and go off to our den to play. About a five minute walk along the tall, hedged lanes there was a hidden exit off the road to the stream. If you waded across, there was a huge oak tree that had grown horizontally in a U shape and then upwards. The U faced upstream and would collect debris as the water flowed past. Every spring we would clear it out. I usually pretended that the U was a kitchen countertop and would prepare foraged (inedible, probably poisonous) meals on flat rocks, then wash up in the stream.

We would then go on a huge clipping trip around her garden, harvesting wild and cultivated flowers. I particularly remember the scent of the lily of the valley, tucked into a quiet, shady corner. We'd then arrange them into various small posies and wrap the stems with wet kitchen roll and foil to stop them wilting.


Now I look back, I'm so grateful that I had those wild times - playing on our own, out of hearing distance, in the streams, gardens, fields and pub car parks of Devon.

I imagine people would now be horrified at the thought of two little girls sitting outside a pub in our best dresses, next to a road, engaging every stranger who came for a drink in conversation - while trying to be terribly charming in order to up our sales. To be fair, our parents did pop out to check on us and we knew a lot of the regulars. I have to admit it didn't always go well - I still have the scars from a spectacular fall in the car park involving a broken glass and a trip to A&E.


One of my other memories from H's garden is of eating raw gooseberries. We picked them off the bush, bright green and hard. They were incredibly sour but we ate some anyway, to prove we could. I couldn't remember when I'd tried them since, so I bought a punnet to experiment with. After a few conversations on twitter, I settled on trying to roast them as I love roasting rhubarb, which is pretty similar in flavour. They are very sour - you could add more sugar if you like.

I decided to pair the sour berries with a honey ice cream inspired by the one I ate at Chez Panisse. I adapted a Lavender - Honey recipe from their book. Topping a few soft scoops of the sweet ice cream with the warm, sour berries and their syrupy sauce creates a wonderful contrast as they start to pool together in the bottom of the bowl.

The ice cream is made with a custard base. If you're nervous about making custard with egg yolks or just want some tips, try having a look at my Foundations post.


Roasted Gooseberries with Honey Ice Cream
(Ice cream adapted from Chez Panisse Desserts by Lindsay Shere)

For the ice cream:
350ml double cream
70ml milk
3 egg yolks
100ml quality runny honey*

For the gooseberries:
275g gooseberries
2 tbsp brown sugar or more, depending on acidity of berries

Place the cream and milk into a medium saucepan. Break the yolks up with a whisk in a small bowl. Heat the cream until it begins to steam then turn off the heat. Pour about 1/3 of the hot cream into the egg yolks, whisking the yolks as you go. Scrape the yolk mixture into the pan. Use a wooden spoon to stir the two together. Turn the heat on to medium-low and stir until the custard coats the back of the spoon - you should be able to draw a finger through the custard on the spoon and see the line. Stir in the honey. Transfer to a jug and chill overnight or for at least 3 hours. Churn according to the instructions for your ice cream maker then place back into the freezer.

Preheat the oven to 180C/350F. Nip the little brown bits off the tops of the berries and remove the stems. Place them in a tin (they need a bit of space to caramelise) and sprinkle the sugar over the top. Toss them together with a spoon or your hands. Place into the oven and bake for 20 minutes or until just burst and caramelising around the edges.

Scoop some ice cream into each bowl (the honey means that the ice cream freezes softly, so no need for it to stand before serving). Spoon some of the berries over the top - don't add too many or you'll end up with too much sour in each bite.

*This is the original ratio from the book - it's perfect to counteract the sour berries, but as a general ice cream I think it's a bit sweet. I'd probably try 75ml or so if I wanted to eat it alone or with sweet fruits - though a slightly sour punnet of raspberries were delicious with this batch. I used orange blossom honey.

(Serves about 6)

Saturday 14 July 2012

Tarta de Santiago


At the end of the Way of St James pilgrims reach the Cathedral in Santiago de Compostela. This pilgrimage has been made since the 9th century.

I have no personal experience of the city or the route, though several of my friends have talked about walking it and a few have succeeded. None of them mentioned it but I've read that every bakery and restaurant in the city has this special cake displayed proudly in their windows.

I found this recipe in Claudia Roden's fantastic book The Food of Spain. Some recipes call for a pastry tart base but I liked the idea of the filling standing alone. Claudia believes this cake evolved from a Passover cake brought to Galicia by Jews fleeing Andalucia in the 12th and 13th centuries. Even though (and partly because) I'm an atheist, I find religions and their history fascinating.


This recipe calls for whole blanched almonds, which you then grind yourself. It's worth the extra step in a cake like this as there are so few ingredients - just almonds, eggs, sugar and citrus zest.

If you have whole almonds with their skins on, you can easily blanche them. It's a little fiddly but I rather enjoy it.

All you do is place your almonds into a bowl or mug, cover them with boiling water and leave to sit for a few minutes before draining. Then you can just use your fingers to slip the skin off.


The tarta traditionally has the cross of St James (the apostle's relics are believed to be in the cathedral) stenciled with icing sugar in the middle. I printed off a small version of this template, then cut it out. Place in the middle, dust with sugar, then whip it off. I made a smaller version that fits in a 6 or 7 inch tin, but you can easily double the mixture and use an 11 or 12 inch tin.

So often damp almond-citrus cakes are very heavy, but this one manages to be feathery light. The edges crisp up almost like a meringue or pavlova. It's simple but perfect.


Tarta de Santiago
(adapted from Claudia Roden's The Food of Spain)

125g blanched whole almonds
3 eggs, separated
125g caster sugar
zest of 1 lemon (or orange, or half of each)
icing sugar, to dust

Preheat the oven to 180C/350F. Butter a 7" tin and then dust with flour. Tap out any excess. Grind the almonds in a food processor until they're fine - don't overdo it as it will eventually turn into a paste. In a bowl, beat the egg yolks and sugar until they're pale and thick. Stir in the zest. Add the almonds and mix together - it gets pretty stiff.

In a clean bowl (wipe down with a bit of lemon if it looks murky), whip the egg whites to stiff peaks. Take a big spoonful of whites and mix into the almond mixture to loosen it. Scrape it all into the egg white bowl and use a big spoon (I use a metal one) to carefully fold them together. Keep folding until the mixture is uniform - you don't want lumps of either mix left, but try to keep most of the volume. Scrape into the tin.

Bake for 30-35 minutes until golden and a toothpick comes cleanly from the centre.Leave to cool in the tin. Slide a knife around the edge to loosen the cake then remove to a plate. Put the stencil on top of the cake and sieve icing sugar over the top. Remove the stencil, then serve. Keeps well in a tin for a few days.

(Makes about 6-8 slices)

Friday 6 July 2012

Amazing Fruit Salad


I have a confession.

I am writing a proposal for a cookbook.

Writing a book is something I have daydreamed about for years but never really thought would transition into reality. Then I received an email in April from a literary agent, Juliet Pickering at A P Watt, saying how much she liked the blog and asking if I had any book ideas. We sent emails back and forth and she tried a recipe of mine. Literally two hours before I went to the Guild awards ceremony, we finally met.


And so - I signed. I have an agent. (I keep on having to repeat that one back to myself to believe it). I'm even on the website! You can find me by looking in authors (!), then G for Gardner, Emma.

Around the time of the awards, several editors and other agents approached me. I have to admit that at the time I found it all hilarious. Ridiculously, they-must-be-joking, absurdly hilarious. Now I've spent a lot of time working on an idea, it doesn't feel so funny.

It feels absolutely terrifying.

The only experience I can vaguely equate it to is falling in love. The excitement and thrill firmly streaked with the terror of loss and rejection. The all-encompassing nature that means you can't think about anything else. The excitement itself is scary - the more you want it and believe it will work, the harder it is to think of it failing.

Having said that, there are differences. I don't remember falling in love being so stressful... or such hard work.


For some reason I haven't quite pinned down, I really want to share this with you now. Not later, when I've avoided public failure. Now, when I am at the beginning.

Yesterday, Tara posted a quote on twitter from an interview with Cheryl Strayed:

"I find the most important thing for aspiring writers is for them to give themselves permission to be brave on the page, to write in the presence of fear".

I am definitely in the presence of fear, both on my proposal document and right here, sharing this with you. I can't decide if this is brave or foolish (or, for that matter, boring - so many bloggers are writing books).


The end that is a beginning does seem to be in sight - my proposal is nearly finished. I sent a partial first draft to Juliet today.

I've thrown out huge chunks of work, reinvented and edited on repeat. I'm on my third chapter of sample recipes, having binned the others for various reasons. There have been three, four, five, six batches of testing a day in the past weeks. Mum had her holiday time in California filled with testing and writing.

As you might have noticed, there is one teeny little problem - I'm signed up to do a masters at Oxford this autumn. If this does all happen, I'm hoping to defer or re-apply for next year. I've spent a lot of time agonizing over what to do. It will only be worth it if I can create something I'm really proud of.

I know this post isn't the most cheerful, it's-all-sunshine-and-happiness way to tell you, but it is the truth. I've tried to write this post differently but at the moment my excitement is too entangled with fear to unravel the two and only write about one. Besides, I want to preserve this moment - whatever comes next.

So yes. That is what I am up to. Are you excited? Would you like me to write a book? I hope so!


*

We had a dinner party a few weeks ago in California. About an hour before the guests turned up (when the main course was in the oven), I realised the pudding I'd planned wasn't nice enough to serve (this may or may not have been perfectionism on my part). This fruit salad was born.

I had to make it again the next day. The quality of the fruit in California is insane - everything is bursting with flavour. I've put a recipe below for the version we fell in love with but it's just a guideline. The figs perfume the whole bowl and the minty-lemon syrup heightens the taste of every fruit.

My pointers for fruit salads = buy the best fruit you can and use it at the peak of ripeness (it's not a place to hide furry apples and overripe bananas); have lots of colours for visual appeal; let it sit for a bit and finally use a nice sharp-sweet syrup to dress it (I like to use the syrup while it's still warm, it seems to help everything to mingle).


Amazing Fruit Salad

2 small lemons (or 1 big)
25g caster sugar
a sprig or two of fresh mint
1/4 big cantaloupe melon
1 small mango
1-2 white peaches or nectarines
big handful of blueberries
big handful of cherries
small punnet of strawberries
2-3 figs

Cut the lemons into halves and juice three of them into a small saucepan. Add the sugar, about 50ml of water and two or three mint leaves. Place over a medium-high heat until the sugar has dissolved. Pour into a bowl or glass to cool a little.

Chop the fruit up into fairly big chunks. Peaches need skinning, strawberries need hulling, cherries need pitting, blueberries are fine as they are and so on. Place all the fruit minus the figs (which I cut into small pieces) into the bowl as you go and toss together. Squeeze the other half of the lemon over as you add more. Finally put the figs on top.

Remove the mint leaves from the syrup and pour it over the fruit. Toss everything together, making sure the syrup comes into contact with all of the fruit. Cover with clingfilm and leave for 1-4 hours. Toss again. Finely chop 1-2 leaves of mint and sprinkle over the top, then serve.

(Serves 4-6)

ShareThis