Monday 30 August 2010

Brown Butter Blueberry Muffins


My mum loves these muffins. I can understand why: they're crunchy and sweet on top, fluffy with that wonderful brown butter flavour in the middle and studded with juicy blueberries. They're definitely the best blueberry muffin I've ever made or tasted.

I found these on Joy the Baker's wonderful site over a year ago. They were one of the first recipes I converted from American measures and coming back to it now, I realise that I didn't get the transition quite right. I've put my updated recipe below.


Brown Butter Blueberry Muffins
(Adapted from Joy the Baker, recipe here)

For the muffin mix:
55g unsalted butter
50g milk
1 egg
1/2 tsp vanilla essence
90g plain flour
85g caster sugar
3/4 tsp baking powder
pinch of fine sea salt
150g blueberries

For the crumble topping:
25g unsalted butter
30g plain flour
35g caster sugar
pinch of fine sea salt

Preheat the oven to 190C/375F. Put muffin liners in a muffin tin. Melt the butter in a medium saucepan. Keep heating it over medium heat until it has foamed up and brown bits have appeared and it smells nutty and delicious. Make sure you keep an eye on it as it happens - it takes a while but can burn quickly. Take off the heat and pour into a bowl to cool.

Weigh the topping ingredients into a small bowl. Rub together until you have a crumbly mixture.

Whisk the egg, milk and vanilla together, then add the brown butter and whisk again. Put the flour, sugar, baking powder and salt in another bowl and combine. Pour the liquids into the bowl and fold in until just combined then fold the blueberries in. Spoon out into the muffin cups. Divide the topping between the muffins.

Put into the oven and bake for around 20-22 minutes, until they are lightly browned and a tester/skewer comes out clean. Leave to cool on a wire rack until just warm before eating.

(Makes 6 muffins, easily doubled)

Updated 30/11/16 - I've rewritten the recipe to one I made today, with half the mixture, a few more blueberries and minus the awkward egg yolk.

Friday 27 August 2010

Baked Alps

When I saw this challenge, I knew what I had to do. I've made baked alaska a few times before, but this time I wanted to do something a bit different with the shape - and so I present to you... Baked Alps! 

I adore mountains, especially the bit of the Swiss Alps where my mum lives. They're like home and yet are the most exciting, changeable place to be. Nothing is ever boring in the mountains. 


To make my Alps, I simply cut out a bit of the cake in the right shape and then sculpted the mountains with the ice cream. I then made some french meringue and used a small palette knife to cover and perfect my range. I then used a kitchen blowtorch to make them look more realistic.

 I'd say this is a picture of the alps in mid-late spring - the brown areas are a combination of the trees and also the snow melting, leaving the bare ground. For this reason, there is a swathe all around the bottom and then more up along the south, sunny side (to the right of the pictures). 

My favourite addition to baked alaskas is a fruit layer between the ice cream and cake. The last one I made had an almond and orange sponge base topped with mixed summer fruits which were lightly cooked and then topped with vanilla ice cream and meringue. I feel the sharpness of the fruits is really needed to cut through the sweetness of the rest of the dessert.  For my alps I decided to use a layer of fresh blackberries. 


Though I absolutely adored making the shape and using the blow torch a bit like a brush, I wasn't hugely pleased with the recipe - though all I think doesn't work is that the cake base and fruit becomes rock solid with all the freezer time. The cake also lost a huge amount of taste when frozen.  If I were to make this again, I would sculpt the ice cream on some clingfilm and freeze that, then simply top the cake and fruit with it before covering with meringue and torching. 

Despite this, baked alaska is an amazing dessert. I have always thought that I were ever to host a DB challenge, I would choose baked alaska. 

The August 2010 Daring Bakers’ challenge was hosted by Elissa of 17 and Baking. For the first time, The Daring Bakers partnered with Sugar High Fridays for a co-event and Elissa was the gracious hostess of both. Using the theme of beurre noisette, or browned butter, Elissa chose to challenge Daring Bakers to make a pound cake to be used in either a Baked Alaska or in Ice Cream Petit Fours. The sources for Elissa’s challenge were Gourmet magazine and David Lebovitz’s “The Perfect Scoop”.


Baked Alps

See the challenge recipe, here

My changes 
I made a half measure of the challenge recipe for the pound cake in a rectangular tin (I had leftovers). 
I added a layer of fresh blackberries in between the cake and ice cream.
I made a french meringue with 1 egg white and 55g of caster sugar as I didn't need much. 

Tuesday 24 August 2010

Spiced Caramel and Pear Bundt Cake


As my blog title suggests, I love pears. Pears with caramel is a combination I've tried before (see Pear and Caramel Cakes) and I've poached pears before (see Rosé Poached Pears) but I've never made anything quite like this. I think it's really a dessert cake, but it's pretty yummy at any time of day.

This cake started when mum came home with these absolutely gorgeous corella pears. They sat in the fruit bowl looking pretty while I deliberated for ages over what to do with them. In the end I googled corella pear recipes and came up with this.  I felt awful peeling them - the skins are just so pretty.


The original recipe calls for four big sponge cakes sandwiched with whipped creme fraiche and cream, topped with the pears.  Instead I decided to give my new bundt tin a whirl and arrange the pears in the centre. I served it with a good dollop of creme fraiche instead of including another element.

A few days before I decided to make this cake, I bought a jar of star anise. This provided the perfect opportunity to try it out - I don't think I'd even smelt it before - though I know aniseed as a flavour from things like aniseed balls.

Before I saw this recipe I had never thought of turning a poaching sugar syrup into a caramel. I hadn't even made or tasted a spiced caramel before. Both were great - I'll be using them again.  

Instead of using dessert wine in the caramel I used pear juice. I didn't want it to be alcoholic and I thought it would be nice to increase the pear aspect. I switched the volumes around - there was more dessert wine than cream. I might slightly decrease the liquids added to make a thicker caramel - if you want to do the same, I'd recommend using 100ml of cream instead of 120ml. 


The cake itself was nice, but mainly served as a base for the rest of the dessert. I halved the original recipe and I ended up with far too much - I had another whole tin full. I've therefore put a quarter recipe below, which should be about right. 

Overall, this made for a lovely dessert with friends. I'm very glad I made it and discovered the various methods below - the caramel and pears were fantastic. 


Spiced Caramel and Pear Bundt Cake
(Adapted from Australian Gourmet Traveller, see here)

For the pears:
375g granulated sugar
juice and rind of a lemon
juice and rind of an orange
1 cinnamon quill
1 star anise
1/2 vanilla bean
500 ml water
3 corella pears

Put all the ingredients except the pears into a big saucepan. Put over medium heat, stirring occasionally, until the sugar has dissolved. Meanwhile, peel the pears, split them in half and then use a melon baller to scoop the pips etc out. When the syrup is ready, put the pears into the saucepan. Cover with a circle of parchment paper and weigh down with a plate. Turn heat down to medium-low and cook for 20 minutes until the pears are tender.

120 ml double cream
90 ml pear juice
15g butter

When you are ready to make the caramel, remove the pears from the syrup to another bowl. Strain the liquid into a deep sided pan (or the same big saucepan). Heat over medium-high until the mixture turns a deep golden caramel - this takes about 20 minutes or so. Whisk in the cream, then the pear juice, then the butter. Put the pears back into the pan and glaze for a few minutes. Remove to a bowl to cool.  


For the cake:
3 eggs
25g caster sugar
55g brown sugar
seeds of half a vanilla bean
75g plain flour, sifted
1/4 tsp baking powder
30g butter, melted

Preheat the oven to 180C. Prepare a bundt tin by buttering and flouring. Put the eggs, sugars and vanilla seeds into a mixer and beat until it has tripled in volume and holds a trail - this took me about 8 minutes. Meanwhile, melt the butter and set aside to cool. When ready, sift over the flour and baking powder and fold until just combined. Finally add the butter and fold in carefully. Pour into the tin and put into the oven. Bake for about 25-30 minutes or until golden brown and springy to touch. Remove from the oven and let cool in the tin for ten minutes before turning out. Brush the whole cake with some of the caramel to glaze. Serve slightly warm with the caramel pears spooned into the middle and the spare caramel on the side in a jug. 

(Serves 6 with some cake leftovers)

Sunday 22 August 2010

A Selection of Choc Ices

When I was little, I used to spend at least one day a week with my grandparents. In the summer, I almost always had a choc ice for pudding after lunch. I used to rummage through the draw to find the smallest teaspoon and then carefully crack the top of the choc ice. It was a very precise process. 


In the end I ended up making not only the classic vanilla ice cream, but three other combinations. There's  a peanut butter ice cream (chopped peanuts on top), a peanut butter and vanilla (one peanut) and finally, a peanut butter with a core of fleur de sel caramel left over from this cake (fleur de sel).


I have to admit, making these ended up being a rather messy business. I got chocolate everywhere. The fridge, the freezer door, the freezer drawers, the work surfaces, the floor, the puppy, my face, my hair and most definitely my hands. This was an early shot. It got messier. 

I found the recipe for this peanut butter ice cream on Baked Bree. It's a great recipe. The peanut butter is distinct but not cloying and even people who don't really like peanut butter seem to like it. I'm going to have to make some more soon.


Otherwise, I used a very dark 85% chocolate and my favourite vanilla ice cream recipe. The peanut butter ones are great - the dark chocolate still has a very distinct flavour and plays off the creamy ice cream. I'm glad I used chunky peanut butter. I like having the nuts in the ice cream and it churned without any problems. 

I have to admit that the star of this show was definitely the over-the-top peanut butter with the fleur de sel caramel. It's wicked but oh so good. 


Peanut Butter Ice Cream
(recipe adapted from Baked Bree)

240g chunky peanut butter
340ml whole milk
550ml double cream
75g brown sugar
75g caster sugar
2 tsp vanilla essence

Spoon the peanut butter into a saucepan and stir over medium heat until it is melted. Pour in the milk and whisk to combine, followed by the double cream. Stir in the sugar and vanilla. Whisk until the mixture is smooth and the sugar has dissolved. Chill overnight then churn according to the instructions for your ice cream maker.

(Makes 1 litre)


Choc Ices

1 litre of ice cream (can be of multiple flavours)
about 300g dark chocolate
toppings (peanuts, fleur de sel etc)

Line a 9 inch square tin with cling film, making sure you have some overlap. Spread the ice cream evenly into the pan (this is easiest if it's freshly churned). Freeze until solid. Lift out with the cling film then chop into cubes (I did mine into five bars and then split these into five).  Put back in the freezer for a bit to harden up again. To add a caramel middle, cut a cube into a 2/3 chunk and a 1/3 chunk. Use a melon baller to scoop out a hole in the bigger chunk. Fill with caramel and top with the other chunk. Melt about 100g of chocolate in a bowl over a double boiler. Leave to cool for a few minutes. Use a toothpick to pick up a cube of ice cream, then spoon the chocolate over until it is covered. Set onto a tray lined with greaseproof or similar and add any topping. Repeat, then melt more chocolate and so on until you have finished.

(Makes 25)

Friday 20 August 2010

Tiny Plum Galettes


After the glorious excess of the Butterfly Fleur de Sel Cake and all the chocolate I've been posting, I thought I should tone things down for a bit. These therefore contains lots of fruit and some wholemeal pastry. I even only ate half of one. I feel wholesome. (Despite eating it with a big scoop of vanilla ice cream).

Mum found these gorgeous miniature plums at the market the other day. I love how they're multicoloured. They're about the size of cherries and quite sweet. They don't seem as juicy as big plums - but then they don't have as much flesh.

If you want to use full size plums, I reckon you would need about five or so.


I was a bit worried about my pastry - it was crumbling and splitting all over the place - but it held up and was very tasty. I'm pretty sure it was because I didn't add enough liquid.  At least these are meant to have a rustic charm!


You may notice that I have set up a new link to a 'Guide to my recipes' on my side bar - Confused by my recipes?. This is to explain my measurements and the way I convert American recipes to UK. It also explains the way I scale things up and down - which you may have noticed I do a lot. I also put some notes down on recipe sources and the ingredients I use. Give it a read if you've ever been confused by my recipes!


Tiny Plum Galettes
(pastry recipe adapted from Leith's Baking Bible)

For the pastry:
90g plain flour
80g wholemeal flour
100g cold butter
1 egg yolk
1 tbsp cold water

 Chop the butter up into cubes.Beat the egg yolk and the water together and set into the fridge to keep cool. Sieve the flours into a bowl. Take the butter out and put into the flour. Rub the butter in until it resembles fine breadcrumbs. Dribble half the egg mixture around the bowl then use a knife to work it in. Add the other half and work in. If you still need more moisture, add another bit of cold water. Bring together, wrap in cling film, and leave to rest in the fridge for at least 30 minutes. 

For the filling:
2 handfuls of tiny plums
rind of an orange
1 tbsp brown sugar
1/4 tsp ground cinnamon

Pit and halve the plums. Place in a small bowl with all the rest of the ingredients and toss so they are coated. 

To assemble:
1 egg, beaten
2 tsp brown sugar

Preheat oven to 200C. Roll out half of the pastry into a rough circle. Transfer to a baking tray. Brush the outside 2 nches of the pastry with the beaten egg. Spoon half the plum mixture into the centre of the pastry. Fold the sides up around the filling. If the pastry splits, just press down to seal it (I had to do this quite a lot). Brush the outside pastry with more egg and sprinkle one teaspoon of sugar over the top. Repeat for the other one. Put into the oven for about 30 minutes or until the pastry is a deep golden brown. 

(Serves 2-4)

Tuesday 17 August 2010

Butterfly Fleur de Sel Caramel Cake


This is my hundredth post. 

Over the last ninety nine posts, I have learnt a lot of new skills. My cooking has improved and expanded in ways I couldn't have imagined when I sat down to write my first post. I've discovered how much I enjoy photography and developed a style I like. Most of all, it has shown me how much I still have to learn and how many more exciting things lie in the future. I can't explain how excited I am. 


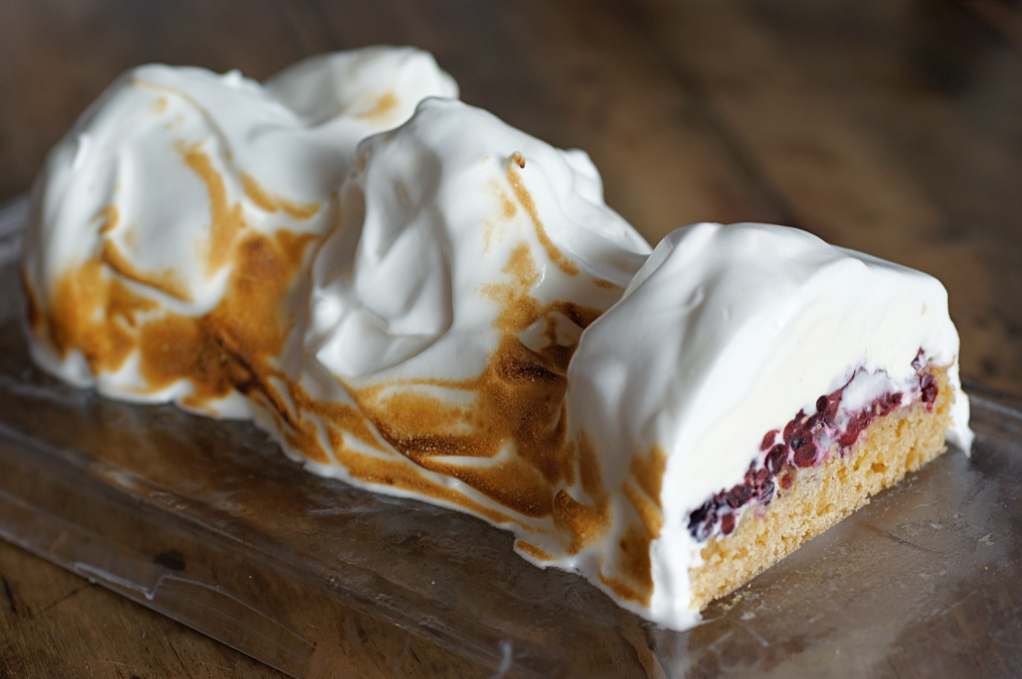
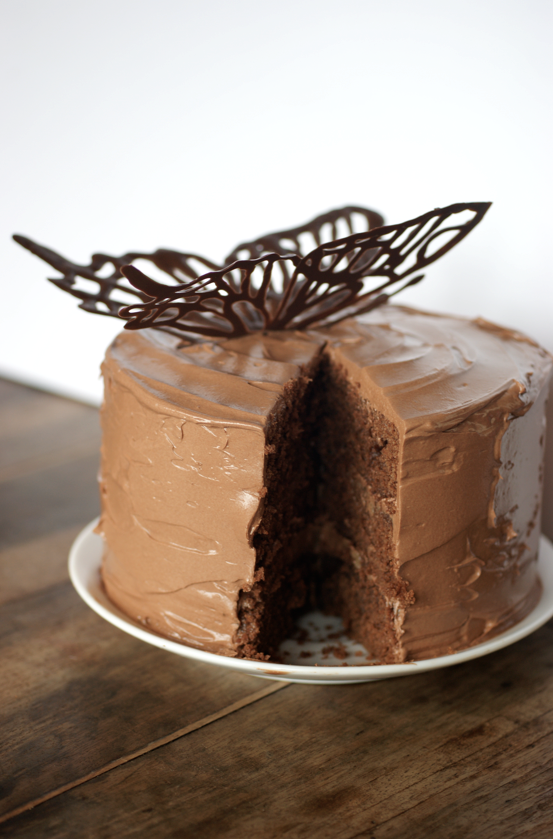
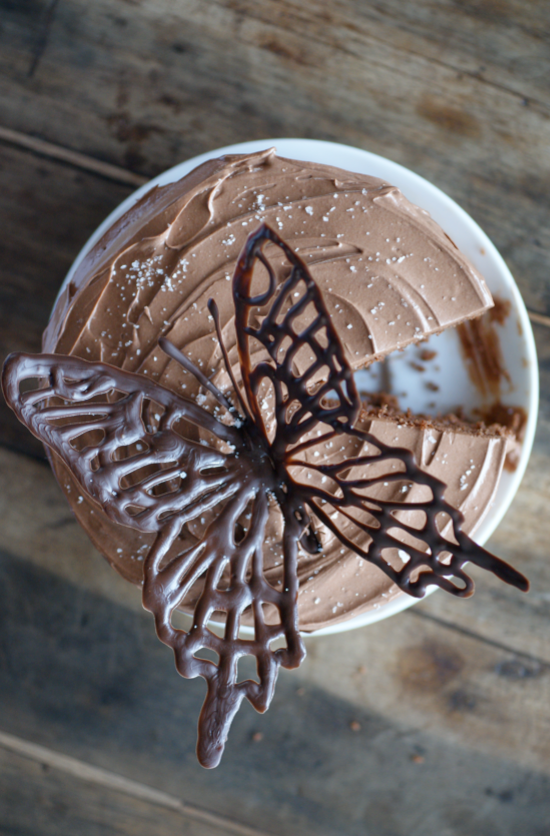
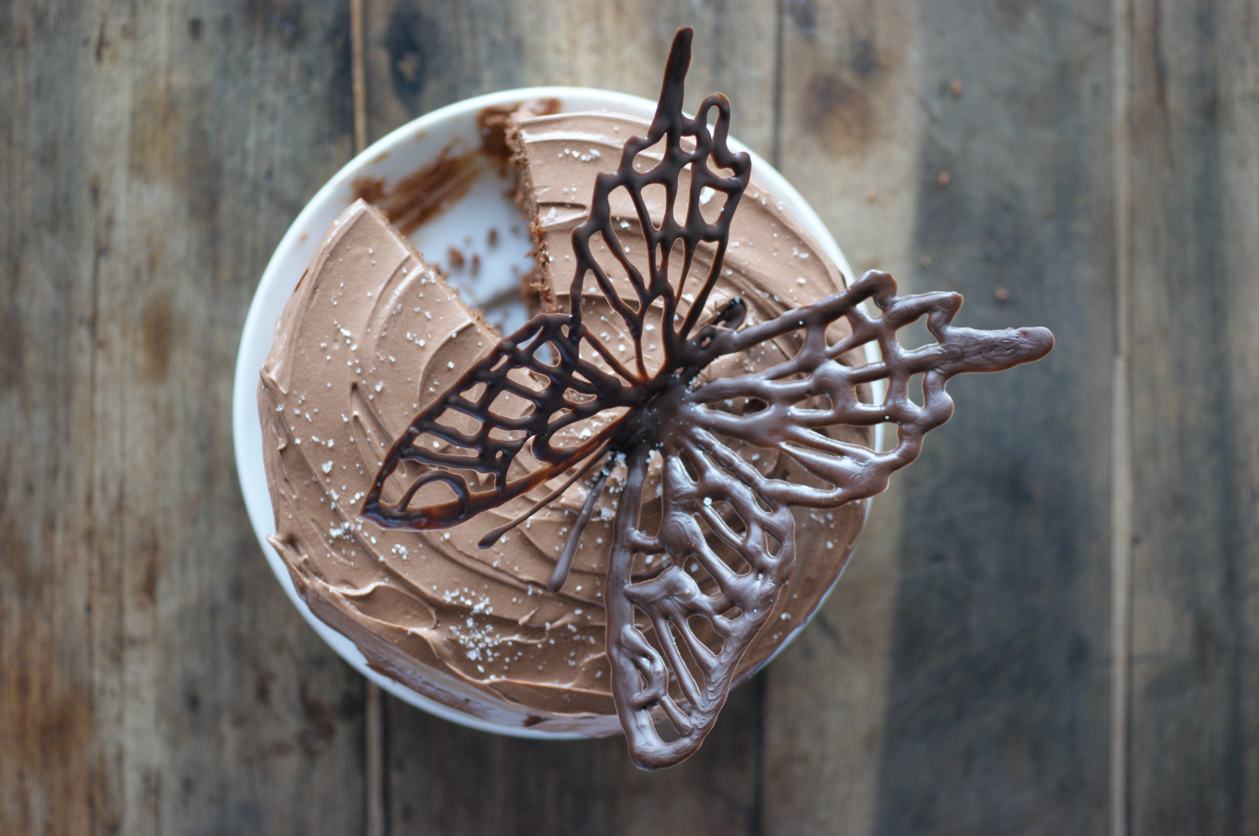
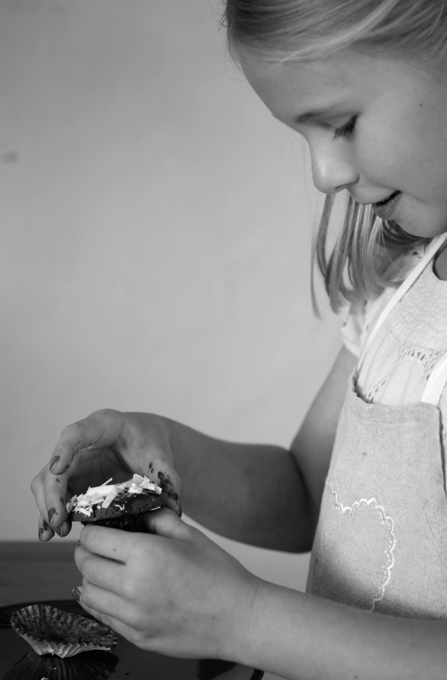
To celebrate this, I decided to make a cake. This is a recipe I have had my eye on for months, but never quite got around to it. I added a butterfly flourish. I couldn't resist. 

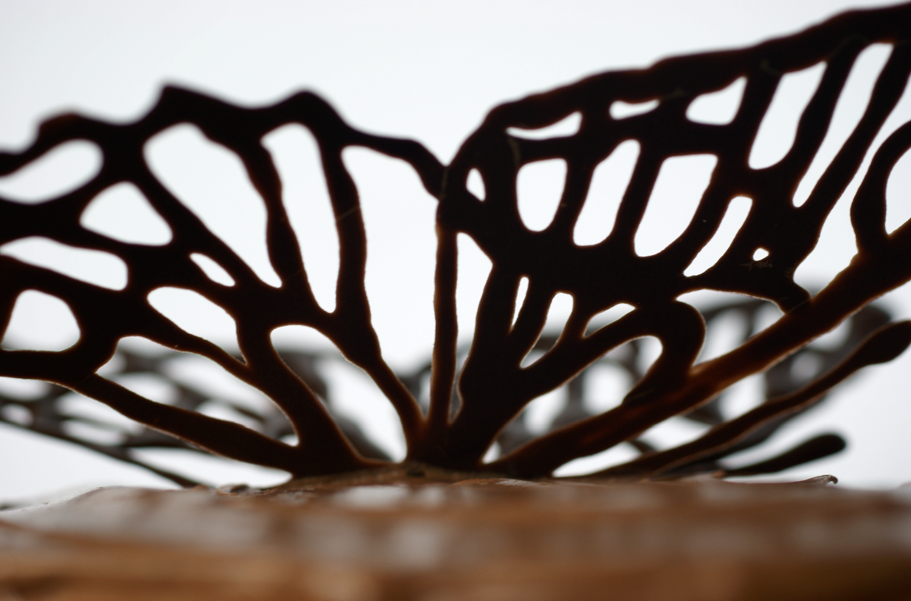
I also thought it was apt that it therefore contained two of the things I've enjoyed learning about most while keeping my blog: how to make caramel and to create chocolate decorations (as on my Beautiful and Damned Cake and the Present of Profiteroles). Instead of looking forward, this cake looks back to celebrate what has gone before. 


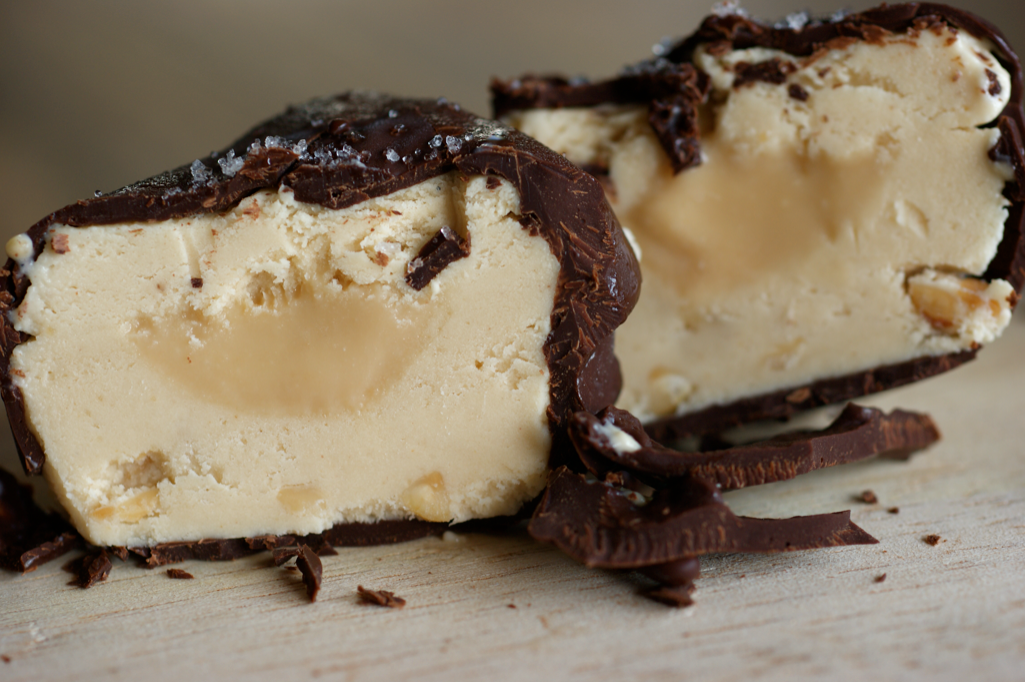
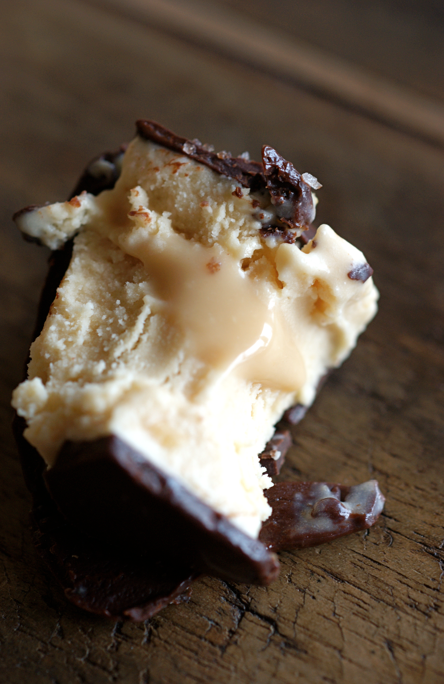
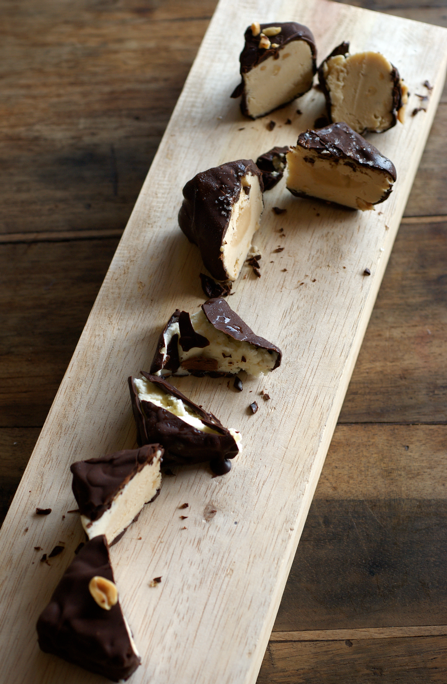
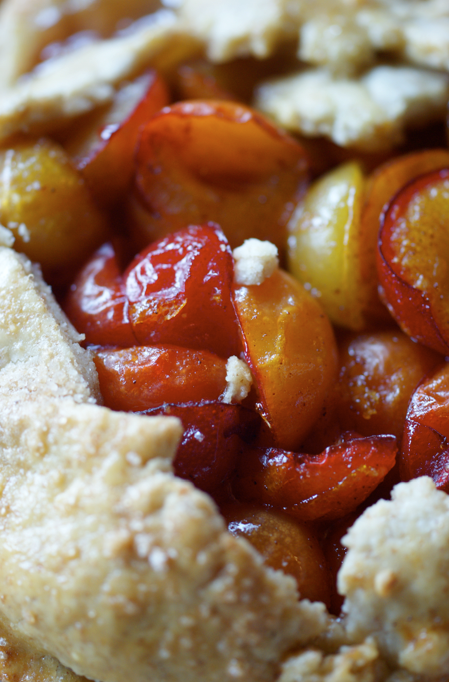
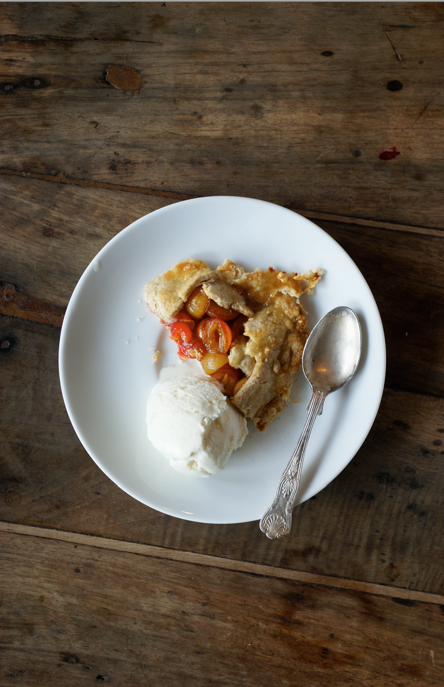
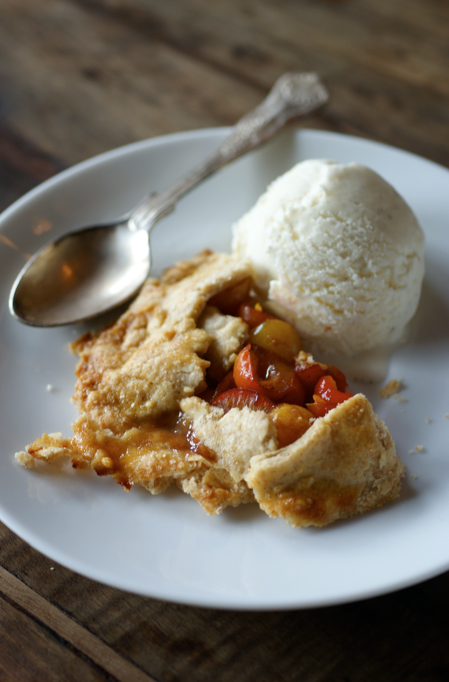
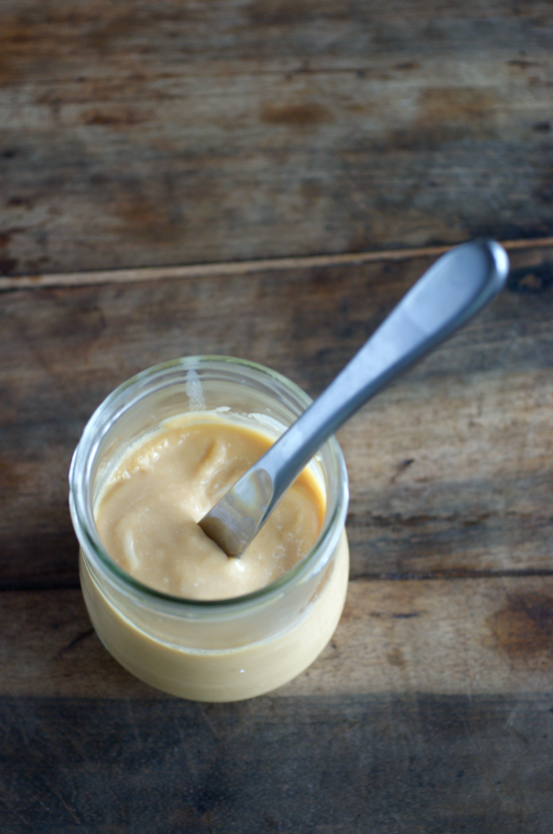
To my slight surprise, the runaway star of this show for me was the fleur de sel caramel with sour cream. It is truly spectacular. I have spent a lot of time since I made it hovering by the fridge trying to decide if eating it off a spoon (or even dipping in a finger) would really be that bad...


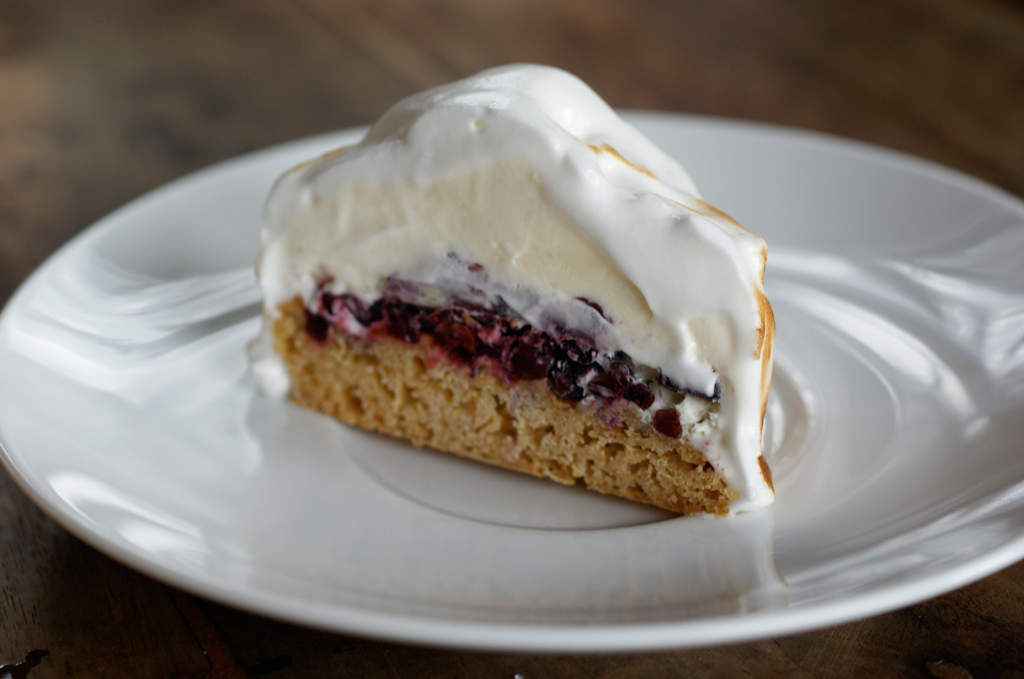
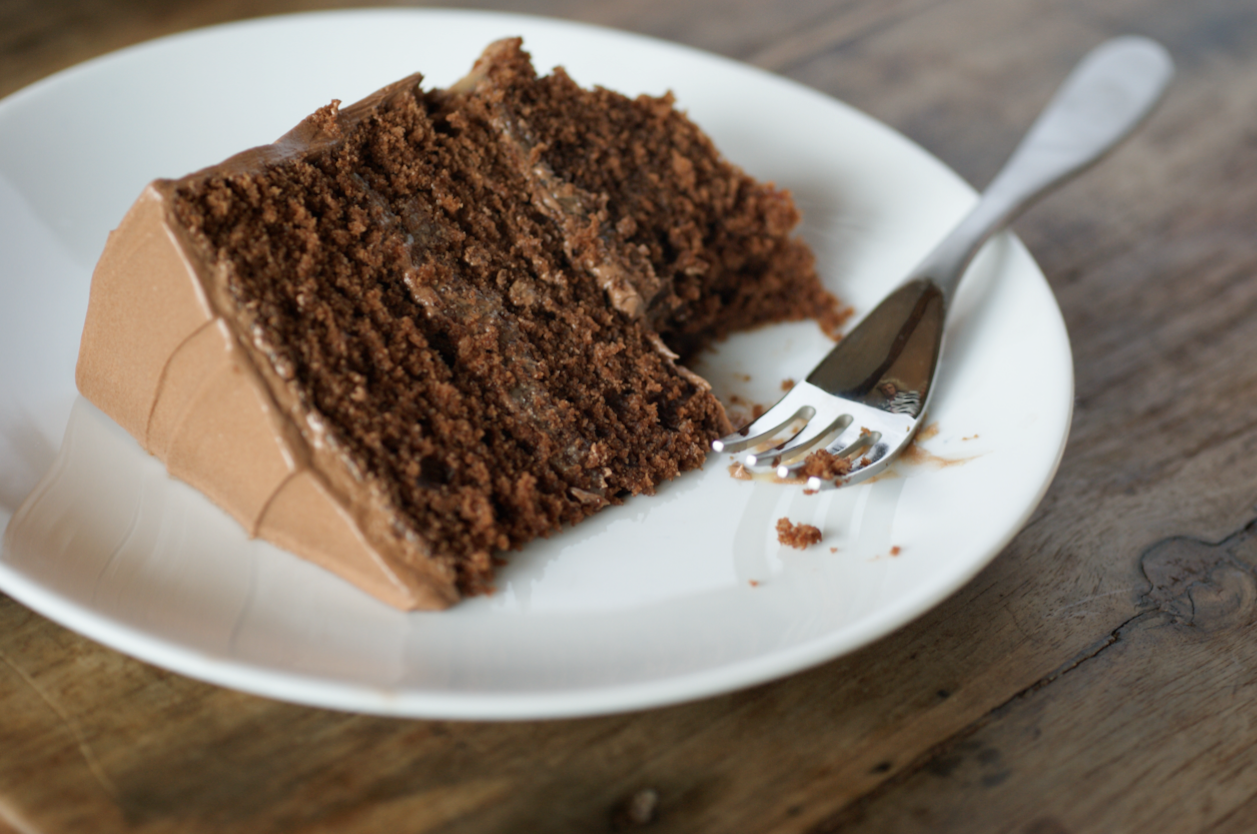
This cake is about as rich as it gets. The cake is intense and damp, then smothered with the glorious caramel. The icing, found between each layer and covering the whole cake, is almost ridiculous in its decadence. You take sugar and water and make caramel. Then you whisk in a lot of double cream. Then you pour it all over a big pile of dark chocolate. Then you beat in a big bowl of butter. Despite all this, it's not as over-the-top rich as you would think - it's smooth and complex.

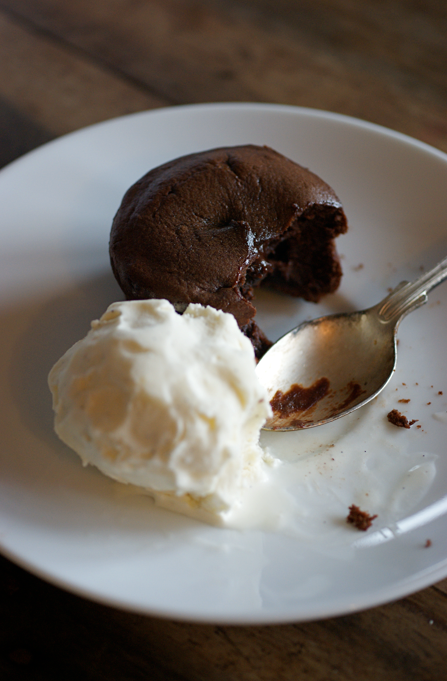
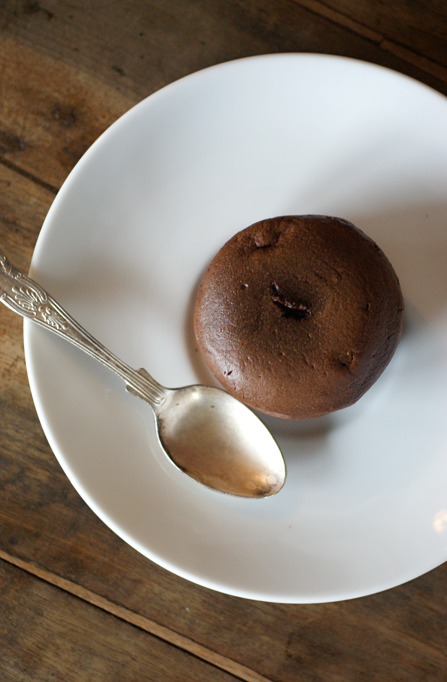
I found the most disappointing aspect of this cake to be the cake itself. The bits I cut off to level things up were delicious and I think it's a very nice plain chocolate cake, but it didn't work perfectly with the rest. This could well be the way I made it, but the flavour just slightly jarred with the icing and caramel. Perhaps it was because I couldn't find vegetable shortening so substituted extra butter. Another time I might use a different recipe - perhaps my ever reliable Birthday Cake with some good quality cocoa. It wasn't in any way bad, just not perfect. 

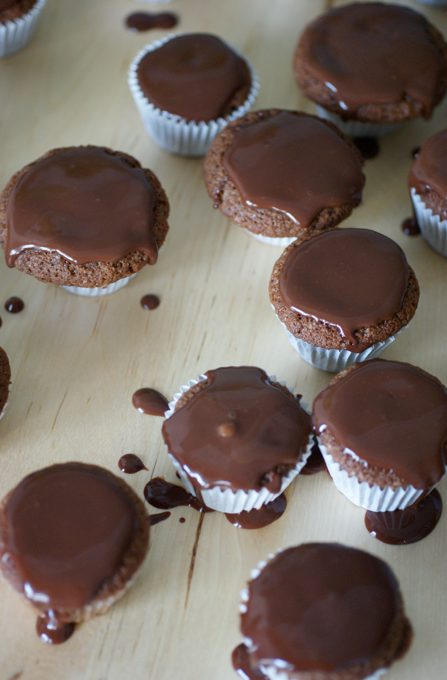
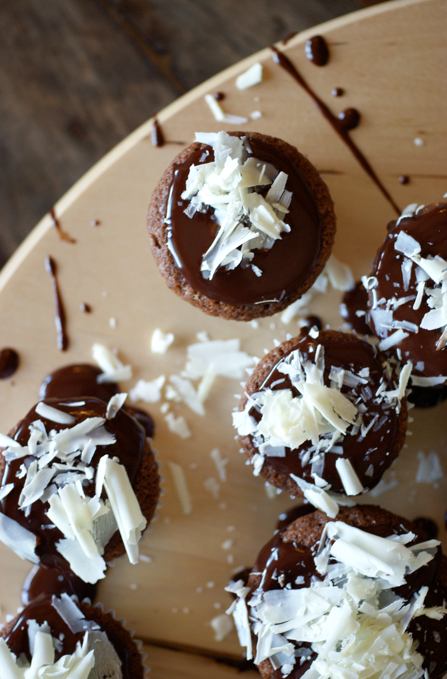
Despite halving the recipe, this was a big cake. I only used about half the icing I made - I'm not a fan of inch thick icing in between the layers and all over, even if it does look striking. If you're also like me, maybe reduce the recipe or make a batch of cupcakes or something to smear the spare icing on.

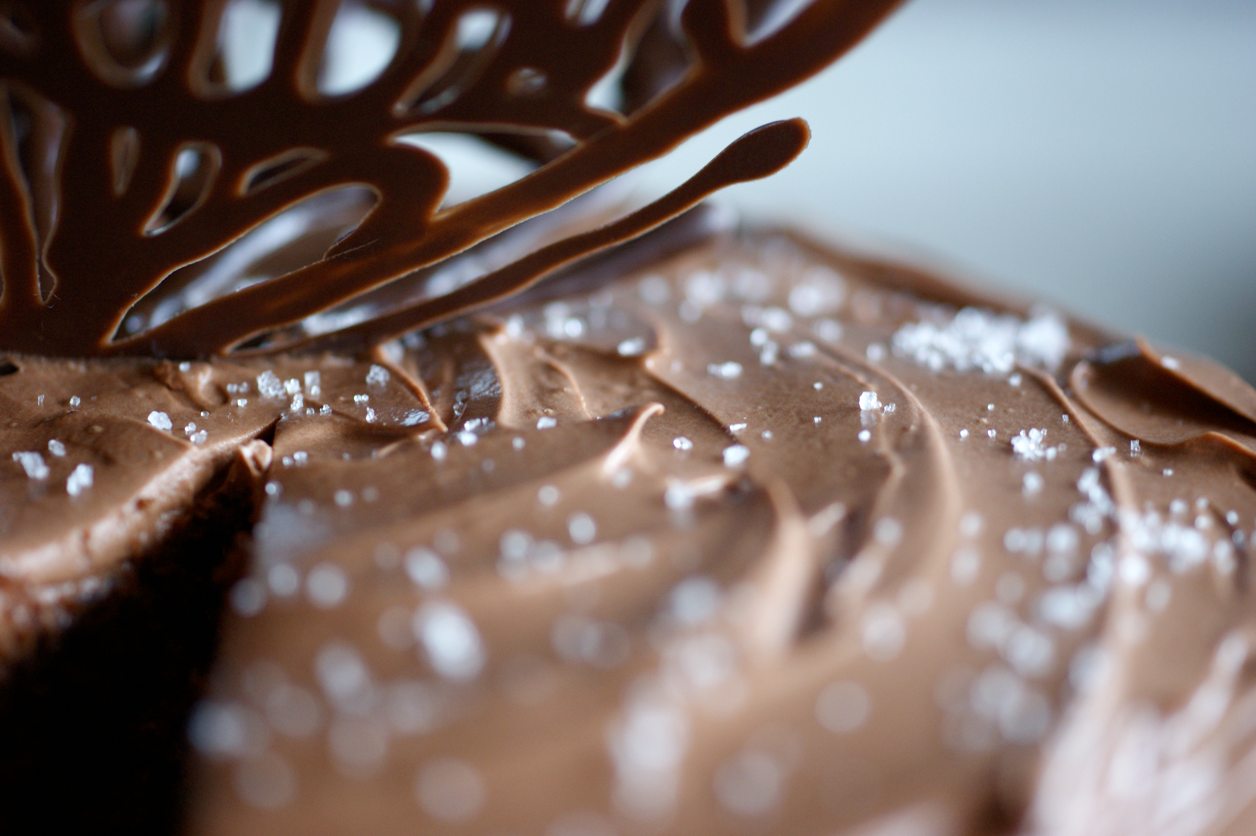
I'm not entirely sure why I decided on making a butterfly for the top. Perhaps because it was a challenge to make wispy wings that would stay flying in the air and not sag into the icing or snap. 

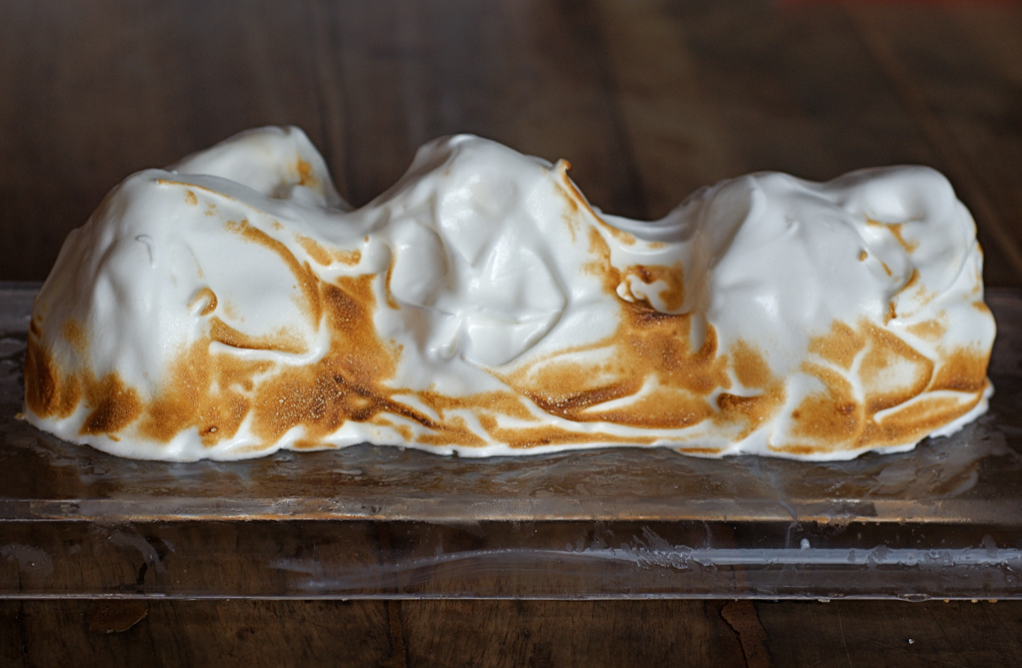
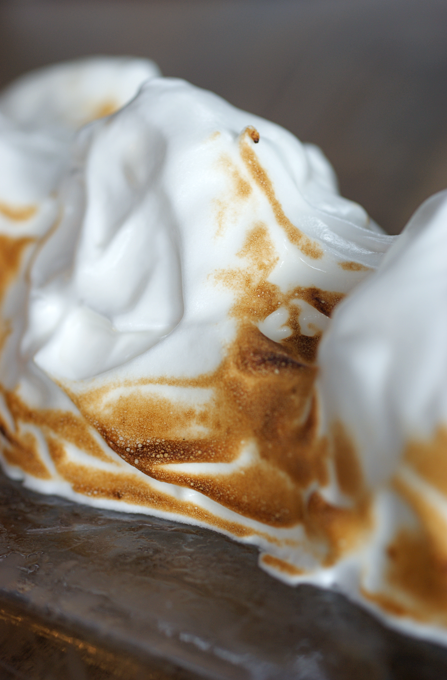
I forgot to sprinkle some fleur de sel onto the top of the cake until after I had photographed it and eaten a slice, hence the fact that only a few photos include it. I like the way it looks like the first flakes of snow falling on bare ground around a fragile butterfly flickering in the cold. 

Fleur de Sel Caramel Layer Cake
(Adapted from the bakery Baked's recipe - I found it here)

For the caramel:
112g granulated sugar
1 tbsp glycerine/corn syrup
70 ml water
140ml double cream
1/2 tsp fleur de sel
70ml sour cream

Put the sugar, glycerine and water together in a saucepan. Attach a sugar thermometer. Stir to dissolve the sugar as you bring it to the boil over a high heat. Meanwhile, heat the cream and salt in a small saucepan until the salt is dissolved and the cream has reached a boil, then remove and set aside. Keep going with the sugar until you reach about 350F - then try to keep the mixture at about this temperature until it reaches a deep golden brown. At this point, remove from the heat and let sit for a minute before whisking in the hot cream. Let the foam subside, then whisk in the sour cream. Leave to cool then store in a jar in the fridge. 

For the cakes:
45g cocoa powder
90ml sour cream
200ml hot water
305g plain flour
1 tsp baking powder
1/2 tsp bicarbonate of soda
1/4 tsp fleur de sel
140g butter
165g granulated sugar
90g brown sugar
1 1/2 eggs, beaten
1/2 tsp vanilla

Preheat the oven to 160C. Grease and line three 6" tins (I only have one here - I split it three ways and did one after another). In a medium bowl, whisk together the cocoa powder, sour cream and hot water then put it aside to cool. Weigh out the flour, baking powder, bicarbonate of soda and fleur de sel  and sift into another bowl. In a mixer, beat the butter for 5 minutes. Add the sugar and beat for another 7 minutes, occasionally scraping down the sides - it should be light and fluffy. Slowly add the beaten egg, mixing well between addition. Add the vanilla and beat again.  Start adding alternate small amounts of the flour mixture and the chocolate mixture, starting and ending with the flour. Divide the batter. Bake for about 20 minutes or until the cake is springy to the touch and a toothpick comes out clean. Leave to cool for a few minutes before removing from the tin and leaving to cool on a wire rack. When cool, level out the tops with a serrated knife or cake knife. 

For the icing:
112g granulated sugar
1 tbsp glycerine/corn syrup
35ml water
200ml double cream
225g dark chocolate
225g unsalted butter, still cool but soft

Before you start have all the ingredients measured out and the mixer standing ready. Make the caramel as you did for the fleur de sel caramel above, except that the cream doesn't have salt in it. Instead of adding the sour cream, let it cool for a few minutes. While it cools, chop the chocolate and put it in the mixer bowl. Pour over the caramel mix. Leave for a few minutes then stir until smooth. Put into the mixer and beat on low until the mixer bowl is cool to the touch and the mixture has cooled down. Tip in the butter and turn the speed up to medium-high. Whip until the mixture is silky smooth, thick and whipped. Take out and put into the fridge until needed. 

For the butterfly:
The process is similar to the one for the decoration on the Beautiful and Damned cake. I also creased the parchment paper along the joins between the body and wings so they folded easily and lightly greased the paper so it released. I made a foil mould of how I wanted the butterfly to sit before I piped it and then let it set in that position.

To assemble:
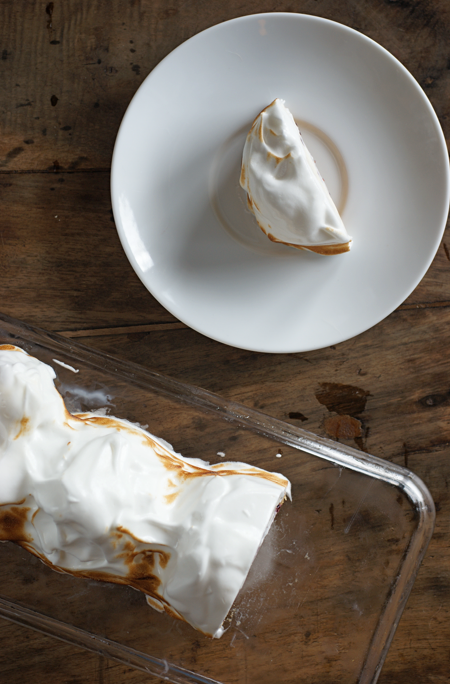
Place four strips of parchment paper over the plate you want to use. Put the first layer of cake on top of them. Spread with some of the caramel and then some icing. Add another cake layer, the caramel and icing and then the final cake layer. You can use a dowel to secure the layers at this point if you like (I used a wooden kebab stick, cut to size). Make sure they layers are straight and then add a crumb coat. Put in the fridge to firm for half an hour or so. I made the butterfly in the gap. Take out of the fridge and ice with the remaining icing. Position the butterfly, sprinkle with fleur de sel and put into the fridge to set for half an hour or so before serving. 

(Serves 10-12)

Saturday 14 August 2010

Chocolate Fondants


I have just returned from the UK after a quick trip to see friends and loved ones. I had some sneaky scheduled posts so hopefully you didn't notice too much, but I apologise for any slackness in replying to comments or posts.

As I left, I found something very exciting in the duty free section at the airport: Valrhona chocolate.


In the past few years as I have learnt more about food, baking and chocolate, I have heard a lot about Valrhona. After much deliberation, I bought three 70g bars. I chose Jivara, a delicious creamy milk chocolate which has an incredibly pronounced chocolate flavour despite such a small percentage of cacao (40%). I chose Taïnori, a 'fruity and intense' dark chocolate.

Finally I chose Alpaco, which is the bar I used for these fondants. It's described as combining "strength and sophistication, and offers delicate floral aromas of jasmine and orange blossom, intimately and intricately intertwined with deep cocoa notes". My kind of poetry.


To showcase this fabulous chocolate, I knew I needed a simple recipe where the chocolate - and therefore the floral aromas and deep cocoa notes - could shine though. I contemplated mousse, petit pots, cakes and various other ideas.

In the end I settled for a well-worn recipe for these chocolate fondants.  They're perfect for entertaining - easy and quick to make in the first place and you can kept them in the fridge until just before you serve. They're also impressive and really very good.


As we weren't actually entertaining and I only had 70g of this very precious chocolate, I scaled the recipe down to serve two. This involves silly measurements such as 8g of flour. Still, why shouldn't we serve lovely desserts everyday or just at dinner for two. It's easy to scale up if you need more - 4, 6, 8 etc would be fine.

The quality of my precious chocolate really shone through in these - they were even more delicious than normal. I slightly overcooked the one in the pictures by a minute or two - I wasn't concentrating - but if you cook them for the right number of minutes they should have the perfect melted heart. I served mine with some more of this delightful vanilla ice cream. They make a perfect match, cuddled up on the plate.


Chocolate Fondants for Two
(Adapted from Annie Bell's Gorgeous Desserts)

60g best quality dark chocolate
15g unsalted butter (room temp)
15g soft brown sugar
1 medium egg
8g plain flour
pinch of fine sea salt
extra butter and a little cocoa powder, for ramekins

Preheat the oven to 180C if baking immediately. Grease two ramekins with butter and then evenly coat the insides with cocoa powder. Melt the chocolate slowly in a bowl over a saucepan of simmering water then set aside to cool. In a food processor whizz up the butter, sugar, egg, flour and salt until you have a smooth batter. When the chocolate has cooled slightly, pour it into the processor and blend until smooth. Spoon into the prepared ramekins. At this point, you can cover the ramekins and keep them in fridge for a day or two (simply bake for 3 minutes longer). Bake in the oven for 9 minutes. Meanwhile, prepare plates and the ice cream. When you remove them, run a knife around the edge then turn out onto a plate. Serve hot.

(Serves 2)

Updated 26/02/16.

Wednesday 11 August 2010

Decorative Ice Bowl


While this is not really a recipe, I wanted to share this unique presentation idea with you. I found it in a book an old friend gave to me for my birthday, The Ice Cream Book. It's a bowl made of ice set with petals and edible leaves which becomes the perfect setting for any iced dessert - ice cream, sorbet, sherbet etc. 

I decided to make mine with some roses and mint leaves from our balcony garden. I was was too impatient to wait while some ice cubes froze so I used some blueberries instead. You can't see them once you've put things in and I think they look pretty anyway.

I decided to fill mine up with some of my White Nectarine Sorbet. My big ice cream scoop is having a tantrum at the moment so I ended up making more little ones with my melon baller. 

I think this is an incredibly gorgeous way of presenting iced desserts. It would help stop them melting for a little bit longer too.  Give it a try - it's so easy and doesn't cost you anything. 

Decorative Ice Bowl
(adapted from The Ice Cream Book by Farrow and Lewis)

2 bowls of slightly different sizes
handful edible petals/leaves
kitchen weights
jug
ice cubes/blueberries

Make sure your bowls fit together leaving a clear space in between. Put the ice cubes/blueberries in the bottom of the bigger bowl together with a few leaves and petals. Put the other bowl inside, making sure it is even. Place the weights in the bottom of the smaller bowl. Fill with water until it is starting to come up the sides. Carefully put in the freezer for 2-3 hours. Remove from the freezer and place the rest of the petals in between the bowls. Fill with water up to the desired level. Put back in the freezer and freeze overnight. 

To remove from the mould, remove the weights then pour some hot water into the small bowl. It should lift out easily aster a moment. Then either pour more hot water over the base bowl then remove, or put in a bowl of hot water and remove like that. Return to the freezer. A few hours or so before serving, scoop up the ice cream/ sorbet and place in the bowl. Return to the freezer until you are ready to serve. 

Sunday 8 August 2010

Black and White Mini Cakes

Sometime in the distant past, mum bought a mini muffin tin. We don't use it very much. I decided this was a shame, and so these mini cakes were developed. They're chocolate cake topped with dark chocolate ganache and white chocolate shavings. 


I had help making these. Isabella - you may well have seen her comments on my posts - is quite possibly this blog's biggest fan.  I invited her over to have a bit of a baking session and this is the result. She's a very useful assistant!  

We whipped up a cake dough and set about dividing it between the cases. Our kitchen surfaces are very tall so we moved to the kitchen table to make things easier.  Some cases got a bit more than others but they all look lovely. 

(Also, how gorgeous is Isabella's dress? So cheerful and bright.)


While they were in the oven, we set about making a simple ganache. We broke up the dark chocolate, getting very messy fingers in the process. We measured out the cream and heated it up, chatting about Dr Who and Jamie Oliver.  I showed Isabella how fun it is to watch cakes rise through the oven door. 


Once we had set the ganache aside to cool, we started making the chocolate shavings. We had a lot of giggles trying to make them work, but in the end we ended up with a big pile and no major mishaps. I love the way you can see through the bar once you've scraped lots of it away. 


After taking the cakes out of the oven and letting them cool a bit, we put them all on a big stand and started spooning (dripping) ganache over them. Then we sprinkled handfuls of the chocolate shavings over the top - I love the rustic look of them piled on top. 


We ate some while they were still slightly warm, with the ganache spilling off the top. Pretty messy but very tasty. 


I'm not usually a fan of black and white food photos, but here it just seemed to work.  I love the fact that these photos ended up with a colour palette of browns and white with splashes of yellow, blue and pink nails. 

I had such fun making these and they taste wonderful too. 


Black and White Mini Cakes
(adapted from Nigella Lawson's recipe for basic fairy cakes in How to be a Domestic Goddess)

For the cakes:
125g butter
50g caster sugar
70g light brown sugar
2 eggs
100g plain flour
1 tsp baking powder
20g cocoa powder
2-3 tbsp milk

Preheat the oven to 180C. Cream the butter and both sugars together until light and fluffy. Add the egg a little at a time until incorporated. Sift in the flour, baking powder and cocoa over the top and beat in until combined. Divide between cases using a tablespoon. Place in the oven and make for 10-15 minutes or until a toothpick comes out clean. 

For the ganache:
60g dark chocolate
50ml double cream

Chop the chocolate up into small pieces and put it in a small bowl. Heat the cream up till nearly boiling, then pour over the chocolate. Leave for a few minutes then beat until smooth. Leave to cool before topping the cakes. 

To assemble:
100g bar of white chocolate (you won't use it all)

While the ganache and cakes cool, make white chocolate shavings by scraping a small sharp knife down the bar of chocolate, with the blade tilted towards you and pressing on the end as you drag it.  Make sure the chocolate is secure and won't move and be careful. Spoon some ganache onto each cake and then top with some of the white chocolate shavings. 

(Makes 24)

ShareThis