Friday 26 October 2012

Whole Vanilla Bean Biscuits


Did you know that you can whizz up an entire vanilla bean and use it in baking?

I first came across the idea in July in a 101 cookbooks recipe for vanilla bean cookies. It had never occurred to me before. Usually I scrape the seeds out and then use the bean itself to infuse ice creams, custards and syrups or to make vanilla sugar. I bookmarked the post and finally got around to making the recipe this week.


The food processor chops the bean up into tiny pieces and releases all the seeds and oils into the sugar. The tiny chunks you get have a similar texture to fragments of raisin. Vanilla often gets overlooked as just another basic ingredient to slosh into everything, so it's lovely to be able to put it in the spotlight. I'm definitely going to experiment to see where else I could use this technique. I've also been trying to work out what you could do if you don't have a food processor. Perhaps chop the bean as small as possible then grind it in a pestle and mortar?

Try to use a high quality, plump vanilla bean - you want it to be soft, as I imagine a tough bean would be difficult to blend and the little bits would be chewier. I did wonder if you could briefly soak a harder bean in some boiling water, like soaking raisins or dried fruit to plump them up, but I haven't tried it.

Though I loved the punchy vanilla, I thought - much to my surprise - that the cookies were too sweet. To me, it seemed that a short, delicate biscuit would be better than a crunchy one. Fork Biscuits, a staple of my childhood, are nearly the texture I was going for, so I compared the ratios of butter : sugar : flour (Heidi = 1 : 1 : 1.08, Fork = 1 : 0.48 : 1.38 ) and came to a new one = 1 : 0.5 : 1.25. Which, I then realised, isn't far off shortbread.


(This slightly ghostly bit of biscuit dough hiding behind parchment is as close to spooky/spidery baking as I'm going to get this year. Happy Halloween!)

The photo above is from the Heidi recipe, where you roll all of the dough out between two pieces of parchment, chill it, then stamp the cookies out afterwards. I decided to adapt this by combining it with the fork biscuit method of making balls and squishing them with (surprise!) a fork: I took some dough, formed a little ball, put it between parchment and then rolled it out into an oval shape. It naturally flutes the edges a little and means that you don't have any dough that you have to re-roll after cutting, so it all stays very tender.


The resulting biscuits are beautifully light and - this is such a cliché, but true in this case - they seem to melt in your mouth.

They might not look as dramatic or exciting as some of my last posts but I am very, very excited about this recipe. My childhood favourite has grown up.

P.S. I'm sorry that this post is a day late and that I've been so useless at replying to comments on the past few posts - I've been ill (lost nearly an entire week to a horrid bout of flu, I was not amused) and between catching up with work and still being pathetically weak and tired I've been struggling to keep everything in the air. Replies will be up soon.


Whole Vanilla Bean Biscuits
(adapted from 101 Cookbooks and my family Fork Biscuit recipe)

1 soft, plump vanilla bean*
50g caster sugar
100g unsalted butter, cold but not rock solid
125g plain flour
1/4 tsp baking powder
a big pinch of fine sea salt
a few pinches of sea salt flakes or fleur de sel (optional)

Cut the hard tips off the vanilla bean then chop it into small chunks. Place in the bowl of a food processor with the caster sugar. Throughout the processing you'll need to stop and scrape the sides and bottom down fairly regularly. Blend until the bean has been broken down into seeds and tiny dark flecks and the sugar has turned light brown (see this photo) - this takes a few minutes. Add the butter and blend, stopping as soon as you have a uniform creamy paste. Tip in the flour, baking powder and pinch of sea salt and pulse until the mixture starts forming bigger clumps and cleans the sides.

Take little balls of the mixture (in between the size of a cherry and a walnut). Don't worry about forming perfect spheres - you don't want to work the dough too much or warm it up. Place the ball on one side of a small rectangle of baking parchment (or two squares, if it's easier). Fold the other side over and use a rolling pin to flatten the ball into an even oval shape about 5-7mm thick. Peel off the parchment and place onto a parchment-lined baking tray. Repeat for the rest of the mixture - I place them in close formation on one sheet as I don't have much space in my fridge, then move after chilling. Chill for 30 minutes.

While they rest, preheat the oven to 170C/340F. Move half of the biscuits onto another baking tray and put back into the fridge. If desired, crush a few sea salt flakes over the biscuits you're baking, then place the tray into the oven. Bake for 8-10 minutes - I turned my trays at 6 to ensure an even bake. The biscuits should have risen slightly then fallen a little and be pale gold with ever-so-slightly darker edges. Cool on the tray for two minutes then transfer to a wire rack. Repeat with the rest of the biscuits chilling in the fridge. They're at their best when they've just cooled down but keep well for a few days in an airtight tin. The unbaked biscuits keep for a day in the fridge and a few weeks in the freezer, separated by parchment.

(Makes 15-17, depending on how much dough you eat *coughIhad15cough*)

Edit 11/01/16: * I recently made these with one of those extra intense ndali vanilla beans and only used half as it was so plump and strong and that was perfect. The mixture was quite pink (got me worried!) but it baked well.


A few related posts:
Gingernuts
Peanut Butter Biscuits
Cumin and Lemon Cookies
Thursday 18 October 2012

Apple & Cinnamon Layer Cake


One of my closest friends recently moved into a house across the street. She had been staying with me for a bit before, so we just carried her things across our little road, arms full of books, clothes and open boxes.

Last weekend they had a housewarming. I made cake.


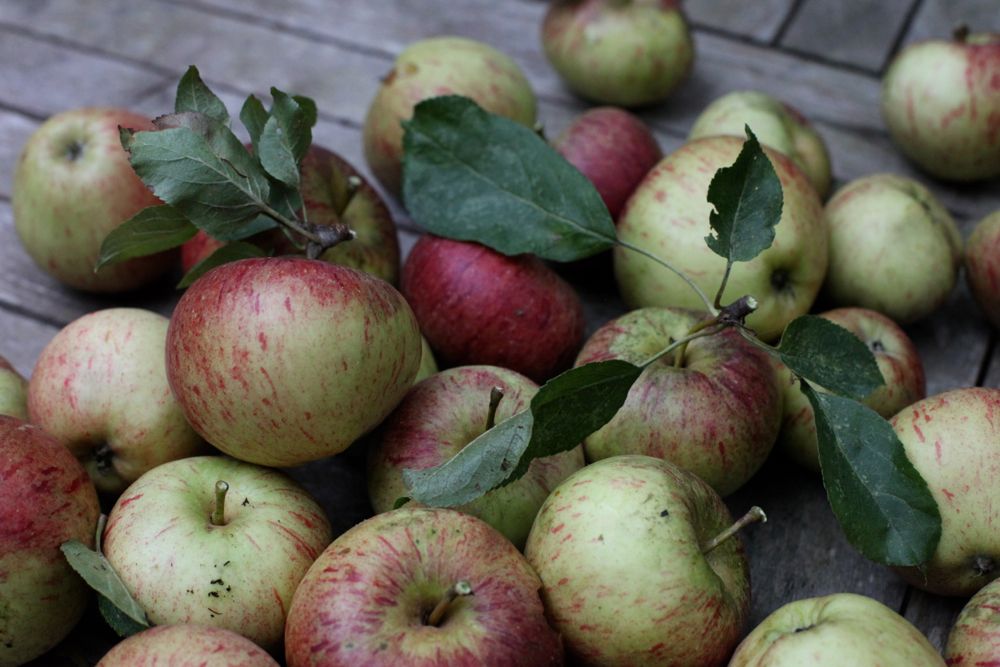
As I mentioned in my post about Cider Caramel, Sautéed Apples and Cinnamon Ice Cream, there is an apple tree in my tiny garden. I finally harvested all of the remaining apples last week. I broke because the resident grey squirrel - Greg - started taking little nibbles out of apples while they were still on the tree, keeping mildly insolent eye contact with me as he left them bobbing on their branches, just like a child placing an incomplete apple back into the fruit bowl.

Now I've picked them, he's moved onto the clusters of coral rosehips. Last weekend he even had a friend (I like to think it was a ladyfriend) perching next to him. They both watched through my kitchen windows as I cooked with my (/his?) apples, gobbling away on the rosehips clutched to their chests.

(This, my friends, is what happens when I let my mind wander when I'm in the kitchen. I start producing life stories and deducing personalities for squirrels, which leads to a daily habit of saying good morning - normally with a curt nod and fleeting eye contact. I blame Beatrix Potter.)


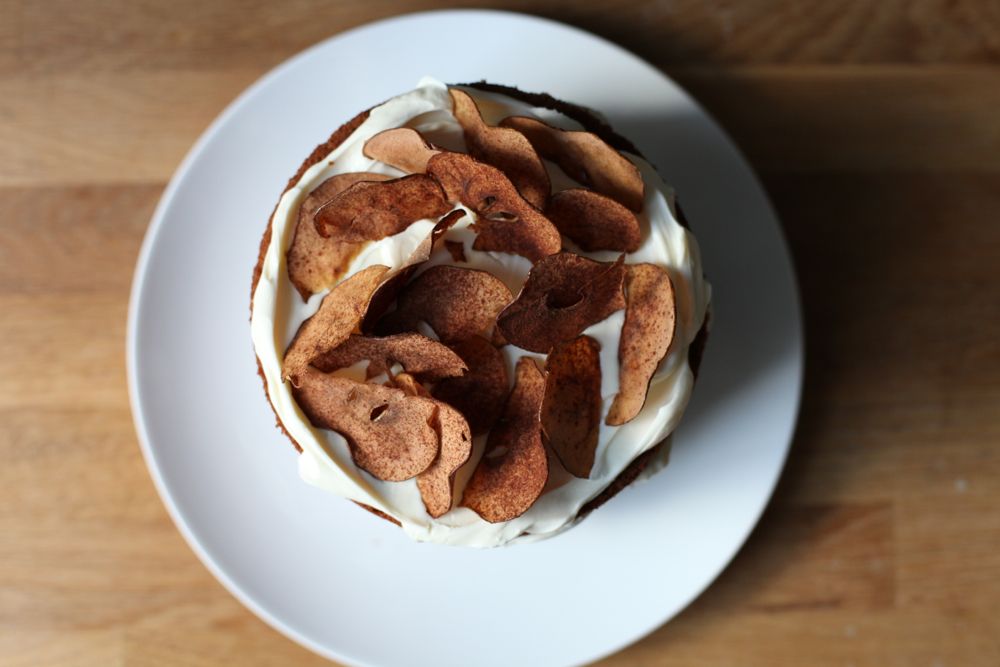
Though I've been trying to eat my harvest while they're still at their crisp, juicy best, my thoughts kept wandering to a carrot-cake-style apple cake. Late one night I had the idea of topping a layered cake with some apple crisps. I recently came across pear crisps for the first time and thought the concept would translate well.

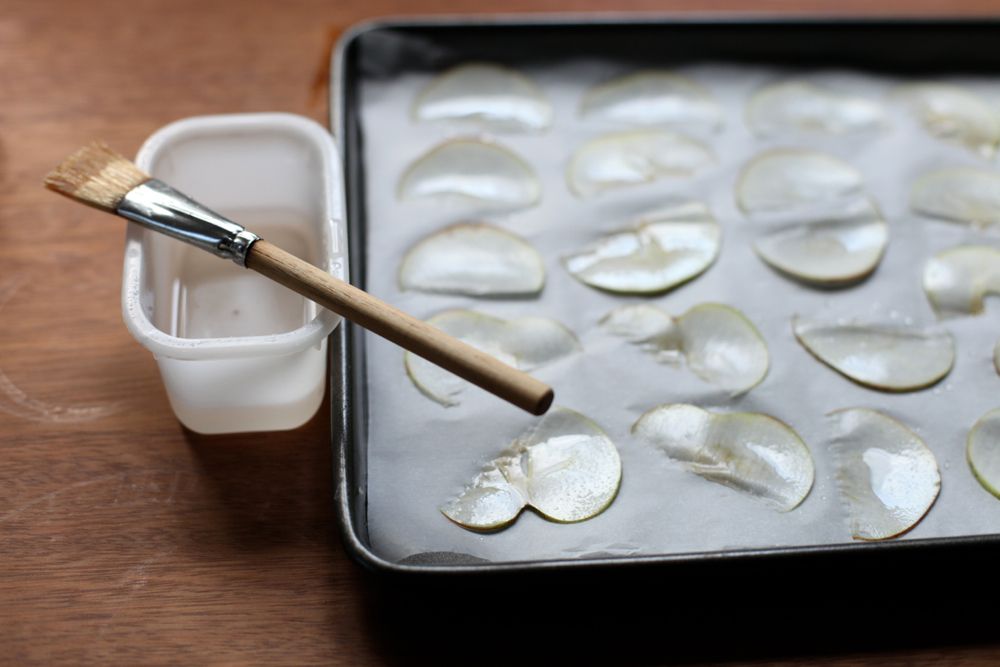
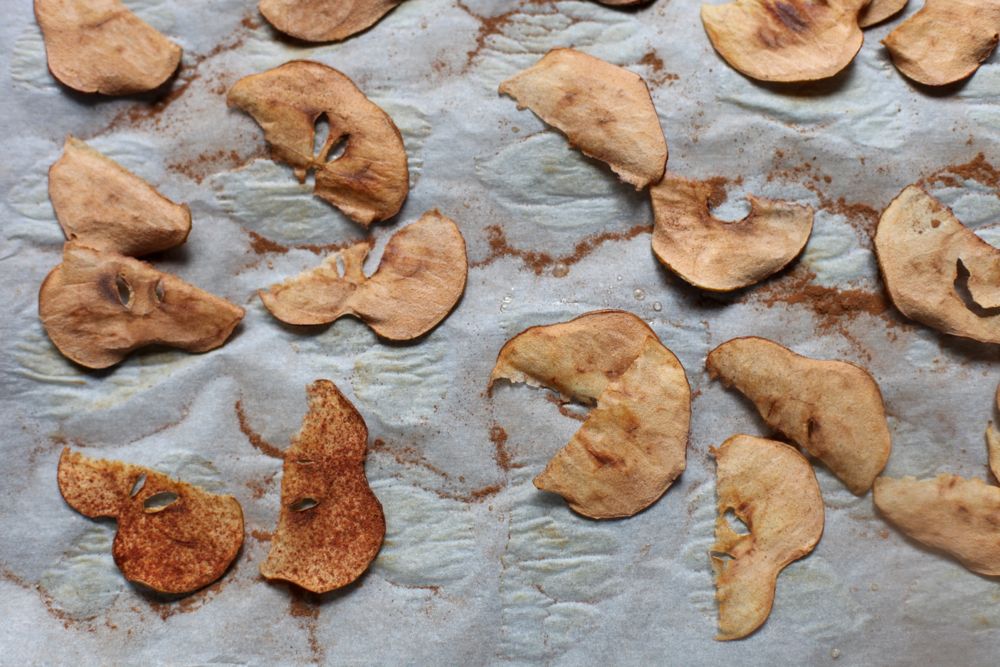
A few days before the party, I tried them out. I had some sugar syrup left from the Chocolate Pecan Krantz Cake, so I decided to try using a bit of that instead of sugar. I split the tray into four: sugar/cinnamon, sugar/plain, syrup/cinnamon and syrup/plain. The syrup/cinnamon quarter was the clear winner.


In the future I'd like to experiment with a few more things: slightly thicker slices (the pears were cut into 1/8" slices, mine were thinner - maybe that's how they got whole slices); brushing both sides of the slices with syrup and a few different oven times/temperatures.

I decided on a mascarpone icing with just a touch of sugar and a little lemon to sharpen the edges. It's pure and you retain the delicate flavour of the mascarpone. I chose a simple carrot cake recipe from Nigel Slater to jump off from (it also happens to have a mascarpone icing, though it's much sweeter).


One of my favourite things about this cake is the coconut oil. The mixture with brown sugar is almost as divine as it is with butter. It gives the cake a glorious smell, a certain smoothness on the tongue that's hard to describe and a delicate flavour that works beautifully with the mascarpone and apple.

The cake is wonderful without icing and decoration too - I really enjoyed the plain test cakes I made. I'll probably make it more often that way, for simplicity and ease.

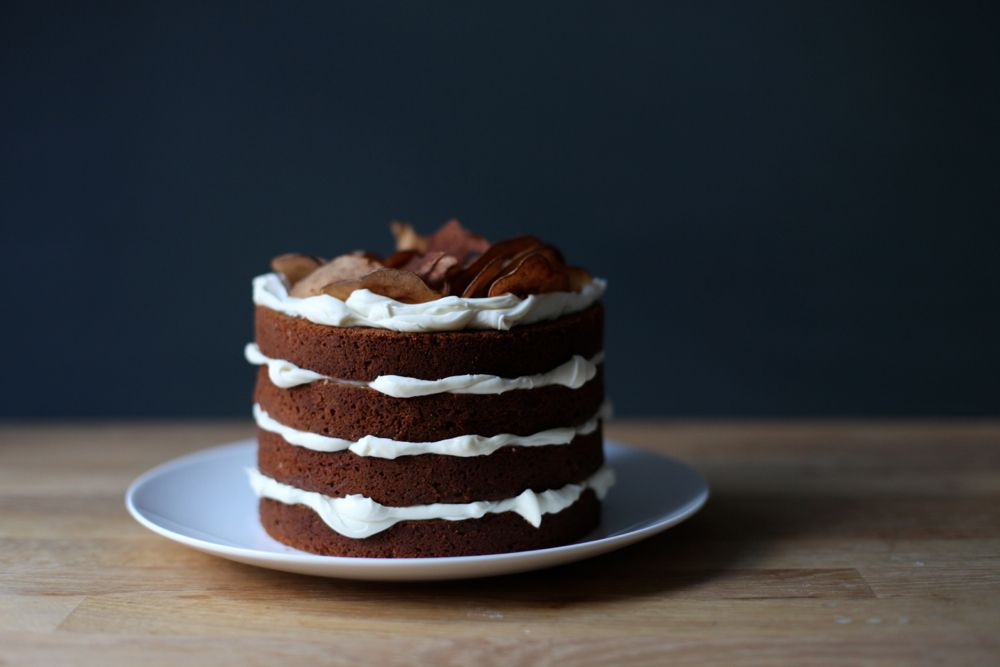
I think the flavour and texture of the cake is best when it's really fresh (and I was late for the party...), so I assembled as soon as I could without the icing melting. While it's warm, the crunchy dome is the best bit - but that can be the chef's secret if you do cut off each dome to make a layer cake...


Apple & Cinnamon Layer Cake
(Cake adapted from Nigel Slater's Carrot Cake recipe in Tender v.i, crisps inspired by food 52 via The Year in Food)

For the crisps:
65g caster sugar
40ml water
1 firm eating apple
a few pinches of ground cinnamon

For the cakes:
4 eggs
340g plain flour
2 and 1/2 tsp baking powder
1 tsp ground cinnamon
1/4 tsp fine sea salt
2-3 eating apples - you need 200g grated
200g coconut oil, solid
340g light brown sugar
2 tsp lemon juice

For the icing:
350g mascarpone
40g icing sugar
2 tsp lemon juice

Preheat the oven to 130C/270F for the crisps. Put the sugar and water into a small saucepan and heat until the sugar dissolves and it starts bubbling. Pour into a bowl to cool. Cut the apple in half, top to bottom, and remove the stalk. Use a mandolin to cut thin slices of the apple - I used my thinnest setting. Set the slices onto a parchment lined baking tray. Use a pastry brush to thinly coat the slices with some of the syrup. Sprinkle over a little cinnamon. Put the tray into the oven and bake for 30 minutes then turn the oven off and leave to cool inside. Remove from the oven and place into a sealed tin or box.

To start the cakes, preheat the oven to 180C/350F. Grease two 6" cake tins and line the bottoms with baking parchment. Wipe a clean mixing bowl down with a piece of lemon (to remove any little bits of grease). Separate the eggs, putting the egg whites into the lemony bowl (to be whipped later) and the yolks into a cup/bowl. Sieve the flour, baking powder, cinnamon and sea salt onto a plate or bowl. Peel the apples then grate them - weigh and make sure you have 200g (don't add extra, it'll throw the liquid balance off).

Put the coconut oil and brown sugar into the bowl of a stand mixer and beat on medium until fluffy and paler than before - about 4 minutes. Add the yolks one by one, beating well and scraping down in between each addition. Take off the machine and tip in the 200g of grated apple and the lemon juice. Fold together. Get your egg whites and whip them (I do this by hand because I think it's simpler, but you could transfer the apple mix to another bowl and very throughly clean the mixer bowl and use the machine, or use a hand beater) until they hold stiff peaks (be careful not to overdo it - a spike on the end of the beater should hold upright with a little waver - it won't be as firm as meringue).

Fold half of the sieved dry ingredients into the apple mix, carefully but throughly, scraping the sides and bottom. Add half of the whipped egg whites and fold them in, followed by the rest of the flour, then the rest of the egg whites. It takes a little bit of patience but you need to get it evenly combined (no lumps of flour or big streaks of egg white) without losing too much air. Divide the mixture between the two tins, level, then form a dip in the middle.

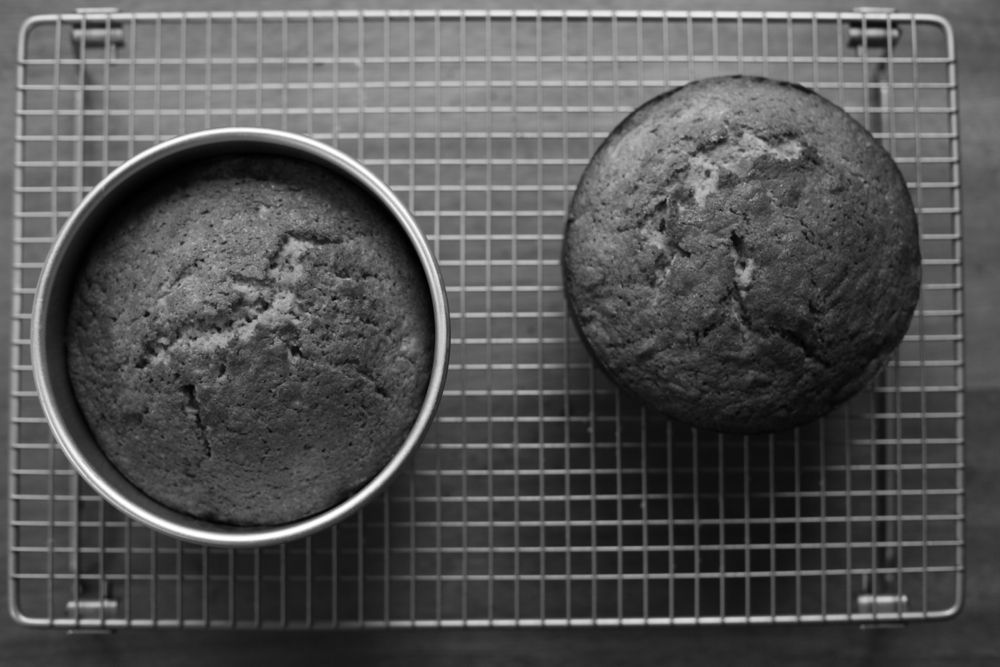
Bake for 40-45 minutes until domed, cracked, golden and a skewer comes out cleanly from the middle. Cool on a wire rack for 5 minutes then remove from the tin and leave to cool. When the oven has turned off and cooled down a little, I gave the crisps a crunch boost by leaving them in there for a few minutes.

Make the icing as the cakes bake or cool. Place the mascarpone into a bowl and beat until smooth. Sieve over the icing sugar, pour in the lemon and beat again. Keep in the fridge until you need it.

When the cakes are barely warm (or cold) you can start cutting - use a sharp serrated knife to cut the dome away from the top, trying to keep as flat as possible. Work out where the halfway line is on the remaining cake and carefully score all the way around with your knife, then go around cutting deeply to split the cake (this should help guide the knife so you get an even cut).

Place one of the cakes onto a clean serving plate. Smooth over 1/4 of the icing, going right out and almost over the edge. Add the next layer and repeat until finished. Finally arrange the crisps on top. Best immediately, keeps assembled for a day in the fridge (will be quite different to fresh), plain cake for 3-4 days in a tin.

(Serves 12-15)


A few related posts:
Spiced Caramel and Pear Bundt Cake
Rose and Pistachio Layer Cake
Coconut Cream Layer Cake

Thursday 11 October 2012

Chocolate Pecan Krantz Cake


On Saturday, I was blindly speeding through my google reader when this post from Not Without Salt flashed past. The only thing my clouded brain latched onto was the italics of a quote.

“At its root, perfectionism isn’t really about a deep love of being meticulous. It’s about fear. Fear of making a mistake. Fear of disappointing others. Fear of failure.”
― Michael Law

A bell started to ting-a-ling in the back of my mind at each mention of fear but I still went back to alternately reading without comprehension and freaking out on the phone to my poor mum about this horrific, hostile situation I was sure to be placed in the moment I started.


I disagree with the first point of the quote. I think that perfectionism is more than fear. Fear is just the shadow, long or short, deeply shaded or dappled, depending on the time and place. I know that it can be a positive thing and that I wouldn't have achieved many of the things I have if I wasn't seeking perfection. When tamed, it makes me push myself, sparks creativity, makes sure all the little details are accounted for.

Yet if I do let fear take control, it becomes paralysing - as it did briefly last Saturday. If I listen to the voice telling me I can't do it, that I'm not good enough, I lose sight of everything. These days if it takes hold it's only for a few seconds, minutes, or - rarely - hours. I've grown into a strong fighter over the years. I'd love to get to the point where I never lose balance and hit the blank, numbing snow face-first. That's my goal. To be able to tell it to go away (possibly in saltier language than I'd use here) and see every single minute of my life clearly.

The actual reality of the new term is thrilling and inspiring. The moment I got on my bike to go home after the first day on Monday, I felt fully free again, my limbs loosening as they let go of the residual stress. I cycled home with a smile so big my cheeks hurt, my chest fizzing with the joy of it all, flying along the familiar roads of my beloved city with no effort whatsoever.


I bought a copy of the new Ottolenghi book, Jerusalem, a few weeks ago. The cover is printed fabric - it's a lovely touch, though I worry it'll get dirty in the kitchen. I believe the US edition is just about to come out.

By now it should come as no surprise that the first pages I slotted the blue ribbon bookmark between were in the sweets section, involved the largest amount of butter, sugar and chocolate and had the most complicated method.


I also thought that the recipe looked unusual. The yeasted dough is made with plain flour and treated similarly to a brioche. It barely rises when proving and doesn't greatly expand when you bake it. The loaf is then soaked with lots of sugar syrup, filling most of the crumb. It's dense and sticky, very rich, filled with nuts and pretty punchy with the chocolate. It's not bread but it doesn't feel like cake either.

I did change a few things: I halved the recipe, adding extra water and butter to replace the remaining half egg; swapped the caster sugar for brown sugar; toasted the pecans; baked the ends so they didn't go to waste (as you can see below, they didn't last long); didn't - despite the strict note - use all the syrup and, finally, sprinkled a hefty pinch of Maldon sea salt flakes over the top. Another time I think I would take the lemon zest out of the dough (I'm not a huge lemon-chocolate fan) - it could be replaced with vanilla, cinnamon or another sweet spice.

The technique of splitting the roll of dough lengthways and then twisting it is brilliant - it creates such a bold design. I might try it with a normal cinnamon bun dough soon.


Finally, I've decided to settle on one post a week on Thursdays. Before now I've aimed at 6-7 a month with one a week as a minimum but I think it'll be easier at the moment to formally organise it into my week and admit that I can't do more than one. So you can expect a post every Thursday evening - the email subscribers should get it on Friday morning.

I'm also proud to announce that last Thursday I won Best Food Blog at the Cosmopolitan Blog Awards 2012! It was a bizarre, dreamy evening filled with sequins, sparkle and rather loud music (I'm getting old). You can watch a short video about the evening here - it includes the moment I won and a little interview bit, which starts at 1:10. Finally, I'd like to say a big thank you to whoever nominated and voted for me.


Chocolate Pecan Krantz Cake
(adapted from Yotam Ottolenghi and Sami Tamimi's Jerusalem)

For the dough:
265g plain flour
50g soft brown sugar
1 tsp fast action dried yeast
zest of half a lemon*
pinch of salt
1 large egg
85ml water
85g unsalted butter, at room temperature but not too squishy

For the filling:
100g pecan halves
65g dark chocolate, approx 70%
60g unsalted butter
25g icing sugar
15g quality unsweetened cocoa powder
1 tbsp caster sugar

To finish:
130g caster sugar
80ml water
big pinch of sea salt flakes (optional)

Tip the flour, sugar, yeast and zest into the bowl of a stand mixer. Stir together with the dough hook in your hand. Add the egg and water and stir again. Once most of the flour has been absorbed into the liquid, put it on the machine. Knead on medium for 2-3 minutes until you have a uniform dough. Add the salt then start adding chunks of soft butter, bit by bit (roughly a tablespoon), letting each piece work into the dough in between. Once it is all in, keep mixing for 10 minutes on medium - scrape down the sides a few times within that time. Once done, the dough will be totally smooth, silky, just come away from the sides and should pass the windowpane test if you want to check. Place in a greased bowl, cover with cling film and leave in the fridge overnight.

When you come back the next day, start by toasting the pecans in a dry frying pan until they start to smell nutty. Leave to cool. Grease a 9x4"(23x10cm) loaf tin and line the bottom with baking parchment (you could line the whole tin - might be easier to lift out at the end). Take the dough out of the fridge - it will be solid but don't worry. Place the butter and chocolate into a small pan (or in a bowl over a pan of simmering water if you're nervous) and melt gently over a low heat. Transfer to a bowl then stir in the icing sugar and cocoa powder - you should have a thin paste.

Lightly dust a work surface with flour. Form the dough into a square shape with your hands then start rolling it out. It will get softer as it warms up but you don't want to let it get too warm before you've finished. It needs to be rolled out to a rectangle of 38x28 cm. Try to keep the edges as straight as possible - turn the dough 1/4 turns regularly as you roll. Trim the edges so they're straight when you have the right size. Spread the chocolate mixture evenly over the dough with a palette knife, leaving a 2cm gap around the edge. Sprinkle the pecans over the top followed by the caster sugar.

Take a look at this picture series to help. Brush one of the short ends with a bit of water and then start tightly rolling the dough up towards it - as you would for cinnamon rolls. Seal the end. Use a sharp serrated knife to cut 2cm off each end of the roll. Cut the roll in half lengthways. Weave the two halves together, cut side up. Transfer to the tin. I then popped the two ends into another little tin. Cover with a damp tea towel and place in a warm spot to rise for 1 - 1hr 20. The cake will only rise a little in this time - don't worry.

Towards the end of the rise, preheat the oven to 170C/ 340F. Unwrap and place into the middle of the oven. Bake for 25-30 minutes - you may need to put a bit of foil over the top to stop it browning too much at the end. When it is ready you should be able to remove a skewer from the middle cleanly. My little ends only took about 15 minutes. While the cake bakes, make the syrup: place the sugar and water into a small pan and heat until the sugar has dissolved and it has just come to a boil. Leave to cool a little.

Once the cake is out of the oven, immediately start brushing the syrup all over it - you may have to let it sink in a few times and come back again. I think I used about 2/3 in the end - if you want it really sodden, keep going. Sprinkle with sea salt flakes if desired. Take out of the tin once it has nearly cooled. Best fresh but keeps for 2 days in a tin and up to a month in the freezer.

(Makes 1 loaf)

* You could replace this with 1 tsp of vanilla extract or paste, 1 tsp cinnamon or another flavouring.


A few related posts:
Braided Lemon Bread
Pear and Chocolate Loaf 2.0
Super Chocolate Cinnamon Rolls

Thursday 4 October 2012

Cardamon & Orange Pound Cake


This cake is part of my continuing search for the perfect snack to eat outside the library.

It needs to be:
a/ robust enough to handle being bashed around in my bag.
b/ self-sufficient - i.e not need anything else to go with it (including tea).
c/ filling enough to fuel reading.
d/ able to keep well so I can have it for several days.
e/ tempting enough to be used to reward/bribe myself.


This recipe fulfils all my criteria.

Pound cake is a term for a traditional creamed sponge, so named because they used to make huge cakes involving a pound (around 450g) each of butter, flour, sugar and eggs. This is a slightly different recipe - with the oil and milk and so on - but its roots lie in that tradition.

I flavoured the cake with orange zest and freshly ground cardamon. I wanted the flavours to be subtle instead of punchy - as I'm eating it unadorned, there aren't any other flavours competing, so it doesn't need to hit you over the head.


I had a friend coming round the evening I made the cake, so I siphoned off a bit of the mixture into a tiny loaf tin so it would bake faster and we could eat it earlier. Alas, my genius plan was flawed - I had to wait for the big cake to nearly finish baking so it didn't sink because I'd opened the door. So yes. It's not a shortcut.

Also - if your kitchen starts smelling very strongly of orange cough syrup while the cake bakes, do not panic. The cake itself does not smell of orange cough syrup and it does not taste of orange cough syrup. It freaked me out. I don't like orange cough syrup.

P.S. I'm getting glammed up and heading to the Cosmopolitan Blog Awards tonight - wish me luck!


Cardamon & Orange Loaf Cake
(adapted from Alice Medrich's Olive Oil Pound Cake in Sinfully Easy Delicious Desserts)

zest of an orange
200g caster sugar (I used golden)
4 whole cardamon pods
165ml extra virgin olive oil
big pinch of fine sea salt
3 eggs, cold from the fridge
200g plain flour
1 and 1/4 tsp baking powder
165ml milk

Preheat the oven to 180C/350F. Line a 9x4" (23x10cm) loaf tin with baking parchment. In the bowl of a stand mixer (ignore my other bowl above, this will save on your washing up), rub the zest into the sugar with your fingers until the sugar has turned orange (this releases the oils in the zest). Crack the cardamon pods by crushing them with the side of a knife. Remove all of the little black seeds and discard the shells. Grind the seeds up with a pestle and mortar. Add the cardamon, olive oil and salt to the mixer bowl. Beat with the paddle attachment until combined. Add the eggs one by one, mixing well between each addition. Beat on medium-high for 5 minutes - the mixture should look paler and thicker.

Sieve the flour and baking powder into a bowl. Add a third of the flour to the mixer, stirring on low until combined. Add half the milk, then another third of the flour, the rest of the milk and the rest of the flour, mixing until uniform in between each addition. The mixture will be pretty liquid. Scrape the beater and the sides down and fold in. Pour into the prepared tin and place in the bottom third of the oven. Bake for 60 to 70 minutes until well risen, golden brown and a knife/cake tester can be removed cleanly from the middle. Cool on a wire rack for 10 minutes then remove from the tin. Keeps well for four or five days in airtight tin/box and freezes well.

(Makes one loaf)

ShareThis