Saturday 31 December 2011

Best of 2011


Happy New Year!

Here are six picks from this year's posts - chosen, like last year (see Best of 2010), for being fairly low-key but incredibly delicious. These are recipes I can't stop thinking about and that I'm sure I'll make in 2012 and the years to come.

Which would you choose to eat? If you go over to facebook, you can vote!

First, possibly my favourite dessert, served here with macerated summer fruits but incredible on its own = Tiramisu


Toasted Coconut, Brown Butter & Dark Chocolate Blondies


Apple & Quince Pie


Buttered Pecan & Butterscotch Ice Cream


Coconut Milk Chocolate Cake


Strawberry Cream Layer Cake

Wednesday 28 December 2011

Pomegranate & Berry Pavlova


When I was a girl, we always had pavlova for pudding at Christmas. Though it wasn't shrouded in flickering blue flames like its traditional rival, I thought it was the most exciting part of the whole lunch.

Granny would top her pavlovas with defrosted raspberries saved from the summer bounty. In memory of her I used some frozen mixed berries on our Christmas pavlova.


I also scattered over some fresh pomegranate. When I came to photograph the fruit I found myself trying to create the same (lovely) pomegranate shot I've seen so many times. Instead I decided to try and make it mine. So in the middle of our sitting room I started splashing the pomegranate quarters into the waiting bowl of water, holding my camera in the other hand.

I must have looked pretty sheepish when mum found me drenching the white sofas and rug in the midst of torn up wrapping paper from earlier in the day. She moved me outside onto the balcony (thankfully not as cold as last time) and dropped the quarters into the bowl for me. Arthur tried to 'help' and got in the way.

Not only did I get a photo I like but I also got a Christmas memory I'll always remember with a smile.


I've had some troubles with our old recipe over the past few years so I decided to try a new one from this gobsmackingly beautiful post by Katie. It's a great recipe - it feels stable as you heap it on the sheet and bakes into a soft pillow of marshmallow-esque filling with a nice crisp shell. I like some contrast so I barely sweetened the berries and kept the cream simple.

It's a classic for a reason.


Pomegranate & Berry Pavlova
(Adapted from What Katie Ate)

For the pavlovas:
1/4 lemon
4 egg whites
220g caster sugar
1 tsp vanilla extract
2 and a 1/2 tsps cornflour

To assemble both:
250ml double cream
1/2 tsp vanilla paste
1/2 pomegranate
100g frozen mixed summer fruit
1 tsp icing sugar

Preheat the oven to 150C (or 130C for a fan oven). Line two trays with baking parchment. Rub the clean bowl of a stand mixer (or a mixing bowl if you're using a hand whisk) with the slice of lemon. Add the whites and whisk until you have a thick froth that forms a soft peak then start slowly adding the sugar. Keep whisking until glossy and holds a fairly stiff peak. Add the vanilla and sift over the cornflour, then whisk briefly to combine. Divide the mix between the two trays, heaping it up in the middle. Use a spatula to spread out into a large nest shape (I then brought the spatula in around the sides to create a pattern.

Bake for 30 minutes then swap the trays and turn them around to help them cook evenly. Bake for another 30 minutes then turn the oven off and leave them to cool for one hour. Afterwards, take them out and leave to cool totally on a wire rack. They'll store for at least a week if needed.

When you're ready to serve, defrost the fruit. Sprinkle the icing sugar over the top to lightly sweeten them without breaking them down. Cut the pomegranate into quarters and de-seed in a bowl of water. Whip the cream and vanilla until soft peaks form. Knock the centre of the pavlova gently in then spread the cream over. Top with the summer fruits and pomegranate seeds and serve.

(Makes 2 medium pavlovas, each serves 4-6)


Sunday 25 December 2011

Merry Christmas!


We're having waffles with maple syrup and swiss bacon for breakfast as we open presents and then preparing the big lunch - turkey and all the trimmings - and generally having a quiet family day. I'll post about our dessert in the next few days...

I hope you all have a wonderful festive season filled with delicious food, smiles and laughter.

Merry Christmas!


Wednesday 21 December 2011

Bûche de Noël


Three things I learnt yesterday about the highly specialized field of sub-zero food photography:

1/ Icing sugar to simulate snow-on-a-log is pretty pointless when you also have actual snow on your yule log.

2/ Forget tables - plant pots with a drift of snow perched on top or sun loungers (oh the irony) make excellent surfaces.


3/ 'Shoot and run'. It's -6 C. No fancy moves, just a bit of exposure tweaking. Or your hands will fall off (gloves get in the way). Wrap up as if you're going skiing or taking the dogs for a walk. Yes, that means thermals (sexy, I know). Food photography is just another activity that has to be adapted to snow (and therefore darkened houses) when it just keeps on falling for days and days on end.


I decided to keep this simple: light chocolate sponge (the one I used to make the chocolate & peanut butter mousse swiss roll), a chestnut-marscarpone filling and whipped dark chocolate ganache swirled over the top. It's a delicious combination. The chestnut gives a smoky depth and graininess to the filling.

Also - I passed basic patisserie! Despite a very stressful and frustrating practical exam my other marks pulled me up to a credit - I was so happy when I opened the envelope at graduation.


Edit: The lovely Felicity Cloake tried out this recipe in her Perfect column in The Guardian! You can still see it online: 'How to cook the perfect yule log'.


Bûche de Noël
(sponge recipe adapted from David Lebovitz's Ready for Dessert)

For the sponge:
60g plain flour
30g cornflour
20g cocoa powder
1/2 tsp baking powder
pinch of salt
3 eggs, separated
35ml cold water
120g caster sugar

For the chestnut cream:
200g mascarpone
125g sweetened chestnut puree*
1 tsp icing sugar
1/2 tsp vanilla extract

For the whipped ganache:**
150g dark (70%) chocolate, very finely chopped
150g double cream
2 tsp light brown sugar

Preheat the oven to 170C. Line an oven tray with parchment paper. Sift the flour, cornflour, cocoa powder, baking powder and salt together three times - the mixture should be a uniform pale brown. Place the 3 egg yolks and the water into the bowl of a stand mixer. Whisk on high for 1 minute then sprinkle the caster sugar over the frothy mixture. Put back onto high and whisk for 5 minutes until the mixture reaches ribbon stage (i.e. if you lift the whisk, the ribbon coming off it stays on the surface for a few seconds) and is very pale.

In another clean bowl whip the egg whites to stiff peaks. Steady the bowl of whipped yolks on a damp cloth and sieve over a 1/5 of the flour mixture. Fold in with a rubber spatula, swirling around the edge of the bowl and flicking into the middle. Repeat with the next 1/5 and so on until you have incorporated all the flour mixture. Fold in 1/3 of the whites to loosen, then fold in the remaining 2/3. Scrape out of the bowl onto the tray then with bold strokes use a palette knife to spread out into a rectangle roughly 20x30cm (this post about another swiss roll has videos on spreading and a slightly different filling/rolling method).

Bake for 12-15 minutes until the sponge springs back when touched in the middle. While it bakes lightly grease two sheets of parchment bigger than the cake. Lay one on a table and sprinkle with a little granulated sugar. When the cake comes out of the oven, let it rest for 1 minute then flip it out onto the parchment. Slowly peel the baking parchment off the top. Trim a small amount off each side with a serrated knife. Lightly score a line about 1cm from the end of one of the shorter sides with the back of a knife. Top with the clean parchment sheet then start rolling up from the scored end, tightly tucking in as you go. Once you get to the end, wrap the whole roll in a tea towel and leave to cool a little.

While it cools, beat the mascarpone until smooth in a bowl. Add the chestnut puree and sugar and beat again, then finally add the vanilla and combine until uniform.

When the wrapped roll is no longer hot to touch but is still warm, carefully unwrap it. Spread the inside with the chestnut mascarpone mix and then roll up again, using the outer parchment but discarding the inner. Place in the fridge to firm up.

Put the chopped chocolate into the bowl of a stand mixer. Place the cream and sugar into a small saucepan and heat until steaming, then pour over the chocolate. Leave for a minute then stir until smooth. Place into the fridge to firm up - you want it to be thick but not solid. When it's ready, fit the bowl into the mixer and whip until fluffy and a bit lighter. Dollop some of the icing onto the chilled roll and spread over the entire roll with a palette knife. Style the icing to your liking - I used an icing comb to create a bark-esque effect on the top, then a serrated knife to create the rings on each end. The roll keeps really well in the fridge - in fact we preferred it after it had chilled for a few hours.

(Makes about 10-12 slices)

*In Switzerland they sell tubes of prepared sweetened chestnut puree - it's 68% chestnuts, which is I think a little more than most pastes (like the Crème de Marrons from Clément Faugier that seems to be most common in the UK) and some of them have vanilla, so I think if I was using a paste like that I'd exclude the extra icing sugar and the vanilla. (updated 15/12/15)

Update 21/12/16 - This year I tried it with unsweetened chestnut paste as that's what was in the supermarket - I added 2 tsp of icing sugar. I think I prefer it with the sweetened paste I normally use, but it's an option.

**I also used less ganache and didn't whip it - didn't cover the ends and used a fork to make waves along the log. I used 50g/50g/1 tsp for the ganache amounts.


Three more Christmas recipes:
Mince Pies
Moulded Gingerbread Cookies
Galette des Rois

Thursday 15 December 2011

Maple and Nutmeg Biscuits


I'm going home for Christmas on Sunday. I can't wait to see and ski all the snow that has been falling, to properly start the Christmas baking and to decorate our tree.

We've got mincemeat and mince pies to make, a christmas cake to decorate and stollen to create. This year I'm also thinking of trying out a yule log/bûche de noël - does anybody have a good recipe or tips?


I made up the dough on Monday but waited to bake these until today. In the gap I managed to eat a fair chunk of the chilling packet - the dough is absolutely delicious. I hadn't tried this combination of maple syrup and nutmeg before but it's fantastic - I'm definitely going to try and think of other ways to use it.


I'm not going to write out the recipe as I wasn't happy with the way they baked (they're not the prettiest but they are good to eat - though not as good as the dough!). It may well be because I removed the egg yolk when I halved the original recipe, so you can give it a go from there if you like. I tried to jazz them up with a touch of icing sugar - doesn't it look like glitter in b&w?

Do try the maple-nutmeg-salt combination though, it's absolutely wonderful.


Thursday 8 December 2011

Chocolate Chunk Banana Bread


When I popped out to Switzerland for five days a week or so ago, my mum made me some chocolate banana bread. It was an unusual choice as I don't like banana bread.

Or perhaps I should say I didn't like banana bread. As she knew, this recipe is a game changer.

My mum and I differ in our attitude to recipes. Take this one, for instance. One day she decided to double the banana as well as adapt the chocolate. Things are weighed, but in a much more dash & splash & heaped spoon manner. I adapt recipes all the time too, but I'm very methodical and always measure and record my changes carefully.

But you know what? This banana bread is fantastic. So here's to mum and her courage to just go out there and double ingredients without a thought to ratios and percentages.


Before I left, I carefully wrote down the changed recipe into my notebook so that I could make it when I got home.

Imagine my horror when I opened the cupboard to make the cake today and discovered that I'd left my home scales in my knife kit at school - I'd taken them in as a spare set for my exam. Bake without scales?! Not be able to measure everything exactly to the gram? Dear me.

But my hunger for warm, comforting banana bread won out. So I eyed 100g out of my 250g pack of butter, I used my tablespoon to measure out the flour and sugar. I went with the flow.

Heck, if mum can double an ingredient and it tastes better, I can be a few grams out today. A little break from precision.


As the cake went into the oven, it started to get dark. I'd forgotten how quickly the light drains out of the sky at the moment and soon it was far beyond the point of photography. So I sat on the floor and wistfully watched my cake bake through the glass door. I love watching things slowly rise, bubble and change - it's very calming.

I decided to try and take a photo, not expecting anything. And yet I really like the photos I took. (Here's a slightly more traditional snap of the one my mum made too). I love the suspense during the lingering wait as something bakes, the intoxicating smell. That's one of the best bits about baking and that's what I have tried to capture.


Chocolate Chunk Banana Cake
(adapted from Ultimate by Green & Blacks)

225g plain flour
1 and 1/4 tsp baking powder
pinch of salt
100g butter at room temperature
150g caster sugar
4 small very ripe bananas (or 2 large, 3 medium etc)
2 eggs, beaten
3 tbsp milk
100g dark chocolate - 70% to 85%, roughly chopped

Preheat the oven to 180C/350F. Line a loaf tin with baking parchment. Sift the flour, baking powder and salt together. Cream the butter and sugar together until pale and fluffy. Mash the bananas up into a puree with a fork. Add the eggs, bananas and milk to the butter/sugar mixture and beat until uniform. It will curdle and look horrid but don't worry. Fold the flour into the batter. Fold in half the chocolate then transfer to the tin.

Sprinkle the rest of the chocolate over the top then press in lightly. Bake for 45 minutes to an hour or until a skewer comes out without any cake mix (will probably have a bit of melted chocolate!).

(Makes one loaf)


Saturday 3 December 2011

Passionfruit Fromage Blanc Bavarian


I'd say I'm roughly 50% calm and 50% nervous.

My hands are calm as they carefully tuck yet another batch of pastry into a tart tin or as they guide a piping bag around now-familiar lines. My brain is calm as I write and re-write quantities and methods, stashing them in my memory.

My eye is nervous, flickering from lack of sleep. My stomach is nervous, intermittently releasing a butterfly.


This week marks my first set of exams at Le Cordon Bleu.

On Tuesday I have my practical exam. There are three exam dishes - I will have to pick an unseen token when I enter the room, which will tell me which dish I make. The possibilities are: the tarte aux citron, the coffee eclairs, the raspberry genoise. Now I tend to think about them in terms of my fears: the shrinking tart case, the fondant topping, underfolding my genoise and finding flour pockets.

On Friday I have my technical exam. I haven't really started learning for it as it's only 10% of my overall mark (compared to 45% on the practical exam - the other 45% has been the continual assessment in my practicals). By Wednesday morning I'll be squirreling away sugar temperatures, fat contents and more recipes.


Whatever happens in my exams, I've learnt a lot this term. I hadn't realised how much I've changed until I went home last weekend and made a few things for mum. I've picked up a lot of good habits, tips and techniques. I've also got far too used to having a kitchen porter to do my washing up...

In the past few weeks we've made a few bavarian creams to fill charlottes and so on. I thought I would try out a slightly modernized version I found in Tartine. My presentation wouldn't work at school but I fancied a casual look.

It's a subtle, light dessert and would be perfect for after a heavy meal. It's creamy but not rich. There's only a touch of sweetness so it feels almost refreshing - the best word I can think of to describe it is pure.


Passionfruit Fromage Blanc Bavarian
(adapted from Tartine by Elisabeth M. Prueitt and Chad Robertson)

50g pistachios, finely chopped
60ml cold water
50g granulated sugar
4 egg yolks
2 1/2 tsp powdered gelatine
30ml hot water
300g fromage blanc
375ml double cream
10ml lemon juice*
3 passionfruit
1 tbsp icing sugar (approx)

Line the sides of a 6" loose-bottomed tin with cling film (you could also use a wider tin, such as 7 or 8", and I would have used acetate to line if I had any so that it was totally smooth). Spread the pistachios in the bottom of the tin in an even layer.

Place 60ml of the water and the sugar into a small pan and heat until the sugar dissolves and you have a syrup. Pour into a round-bottomed bowl and leave to cool. Set a pan on the heat with a few inches of water that the bowl with the syrup will fit into without touching the water. Sprinkle the gelatine over 30ml of hot (not boiling) water to soften.

Add the egg yolks to the syrup and combine. Place over the pan and whisk until thick and foamy (the ribbon stage - if you take the whisk out, the drips should stay on the surface before merging again) - this takes about 5-10 minutes. Once ready, whisk in the dissolved gelatine. Set the bowl into an ice bath (or sink of cold water) to cool, whisking every now and again (you need to be fairly quick with the next two tasks and keep an eye on it).

In another bowl, combine the fromage blanc and 75ml of the cream, whisking until smooth. Whisk the remaining 300ml of cream up to soft peaks.

Once the yolk mixture is starting to set, combine 1/3 of the yolks into the smooth fromage blanc mixture to lighten it. Fold the rest of the yolks in carefully. Fold in the lemon. Finally gently fold the cream into the mixture in two goes. Transfer to the prepared tin. Smooth the top and cover with cling film. Place into the fridge. Chill for at least 4 hours - overnight is best.

When you're ready to serve, scoop the passionfruit seeds out into a small saucepan. Add the icing sugar and warm slightly to dissolve the sugar. Test to see if you need more sugar.

Take the bavarian out of the fridge and unwrap the cling film. Ease it out of the tin (or snap open the springform) and peel away the plastic. Slide off the bottom onto a serving plate. Top with the passionfruit glaze.

*If you would like a stronger citrus flavour, add the zest of half a lemon or 1/4 of an orange - I wanted mine simple.

(Serves 10-12)


Wednesday 30 November 2011

Porridge


You're probably looking a bit confused right now. Porridge, Emma? Really?

My friend Elly (of Nutmegs, Seven) recently wrote a wonderful article about porridge. It really inspired me and I've been eating porridge for breakfast ever since. She sells it well: it's healthy, cheap and delicious.

When I was a little girl, porridge was a great wintertime treat. On a special morning mum would stir up a pot of oats then we would eat it drowned in double cream and brown sugar. I hadn't even considered adding spices to the mix.


This new, sexy porridge is amazing - full of flavour. I've tried lots of combinations and toppings. Elly inspired me to roast plums with orange juice and stem ginger and spoon them on top and from there I've experimented. The only things I've tried that were a little off were roasted figs on top and lemon zest in the porridge itself.

Writing a recipe for porridge seems a little ridiculous but I've put a sort of rough guide below. You can use your own basic recipe but do try adding in some spices and playing with toppings - it's fantastic.

(Also, if you're interested - top is fresh blueberry & toasted pecan, then raisin & pear, bottom is apple & sultana.)


My Porridge

about 1/3 to 1/4 of a tumbler of porridge oats (I use a small Nutella glass)
roughly 2/3 to 3/4 of the same tumbler of a mixture of water and milk, about half-half
handful of dried fruit (raisins etc), blueberries, grated apple
good sprinkle of cinnamon and ground ginger
fresh grind of sea salt and of nutmeg
optional splash of vanilla extract or dab of paste
fruit to top - chopped pear/apple/banana/roasted plums etc etc
nuts to top, toasted - I love pecans
Spoonful of brown sugar to finish (could use honey, maple syrup, golden syrup etc etc)

Measure the oats in the cup, then toss them in the saucepan. Measure the milk and water in the same glass, then pour in. Add the dried fruit/blueberries, spices & flavourings and stir. Put over a low heat and stir occasionally as it thickens. While it cooks, make a cup of tea and chop fruits/toast nuts. When it's thick enough (this changes with my mood), pour into a bowl and sprinkle your toppings on.

(Makes one bowl)


Monday 21 November 2011

Tarte aux Pommes


The moment I tasted the tart you see here, I danced around my kitchen in jubilation. I've been trying to recreate this recipe for almost as long as I've been cooking.

The tarte aux pommes at Chez Simon is legendary. It's a Verbier staple - I've eaten it every winter for 19 years.

I finally discovered the key a few days ago: cream (as in all good things). There's this wonderful touch of creaminess underneath the apples I couldn't work out. It's not a full layer - just a tiny touch that slightly curdles into the juices. I can't explain why this is so heavenly, but it is. You can use either double cream or sour cream.

Together with a simple pastry, just-cooked apples and plenty of cinnamon and sugar, you have winter perfection. All you need is hot chocolate and a blustery wind to redden your cheeks. Sparkly snow optional.


Tarte aux Pommes
(inspired by Chez Simon's original, though I don't have his recipe)

For the pastry:
60g plain flour
1 tsp sugar
pinch salt
30g cold butter, cut into cubes
cold water to bind (about 1.5 tbsp)

For the filling:
1 tsp lemon juice
1-2 fairly tart apples, such as Granny Smith
1 tbsp granulated sugar
1/2 tsp cinnamon
2 tbsp double cream or sour cream

Sieve the flour, sugar and salt into a mixing bowl. Toss in the cubes of cold butter. Rub the butter into the flour using your fingers until the mixture resembles fine breadcrumbs. Add a tablespoon of water and use a blunt knife to combine with the crumbs. Add a dribble more water until the dough comes together into a ball (use your hands at the end). Squish into a disc, wrap in cling film and chill for at least 20 minutes.

When the pastry has chilled, roll it out on a lightly flour-dusted surface into a circle an inch larger than your tin (a shallow 8” tin is perfect) – there is enough dough but it will be thin. Drape the pastry over your rolling pin and place it into the tin. Press into the corners and sides. Leave to rest in the fridge for 10 minutes.

Preheat the oven to 180C/350F. Trim the sides down to 2cm, press in again and prick the bottom all over with a fork. Then line with paper and pack tightly to the top with baking beans. Bake for 20 minutes or until the pastry is cooked except for a little dampness in the centre.

Place the lemon juice in a medium sized bowl and add a few inches of water. Peel the apples, placing them in the water as you go to stop browning. Half and quarter the apples and slice out the core. Thinly cut them lengthways into strips, so you have a pile of semi-circles – this is faster if you have a mandolin.

Turn the oven up to 220C/425F. Mix the sugar and cinnamon together in a small container. Spread the sour cream over the bottom of the pastry case in a thin layer. Drain the apple slices, then tart arranging them in the case – begin with a row down the middle, tightly overlapping them so you don’t see the cored middle. Continue to the bottom and then start another row, repeating until the case is covered.

Sprinkle evenly with the sugar mix and bake at the top of the oven for 10-15 minutes or until the apples are soft (and knife should easily go through them) and the pastry is lightly browned. Best eaten while it’s still warm with your hands, like a slice of pizza.

(Makes 6 slices)


Sunday 20 November 2011

How to bake a... Birthday Cake


The lovely Fiona Beckett recently asked me to write for her site Beyond Baked Beans. It's a wonderful resource full of cheap and easy recipes for students and anyone else on a budget. I'm going to be writing a series of posts on simple baking that can be done with a minimum of equipment. You read the little introduction here.

For this first post I decided to write about simple, crowd-pleasing birthday cakes. I want to make baking a cake for a friend or loved one possible for as many people as I can. There are four recipes - vanilla cake, chocolate cake, a cream cheese icing and a ganache.

You can read it here.

Wednesday 16 November 2011

Clementine Ricotta Doughnuts


Why do we only hang chocolate shapes and cookies from garlands and trees? Why not doughnuts?

They already look like little wreaths, after all. Wouldn't it be a lovely addition to your autumnal table for a party? I'm always up for making dessert or a tea snack into a fun event in itself.


I threaded and knotted them onto a piece of raffia in a string, but you could also tie each one individually to a branch (a bit like the sweet cakes in this lovely tiger in a jar video). Or even your Christmas tree. (Apologies for the early use of the C-word, but I had to mention it...)


The book I adapted this recipe from, Doughnuts, is fabulous. I had no idea there were so many versions and creative options. These are cake doughnuts, so they're easy to make and very quick - no yeast involved.

The method for getting cake doughnuts into the oil without a fancy machine is so clever. You pipe them onto greased paper and then drop them into the oil on the paper, which then loosens and you can remove it. Forgive me if it is common knowledge, but I was fascinated.


I adore clementines (and satsumas and tangerines - how are we meant to tell them apart?). I used to eat them by the bagful as a child. My beautiful old dog Silver loves them too. Probably partly because when she was a puppy I used to peel them and play 'one for you, one for me' with her (sharing my clementines was a gesture of great love).

Clementines are traditional stocking fillers here. One Christmas my belief in a certain someone was fatally wounded when I found a packet of clementines I had carefully marked with a pen so nobody else ate them at the end of my bed...

I bought my first bag of the winter a few days ago and so these doughnuts were born. I was going to show you a photo of the insides but I lost track of my thoughts while shooting and ate the halved one. Whoops. What can I say - they're rather moreish.


Clementine Ricotta Doughnuts
(adapted from Lara Ferroni's Doughnuts)

For the doughnuts:
120g plain flour
40g caster sugar
1 and 1/3 tsp baking powder
grating of fresh nutmeg
pinch of salt
zest of a clementine
2 eggs
150g ricotta
1/2 tsp vanilla
oil, to fry*

For the glaze:
50g icing sugar
1 tsp honey (to taste)
juice of 1 clementine (approx)

Sift the flour, baking powder, nutmeg, salt and sugar into a bowl. In another bowl whisk the zest, eggs, ricotta and vanilla together. Stir the wet ingredients into the dry until combine - try to not overmix, but you don't want lumps of flour. Scoop into a piping bag and set to one side.

Decide how many doughnuts you'll be able to fry at once (I could do two) and cut that number of 4" squares of greaseproof/parchment paper. Grease the squares with a little extra oil. Place a wad of kitchen towels to the side of your stove. In a heavy bottomed pot with a thermometer (deep-frying or sugar) heat approximately 2 inches of oil to 360F. Pipe circles on the greased paper of about 3 inches.

When the oil hits the right temperature, lower one upside down into the oil (check with one, then do more). The paper will start to loosen - take it out with some heatproof tongs. Cook until golden brown then turn and cook the other side. This only took about 45 seconds on each side for me. Remove with a slotted spoon to the kitchen paper. Repeat until you've used all the mixture.

Sieve the icing sugar into a medium bowl. Add the juice bit by bit until you have a paste, then add the honey. Finally adjust the consistency with more juice until you have a thin glaze. Dip the doughnuts into the glaze (either one side or both). Set onto a wire rack.

*I used sunflower oil but safflower, peanut or canola also would be good.

(makes about 12-15 doughnuts)


Monday 14 November 2011

Queen of Puddings


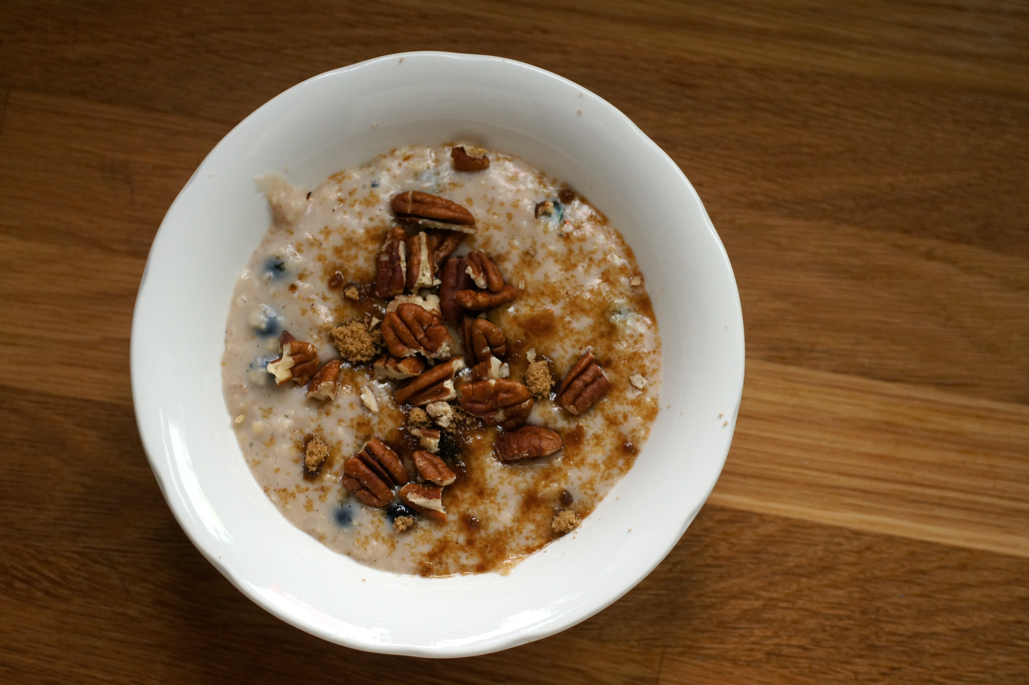
Expectation is a funny thing.

It starts off from a rose-tinted idea in your mind. You call it a dream and think of how much lovlier your life will be when exams end or new adventures start. Some of these plans never come to fruition - the warm glow fades before it even happens and you turn to the next brightest flame.

It's not that reality is better or worse, just different.

I wonder why we can't keep that warm glow alive once it becomes reality. Maybe it's just that - reality cannot be perfect and there are always difficult or testing parts, however small. It feels so romantic to say and believe that you're following your dream, but I wonder if it is too much pressure. Maybe the only way to live is to try and focus on today rather than the future.


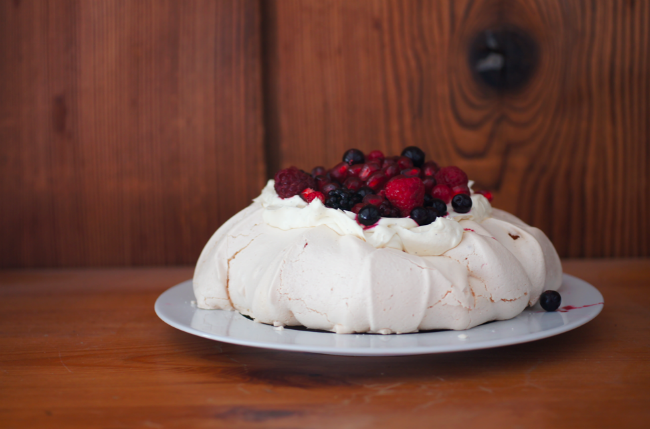
I couldn't decide which traditional pudding to make for this post, so I put it to the vote on 
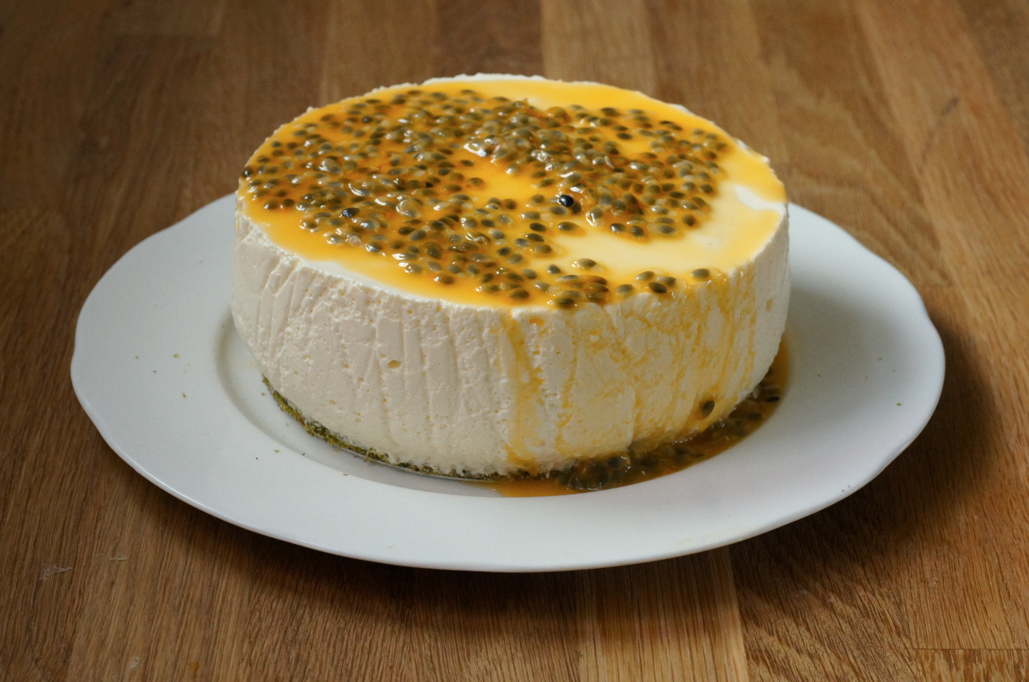
facebook (I've also updated the page and added an album of black and white outtakes from posts). The choices were a baked custard tart (a.k.a. Henry IV's coronation dulcet - I nearly made this just because it mentions that Chaucer was at the feast), a Sussex pond pudding or this, the Queen of Puddings.

Jane Grigson describes the Queen of Puddings as "a pudding that deserves its name for the perfect combination of flavours and tastes, a most subtle and lovely way to end a meal".

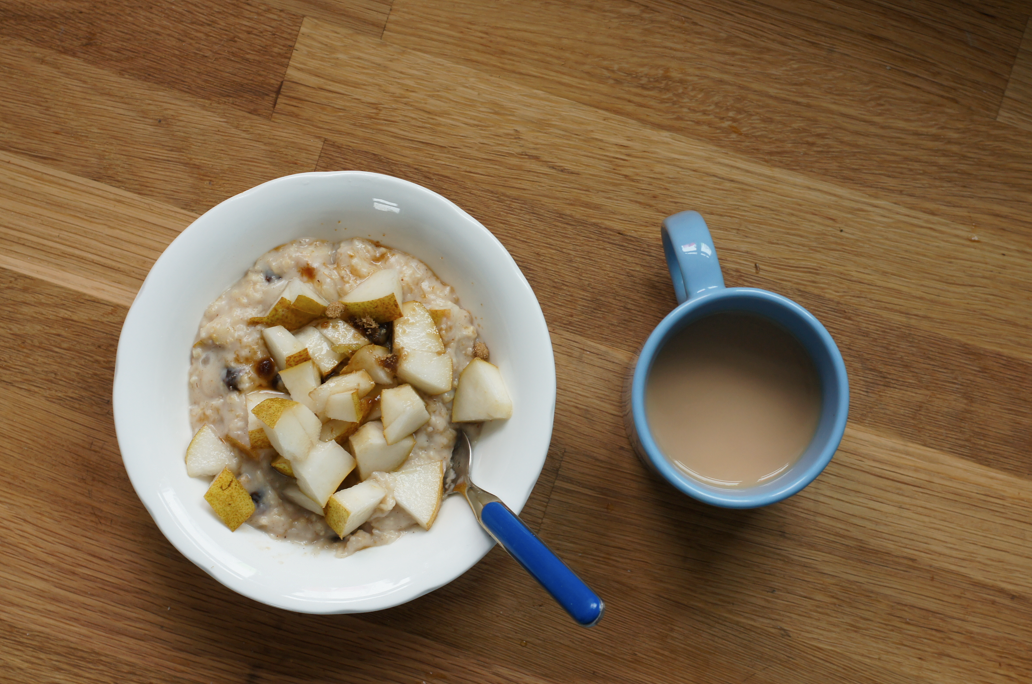
How can a pudding live up to "perfect", to being the winner, to being deemed the "Queen"? It's just like an experience living up to the rosy 'dream' we have called it.


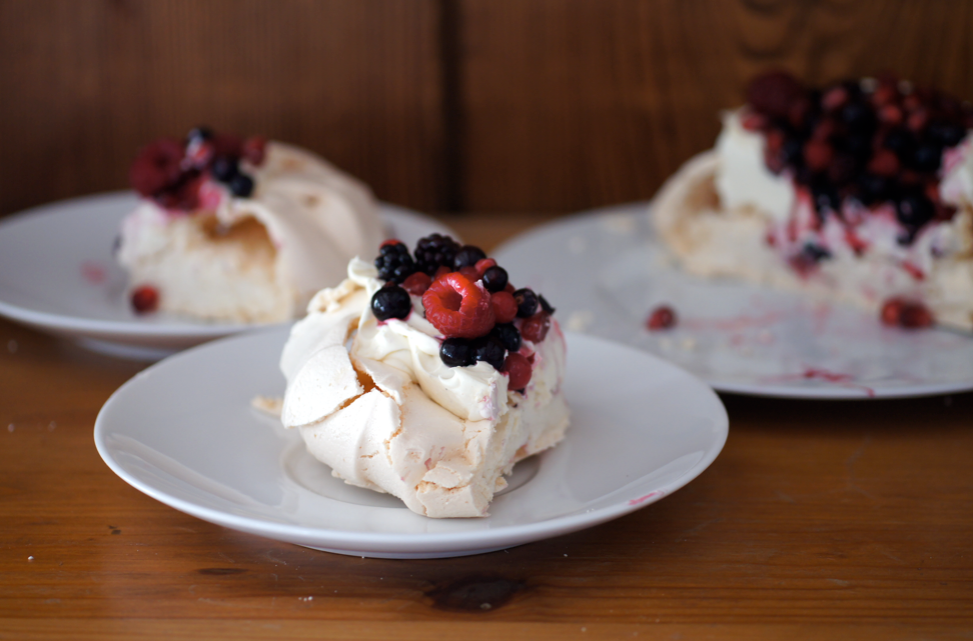
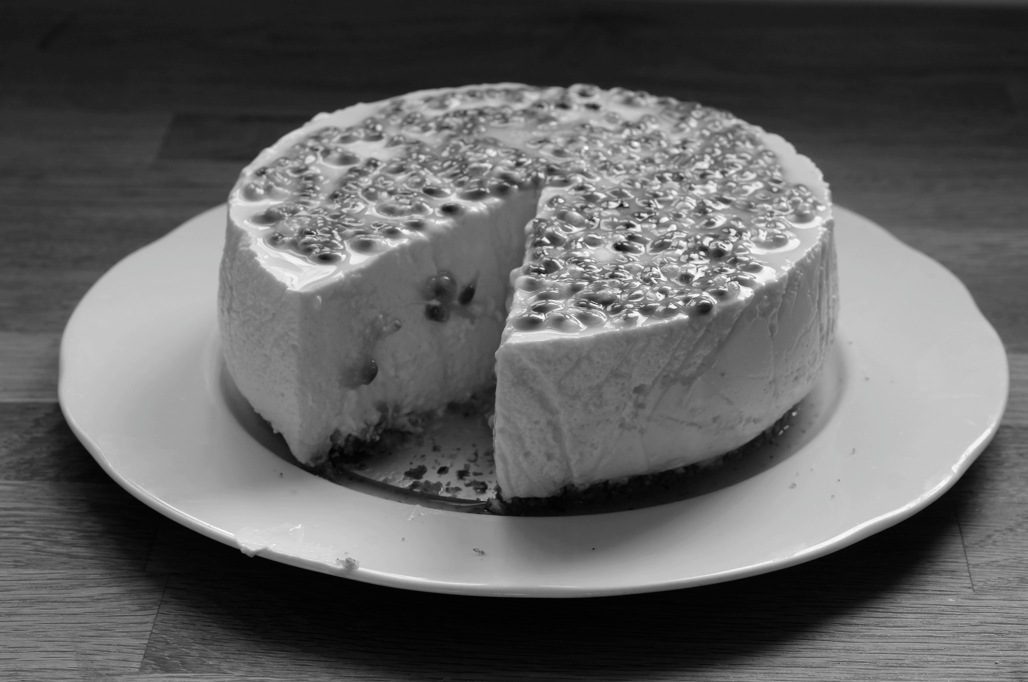
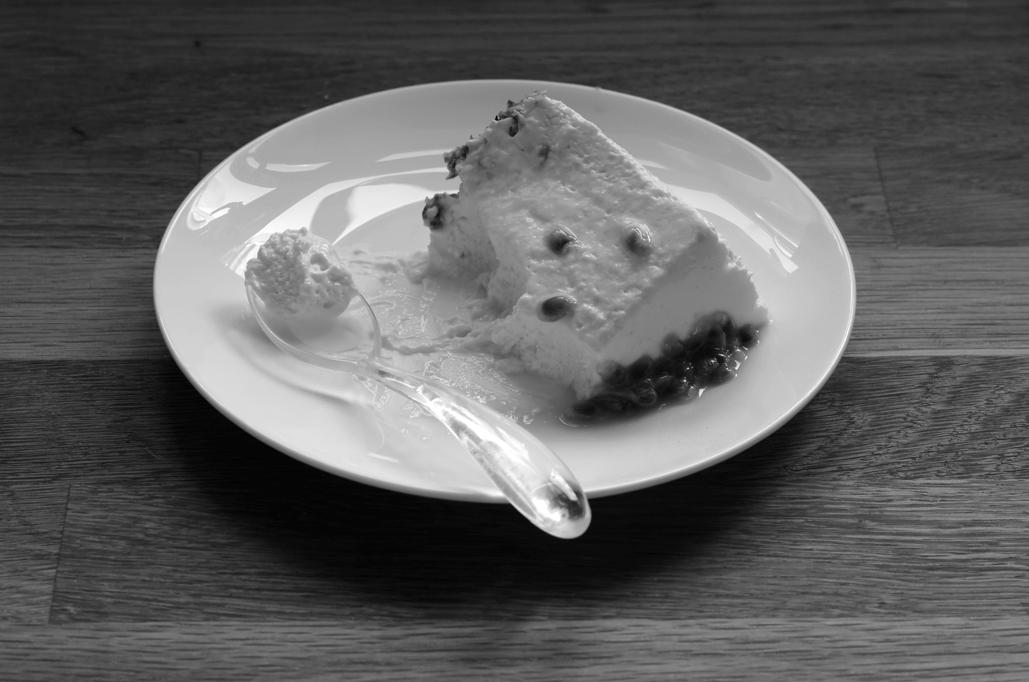
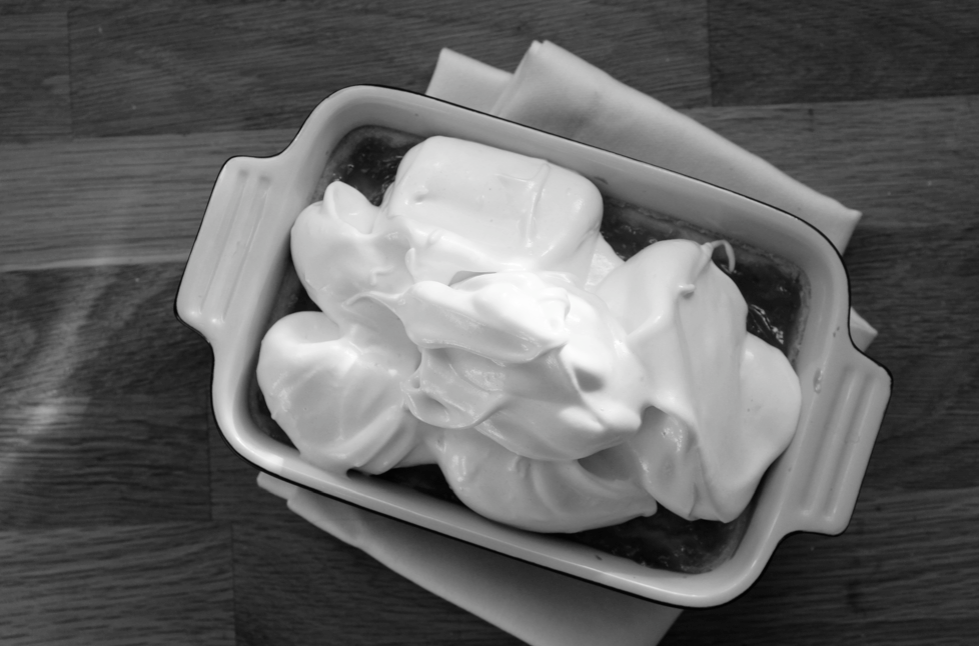
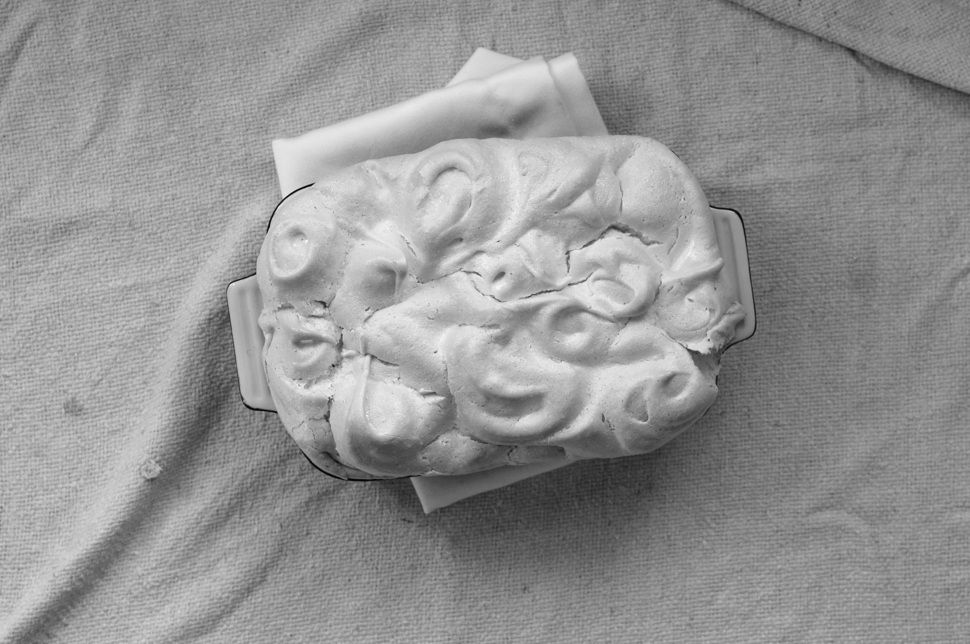
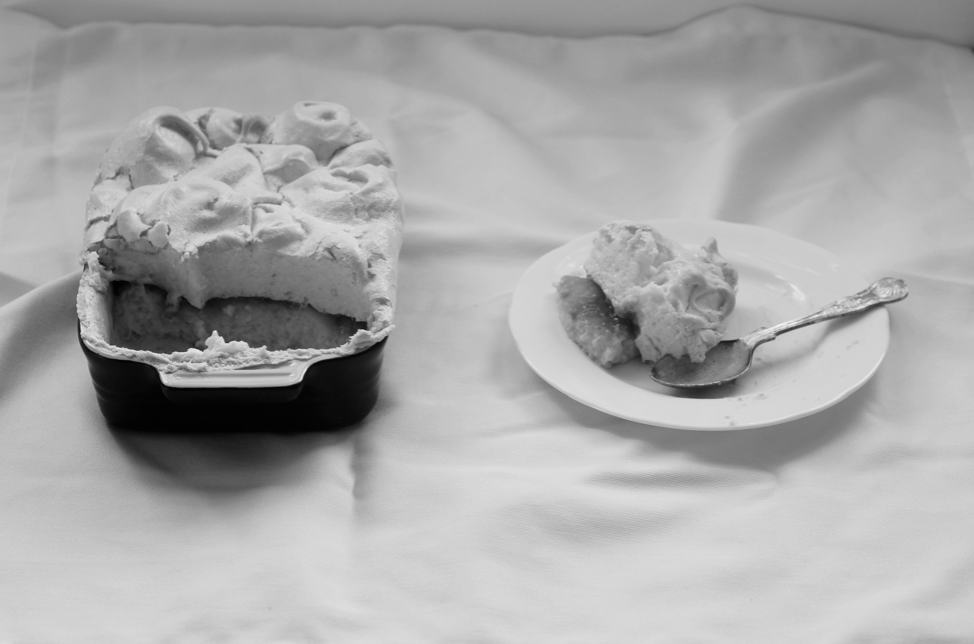
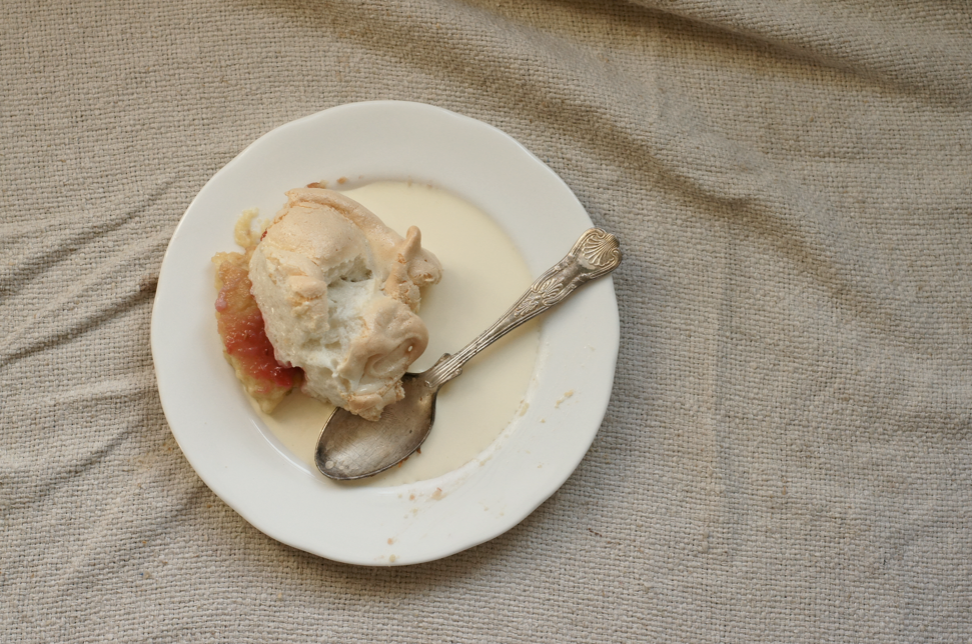
The pudding is definitely "lovely" and "subtle". The custard is warm and nubbly from the breadcrumbs (don't skimp on the vanilla and lemon zest as it brings it to life). The raspberry is only a hint, but it adds another layer of flavour. The meringue is pillowy like pavlova inside and crisp on the outside.

The reality is delicious, but it wasn't quite what I was expecting. It's no worse for that.

Time moves on. The dust settles, familiarity forms and habits are set into place. The next 'dream' or 'queen' recipe slips into the previous place, altered by your new experience. The cycle starts again, pushing you forward onto the next plan, the next idea.

I try to live for today, but my dreams and plans for the future are what drives me - striving for something gives me purpose in life. As with most things, a balance is probably the answer. To not wish the present away but hold onto those dreams. To anchor your feet but keep those brightly coloured balloons tightly wrapped around your hand, propelling you forwards.


Queen of Puddings
(adapted from Jane Grigson's English Food)

For the custard base:
75g fresh white breadcrumbs
zest of 2/3 lemon
2 tsp sugar
1/2 tsp vanilla paste or extract
300ml milk
30g unsalted butter, cubed
pinch of salt
2 egg yolks
1 heaped tbsp raspberry jam or jelly
1/2 tsp lemon juice

For the meringue:
2 egg whites
70g caster sugar (I used golden)

Preheat the oven to 180C/350F. In a medium bowl combine the breadcrumbs, zest and sugar. Stir the milk, butter and salt in a medium saucepan and set over the heat. When the butter has melted into a golden film on the surface and the mixture is steaming but not boiling, pour it over the breadcrumbs. Mix together then let it stand for 10 minutes.

Beat the egg yolks into the breadcrumb mix with a spoon or spatula (not a whisk - you don't want to add air). Pour into a shallow ovenproof dish that holds approximately 750ml. Place into the oven and bake for about 20 minutes, or until the custard is set but still wibbles in the middle (you will be baking it again, so err on the side of underdone). Lower the oven to 150C/300F.

Warm the jam or jelly in a small saucepan with the lemon juice, stirring to combine. Sieve if you've using jam with seeds. Spread over the custard gently, being careful not to break the skin.

Whip the egg whites until they are firm and hold soft peaks. Sprinkle half the sugar over the top and whisk to combine. Repeat with the other half and then whip until stiff and satiny. Spoon the meringue on top of the jam and swirl, making sure it meets the sides of the dish. Place back in the oven and bake for about 25-30 minutes or until golden and crisp to the touch. Serve hot alone or with cream.

(Serves 3-4)

ShareThis