Showing posts with label cake. Show all posts

Thursday, 8 May 2014

Chocolate Torte with Hazelnut Praline


Back in April, Mum asked for three things for her birthday tea: chocolate cake, praline and ice cream. A coeliac friend was coming to the tea so it also had to be gluten free.

Mum had already tried making this chocolate torte with cocoa powder instead of flour, so I decided to start with that. Next, I made a batch of my favourite vanilla ice cream. On a whim I ground the praline down to a fine crumb, which turned out to be wonderful (both on top of the torte and on a spoon).


Last weekend I went to Wales to celebrate a housewarming and generally enjoy the bank holiday. I thought this would be a good recipe to take down as the torte improves with time so it didn't matter which day we ate it. I kept the praline in a separate airtight box (it doesn't keep well on top of the cake) so I'm afraid I don't have an image of the assembled cake for you.

Despite that, I think you can imagine it: a dark torte topped with a thick layer of nutty, crunchy praline crumbs and a big scoop of melting ice cream to meld it all together.


Chocolate Hazelnut Torte with Hazelnut Praline
(adapted from Alice Medrich's Sinfully Easy Delicious Desserts)

For the torte:
70g whole hazelnuts
30g cocoa powder
170g dark chocolate (70-85%)
150g light brown sugar
140g unsalted butter, slightly softened
big pinch of fine sea salt
4 large cold eggs (from the fridge)
1 tsp vanilla extract

For the praline topping:
70g whole hazelnuts
40g white granulated or caster sugar
big pinch of fine sea salt

Preheat the oven to 180C/350F (fan). Lightly butter a deep 8"-9" springform or loose-based tin. Place the hazelnuts on a small tray in the oven and toast for a few minutes until they start to smell and darken and the skins begin to split open. Rub any loose skins off with a clean tea towel or kitchen roll. Put into a food processor with the cocoa powder and blast until they are finely ground.

Place a mixer bowl over a pan of barely simmering water. Chop the chocolate and tip into the bowl. Stir occasionally as it melts. Meanwhile weigh out the brown sugar and salt and cut the butter into cubes - it should be starting to soften, not squishy. When the chocolate has nearly melted, take it off the heat and stir until it's smooth. Place on the mixer (with the whisk attached) and add the sugar, salt and butter. Whisk on medium until the ingredients have fully combined and the mixture has lightened a little. Scrape the sides down then add the first egg. Whip until combined, then add the next egg. Repeat until they're all combined then add the vanilla and whip for 2 minutes on high until stiff and pale.

Add the cocoa-ground hazelnut mixture and fold in. Scoop into the pan and level out. Bake for 23-30 minutes - a tester should still bring up a sticky crumbs and it won't look fully cooked in the middle (a bit like brownies - don't overcook it or it gets dry and crumbly). Place on a wire rack and leave to sink and cool fully in the tin. Wrap in kitchen foil and try to leave for at least one day and up to three before serving.

To make the praline topping, place a sheet of baking parchment near the stove. Toast the hazelnuts (as above, or in a frying pan until a similar stage) - they need to still be warm when they're combined with the caramel. Spread the sugar over the bottom of a medium sized heavy-bottomed pan and place over medium-high heat. Watch carefully - after a few minutes, the sugar will start to liquify at the edges. Don't stir it - you can flick some of the crystals onto a liquid bit, but don't fiddle too much. Once it's nearly all melted and starts to caramelise, swirl it all together. Keep heating until you have a deep golden-bronze colour then stir in the salt and the still-hot hazelnuts so they become covered in caramel. Quickly scrape it all out onto the baking parchment and spread out. Leave to cool (it's ready once the caramel snaps). Break into big chunks then place into a food processor (no need to wash between the earlier hazelnut/cocoa mix) and pulse until it is finely ground (same sort of texture as ground almonds).

Spoon the praline over the top of the cake then serve. It's best with softened vanilla ice cream but a big spoonful of gently whipped cream or crème fraîche also works.

(Serves 10-12)


Three more hazelnut recipes:
Fig & Hazelnut Crumble Bars
Roasted Hazelnut Butter Biscuits
Brown Sugar, Cinnamon & Hazelnut Meringues

Thursday, 14 November 2013

Pear & Caramel Pudding Cake


In the middle of making this cake for the first time, my mum's Kenwood Major died.

It was eighteen years old, bought when I was six. Mum taught me to bake with it. I can't begin to count the number of memories it features in.


It had been going slowly wrong for the past year or so, and finally gave up as I scraped down the sides of the bowl, declining to turn on again to finish creaming the butter and sugar. It went without a whimper or a bang, quietly, in great contrast to the racket it had started to make whenever you managed to twist and push the dial just so to make it turn on.


A few days before the mixer's demise, I came across this caramel apple cake. As I hadn't made anything with pears this autumn I decided to try making a upside down caramel pear cake. That recipe and most other similar cakes I've seen start with a brown sugar mixture on the bottom. I wanted to make one with proper caramel, lightly salted - a sort of tarte tatin/cake hybrid.

I adapted the cake mixture from my Pear and Chocolate Loaf as it's one of my favourites and I already knew it went well with pears. I tried three different types of pear: Bosc, Conference and Comice. Bosc was the best.


Despite the emotional loss of the mixer (and having to do the rest by hand), the first cake came out beautifully.

But then can you really go wrong with buttery salted caramel, tender pears, fluffy cake, caramelised edges and a spoonful or two of thick crème fraîche?


Finally, a quick little guide to fully lining a tin. I rarely think it's necessary to fully line (usually it's just the Christmas cake and similar things) but for this cake I wanted to make sure the caramel didn't leak out.

1.   Take your tin apart and roll out some baking parchment. Use a pencil to draw around the bottom circle of the tin. Cut it out.

2.   Align the side part of your tin with the edge of your roll of parchment paper. Roll the tin along the paper until you have a small overlap then mark the spot.

3.   Cut a strip of paper that's a bit wider than the height of your tin up to the mark - for this, mine was about 4"/10cm wide as my tin is 3"/7.5cm. On the edge that was the outside of the roll (as this is always straight) cut little slits into the paper that are about 0.5-0.75"/1.5-2cm deep all the way along.

4.   Flatten the paper and fold the tabs formed by the slits up on the side that was outwards on the roll (if the paper is put in the same way as it was rolled, it curls inwards). Curl it into the tin so that the tabs are flat on the bottom, then secure it with the circular middle.


Pear & Caramel Pudding Cake

For the top:
100g caster or granulated sugar
30g double cream
2 pinches fine sea salt
2 pears, just ripe, preferably Bosc

For the cake:
125g unsalted butter, room temperature
75g caster sugar
50g soft brown sugar
2 eggs
135g plain flour
1 tsp baking powder
pinch of fine sea salt
2 tbsp unsweetened plain yogurt (or milk)

Preheat the oven to 190C/375F. Fully line an 8"/20cm* tin (as above).

Sprinkle the sugar evenly over the bottom of a large, thick-bottomed pan. Turn the heat up to medium-high and watch carefully - after a few minutes, the sugar will start to liquify at the edges. Don't stir it - you can flick some of the crystals onto a liquid bit, but don't fiddle too much. Once it's nearly all melted and starts to caramelise, swirl it all together. Keep heating until you have a deep golden-bronze colour. Turn off the heat and stir in the cream and sea salt. Quickly scrape into the case and spread out carefully so that it covers as much of the base as possible. It will become hard once it has cooled.

Peel the pears, then chop in quarters and core. Slice each quarter into three. Arrange on top of the hard caramel in a fan shape.

Cream the butter and two sugars together until pale and fluffy, scraping down occasionally - this takes about 5 minutes. Beat the eggs together in a jug. Weigh the flour, baking powder and salt into a bowl. When fully creamed, start adding the eggs, bit by bit, beating all the time (I keep mine on 6 on my KA). About half way through adding the egg, add a tsp of flour, then again towards the end, scraping down each time. Sieve the flour bowl into the mixer bowl then mix together on a low speed. When it has come together, add the yogurt and mix until combined.

Dollop the cake mixture on top of the pears then spread out into an even layer - it won't seem like much mixture but it's fine. Bake for 20-26 minutes until deep golden brown and a toothpick or tester can be removed cleanly from the middle. Place on a wire rack to cool for 10 minutes then remove the side of the tin and the side paper. Flip onto a serving plate and remove the bottom part of the tin and the paper.

I think this cake is much better when warm or hot, so I recommend either eating it immediately or reheating it just before. Best on the day it's made, keeps two days overall. Serve with crème fraîche.

(Serves around 6-8)

Edit 24/10/15: I've changed the caramel to a cream caramel which solves the problems some were having in the comments below (which means the photo above is incorrect for the recipe, sorry). I've also changed the milk for yogurt in the cake.

*I've also started making this in a 9" tin - either is fine, though 9" tends to cook in more like 20 minutes.


Three more posts that involve making caramel:
Salted Caramel Brownies
Choco-Caramel Sundae Sauce
Cider Caramel, Sautéed Apples & Cinnamon Ice Cream

Thursday, 24 October 2013

Apricot & Coconut Loaf Cake


Now the days have become darker and the rain has started pounding on the windows, I've made myself a nest on the sofa. It started when some friends visited last weekend. When they left, they carefully stacked the duvets and pillows from the night before on the sofa. Instead of moving them, I fell straight into the (very comfortable) trap.

Obviously, aside from duvets and pillows, my nest has a large number of books and a laptop cable sneaking out to the nearest socket. All it needed was cake.


This recipe was initially inspired by a cake that I've had a few times at the Vaults in Oxford - I've been meaning to make a version of it for years. The base is a soft, fluffy coconut cake that doesn't dry out. It's laced with apricot jam, which creates a subtle flavour through the cake and a sticky, slightly caramelised bottom. It's a sweet cake, but not in an overwhelming or unwelcome way.

With a large mug of tea, it perfects my autumnal nest.


Apricot & Coconut Loaf Cake

For the cake:
200g unsalted butter, at room temperature
180g caster sugar
3 eggs
120g plain flour
1 tsp baking powder
pinch of fine sea salt
80g unsweetened desiccated coconut
3 tbsp milk
1 tsp vanilla extract
6 tbsp apricot jam/preserve (I like to use a chunky jam that's not too sweet)

For the glaze:
1.5 tbsp apricot jam
1 tbsp water
about a tsp of desiccated coconut

Preheat the oven to 180C/350F. Line a 9 x 4"(23 x 10cm) loaf tin with greased parchment (or as I used here, greased parchment lined foil). Place the butter and sugar in the bowl of a stand mixer (or a mixing bowl if using an electronic hand whisk) and cream until light and fluffy - this takes at least four or five minutes. Sieve the flour, baking powder and salt together.

Whisk the eggs together. Add the egg in small additions to the creamed mix, making sure you beat in between each addition until the mixture has totally incorporated the egg you've added - add a tablespoon of flour about half way through and again near the end to help prevent curdling. When you've finished the egg, add the rest of the flour mix and the coconut and briefly beat to combine. Add the milk and vanilla and stir briefly again until you have a uniform mixture.

Spread 3 tbsp of the jam over the bottom of the tin. Scoop 2/3 of the cake batter on top and level it. Swirl in the remaining 3 tbsp of jam then top with the rest of the cake mixture and level off again. Bake for 45-55 minutes until deep golden brown and a toothpick/skewer can be removed cleanly from the middle.

Combine the jam and water for the glaze in a small saucepan and heat until you have a syrup. Brush it over the top of the hot cake, using all of the glaze. Sprinkle the coconut over the top. Leave to cool in the tin for 5 minutes then lift out onto a wire rack to cool. Keeps for 3-4 days in an airtight tin.

(Makes 1 loaf cake, about 10 slices)


Three more loaf cakes:
Pear and Chocolate Loaf 2.0
Cardamon & Orange Pound Cake
Apricot & Fig Tea Loaf

Thursday, 12 September 2013

Blackcurrant Baked Alaska: A Guest Post


Today's post is over on the little loaf. Kate's a blogging friend that has become an offline friend through a series of dinners (along with Kathryn). Every time we've met in the last year or so, talk has turned to Kate's wedding (I love weddings and wedding chat), so I'm honoured to be filling in for her while she's on honeymoon.

One of the first things we bonded over was ice cream (and a mutual love of David Lebovitz's recipes for it). I knew when she asked that I needed to do something frozen. A few years back I made a mountain range - the Baked Alps - for a Daring Bakers challenge. I was never satisfied with the recipe and so it seemed like the perfect time to update it.

So here it is - a soft sponge base, blackcurrants roasted with brown sugar, David's vanilla ice cream and French meringue, all baked. It's messy, it's rather a big portion and it's absolutely glorious to eat. The post and recipe can be found here.


Three recipes of Kate's I'd like to try:
Bourke St Bakery Croissants
Caramelised White Chocolate Brownies
Chocolate Pistachio Ice Cream Bars

Monday, 22 July 2013

Tarta de Santiago + Food 52


As you might remember, almost exactly a year ago I posted about the Tarta de Santiago, a wonderful almond cake from Spain. I was contacted a few months ago by Food52, one of my favourite recipe sites, asking if I would write about the recipe for their Small Batch column this summer.

So if you'd like to read a bit more about the cake or would like to see the new step-by-step photos, then I recommend you head over to Food52.


Or, if you fancy reading about a different European cake, how about the Toscakaka, an utterly delicious Swedish caramel almond cake from earlier this year...


Thursday, 16 May 2013

Coffee & Walnut Cake v.2


Four years ago, when I first posted about this cake, I had a tempestuous relationship with the icing.

Behind the scenes, the icing in that post caused a fit of frustrated weeping (which was very embarrassing, as my then-brand-new-now-ex boyfriend was staying with me at the time - and let's face it, I was probably trying to impress him). Luckily I left it mixing and a few minutes later, it had whipped itself back.

Mum and I had been making the cake for years - it was my granny's favourite - but because we didn't understand the reasons and techniques behind the recipe, the icing was always nerve-wracking to make.


Delia calls the icing 'mousseline' (which appears to be a catch-all term for various things enriched with butter or whipped cream) but I think it's more accurate to call it French buttercream. One of our first exam dishes at Cordon Bleu involved French buttercream - it's a lot like Italian meringue buttercream except it's based on egg yolks instead of whites. I didn't realise the icings were the same until I made the cake for the first time in a few years for mum's birthday in April. I also found that my old recipe was too brief and not very clear, so I thought this was a good opportunity to talk about French buttercream and rewrite it.

The first step is getting the syrup to the right temperature. I'd recommend testing with a thermometer because it's easier and the finger test takes time. Having said that, if you don't have a thermometer or want to try it out, it's quite fun. The test for thread stage is to spoon a bit of the syrup onto a plate, then wait for it to cool. Squidge some syrup between your thumb and first finger then pull them apart slowly until you have a gap of about a centimetre - a thread of syrup should stay linking the two.


One of the problems is that different recipes take the syrup to different temperatures. It doesn't help that the temperatures stated for the stages seem inconsistent too - for instance, we were taught that soft ball was 116-122C but McGee says it's 113-116C. Thread, similarly, is 105-110C or 102-113C. Though others go to soft ball, Delia recommends 103-5C for this - I've been taking it up to 110C and that has been working well, so I've settled for that.

The second step is to pour the syrup down the bowl into the whisking egg yolks. I found it quite hard to visualise at first and mum used to get into a tangle by pouring the syrup into the whisk and it spinning everywhere, so I decided to do a little video for you. Excuse the little slip of the pan near the end - I'd recommend using a smaller saucepan with a long handle as they're easier to control.


After that, you leave it to whisk until cool. It's really important that the mixture is room temperature before you start adding the butter or it'll melt and create a mess.

Once it has cooled, you add the butter bit by bit. To illustrate the speed to add it (and because I find watching the mixer going round mesmerising), here's a clip of the middle of the step. Also note that I often squish the cube I'm about to add to give it a last minute bit of warmth and pliability. The butter needs to be room temperature but not melting or greasy.


Once the butter is all in, give it few more moments to whip. Finally, you can add flavourings - in this case, coffee.

If it goes a bit curdled towards the end, this can usually be fixed by whipping it for longer. If not, try putting it in the fridge for 15 minutes then whipping again.

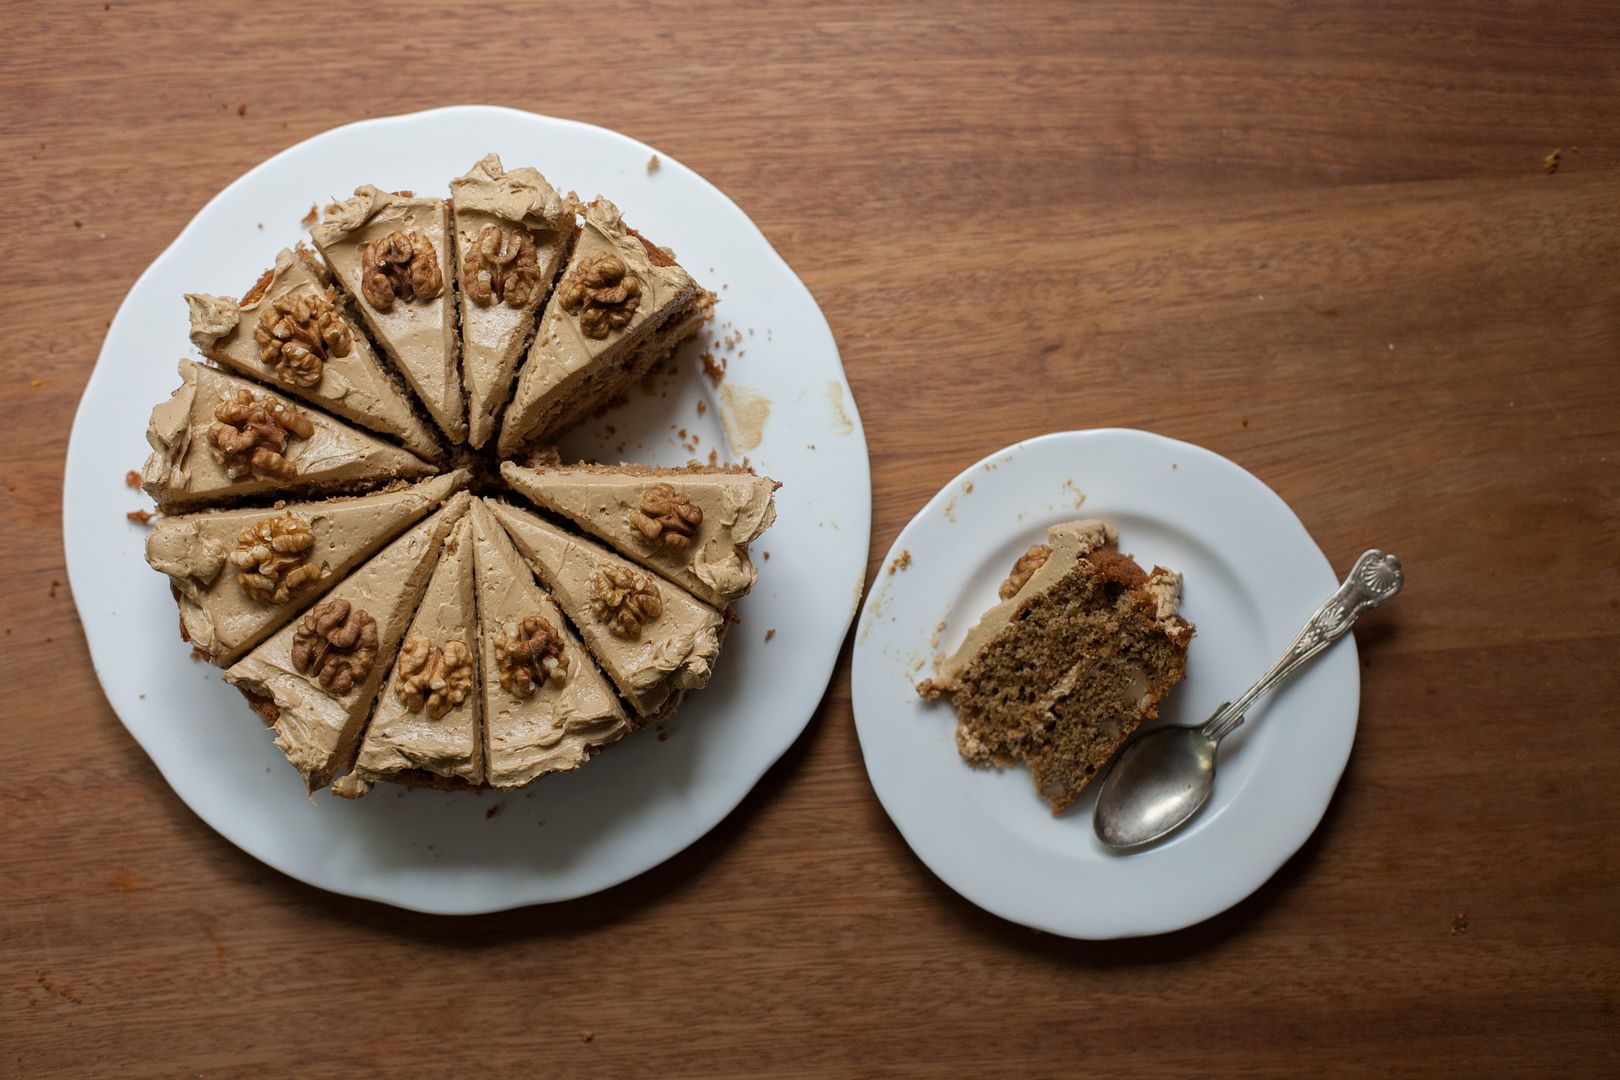
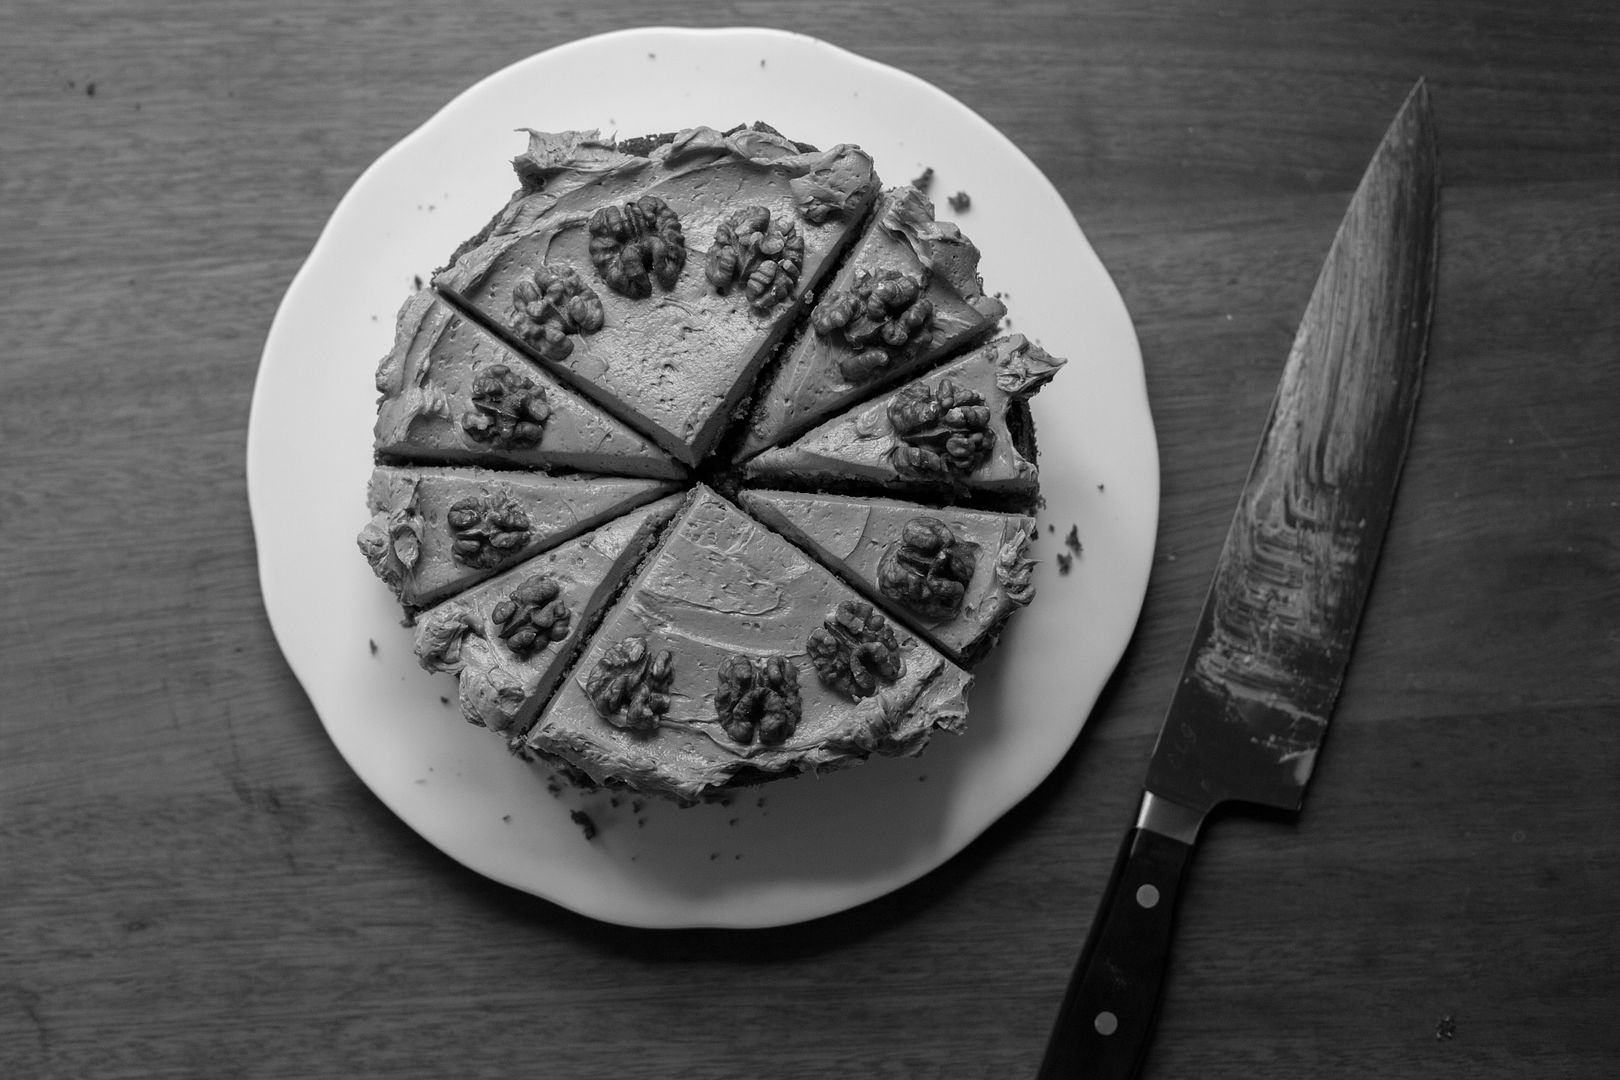
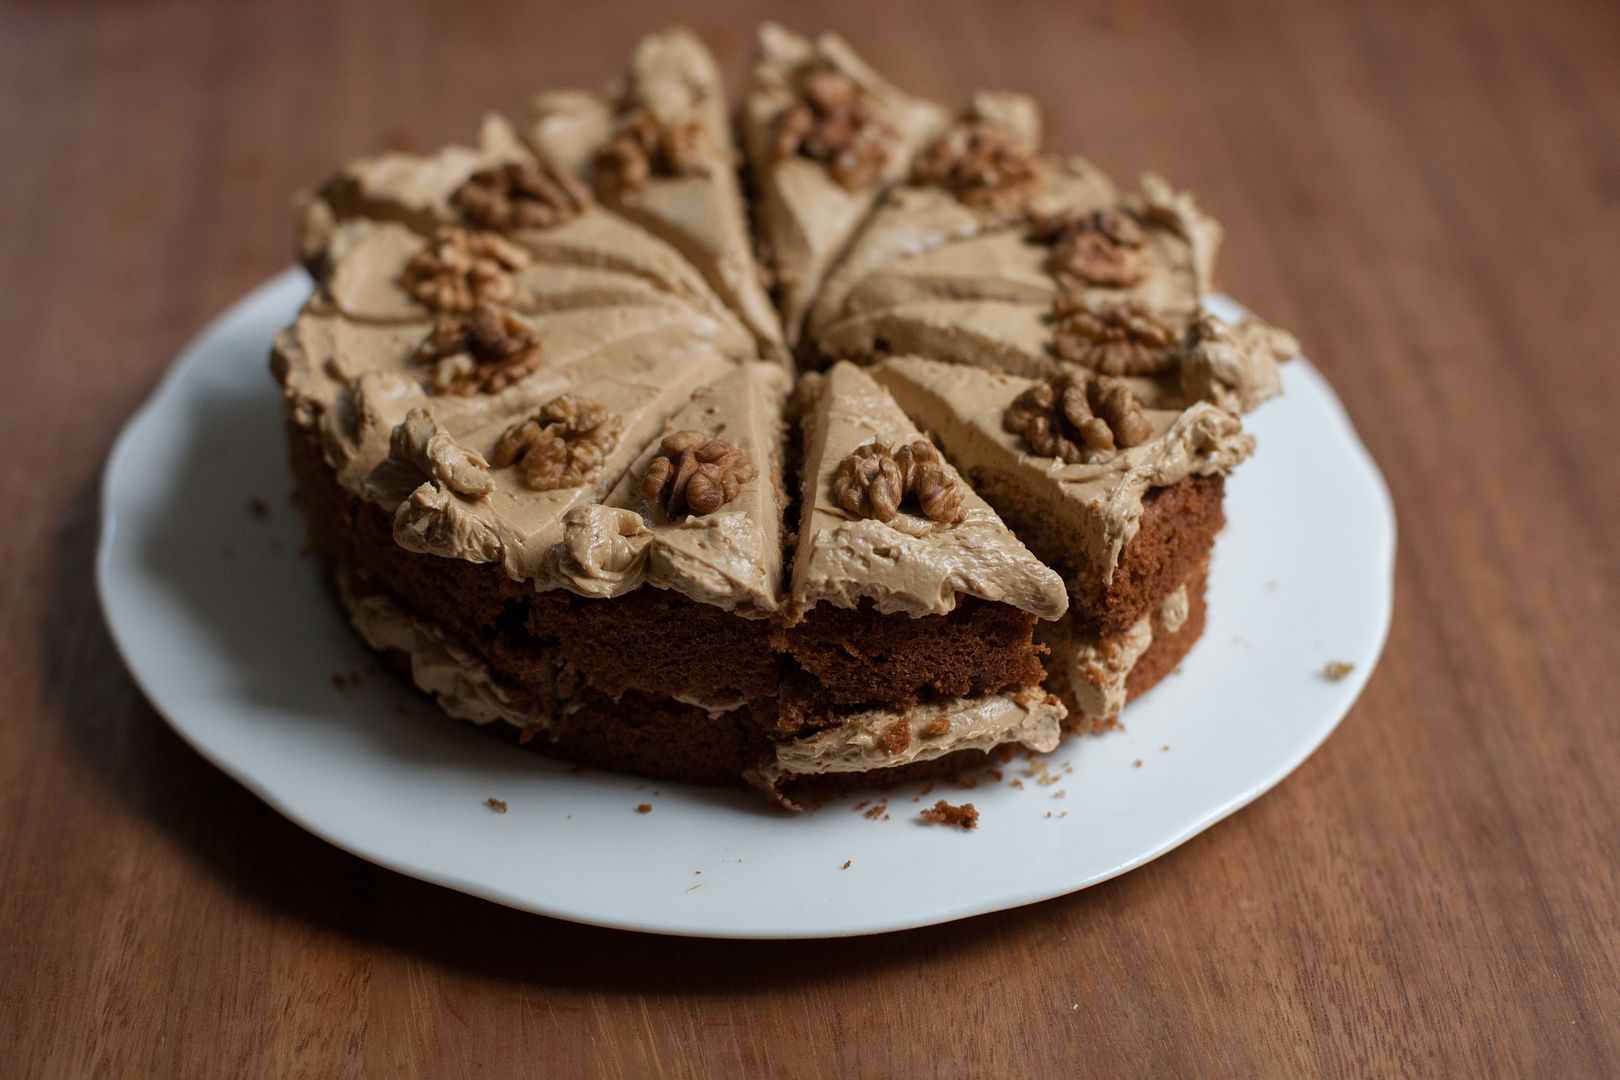
Though the icing is rich, I like it much more than normal buttercream. The bitterness of the coffee and touch of salt cuts through the limited sweetness. It's also very smooth and thick, which is particularly lovely against the crispy-edged cake and toasted walnuts.


When I was making the cake in the photos the other day, I realised I'd run out of unsalted butter when I needed to start warming it up for the icing. I had some salted in the fridge so I decided to try it. The icing finally tasted exactly like I remember it.

It reminded me that mum always used to use salted butter for her baking - partly because that was what was in the fridge - but also because it was apparently harder to buy unsalted when I was little. It made me wonder if something got lost in translation as unsalted became more popular, as many modern baking recipes use unsalted and don't add salt. Perhaps it's because people weren't used to having to add extra salt to sweet dishes as traditionally the butter was salted to preserve it. I guess it's also because of health concerns.

Generally the reason unsalted is preferred is so that you can control the amount of salt. I think a pinch of sea salt improves nearly all baking and desserts. It's useful to have the control as packets vary - my salted butter had 1.8% salt, which is therefore 2.7g in the 150g butter I used. It is quite a bit and while I personally think it tastes amazing in the icing, it would be too much in some other recipes.


Coffee and Walnut Cake
(adapted from Delia Smith's Book of Cakes)

For the cakes:
60g walnut halves + 12 for decoration
1 tbsp instant coffee* + 1 tbsp boiling water
110g unsalted butter, at room temperature
110g caster sugar
2 eggs
110g plain flour
1.5 tsp baking powder
pinch of fine sea salt

For the icing:
2 egg yolks
pinch of salt (or a little more, to taste, or use salted butter)
60g caster sugar
60g/ml water
150g unsalted butter, cubed, at room temperature
1 tbsp instant coffee* + 1 tbsp boiling water

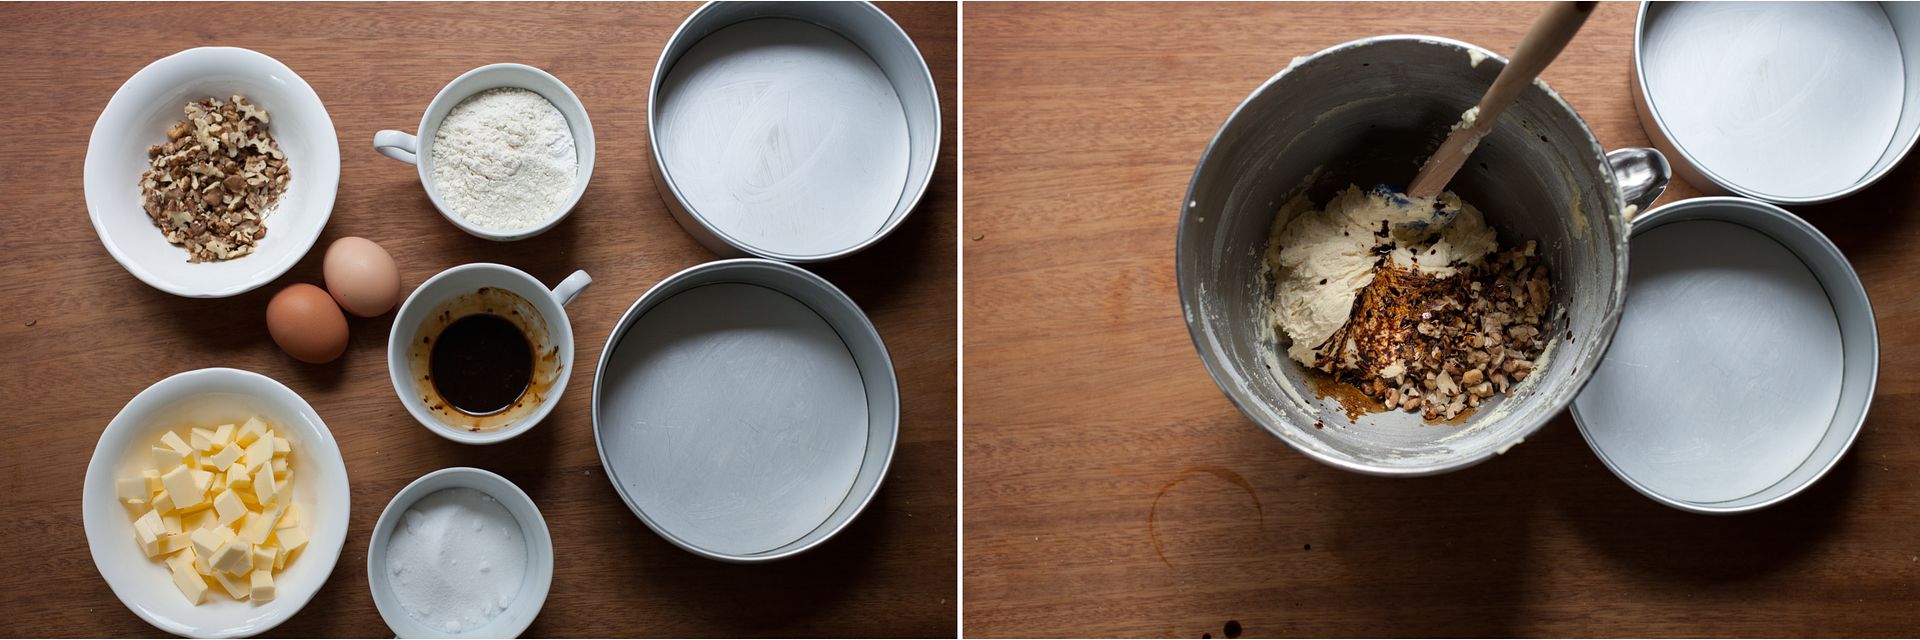
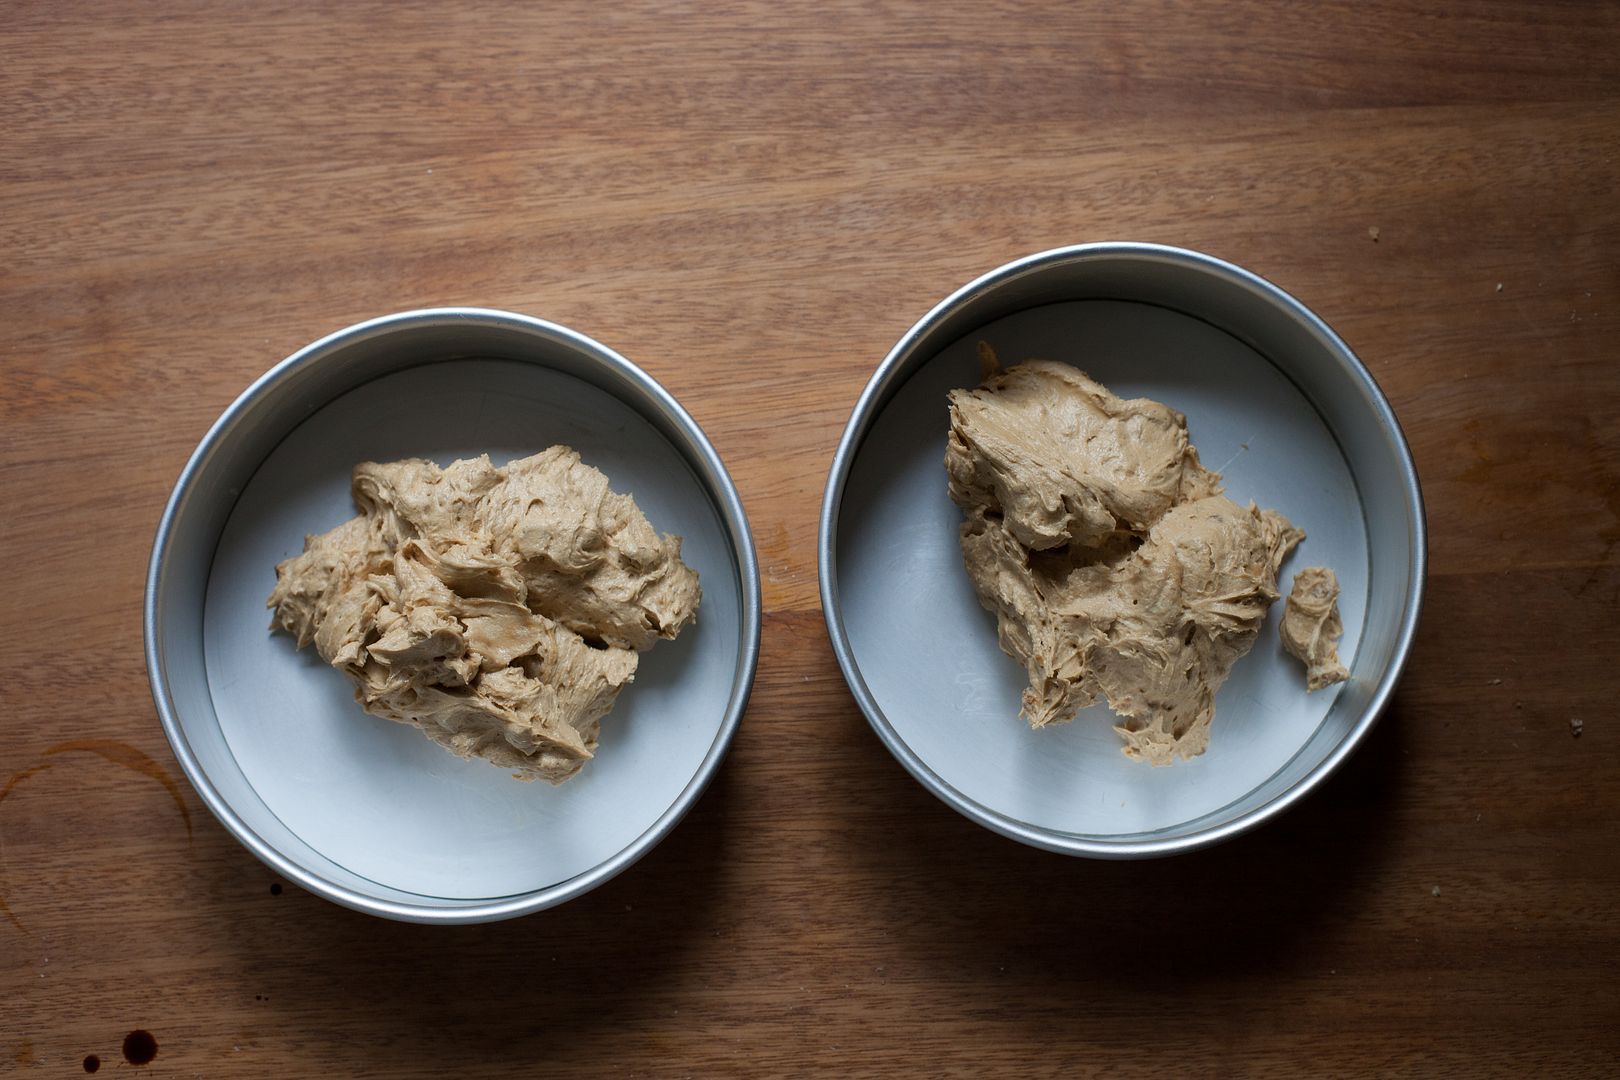
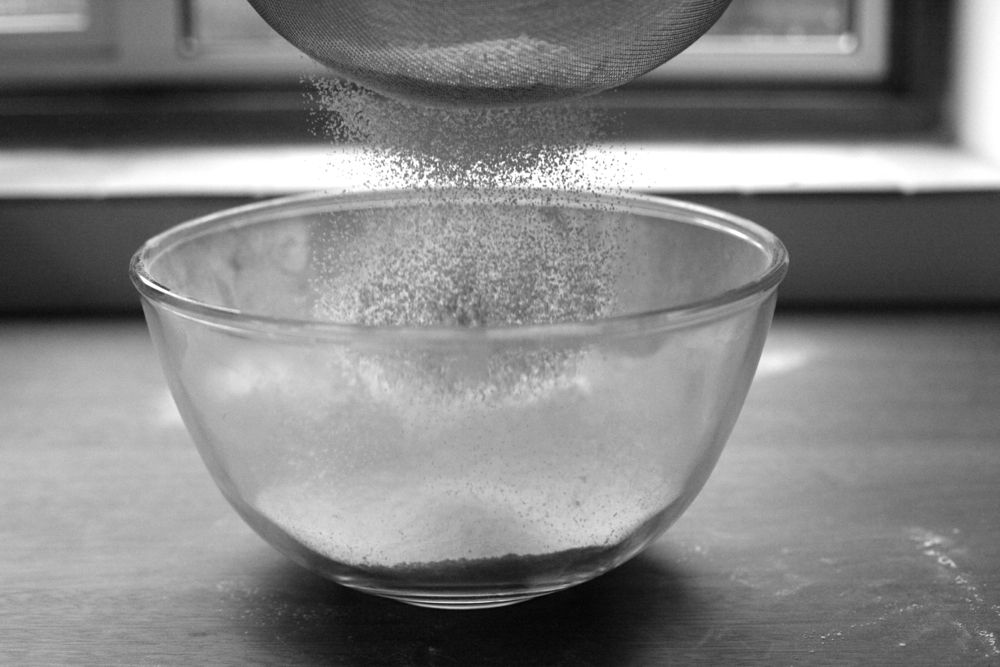
Preheat the oven to 170C/340F. Toast all of the walnuts for 5 minutes then remove the 12 halves for decoration and chop the rest roughly. Grease then line the bottom of two 7" round tins. Combine the coffee and water in a bowl or mug. Cream the butter and sugar together for several minutes until very pale and fluffy. Meanwhile, sift the flour, baking powder and salt together. Beat the eggs lightly together in a jug or bowl then add small amounts to the mixer, beating well in between each addition. When all the egg is incorporated, add the flour and mix on low until combined. Add the chopped walnuts and coffee and fold through. Divide between the tins and smooth out - it will feel like there isn't much mixture but don't worry. Bake for about 25 minutes until a deeper, rich brown and a toothpick can be removed cleanly from the middle. Leave to cool for 5 minutes then turn out of the tins and leave to cool on a rack.

For the buttercream, put the egg yolks and salt into the bowl of a stand mixer with the whisk attached and whisk briefly until broken up and a bit frothy, then turn off. Place the sugar and water into a small saucepan and place over medium heat with a sugar thermometer attached. Once the sugar has dissolved, turn up to medium-high, occasionally giving it a gentle swirl, until it reaches 110C/230F. This takes me about 5-6 minutes (the last 10 degrees are often the slowest). The moment the temperature hits, turn the yolks up to medium speed then steadily pour the hot syrup down the side of the bowl, resting the lip of the pan on the top of the bowl (see video above).

Turn the mixer up and leave to whip until you can't feel any heat in the mixture - this takes about 7 minutes (check if it is cool by touching the outside of the bowl, then if that is room temperature, testing the mix itself with a finger). If it is cool, start adding the butter, which should be soft and pliable but not greasy. Add the butter cube by cube, letting each piece disappear before you add the next. At stages it might start looking weird or curdled but just keep whipping and slowly adding the butter - this all takes about 7 more minutes. When you've added all the butter and have a thick, glossy buttercream, whip in half the coffee, followed by the other half.

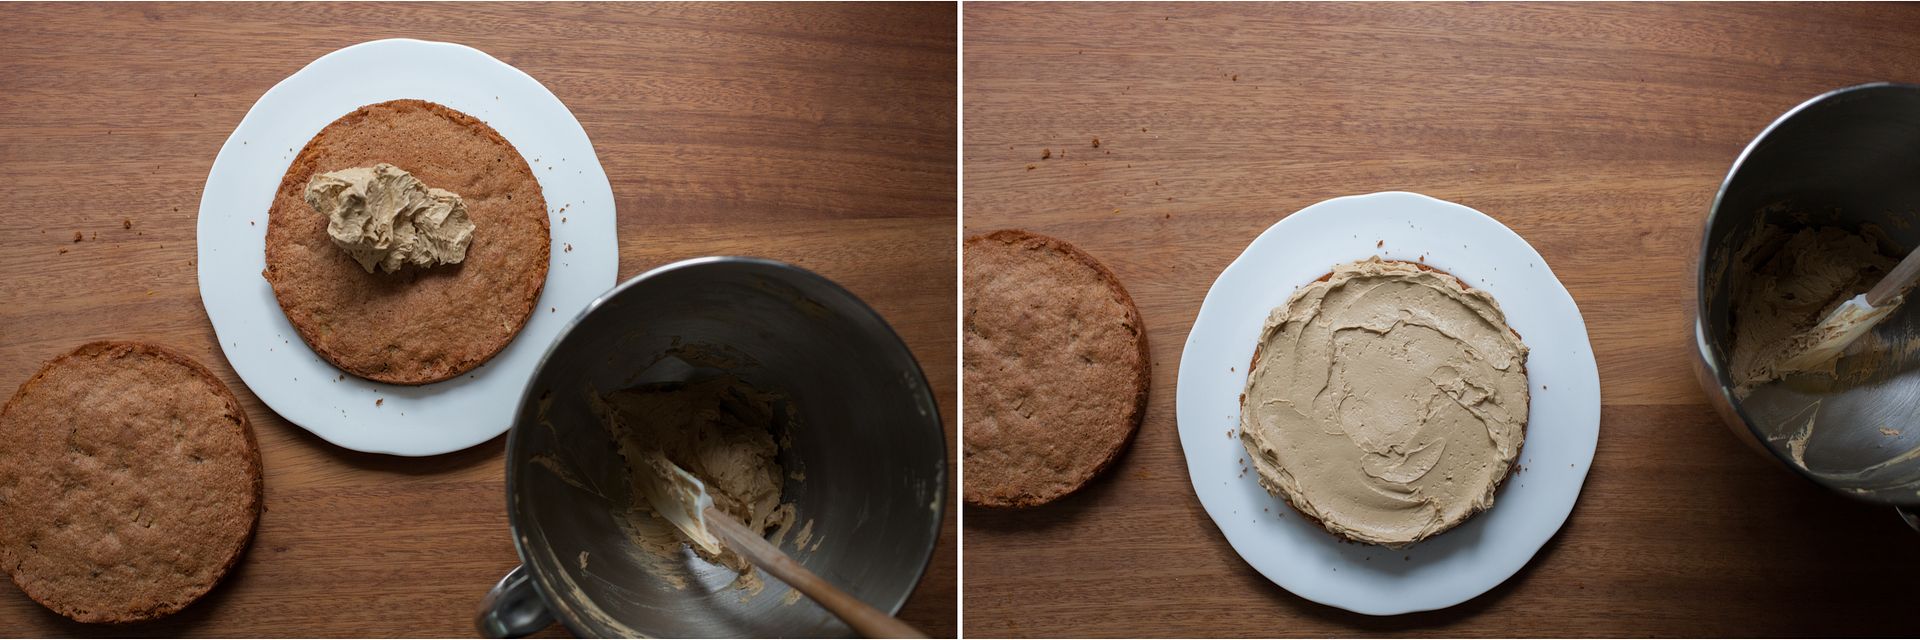
Place one of the cakes on a serving plate. Spread half of the buttercream over the cake then place the other cake on top. Spread the remaining buttercream over the top then decorate with the remaining walnut halves.

(Makes 12 small slices)

* This cake tastes weird to me with anything other than cheap instant coffee as that's what I grew up with. Feel free to try using very strong proper coffee, though I'm not quite sure how you'd get a thick concentrate like this.


Sunday, 7 April 2013

Seed Cake


"I cut and handed the sweet seed-cake - the little sisters had a bird-like fondness for picking up seeds and pecking at sugar; Miss Lavinia looked on with benignant patronage, as if our happy love were all her work; and we were perfectly contented with ourselves and one another."

David Copperfield, Charles Dickens, Chapter 42, 'Mischief', published 1850.


Since coming across this tender scene while reading in preparation for my first term at university, I've found seed cake in several other books and always wanted to try it. As I was already on a history kick with my Hot Cross Buns and Lemon Posset, I decided to see what I could find.


According to the OED, seed cake was first mentioned in 1570 by Thomas Tusser in an new edition of A Hundreth Good Pointes of Husbandrie (I can only find the later Five Hundreth Good Pointes Of Husbandry online). He writes:

"Wife, some time this weeke if that all thing go cleare,
an ende of wheat sowing we make for this yeare.
Remember you therefore, though I do it not,
the Seede Cake, the Pasties, and Furmentie pot."

The feast to celebrate the end of sowing fell on St Martin's Day, the 11th of November. Originally, the forty day fast for advent started the next day, so it would have been an occasion to use up and enjoy rich and special foods (just like Pancake Day before Lent). Over time this association with St Martin's Day seems to have faded and seed cakes became popular all year round.

(Also - on the subject of fasting - BBC Radio 4's Food Programme broadcasted an wonderful discussion on Easter Sunday about fasting from a historical, religious and current 5:2 perspective - you can listen to it here.)


But what is a seed cake? Nicola Humble notes in her book on the history of Cake that the following recipe from 1631 is the earliest recorded for a no-yeast sponge-style cake. It also contains aniseeds and coriander seeds. I've transcribed this from digital images of the edition I found through the Bod, preserving the spelling and capitalisation, though not the long s and other typography (I'd have loved to show you the images but the permissions were a bit complex).


"To make Bisket-bread, take a pound of fine flower & a pound of sugar finely beaten and fearfed, and mixe them together; Then take eight egges and put foure yolks and beate them very well together; then throw in your flower and sug it as you are beating of it, by a little at once, it will take very neere an houres beating then take halfe an ounce of Aniseedes and Coriander seeds and let them be dried and rubbed very cleane, and put them in; then rub your Bisket pans with cold sweet butter as thin as you can, and so put it in and bake it in an oven."

From The English House-wifes, Gervase Markham, 3rd edition, printed in London in 1631, p.125-6.


The recipe continues on to describe how to make thin cakes with the same mixture, which, interestingly, are then called 'Cakes' instead of 'Bisket-bread'. It's also noteworthy that most of the beating takes place after the flour has been added - I imagine it would make a very tough cake (as well as tough arms after nearly an hour of beating...).


I also looked at some later recipes from 1732. Eliza Smith has two recipes for seed cake - one is yeast risen and the another is for a richer sponge with butter, sack (a fortified white wine) citrus and sugar-coated caraway seeds. I've transcribed the second one for you (in a similar way to above):

"A good Seed Cake

Take five pounds of fine Flour well dried and four pounds of single-refined Sugar beaten and sifted; mix the Sugar and Flour together, and sift them through a Hair-sieve; then wash four pounds of Butter in eight spoonfuls of Rose or Orange-flower water; you must work the butter with your Hand, till 'tis like Cream; beat twenty Eggs, half the whites, and put to them six spoonfuls of Sack; then put in your Flour a little at a time, keeping stirring with your Hand all the time; you must not begin mixing it till the Oven is almost hot; you must let it lie a little while before you put your cake into the Hoop; when you are ready to put it into the Oven, put into it eight ounces of candied Orange-peel sliced, and as much Citron, and a pound and half of Carraway-comfits; mix all well together, and put it in the Hoop, which must be prepared at bottom, and buttered, the oven must be quick: it will take two or three hours baking. You may ice it if you please."

From The Compleat Housewife, Eliza Smith, 5th edition, printed in 1732 , p.132-3.


Though the seeds change between recipes, caraway seeds seem to be the most popular choice. Conversely, caraway seeds aren't actually seeds - they're fruits that look similar to cumin and taste a bit like anise. Eliza's recipe appears to have a huge amount of seeds - a pound and a half to five pounds of flour - but I think that's because they're sugar coated comfits. Gervase's half an ounce to a pound of flour seems much more normal. Modern cakes are much smaller - depending on the weight of the pound (there were several systems at the time) five pounds of flour would weigh around two kilos, making an enormous cake - so you just need a pinch or two.

I've tried making two styles of seed cake. They're quite different, both in taste and texture, but I liked the caraway in both. The first recipe I tried was Fergus Henderson's, which is a buttery, rich sponge that is vaguely like Eliza's. I found it impossible to stop the mixture curdling (even after trying every trick I could think of and adjusting the ingredients a few times) but it still rose well and tasted good. I've also spotted a similar-ish caraway seed cake in the beautiful Vegetable Literacy, though I haven't tried it yet.


Finally, and as pictured, I tried adapting my family Old Fashioned Sponge Cake recipe by adding a big pinch of crushed caraway seeds to the mix and sprinkling another pinch of whole ones over the top along with a teaspoon of caster sugar. I made a three egg mix (so the flour is divided by 3 and multiplied by 1.6) and I didn't replace the self-raising with baking powder (as it doesn't really need the extra boost and it seemed more traditional that way). It took 35 minutes to bake instead of 40-45. This version bears more of a resemblance to Gervase Markham's recipe.

I think it's a shame that people stopped adding seeds to cakes - up until the end of the nineteenth century they were in almost every non-fruited recipe, yet now they're a curiosity. It's worth trying a pinch in your favourite plain sponge - if only as a simple way to evoke the past.

*

P.S. I'm very touched - and a little flabbergasted - at the response to the Four Years post. I'm going to work my way through the comments replying to each in the next two days. If you'd like to enter the draw for one of the four presents to celebrate Poires' forth birthday, then please click over here and leave a comment before the 9th. Thank you, once again.


Three more posts about simple cakes:
Brown Butter Pound Cake
Pear and Chocolate Loaf 2.0
Ginger Root Bundt Cake

Friday, 15 February 2013

Raspberry-Redcurrant Jam Swiss Roll


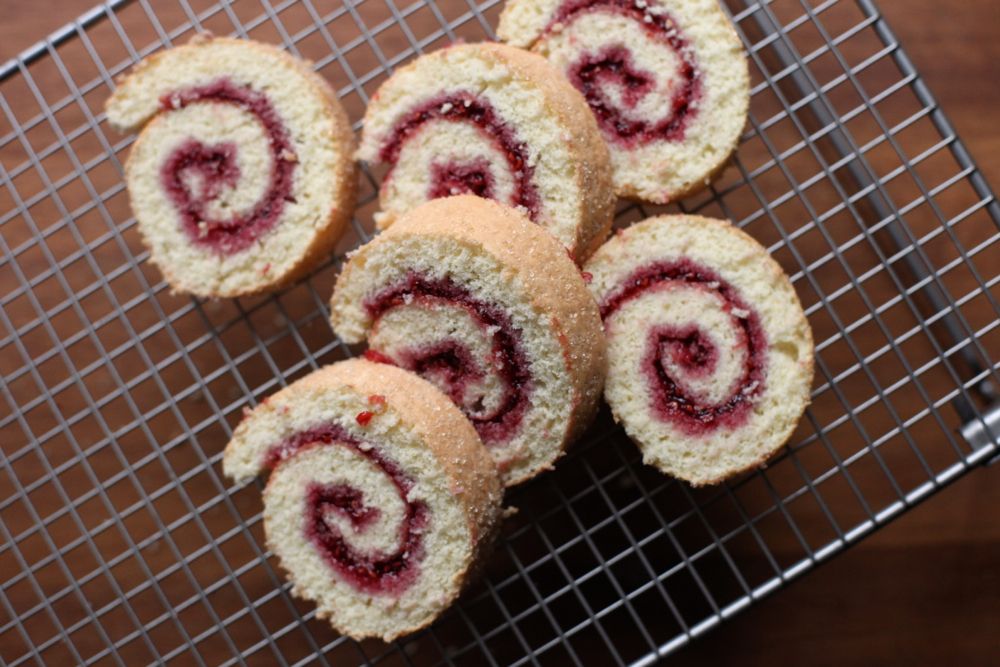
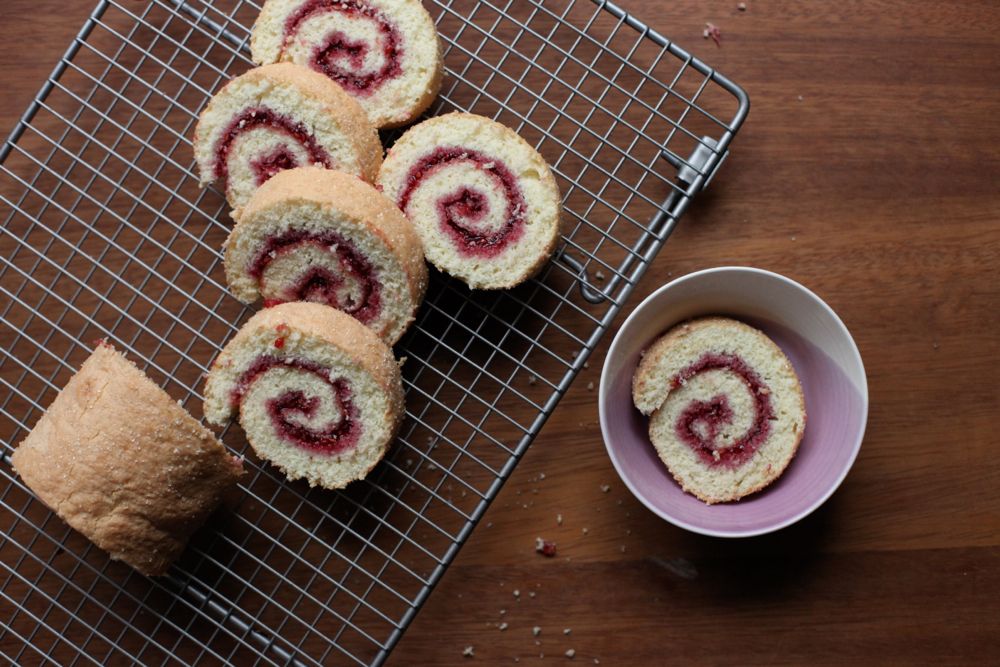
I love the simplicity of a jam roll. There's something very satisfying about a swirl of light, fluffy cake stained with fruity, slightly sharp jam.

Once you've got the hang of it, they're also very speedy, especially as the ingredients are the sort of things you might have to hand. I can usually go from thought to cake in under thirty minutes.


My first attempt at a Swiss Roll, back in 2010, didn't go well. It cracked badly and the sponge tasted bland and was somehow both sticky and dry. Now I have a much better recipe.

I also found it difficult to picture the techniques involved (and a few others have mentioned the same problem), so last week I decided to take some videos. The first is of me spreading the mixture (sounds absurd, but it is delicate and took me time to get right) and the second is of the whole flipping/trimming/rolling process. I hope they make it clearer.

I've also solved the problem of the cake sticking to the parchment by lightly greasing it with butter and using granulated sugar - the bigger crystals keep it off the parchment, don't turn syrupy or sticky and give the outer bites a satisfying crunch.


In recipes that fill the roll with anything heat-sensitive, like my Chocolate Swiss Roll with Peanut Butter Mousse or Bûche de Noël, you have to roll it up between sheets of baking parchment, let it cool, then unroll and fill as below. If I'm making a jam roll with a different flavour (the raspberry-redcurrant jam already has a slight sharpness), I stir in a touch of lemon juice to loosen the set and balance the sweetness.

I was flustered filming the second video as I knew I'd have to make the cake again if I made a mistake. Thankfully I'd already decided to cut the sound, so you can't hear me swear when the side of the sponge sticks to the tray. But, as Julia Child said - 'never apologise'. Just cut more of the side off and proceed as normal - with an extra snack for the chef...


Jam Swiss Roll
(sponge recipe adapted from David Lebovitz's Ready for Dessert)

80g plain flour
30g cornflour
1/2 tsp baking powder (optional*)
pinch of fine sea salt
3 eggs
25ml cold water
120g caster sugar
tbsp or so of granulated sugar
jam to fill (about 150g)

Preheat the oven to 170C/340F. Lightly grease and line a baking tray that's at least 30 x 40cm (the one above was a bit small). Sift the flour, cornflour, baking powder and salt together three times. Place the yolks and water into the bowl of a stand mixer and whisk on high for 1 minute. Sprinkle the caster sugar in and whip for 4 minutes until pale, thick and a ribbon of mixture stays on the surface for the count of five. Whip the whites until a peak on the end of the whisk stays stiff. Carefully fold a third of the flour into the yolks with a big metal spoon, then another third, followed by a third of the whites, the rest of the flour, then the rest of the whites. Carefully scoop out onto the tray (but don't scrape any gluey/unmixed bits off the spoon/bowl) and use a big palette knife to confidently sweep it out into an even rectangle of roughly 25 x 35 cm (see video above).

Bake for 10-12 minutes until light golden brown, slightly risen and springy to the touch in the middle. While it bakes grease a square of parchment bigger than the cake and sprinkle with the granulated sugar. Get a big knife, cake rack and the jam ready (I usually do this on the dining table for space). When it comes out, let it sit on the tray for 1 minute, then flip out onto the sugary parchment. Carefully peel the parchment off the bottom of the cake. Cut a thin slice off the edges to straighten them and stop it cracking as you roll. Spread the jam liberally over the sponge, leaving a cm gap around the edge. At one of the short ends of the rectangle, use the knife to dent (not cut) about 1 cm into the end. Use this to start rolling the sponge up, keeping it tight and peeling off the paper as you go. When you get to the end, tuck the end underneath. Trim the two swirly ends with a serrated knife to neaten them up and leave to cool for a few minutes before slicing.

Best eaten when just cooled. It keeps in a tin for a day and freezes well.

*The baking powder gives it an extra boost - you can easily make it without, but it helps if you're worried about losing too much air when you're folding and spreading.

(Makes 1 roll, 8-10 slices)


A few more posts that involve whipping egg whites:
Tiramisu
Pomegranate and Berry Pavlova
Old Fashioned Sponge Cake

Thursday, 31 January 2013

Toscakaka (Caramel Almond Cake)


About a week ago, I spotted this recipe and pencilled it in for the end of February. After testing it for the first time, I sent the draft to mum for her to try. Her pupil declared it the best cake she'd ever eaten and asked to take some home for her parents. They made the same claim.

I made it again yesterday and handed half to a friend. A few hours later, I got four texts in quick succession:
'Oh'
'My'
'Goodness'
'That cake is delicious.'

It seemed cruel to keep the recipe under wraps for a month. Besides, it's the perfect way to celebrate the end of January.


I found the recipe in Signe Johanson's fantastic book from last year, Scandilicious Baking. I've only tried two recipes so far but they've both been excellent.

Signe notes that this is "the quintessential Scandi cake". In an inspired move, she adapts the tradition by adding salt to the topping. After my first test, I decided to toast the flaked almonds - I think the texture and flavour is better.

Toscakaka is essentially a simple whisked sponge topped with a gooey caramel almond topping that seeps into the cake and hardens on top to a crunchy praline. The edges, in particular, are irresistible. It reminds me of the famous Chez Panisse Almond Tart - and that's a very good thing.

The only difficult part is persuading yourself to leave the topping alone instead of picking bits off and then, ashamed by your uncouth behaviour, trying to make it look like you didn't.


In Signe's book and my other book on Scandinavian baking, Puccini's opera 'Tosca' is suggested as a source for the name. You can watch the Royal Opera House's 2011 production online - I'm listening to it as I write.

The second half of the name also caught my eye. 'kaka' is the Swedish word for cake, which is the same as the original Old Norse word (Old Norse is the medieval ancestor of Swedish, Norwegian, Icelandic and Danish). Though the etymology is still debated, it is thought that our word 'cake' was borrowed from Old Norse in the 13th century, like many other common words (medieval loanwords from French, Latin and Norse were my favourite part of my brief time studying the development of English).

At that time, cake would have meant a yeasted bread, not a light, fluffy sponge created by whipped eggs and baking powder, cloaked in buttery caramel and crisp nuts.


Finally, two things:

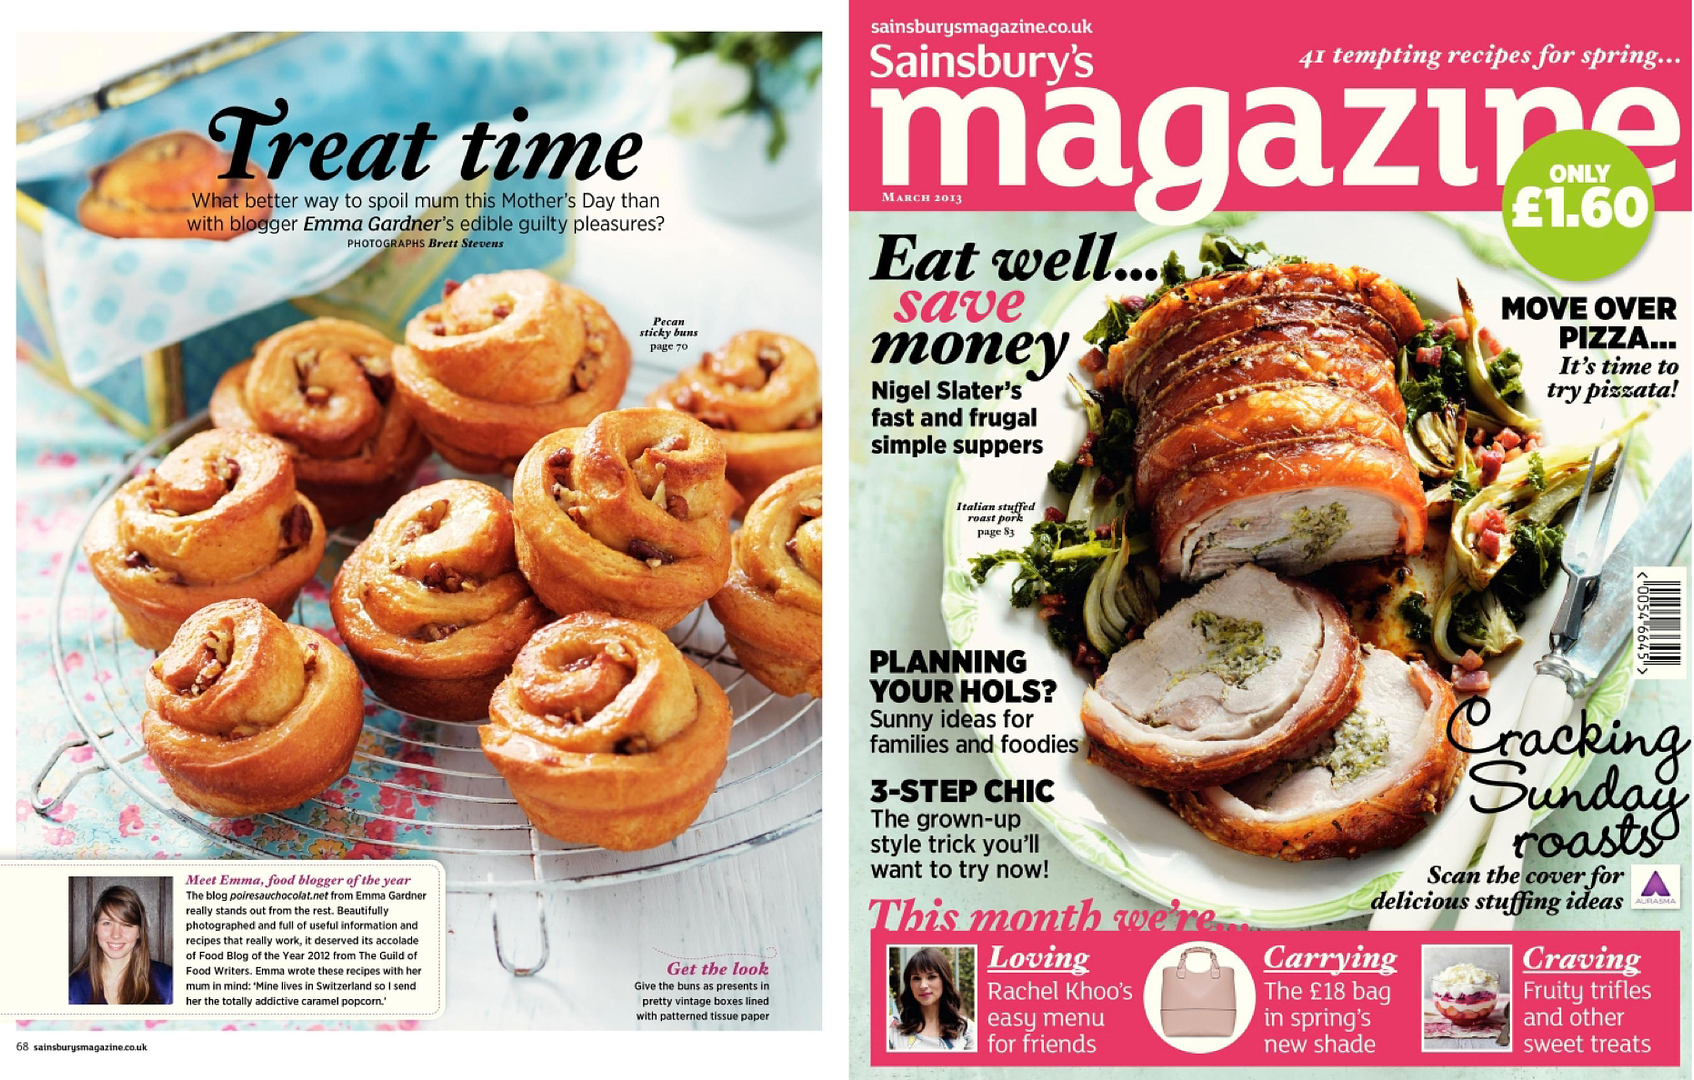
1/ My first ever proper recipe feature is out in the March Issue of Sainsbury's Magazine! I've known about this for about nine months so it's amazing to finally see it in print and get to show you. It's crazy to see my recipes in a magazine-style shoot, without the context of my writing and photography. You'll find the feature on pages 68-70 and there's another little bit with me on page 7. The are three recipes: pecan sticky buns, cocoa-rolled passionfruit truffles and proper caramel popcorn.

2/ I've been reading and revisiting a lot of my food books recently. I thought it'd be good to collect my favourites somewhere. In the end I made a Pinterest board (it's easy to keep adding to and links to amazon). You can find it through the photo link on the sidebar (the photo is of some of my food bookshelves) or here. I'm including recipe-based, memoir, history and reference books.


Toscakaka (Swedish Caramel Almond Cake)
(adapted from Signe Johansen's Scandilicious Baking)

For the cake:
70ml milk
1 tsp lemon juice
75g unsalted butter
3 eggs
150g caster sugar
1 tsp vanilla extract
150g plain flour
1 tsp baking powder
1/8 tsp fine sea salt

For the topping:
150g flaked almonds
125g butter
125g light brown sugar
50ml milk
1/2 tsp sea salt
1/2 tsp espresso powder (optional, could replace with vanilla)*

Preheat oven to 160C/320F. Grease a deep 9" round tin (preferably with a removable bottom) and line the bottom with baking parchment. Stir the lemon juice into the milk and leave to sit (to make buttermilk, you can replace with 75ml if you have it on hand). Toast the almond flakes in a oven tray for 5-7 minutes until they're a light golden brown, then set aside.

Melt the butter for the cake in a medium saucepan then pour into a bowl and leave to cool (keep the pan to use later). Whip the eggs, sugar and vanilla together in a stand mixer on high for 5 minutes (time this if at all possible), until the mixture is a creamy colour and very thick (when you remove the whisk, the trail should stay visible for at least 5 seconds). While it whisks, sieve the flour, baking powder and salt together. Sieve 1/3 of the flour mixture over the egg bowl then gently fold in with a big metal spoon or large spatula (see this video to see how). Drizzle half of the milk over the top and fold in. Repeat with the next 1/3 of flour, the rest of the milk, then the rest of the flour. Finally drizzle half of the butter over the top, fold in, then repeat with the remaining butter. Be very gentle but thorough, scraping the bottom - it's easy to get little pockets of flour but you need to conserve as much volume as you can. Carefully transfer to the tin by scraping it gently out from as little height as possible.

Bake for 25-30 minutes until golden and set (a toothpick should be able to be removed cleanly - it needs to be cooked to support the topping). While it bakes, make the topping. Place the butter, sugar, milk, salt and espresso powder into the saucepan and stir as the butter melts. Keep heating for a few minutes - it should bubble and thicken slightly. Stir in the almonds and set aside. When the cake is ready, turn the oven up to 200C/390F, remove the cake to a rack and spoon the glaze over the top. Spread the almonds out into an even layer. Place back into the oven and bake for 8-10 minutes until the glaze is darkened and bubbling. Cool for a five minutes then slide a knife around the edge of the tin to loosen the sides and remove the cake to a rack.

Best eaten once it's cooled to room temperature, though I have to admit to trying a warm slice with a scoop of vanilla ice cream. It keeps well in an airtight tin for two days and is still alright on the third.

(Makes about 8-10 slices)

*Coffee isn't a traditional addition but I think it's delicious. Up to you.

(Updated 27/07/15)


A few more almond posts:
2012: Chez Panisse Almond Tart
2010: Raspberry and Almond Layer Cake
2009: Lemon and Almond Cake

Friday, 18 January 2013

Brown Butter Pound Cake


It's been snowing all day in Oxford. I spent most of the day in the kitchen, watching the flakes fall and gather outside.

I've made this pound cake four times in two weeks. It's simple but shockingly good. Brown butter usually ends up as a background to other flavours, which is a shame (though I'm guilty of using it in all sorts of recipes). This cake keeps really well in a tin and freezes beautifully, as well as being both robust and fluffy.


When I first set about converting this cake from the original olive oil version to butter, I realised I had no way of working out how much solid butter I needed to create the required volume of liquid brown butter. Guessing seemed a bit... boring. Guessing also wouldn't help me the next time I needed to do it. So I spent my Sunday afternoon browning most of the butter in our fridge, armed with a calculator and the scales.


On the butter packet it should tell you the % of fat, protein and so on. The fat is usually around 82% (I believe it has to be 80% to be classed as butter) and the others total about 1%. This is what will be left when you've browned the butter and the water has evaporated - so for 100g of solid butter you'll get 83g of brown butter.

After experimenting, I worked out that the density of brown butter is 0.93 g/ml (mass/volume, 93g of brown butter is 100ml).

To work out how much solid butter you'll need, you first calculate the weight of brown butter you'll need to get the correct volume by rearranging the density formula (this recipe is the example in bold):

required volume (165ml) x 0.93 (density) = mass of brown butter (153g)

Then work out the amount of solid butter needed to create that mass of brown butter, using the package percentages:

mass of brown butter (153g) / 0.83 (% of fat + others in butter) = mass of solid butter (185g, rounded up to nearest workable weight from 184.3)

I've tried it out a few times and it's always worked. So, erm... yes. For those of you who want to try swapping brown butter for oils in recipes, no need to guess.

[/baking geekery] (Does it make it worse that I just spent a good ten minutes looking up the etymology of 'geek', 'nerd', 'boffin' etc on the OED? Probably.)


Brown Butter Pound Cake
(adapted from Cardamon Orange Pound Cake, which was adapted from the Olive Oil Pound Cake in Alice Medrich's Sinfully Easy Delicious Desserts)

185g unsalted butter
200g caster sugar
pinch of fine sea salt
3 eggs, cold from the fridge
200g plain flour
1 and 1/4 tsp baking powder
165ml whole milk
1 tsp vanilla paste (or extract)

Place the butter into a big pan and set over medium heat. Keep heating until you have brown butter (see this post for more detail/a step-by-step). Pour into a bowl and leave to cool - it needs to be room temperature. If there's any foam still lingering, spoon it off.

Preheat the oven to 180C/350F. Either line a loaf tin (around 9"/23cm long) or carefully grease a round/decorated tin (the one shown is about 8.5"/21cm across). Scrape the cooled butter into a stand mixer bowl and add the sugar and salt. Beat together until creamy, then add the eggs one by one, beating in between. If it curdles, don't worry - that's normal. Beat on medium-high for 5 minutes (do time this, it makes a difference) until pale and thick.

Sieve the flour and baking powder together. Tip a third into the mix and stir together on low. Slowly add half of the milk and briefly beat. Add another 1/3 of the flour, the rest of the milk, then the rest of the flour, combining in between. Add the vanilla and beat together one last time. Scoop into the tin and spread out.

Bake for 45-50 minutes until a toothpick comes out clean and the cake is a deep brown. Leave to cool in the tin for 5 minutes then turn out onto a rack. Best eaten once cooled. Keeps well in a tin for a few days and freezes extremely well.

(Makes one cake, about 16 slices)


A few related posts:
Old Fashioned Sponge Cake
Ginger Root Bundt Cake
Cardamon Orange Pound Cake

Thursday, 18 October 2012

Apple & Cinnamon Layer Cake


One of my closest friends recently moved into a house across the street. She had been staying with me for a bit before, so we just carried her things across our little road, arms full of books, clothes and open boxes.

Last weekend they had a housewarming. I made cake.


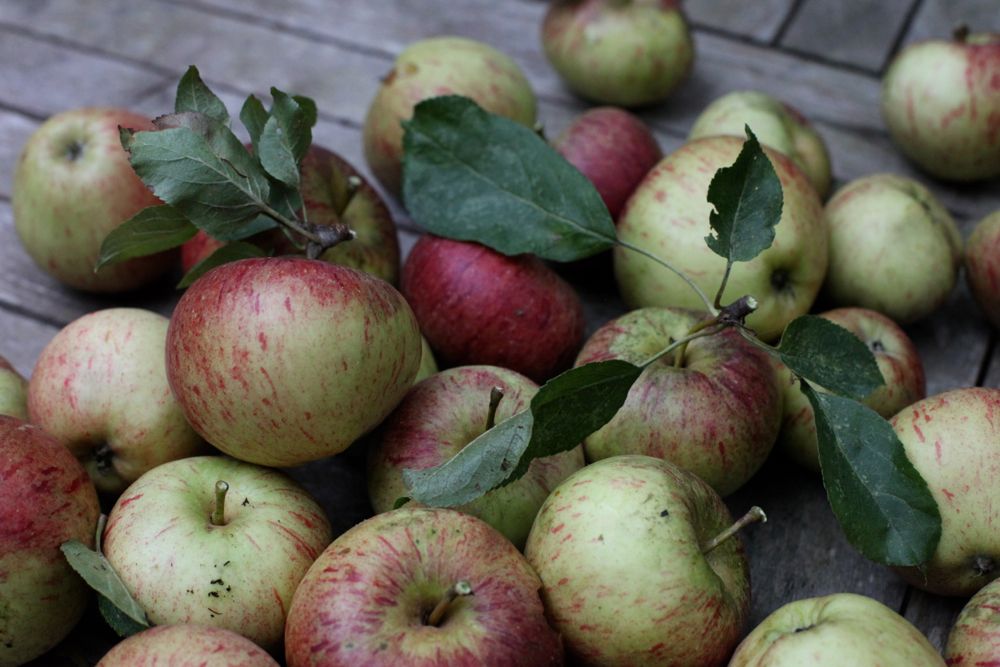
As I mentioned in my post about Cider Caramel, Sautéed Apples and Cinnamon Ice Cream, there is an apple tree in my tiny garden. I finally harvested all of the remaining apples last week. I broke because the resident grey squirrel - Greg - started taking little nibbles out of apples while they were still on the tree, keeping mildly insolent eye contact with me as he left them bobbing on their branches, just like a child placing an incomplete apple back into the fruit bowl.

Now I've picked them, he's moved onto the clusters of coral rosehips. Last weekend he even had a friend (I like to think it was a ladyfriend) perching next to him. They both watched through my kitchen windows as I cooked with my (/his?) apples, gobbling away on the rosehips clutched to their chests.

(This, my friends, is what happens when I let my mind wander when I'm in the kitchen. I start producing life stories and deducing personalities for squirrels, which leads to a daily habit of saying good morning - normally with a curt nod and fleeting eye contact. I blame Beatrix Potter.)


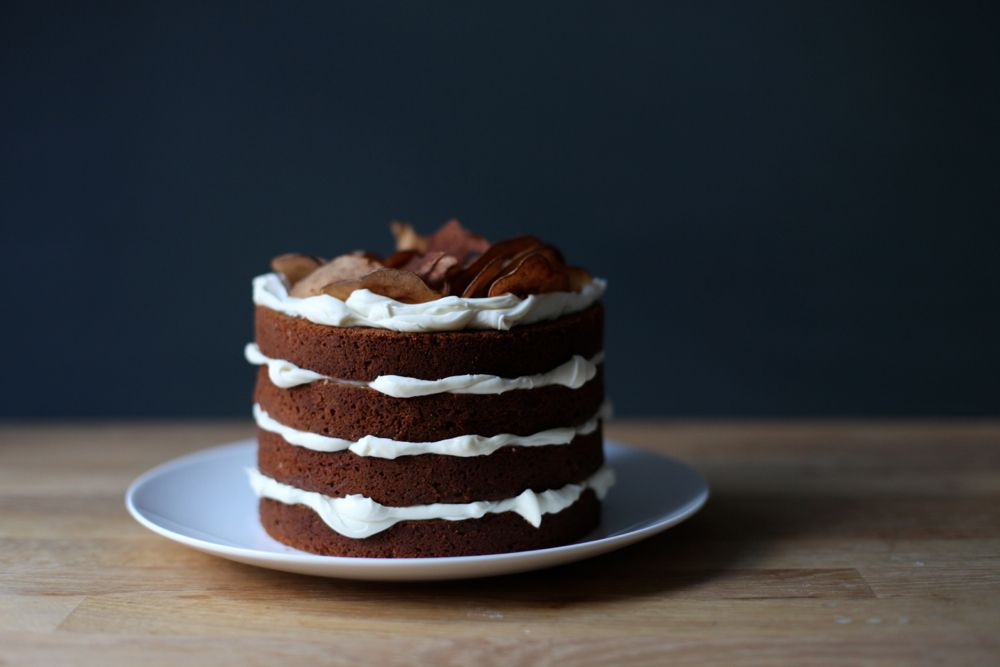
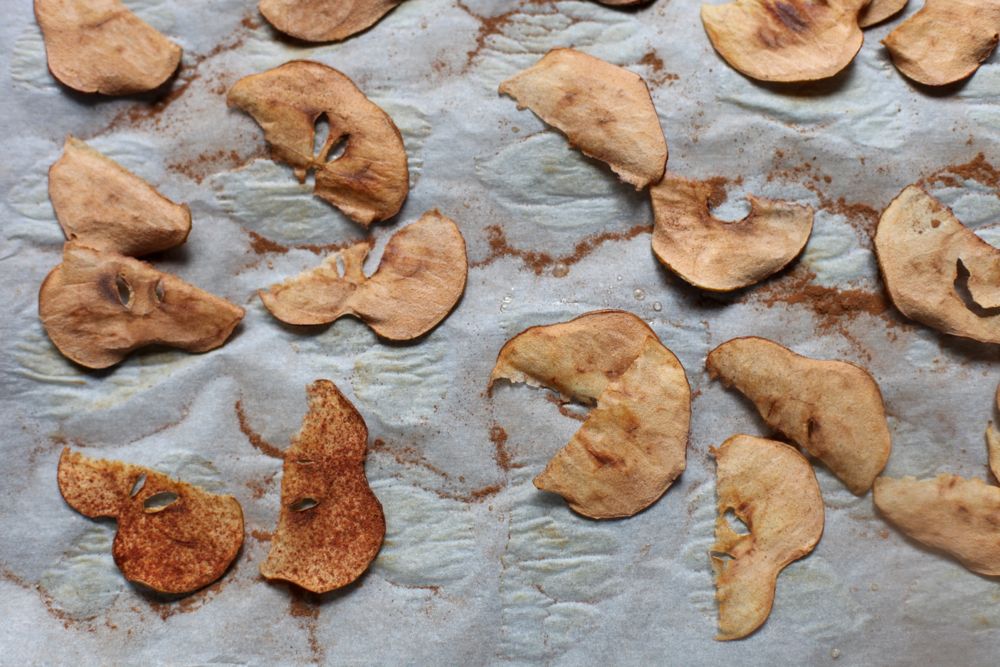
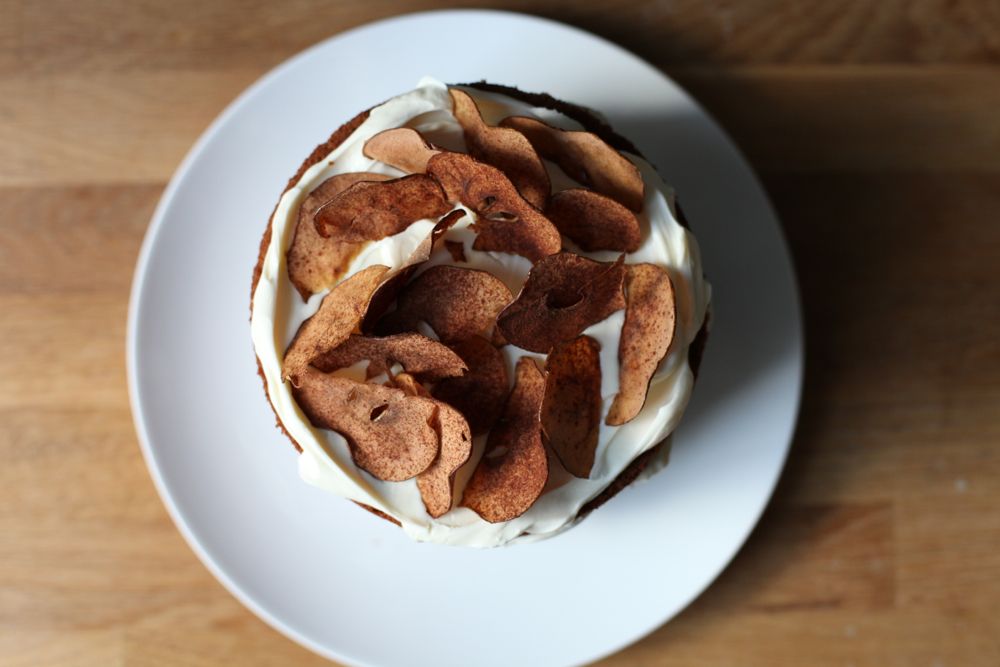
Though I've been trying to eat my harvest while they're still at their crisp, juicy best, my thoughts kept wandering to a carrot-cake-style apple cake. Late one night I had the idea of topping a layered cake with some apple crisps. I recently came across pear crisps for the first time and thought the concept would translate well.

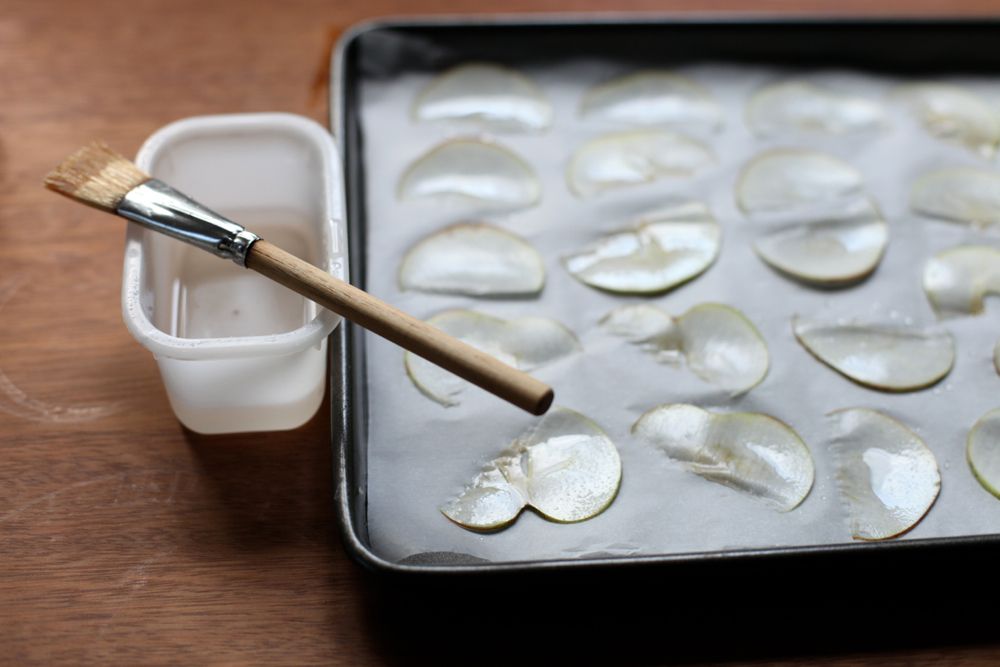
A few days before the party, I tried them out. I had some sugar syrup left from the Chocolate Pecan Krantz Cake, so I decided to try using a bit of that instead of sugar. I split the tray into four: sugar/cinnamon, sugar/plain, syrup/cinnamon and syrup/plain. The syrup/cinnamon quarter was the clear winner.


In the future I'd like to experiment with a few more things: slightly thicker slices (the pears were cut into 1/8" slices, mine were thinner - maybe that's how they got whole slices); brushing both sides of the slices with syrup and a few different oven times/temperatures.

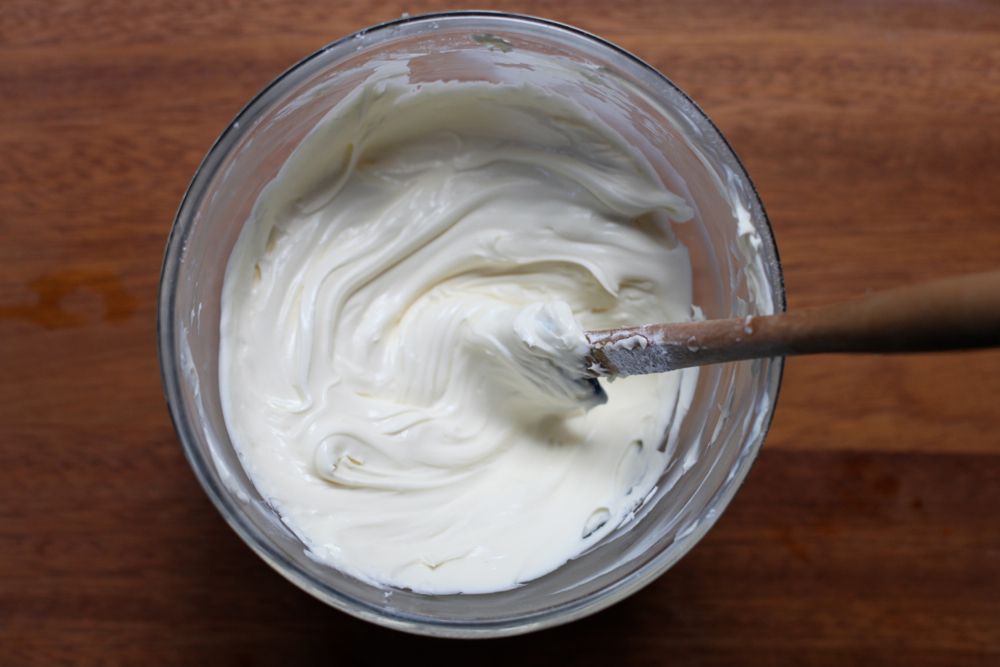
I decided on a mascarpone icing with just a touch of sugar and a little lemon to sharpen the edges. It's pure and you retain the delicate flavour of the mascarpone. I chose a simple carrot cake recipe from Nigel Slater to jump off from (it also happens to have a mascarpone icing, though it's much sweeter).


One of my favourite things about this cake is the coconut oil. The mixture with brown sugar is almost as divine as it is with butter. It gives the cake a glorious smell, a certain smoothness on the tongue that's hard to describe and a delicate flavour that works beautifully with the mascarpone and apple.

The cake is wonderful without icing and decoration too - I really enjoyed the plain test cakes I made. I'll probably make it more often that way, for simplicity and ease.

I think the flavour and texture of the cake is best when it's really fresh (and I was late for the party...), so I assembled as soon as I could without the icing melting. While it's warm, the crunchy dome is the best bit - but that can be the chef's secret if you do cut off each dome to make a layer cake...


Apple & Cinnamon Layer Cake
(Cake adapted from Nigel Slater's Carrot Cake recipe in Tender v.i, crisps inspired by food 52 via The Year in Food)

For the crisps:
65g caster sugar
40ml water
1 firm eating apple
a few pinches of ground cinnamon

For the cakes:
4 eggs
340g plain flour
2 and 1/2 tsp baking powder
1 tsp ground cinnamon
1/4 tsp fine sea salt
2-3 eating apples - you need 200g grated
200g coconut oil, solid
340g light brown sugar
2 tsp lemon juice

For the icing:
350g mascarpone
40g icing sugar
2 tsp lemon juice

Preheat the oven to 130C/270F for the crisps. Put the sugar and water into a small saucepan and heat until the sugar dissolves and it starts bubbling. Pour into a bowl to cool. Cut the apple in half, top to bottom, and remove the stalk. Use a mandolin to cut thin slices of the apple - I used my thinnest setting. Set the slices onto a parchment lined baking tray. Use a pastry brush to thinly coat the slices with some of the syrup. Sprinkle over a little cinnamon. Put the tray into the oven and bake for 30 minutes then turn the oven off and leave to cool inside. Remove from the oven and place into a sealed tin or box.

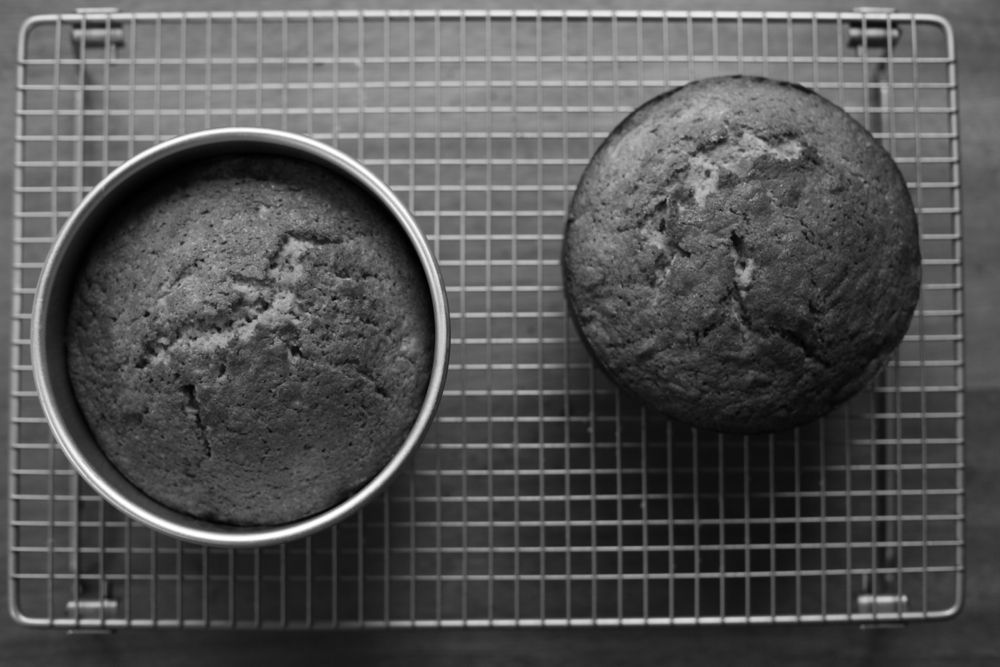
To start the cakes, preheat the oven to 180C/350F. Grease two 6" cake tins and line the bottoms with baking parchment. Wipe a clean mixing bowl down with a piece of lemon (to remove any little bits of grease). Separate the eggs, putting the egg whites into the lemony bowl (to be whipped later) and the yolks into a cup/bowl. Sieve the flour, baking powder, cinnamon and sea salt onto a plate or bowl. Peel the apples then grate them - weigh and make sure you have 200g (don't add extra, it'll throw the liquid balance off).

Put the coconut oil and brown sugar into the bowl of a stand mixer and beat on medium until fluffy and paler than before - about 4 minutes. Add the yolks one by one, beating well and scraping down in between each addition. Take off the machine and tip in the 200g of grated apple and the lemon juice. Fold together. Get your egg whites and whip them (I do this by hand because I think it's simpler, but you could transfer the apple mix to another bowl and very throughly clean the mixer bowl and use the machine, or use a hand beater) until they hold stiff peaks (be careful not to overdo it - a spike on the end of the beater should hold upright with a little waver - it won't be as firm as meringue).

Fold half of the sieved dry ingredients into the apple mix, carefully but throughly, scraping the sides and bottom. Add half of the whipped egg whites and fold them in, followed by the rest of the flour, then the rest of the egg whites. It takes a little bit of patience but you need to get it evenly combined (no lumps of flour or big streaks of egg white) without losing too much air. Divide the mixture between the two tins, level, then form a dip in the middle.

Bake for 40-45 minutes until domed, cracked, golden and a skewer comes out cleanly from the middle. Cool on a wire rack for 5 minutes then remove from the tin and leave to cool. When the oven has turned off and cooled down a little, I gave the crisps a crunch boost by leaving them in there for a few minutes.

Make the icing as the cakes bake or cool. Place the mascarpone into a bowl and beat until smooth. Sieve over the icing sugar, pour in the lemon and beat again. Keep in the fridge until you need it.

When the cakes are barely warm (or cold) you can start cutting - use a sharp serrated knife to cut the dome away from the top, trying to keep as flat as possible. Work out where the halfway line is on the remaining cake and carefully score all the way around with your knife, then go around cutting deeply to split the cake (this should help guide the knife so you get an even cut).

Place one of the cakes onto a clean serving plate. Smooth over 1/4 of the icing, going right out and almost over the edge. Add the next layer and repeat until finished. Finally arrange the crisps on top. Best immediately, keeps assembled for a day in the fridge (will be quite different to fresh), plain cake for 3-4 days in a tin.

(Serves 12-15)


A few related posts:
Spiced Caramel and Pear Bundt Cake
Rose and Pistachio Layer Cake
Coconut Cream Layer Cake

ShareThis