Sunday 27 March 2011

Salted Caramel, Walnut and Meringue Coffee Cake

From the beginning I enjoyed this Daring Bakers challenge due to the charming origin of the recipe (Jamie found it in her dad's collection of recipes, handwritten on a piece of yellowing paper with no source/date etc). I've got various similar recipes written by my granny and great-grandmother but none so far have turned out as well as this. 

The March 2011 Daring Baker’s Challenge was hosted by Ria of Ria’s Collection and Jamie of Life’s a Feast. Ria and Jamie challenged The Daring Bakers to bake a yeasted Meringue Coffee Cake.

Jamie and Ria suggested that we look to national specialities for inspiration, as they had with their All-American and Indian versions. I spent ages trying to think of something delicious to fill this bread with. Eventually I hit upon a good idea. 

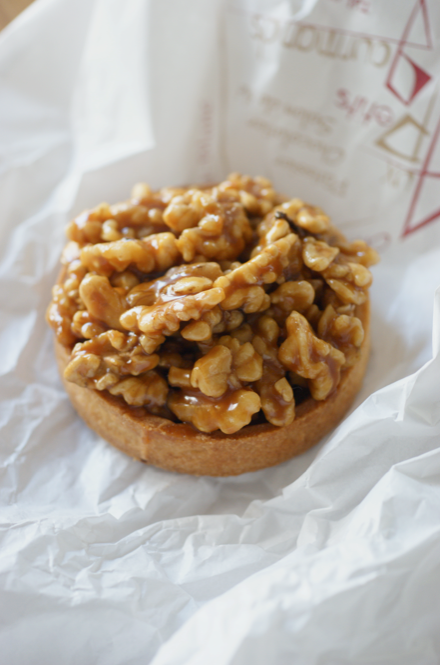
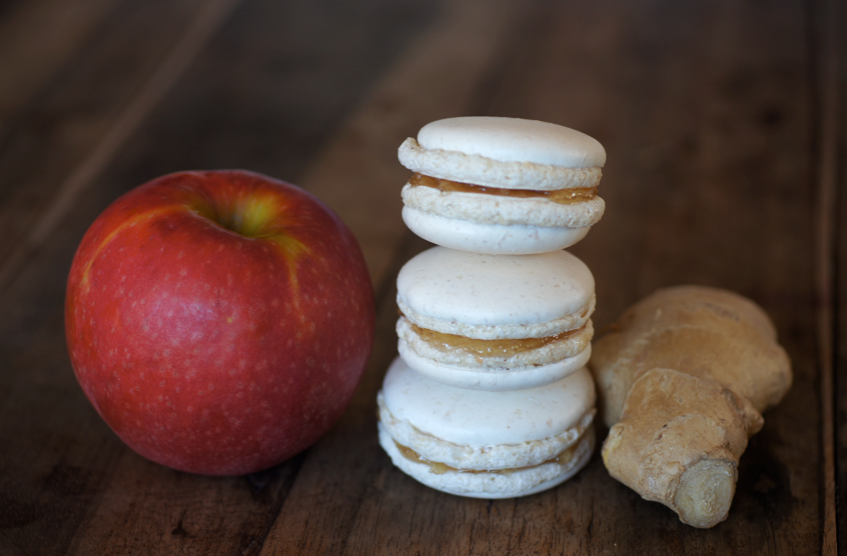
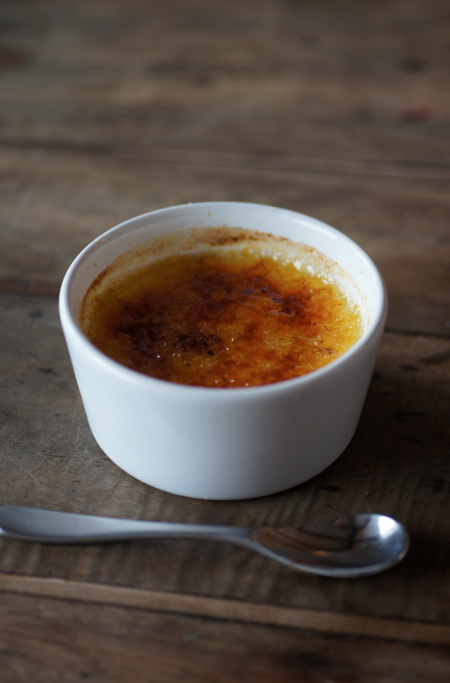
In my town in Switzerland, Verbier, the boulangerie/patisseries all sell 'Tarte aux Noix' (photo below). I haven't seen them anywhere else and nothing similar pops up on google. Essentially they're little shortcrust cases filled with walnut halves drenched in soft creamy caramel. I've been meaning to recreate them in their original form for ages. 


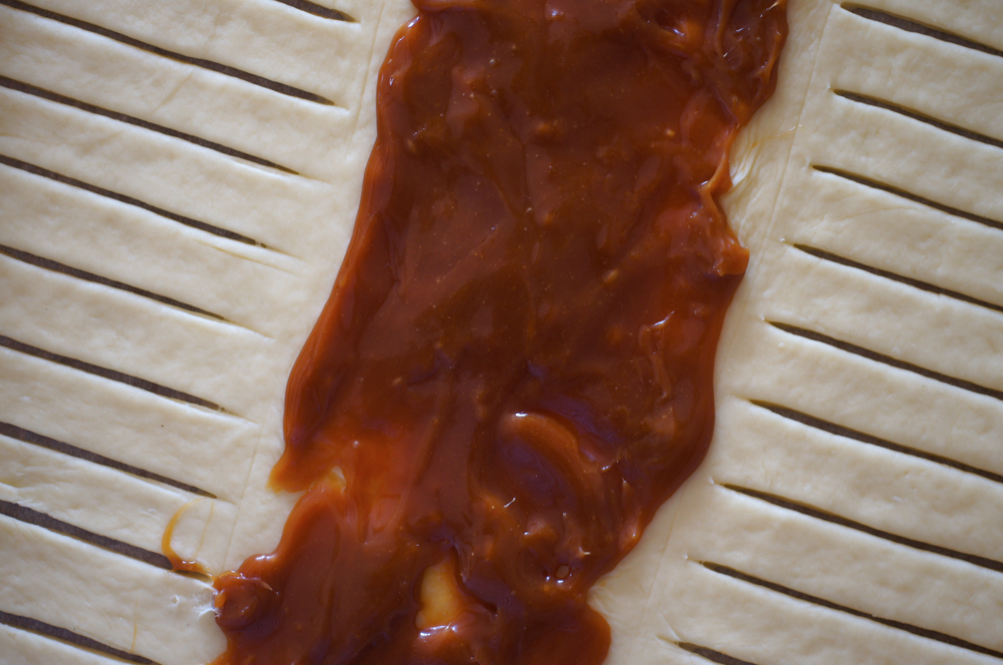
To try and recreate the tarts in bread form, I filled the bread with caramel, walnuts and the requisite meringue. For the caramel I decided to make a salted caramel sauce with about half the cream, so that it set softly. In the end it was like a just-too-soft batch of caramels that you cut up. 


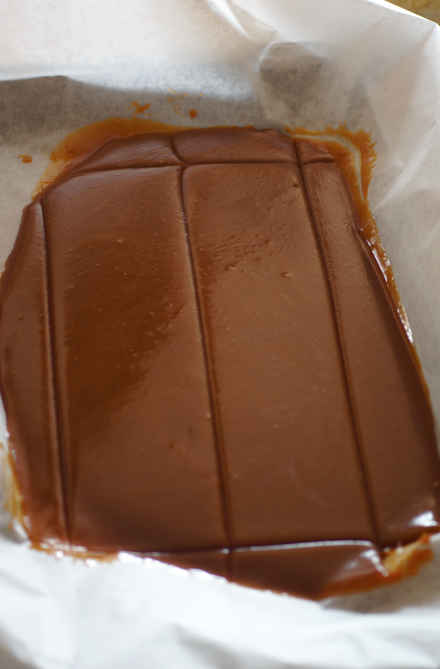
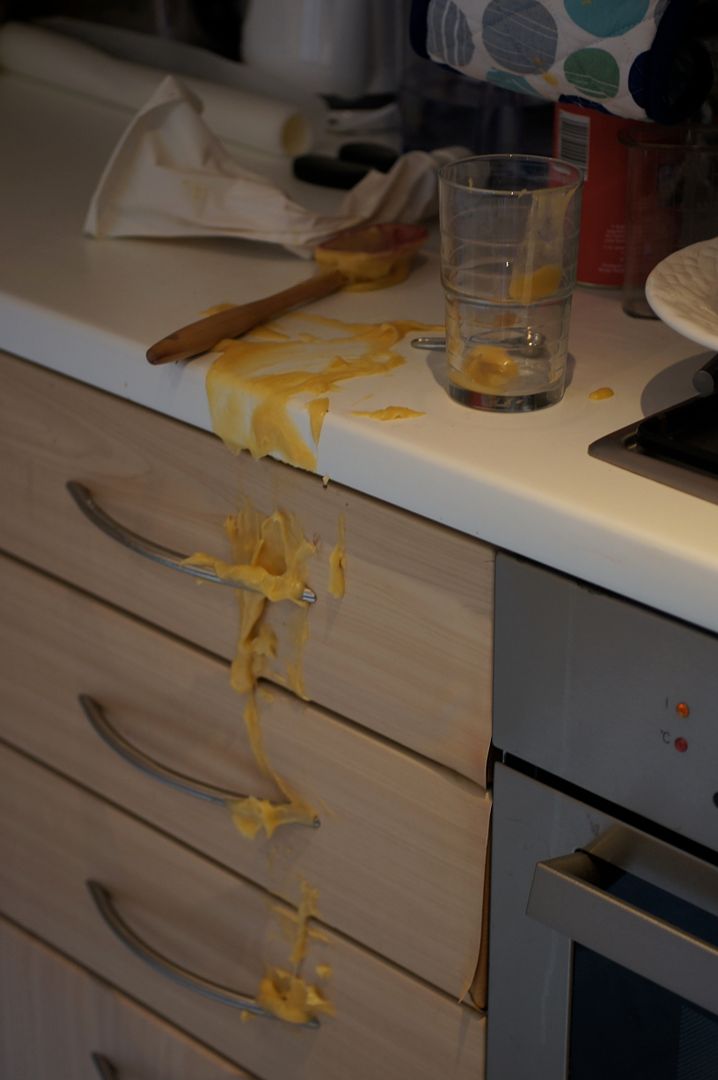
Then I tried to cut and transfer the caramel. It wasn't set enough to do so cleanly, but I managed to spread and tease it into shape. 

I made about double the amount of caramel that I needed. What a shame. I've put a half recipe below but you can double to its former glory if you want extra for guzzling separately. 

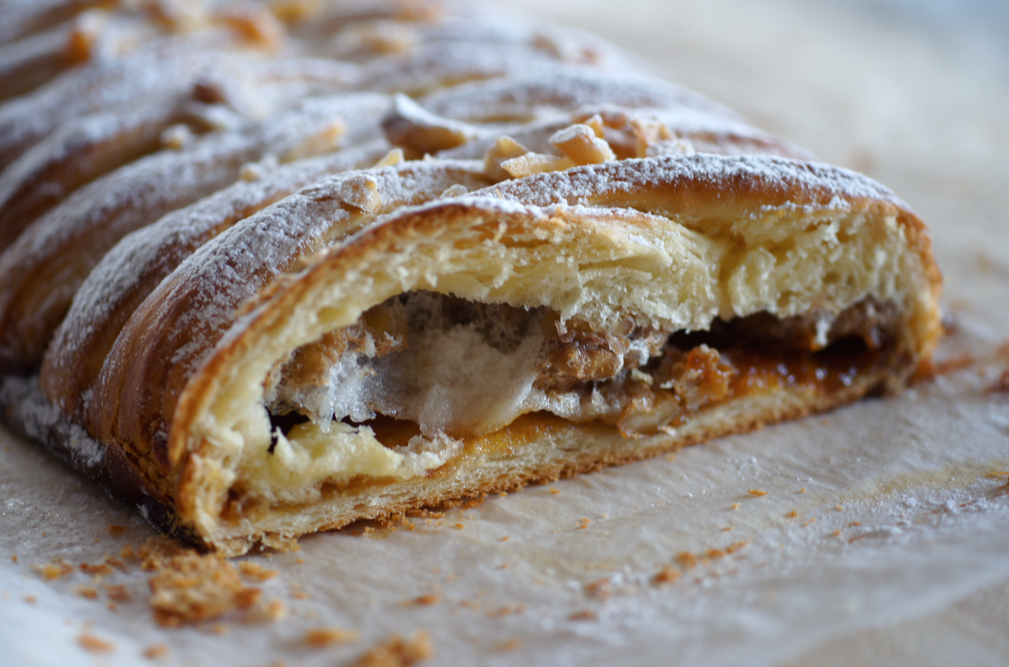
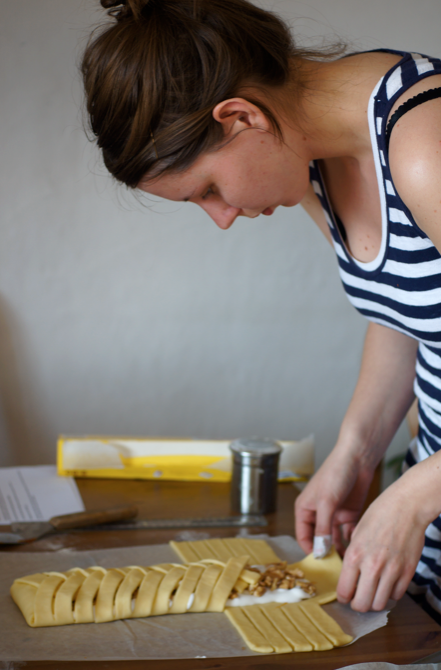
Then the caramel was topped with the meringue and then the toasted walnuts. When I make this again I think I'll either stir the walnuts into the caramel while still liquid or put the nuts on before the meringue as they didn't mingle as much as I would have liked. 


I'd read on the forums that the dough is better if the first rise/punch down step is repeated, so my dough rose three times in total. It's a lovely dough to work with, I'll definitely use it again. 

I decided to braid the bread rather than form it into a wreath as I wasn't sure how the caramel would behave if I tried to roll it up. I learnt to braid filled breads when I made this Braided Lemon Bread from Smitten Kitchen.


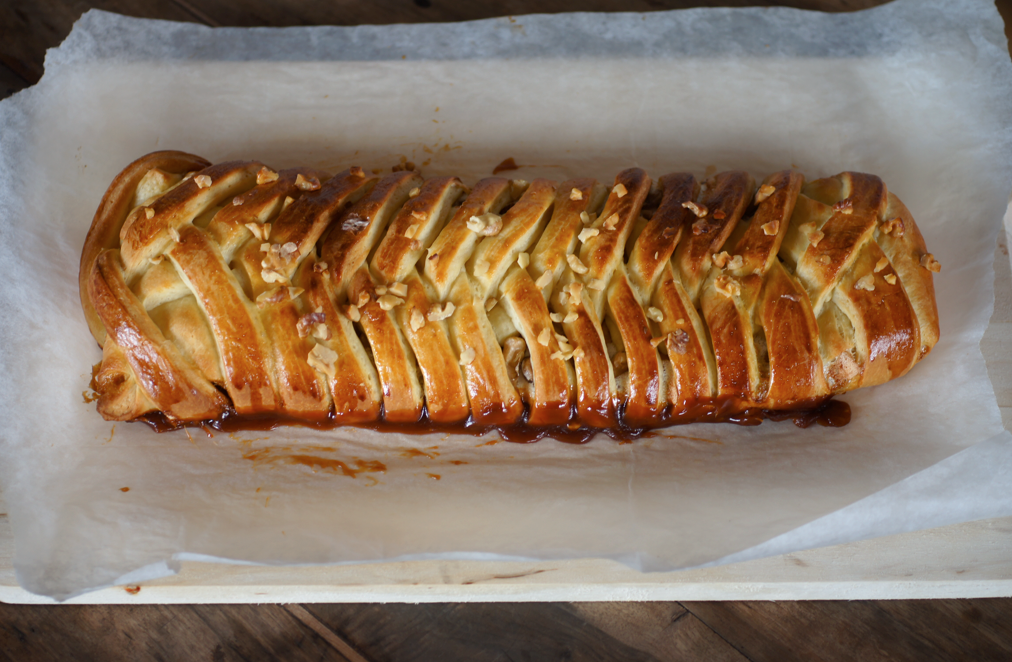
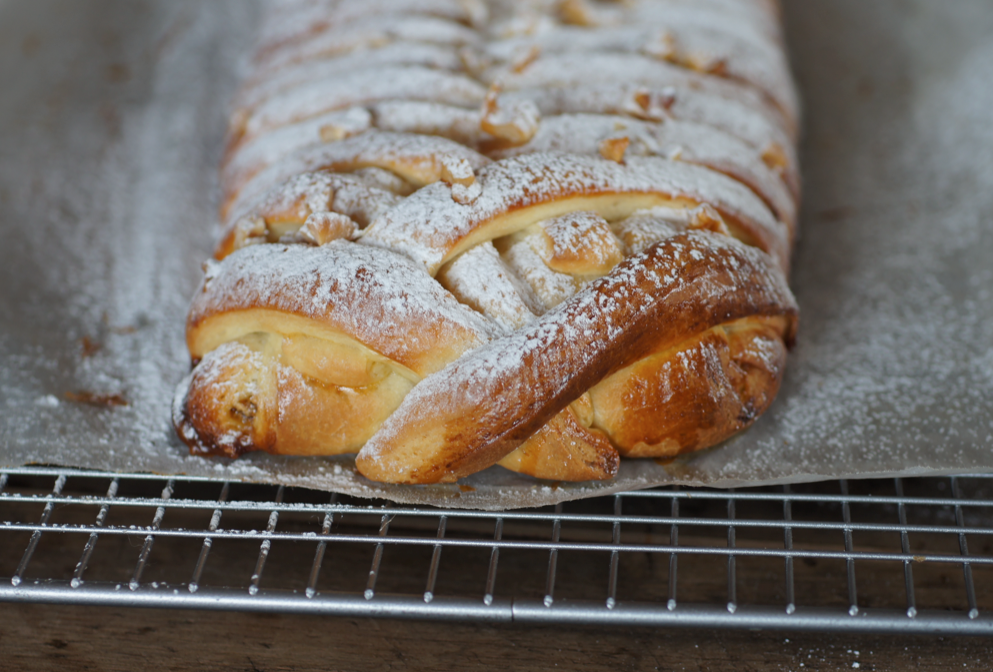
When I baked the braids, some of the caramel escaped and bubbled away on the pan. Next time I'm going to make sure I pull up the sides a little when braiding so it doesn't escape through the gaps. I did this without realising on one side of one of the braids and it didn't leak as much. There's still plenty in the middle of these, though, and the escaped caramel on the sides went delightfully crunchy. 

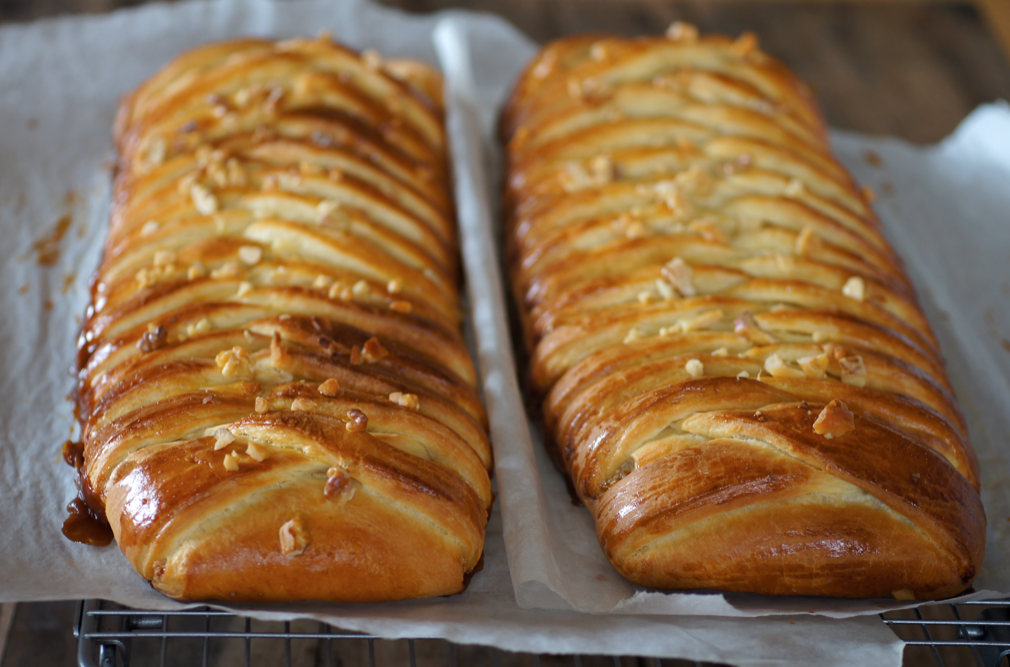
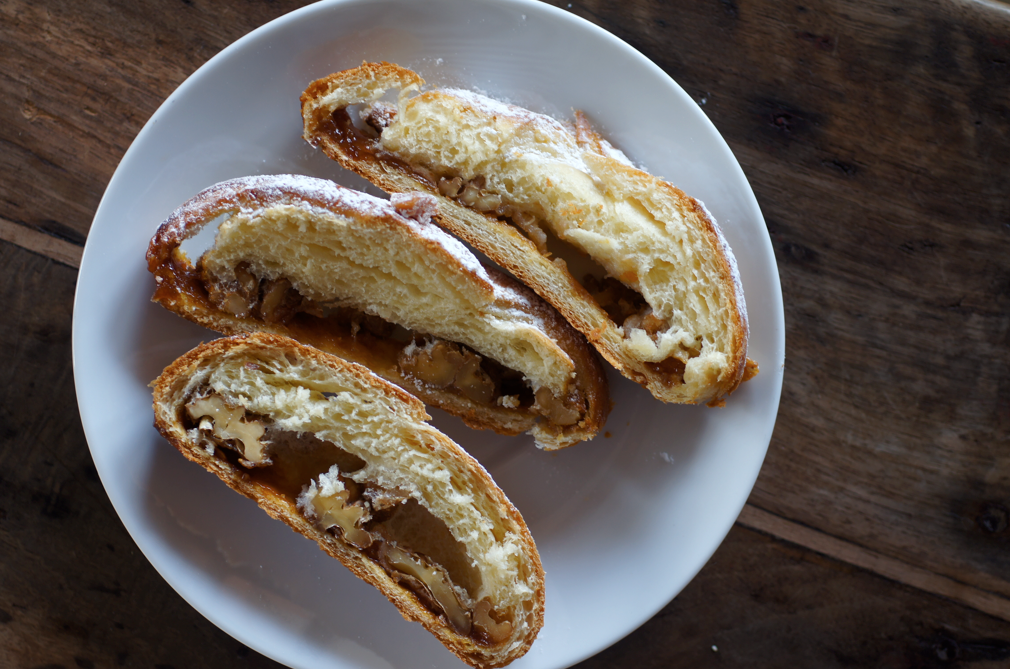
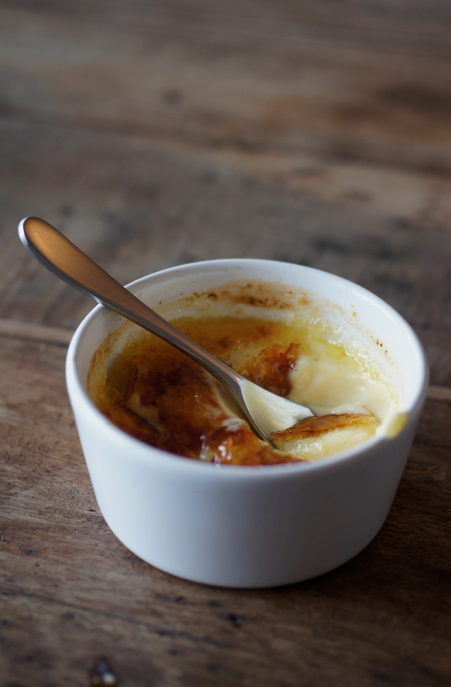
I thought the meringue was going to disappear into the bread as mentioned but some of mine remained. I think it looks a bit like cobwebs (see the 2nd photo up top). I'd be interested to try this recipe without the meringue and see how it affects the result. 

I'm really pleased with how this came out and the flavours I chose. Definitely a keeper and I'm glad I managed to fit in a version of the lovely Tarte aux Noix. 

Salted Caramel, Walnut and Meringue Coffee Cake
(caramel adapted from David Lebovitz's The Sweet Life in Paris)

I made the dough as stipulated in the challenge pdf except I used 15g fresh yeast instead of dried (see here). I then filled it with 2/3 of the required meringue recipe (in pdf) and the caramel (below). I've put a little how-to on for the braiding/assembling below too. 

For the caramel:
200g granulated sugar
100ml double cream
15g salted butter
1/8 tsp fleur de sel or good sea salt

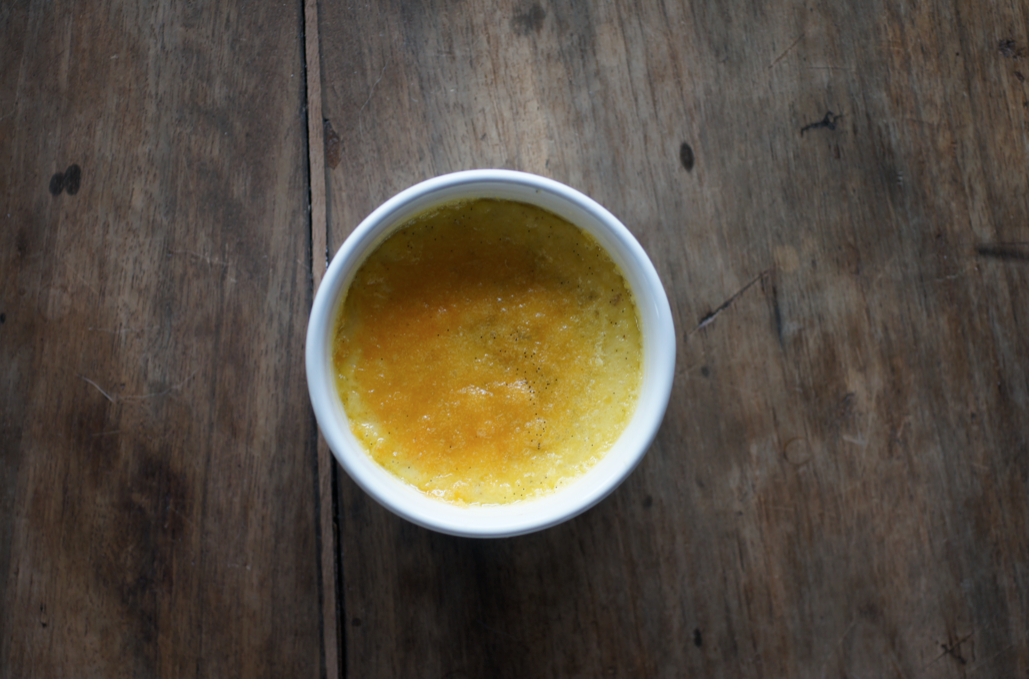
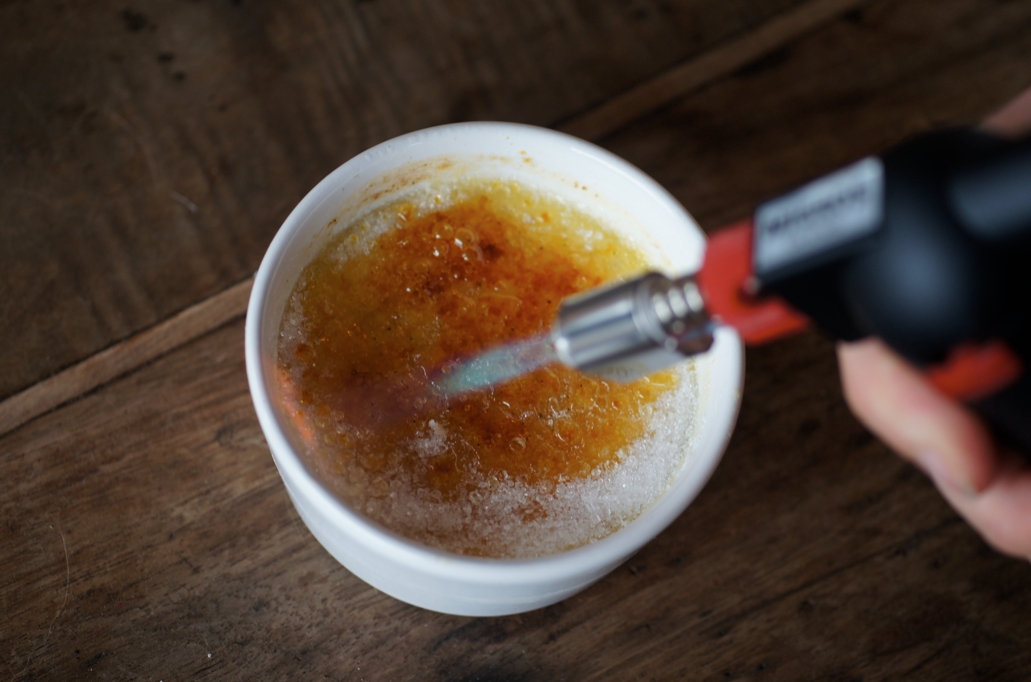
Line a tray with greaseproof paper. Spread the sugar in an even layer in a big saucepan and set over medium - high heat. Wait until the edges start to liquify then start to move the sugar around onto the wet spots to try and get it to melt evenly. Don't worry if it starts to clump a little, it will melt down later. Keep everything moving until you have a liquid. Keep cooking until a deep bronze, the colour of a penny. Take off the heat and whisk in about 1/3 of the cream. Keep pouring and whisking until all the cream is incorporated. I wear a small oven glove while whisking as it can get pretty hot. Stir in the butter and salt. Pour into the tray and put in the fridge to set. 

To assemble:
215g walnut halves
2/3 recipe of the meringue (from pdf)
1 egg, beaten

Toast the walnuts in the oven until golden. Reserve 15g and chop finely. Prepare the meringue. Punch down the dough and divide it into two equal pieces. Cover one piece with clingfilm. Start rolling the other piece out into a rectangle on a floured work surface. When it reaches 50cm x 30cm, transfer to a big sheet of parchment paper. Roll briefly again to make sure it's smooth. Have the rectangle with the long side facing you. Use a ruler and a knife to lightly score the dough into thirds lengthwise. Mark out the final 5cm on each end. Cut each corner out by pressing down with your knife (don't drag). Then mark the long side flap closest to you into 2cm strips and then cut them. Turn the bread around so the the other long flap is closest and repeat the marking/cutting. 

Now cut a strip of the caramel and transfer to the central rectangle, spreading it into shape gently so you don't tear the dough. I topped it with the meringue and then walnuts, but I suggest you cover the caramel with 100g of the walnuts and then spread over half of the meringue. Fold the two small end flaps over onto the filling. Swivel the braid so the short side is closest to you. Take the top strip on the right and fold it over the flap, across the middle. Fold the left strip over the top of the right. Repeat all the way down the braid. When you get to the last few strips, it may be best to trim the final pair so that you don't have a big mound at one end. Fold any strips underneath. Transfer carefully to a baking tray and cover with lightly greased clingfilm. Repeat the whole process with the other piece of dough. 

Put both trays in a warm place and leave to rise for the final time (about 45-60 minutes). When ready to go into the oven brush with the beaten egg and sprinkle the reserved walnuts over the top. Bake for about 25-30 minutes until golden brown. Cool then dust with icing sugar before serving. 

(Makes 2 braids - each about 16 slices)

Thursday 24 March 2011

Ginger and Apple Macarons

After posting about my many trials and tribulations with macarons (see here for the full story) I decided to join Mactweets. I'd had my eye on the group for ages but hadn't felt confident enough to join. I've been putting off making them ever since the theme was released - I've been really busy (hence not many posts) so it's been easy to persuade myself.

The Mac Attack #17  theme is 'Sugar & Spice and Everything... Fruity'.  Having seen these ginger macarons at Cherry Tea Cakes, I decided I wanted to make ginger shells. At first I wanted to fill them with a blood orange curd. I tried adapting a lemon curd recipe and reducing the sugar but the delicate flavour was lost and it didn't really work. 

Instead I decided to try some of my ginger and apple jam. Together with the spiced shells it created quite fiery macarons but you still get a hint of the fruity apple from the jam. 

I was pretty pleased with my batter as it went into the oven but I was worried about the tins mum has warping -  they're a lot thinner than mine. I watched through the oven door as nearly every shell rose lopsidedly. Thankfully a few were okay (though the feet are a bit weird on all of them). When paired up even the really lopsided ones sort of worked: 

I used this Italian meringue recipe from Not So Humble Pie, scaled down to 80g egg whites. I then removed one tsp of the icing sugar/almond mixture and added 1 tsp of ground ginger. Not sure if that was what I should of done but I was worried about upsetting the dry/wet balance. 

I sandwiched them together with some of my ginger and apple jam - recipe here. 

Saturday 19 March 2011

A Chocolate Croquembouche 21st Present


A few months ago I was contacted by a reader who had seen A Present of Profiteroles and wanted to know if I would be up for making a bigger version for her daughter's 21st party. I did a little happy-dance (think Laura Linney in Love Actually) and said of course I would. 

There were plenty of challenges along the way, especially as the cake had to be picked up around 24 hours before it was going to be served. I made a batch of choux and filled and stacked them, checking to see how they fared sitting in the fridge for 28 hours. Whipped cream wasn't an option, so I had to develop a good crème pâtisserie. After testing several different recipes, I decided on Raymond Blanc's recipe. To the completed base recipe I whisked in his suggested chocolate flavouring (15g cocoa and 30g grated dark chocolate) and a good splash of Baileys.  I made three big batches the night before The Big Day and went to bed. 

On the morning of The Big Day, I woke up feeling a bit nervous about my second-ever cake order. I tied my apron on over my pyjamas and started making an enormous batch of choux pastry, scaled up from David Lebovitz's Ready for Dessert. I tipped the flour into the buttery water and watched with horror as it just turned into a grey paste. After a tense few minutes of heat and beating it started to look a little better. Instead of beating in eggs in by hand as normal, I decided to save my arm and use my Kitchen Aid. This was not a good idea. First I managed to drop half an eggshell into the still-running mixer, crushing it into the batter. Due to the amount of ingredients involved, I picked the pieces out and kept going. Unfortunately I ended up with a 2/3 full mixer bowl full of thin paste with a distinctly raw eggy smell.

The next two batches didn't go much better. I halved the quantity for the second one. As I half-heartedly tried to scrape the final half of batter out of the saucepan into my piping bag, the first half decided to escape down the cupboards and onto the floor (photographic evidence of the top half of said incident here). The rest of the batch went into the oven. On noting that the far half was burning I acted without thinking and opened the door to spin the tray. They sank into miserable flaccid mounds.  For the third batch I managed to pull the bottom tray out onto the oven door and then fling the next tray off the rails onto the bottom batch, simultaneously squishing one half and sending the other half flying onto the floor.

My incredibly mature and composed response to this was to take the third batch of buns one by one and throw them into the bin with enough force that they splatted upon the far side of the plastic before sinking into the dark depths. Then I cried hysterically for five minutes while on the phone to my Mum on skype. 

Finally remembering that I was in fact 21 not 2, I started the fourth attempt. I made a small quantity (which turned out to be the perfect amount for two trays in my oven) and after beating it with perhaps a little more ferocity than usual, managed to successfully get a set of buns into and out of the oven without disaster. 

After that I calmed down and started working methodically. Within a few hours I had around 200 buns which I then filled and stacked into the mould with lots of melted chocolate. Finally I added the chocolate ribbons and the 21 which I had made the day before. After clearing up (and changing out of my chocolate-smeared pyjamas) my lovely clients came and took it away, lovingly wrapped in cling film for its journey. 

Despite the drama and being absolutely knackered I would have quite happily gone straight back to the kitchen and done it all again. 

Except maybe the choux-fails.

Thursday 3 March 2011

Crème Brûlée


Crème brûlée is one of my favourite desserts. Unfortunately when you order it at a restaurant it's often  dissapointing and far too big. This is my best recipe and has never failed me. 


The best part about this recipe is that the custard isn't too thick or overly rich. I like mine to still have a bit of a wobble and not be like eating baked clotted cream. 

It's the same custard recipe as the best-dessert-I've-ever-made. So if it's summer and the sun is shining in your part of the world, perhaps consider that version.

But right now, I want caramel.

I love my little blowtorch from Migros. Watching it work on meringue or sugar is mesmerising. I often sprinkle sugar over half a pink grapefruit and brûlée that. Partly because it tastes good and partly because it's fun.

About half an hour after pulling the custards out of the oven, I couldn't wait any more. I took one without chilling it, chucked some caster sugar on it and went to town with the blowtorch. 

While it was worth it at the time, do chill them and use granulated (caster seems to melt too quickly and then burn but that might have been my overenthusiasm). However good they are at first, they're just so much better later. Trust me. 

The next day I had to photograph one again after slightly burning the first. So - oh how awful is the life of a food blogger - I got to eat one at 3pm in the afternoon as a random snack. I still desperately didn't want to share with mum but somehow managed to hand over a slightly meagre half. 

There's nothing quite like smashing through a beautiful layer of caramel into gorgeous custard. I love the  gradation from warm at the top from the torching to still slightly chilled (not too cold, that upsets me) at the bottom...

I like my crème brûlée with plenty of  real vanilla. If I get to the bottom and it's not full of seeds, I will not be impressed. 

So yes, I do have a lot of opinions about crème brûlée. 

Do try this if you have a blowtorch. If you don't, I really would recommend one. Even if just for this. 

Crème brûlée
(adapted from Annie Bell's Gorgeous Desserts)

3 egg yolks
1 1/2 tbsp sugar (I use vanilla caster)
1/2 to 2/3 vanilla pod
300ml whipping/double cream (not too thick)

Preheat the oven to 160C/140C (fan). Place four small-medium ramekins into a small roasting tray. Put the kettle on to boil. Chop the pod into 1/2 inch chunks with a knife or scissors. Put in the bowl of a food processor along with the rest of the ingredients. Blend until the pod seems finely chopped and the seeds are distributed throughout the mixture.  Pour through a sieve into a jug. Pour into the ramekins, trying to evenly distribute between them. Place the tray into the oven and pour hot water from the kettle into the roasting tray carefully up to 1/2 way up the sides, avoiding it splashing into the ramekins. 
 Bake until they still wobble when shaken but are set and have a golden crust - about 50 minutes. Remove from the water to a rack and cool. When room temperature, place into the fridge for at least four hours (I've kept them in the fridge for up to 3 days).

When ready to brûlée, take them out onto the side for 5 minutes to take the proper chill off them before you start. Sprinkle about a tbsp of granulated sugar over the crust, spreading it evenly and making sure it reaches the sides. Fire up your blowtorch and start melting the sugar - I do one side then twist it 180 degrees. Keep going until it's deep golden brown and bubbling. Leave to cool for a few minutes so the pool of caramel sets then serve. 

(Makes 4, easily scaled up)

ShareThis