About a week ago, I spotted this recipe and pencilled it in for the end of February. After testing it for the first time, I sent the draft to mum for her to try. Her pupil declared it the best cake she'd ever eaten and asked to take some home for her parents. They made the same claim.
I made it again yesterday and handed half to a friend. A few hours later, I got four texts in quick succession:
'Oh'
'My'
'Goodness'
'That cake is delicious.'
It seemed cruel to keep the recipe under wraps for a month. Besides, it's the perfect way to celebrate the end of January.

I found the recipe in Signe Johanson's fantastic book from last year, Scandilicious Baking. I've only tried two recipes so far but they've both been excellent.
Signe notes that this is "the quintessential Scandi cake". In an inspired move, she adapts the tradition by adding salt to the topping. After my first test, I decided to toast the flaked almonds - I think the texture and flavour is better.
Toscakaka is essentially a simple whisked sponge topped with a gooey caramel almond topping that seeps into the cake and hardens on top to a crunchy praline. The edges, in particular, are irresistible. It reminds me of the famous Chez Panisse Almond Tart - and that's a very good thing.
The only difficult part is persuading yourself to leave the topping alone

In Signe's book and my other book on Scandinavian baking, Puccini's opera 'Tosca' is suggested as a source for the name. You can watch the Royal Opera House's 2011 production online - I'm listening to it as I write.
The second half of the name also caught my eye. 'kaka' is the Swedish word for cake, which is the same as the original Old Norse word (Old Norse is the medieval ancestor of Swedish, Norwegian, Icelandic and Danish). Though the etymology is still debated, it is thought that our word 'cake' was borrowed from Old Norse in the 13th century, like many other common words (medieval loanwords from French, Latin and Norse were my favourite part of my brief time studying the development of English).
At that time, cake would have meant a yeasted bread, not a light, fluffy sponge created by whipped eggs and baking powder, cloaked in buttery caramel and crisp nuts.

Finally, two things:
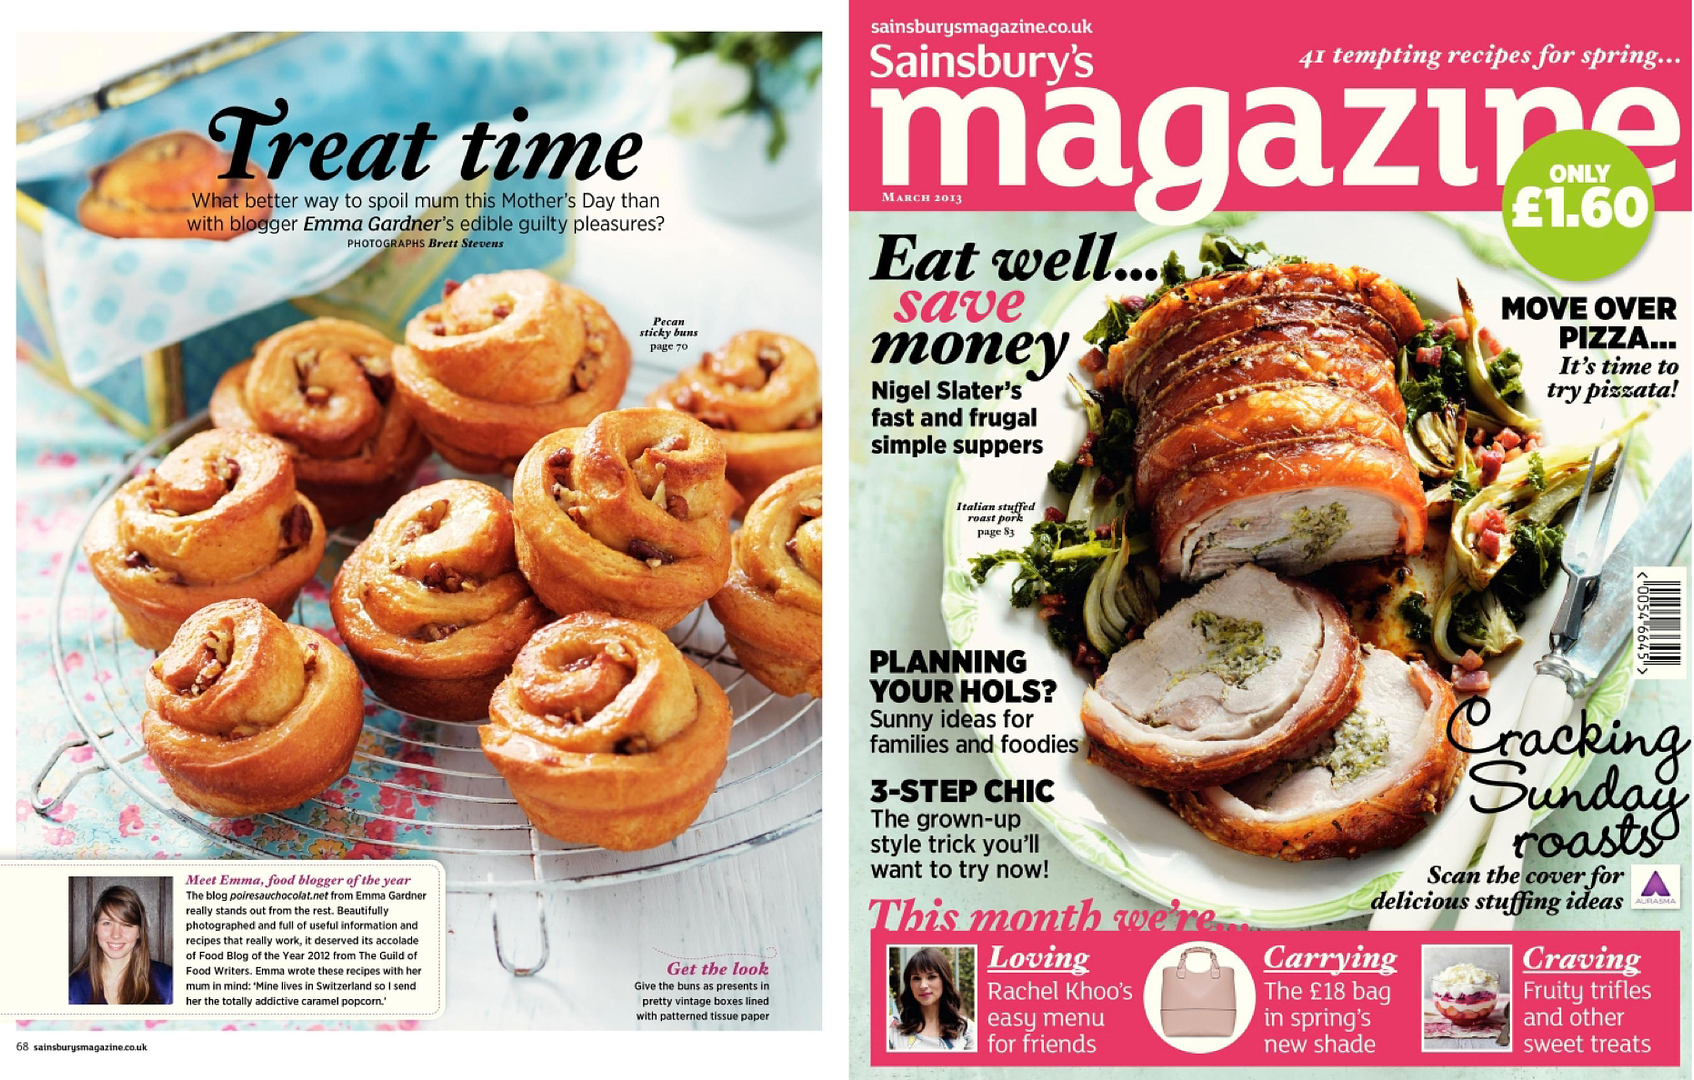
1/ My first ever proper recipe feature is out in the March Issue of Sainsbury's Magazine! I've known about this for about nine months so it's amazing to finally see it in print and get to show you. It's crazy to see my recipes in a magazine-style shoot, without the context of my writing and photography. You'll find the feature on pages 68-70 and there's another little bit with me on page 7. The are three recipes: pecan sticky buns, cocoa-rolled passionfruit truffles and proper caramel popcorn.
2/ I've been reading and revisiting a lot of my food books recently. I thought it'd be good to collect my favourites somewhere. In the end I made a Pinterest board (it's easy to keep adding to and links to amazon). You can find it through the photo link on the sidebar (the photo is of some of my food bookshelves) or here. I'm including recipe-based, memoir, history and reference books.

Toscakaka (Swedish Caramel Almond Cake)
(adapted from Signe Johansen's Scandilicious Baking)
For the cake:
70ml milk
1 tsp lemon juice
75g unsalted butter
3 eggs
150g caster sugar
1 tsp vanilla extract
150g plain flour
1 tsp baking powder
1/8 tsp fine sea salt
For the topping:
150g flaked almonds
125g butter
125g light brown sugar
50ml milk
1/2 tsp sea salt
1/2 tsp espresso powder (optional, could replace with vanilla)*
Preheat oven to 160C/320F. Grease a deep 9" round tin (preferably with a removable bottom) and line the bottom with baking parchment. Stir the lemon juice into the milk and leave to sit (to make buttermilk, you can replace with 75ml if you have it on hand). Toast the almond flakes in a oven tray for 5-7 minutes until they're a light golden brown, then set aside.
Melt the butter for the cake in a medium saucepan then pour into a bowl and leave to cool (keep the pan to use later). Whip the eggs, sugar and vanilla together in a stand mixer on high for 5 minutes (time this if at all possible), until the mixture is a creamy colour and very thick (when you remove the whisk, the trail should stay visible for at least 5 seconds). While it whisks, sieve the flour, baking powder and salt together. Sieve 1/3 of the flour mixture over the egg bowl then gently fold in with a big metal spoon or large spatula (see this video to see how). Drizzle half of the milk over the top and fold in. Repeat with the next 1/3 of flour, the rest of the milk, then the rest of the flour. Finally drizzle half of the butter over the top, fold in, then repeat with the remaining butter. Be very gentle but thorough, scraping the bottom - it's easy to get little pockets of flour but you need to conserve as much volume as you can. Carefully transfer to the tin by scraping it gently out from as little height as possible.
Bake for 25-30 minutes until golden and set (a toothpick should be able to be removed cleanly - it needs to be cooked to support the topping). While it bakes, make the topping. Place the butter, sugar, milk, salt and espresso powder into the saucepan and stir as the butter melts. Keep heating for a few minutes - it should bubble and thicken slightly. Stir in the almonds and set aside. When the cake is ready, turn the oven up to 200C/390F, remove the cake to a rack and spoon the glaze over the top. Spread the almonds out into an even layer. Place back into the oven and bake for 8-10 minutes until the glaze is darkened and bubbling. Cool for a five minutes then slide a knife around the edge of the tin to loosen the sides and remove the cake to a rack.
Best eaten once it's cooled to room temperature, though I have to admit to trying a warm slice with a scoop of vanilla ice cream. It keeps well in an airtight tin for two days and is still alright on the third.
(Makes about 8-10 slices)
*Coffee isn't a traditional addition but I think it's delicious. Up to you.
(Updated 27/07/15)

A few more almond posts:
2012: Chez Panisse Almond Tart
2010: Raspberry and Almond Layer Cake
2009: Lemon and Almond Cake