Showing posts with label milk chocolate. Show all posts

Thursday, 18 April 2013

(Nearly-)Whatever-You-Want Chocolate Cookies


Spring seems to have finally, finally sprung.

I'm having to adjust to taking pictures with sunlight streaming into my kitchen instead of the beautiful muted light we've had all winter. I went out yesterday without a coat or thick scarf or boots or socks. The woollen throw has been tossed off my bed. The violets are flowering in every nook and cranny of my little garden and the buds on my apple tree are bursting open.

To celebrate, I've made cookies.


About ten years ago, mum bought a simple, magazine-style cookbook from the Australian Women's Weekly series. She spent a year working in Melbourne before I was born and I think she came across the series at that point. We've only ever made one recipe from the book: the chocolate cookies. They've evolved over the years but they're still essentially the same - thick, crispy-on-the-edges, squidgy-middled and wonderfully deep with muscavado and plenty of cocoa powder.

I've made them to say thank you. I've made them for picnics. I've made over a hundred for a catering job. I've made them when friends have come to stay. Mostly, I've made them when I really wanted a chocolate cookie.


Since I first posted about them in 2009 (they were the eighth recipe I posted on here), they've got a little lost in the archives. I wanted to talk about them again, so I thought I'd see what else you could fold through the dough. I usually use pecans with whatever other chocolate I have on hand - usually dark. So I could try a few different things, I split one batch of dough into three: Crystallized Ginger & Dark Chocolate, Double Chocolate & Walnut and Freeze Dried Raspberry & White Chocolate.

I used:
80g dark chocolate
25g crystallized ginger pieces

40g dark chocolate
30g milk chocolate
45g toasted walnuts

100g white chocolate
7g crushed freeze dried raspberries

I haven't tried baking freeze dried raspberries into anything before and sadly it didn't work here - any bits on the outside burned and I wasn't happy with the flavour (so the recipe went from whatever-you-want to nearly-whatever-you-want). Despite that, the ginger variation was great (though I might add a little more ginger next time - I was nervous as this packet seems extremely fiery) and I'm always a massive fan of the nut-chocolate combination.

What combination would you try?


(Nearly-)Whatever-You-Want Chocolate Cookies
(adapted from an Australian Women's Weekly book - I'm not sure which as I can't find the book)

125g unsalted butter
200g soft brown sugar
1 egg
1 tsp vanilla extract or paste
185g plain flour
50g cocoa powder
1 tsp bicarbonate of soda
1/2 tsp baking powder
1/4 tsp fine sea salt

Mix in:
350g of assorted chocolate, nuts etc

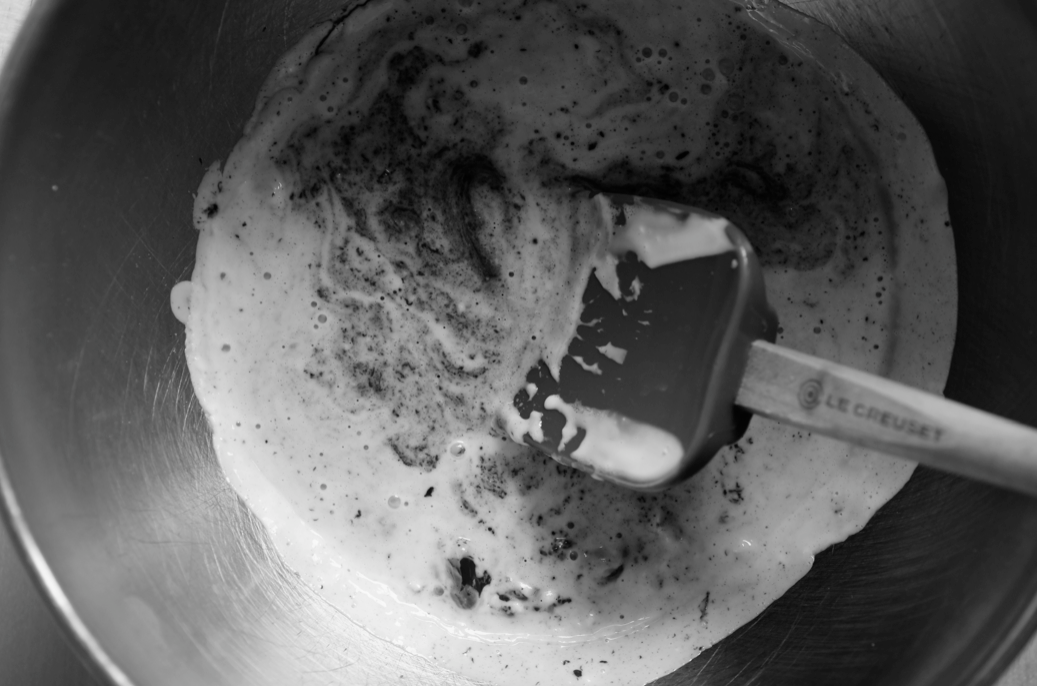
Preheat the oven to 160C/320F. Put the butter into the bowl of a stand mixer and briefly beat to soften it up. Add the sugar, egg and vanilla and beat until smooth. Add the flour, cocoa, bicarbonate, baking powder and salt and mix on the lowest setting to combine. Stir through the mix-ins. Use a couple of teaspoons to create smallish heaps of dough on a lightly greased baking sheet. Place into the oven and bake for 10 minutes (12 if from frozen). Leave to cool on the sheet for 5 minutes then remove to a wire rack.

The dough can be chilled for about 24 hours and frozen for a few months. I freeze formed ready-to-bake cookies on a tray then transfer them to a zippy bag. You can then bake them straight from the freezer whenever you want fresh cookies.

(Makes about 25-27 small cookies)


Three more posts about cookies/biscuits:
2012: Cranberry Oatmeal Cookies
2011: Sesame Wafers
2010: Peanut Butter Biscuits

Thursday, 14 March 2013

Caramelised Milk Chocolate & Espresso Shortbread


For the past ten days or so - ever since I got back to Oxford - I've been in the midst of one of those patches where every recipe I try seems to go wrong. It drives me up the wall (and, occasionally, drives tears down my face).

Earlier this evening I was reading The Year in Food when I came across Kimberly's description of weeks like these: "Where one week will feel smooth and productive, another will feel like I am trying to herd cats – the recipes are stubborn and lopsided and resist coaxing to the place where I’d like them to go." It inspired me to finally stop procrastinating and herd some words onto the screen.


To be honest, life seems to be full of herding unruly and unpredictable cats at the moment. One opportunity turns up, then disappears, then mutates, then another appears, changes, tangles, clashes and so on. Every opportunity I'm getting at the moment - both food and teaching related - is a challenge and seems designed to push me to my limits and out of my comfort zone.

I know that's a good thing and nothing makes you learn faster - but it doesn't make it any less dizzying or scary. Especially when everything is going wrong, the days are vanishing and the deadlines are looming.


Thankfully caramelised milk chocolate never seems to fail and this shortbread behaved itself impeccably three times in a row, like a little purring cat. Most of my recipes for this chunk of time seem to be finally coming into control too, perhaps taking note from these two.

Yet this obedient shortbread wasn't the first version of this post. My first idea was to make some viennese biscuits - you know, the ones that you pipe into nice shapes then dip into chocolate.

I couldn't find a trustworthy recipe to try out and surprise, surprise, the one I picked didn't go well. They literally resisted being coaxed into the right shape. I stood there squeezing and squeezing on the piping bag full of mixture, trying to make the dough come out. The piping bag became streaked with pale stretch marks but the mixture wouldn't budge.


In the end, I snipped the tip off and formed the biscuits by hand. Once baked, they were bland and boring. My guess is that getting it to a pipeable consistency that won't spread in the oven while maintaining taste is pretty difficult, so I shelved it for a later date. Do you have a good recipe for them? I'd love to know.

So, aware that I really needed something to just work, I went back to my Whole Vanilla Bean Shortbread and adapted from there. When I was tasting all the milk chocolate last week I kept thinking that coffee would go really well with it, so I flavoured it with espresso powder. I haven't tried it with real espresso but I imagine it would work too.

I also tried two more chocolates: Sainsbury's Taste the Difference Belgian Fairtrade Milk Chocolate (£1.39) and Tesco Finest 40% Cook's British Milk Chocolate (£1.28). Both worked well and were cheaper than all of the ones I tried last time. The Tesco one has a totally inexplicable but pleasant honey aftertaste.


I tried drizzling the biscuits with chocolate, spreading it on the bottom and sandwiching. The sandwiches won both on taste and because you can't see the chocolate cloud once it's cooled.

Finally, while I really like making the caramelised milk chocolate and I do think it's worth it, for this recipe I think you could just melt the chocolate and stir the pinch of salt through if you don't have time. It won't be quite the same but I think they'd still be delicious.

The light coffee and chocolate flavours remind me of opera cake - it's such a good combination. These are the sort of buttery biscuits that come in a fancy tin (though, made at home, they're a bit fresher).


Caramelised Milk Chocolate & Espresso Shortbread

For the chocolate:
100g milk chocolate*
pinch of fleur de sel or fine sea salt

For the shortbread:
100g unsalted butter, cold to the touch but not rock solid
50g caster sugar
1 tsp espresso powder
1/2 tsp boiling water
2 pinches fine sea salt
135g plain flour

For the caramelised milk chocolate, heat the oven to 120C/250F. Break the chocolate up and place in a small oven dish. Place in the oven and bake for 5 minutes, then take out and stir until smooth. Repeat every 10 minutes until it has been baking for 65. Stir in a pinch of salt then scrape into a bowl to cool.

Put the butter, sugar, combined espresso powder/water and salt into the bowl of a food processor. Blend until you have a smooth paste. Add the flour then blend until the dough forms clumps (you may need to scrape down once or twice). Tip out onto a sheet of baking parchment then form into a square. Roll out, turning the dough by a 1/4 between turns and trying to keep a square shape, until it is 3-4mm thick. Place on a tray and put in the fridge to chill for 30 minutes.

Preheat the oven to 170C/340F to bake the biscuits. Lightly grease a baking tray. Trim the sides and cut into squares - I use the width of my ruler, which is 3.5cm, and cut along it for a straight edge. You should have about 26 squares with a few odd shaped offcuts (I had 7 partial squares last time). Place onto the tray and into the oven and bake for 9-11 minutes, turning the tray halfway through. Leave to cool for a few minutes on the tray then remove to a rack.

When the biscuits have cooled, pair them up according to size then sandwich them with the chocolate (you may well need to re-melt it to spread it - place the bowl over a pan of simmering water). They keep for a few days in a sealed tin.

(Makes about 13 sandwiches or 26 singles + a few odd shaped ones)

* I used about 60g of the milk chocolate to fill the biscuits but I haven't tested caramelising less than 100g. If you're not caramelising it, perhaps try melting 70g (for a little leeway).


Some more recipes that include coffee:
2009: Coffee and Walnut Cake
2011: Tiramisu
2013: Toscakaka (Caramel Almond Cake)
9RUDQ4NS5A3G

Thursday, 7 March 2013

Caramelised Milk Chocolate


You've heard of caramelised white chocolate, right? It's been popping up all over the place since Food 52 posted about it a few weeks ago. I joined in and made Caramelised White Chocolate Éclairs filled with softly whipped cream. Just the memory of them makes me feel a bit weak at the knees.

One day when I was testing for the éclairs, I asked mum to get some extra chocolate from the shops. When she came back there was a bar of Frey Milk in amongst the selection, a sweet and creamy Swiss chocolate that she'd mistaken for a bar of white.

So, ever curious, I decided to see what happened if I applied the same process to milk chocolate.


For the first thirty minutes, nothing seemed to change. Then another flavour started to creep in, bit by bit. Once finished and cooled, it was quite different. It's not as big a change as with white, but I rather like it.

It's still sweeter and creamier than dark chocolate, but it's richer and more complex than usual. The difference is hard to describe - there's a touch of extra caramel, a bit of bitterness (even a touch of sourness in one of the chocolates I tried) and a roasted-coffee depth. The salt, as ever, heightens the flavours and takes the edge off the sweetness. Unlike white chocolate the colour doesn't change, though it does thicken a little. The flavour deepens as it cools.


I couldn't find much information on caramelised milk chocolate, though quite a few chocolate manufacturers talk of caramel notes and caramelised nuts are often folded through or paired with it (i.e. this is the first time I've ever googled an idea and not been able to find anything specifically about it. Cue shock and an uneasy feeling.)

In the oven it stiffens and the surface becomes rough, but it all smooths out if you work it with a spatula. You can see the difference the oven makes in this pair of photos (the first is after 5 minutes of baking, once the melted chunks - as above - have been stirred, and the second is after ten more minutes i.e. 15 in total):


Given all the talk about how you need to buy expensive, professional brands to make caramelised white chocolate (certainly never pick something conveniently from the supermarket), I thought it would be interesting to see what people thought of caramelised milk chocolate made with a variety of different brands.

I haven't organised a blind taste test since 2010. The first one I did was for chocolate hazelnut spreads, where I roped in four friends to taste Nutella, two other brands and a homemade version. Later in the year I organised a larger test for vanilla ice cream - four brands and two homemade versions tested by ten people. They're good, geeky fun - at least for me (though I've never had a complaint...).

So I persuaded five neighbours to come round and eat chocolate for me.


For the test, I tried six types of chocolate (the price is per 100g, calculated from the amount I paid):

Valrhona Jivara (£5.71)
Green & Black's Milk (£2)
Green & Black's Creamy Milk (£2)
Hotel Chocolat Milk 40% Cooking Chocolate (£1.87)
Lindt Excellence Extra Creamy Milk (£1.85)
Marks & Spencer Milk Chocolate (£1.49)

There were so many brands and types I wanted to try but in the end I had to stop somewhere (stirring every ten minutes, hour on hour, was messing with my mind). I tried to create a range of prices and cocoa/milk percentages. (As always, I bought all of the ingredients myself and do not have any links to any of the brands.)

The six were all baked at 120C/250F for 65 minutes, stirring after the first five minutes and then every ten. I used 100g of each, except for the Valrhona, which was 70g (due to the packet size). As I wanted to do two at a time, I used glass dishes as I don't have two appropriate metal dishes. A pinch of fleur de sel was stirred in at the end of the process, before it was all scraped into a numbered bowl and cooled. Once firm, I sliced it into squares for easier tasting.


I asked my testers to make comments (including on the suspected price) and then rank them. I then scored them so that their top choice received 6 points, the second 5 and so on. The result:

1 - M&S
2 - Lindt
3 = Hotel Chocolat
3 = Valrhona
4 - G&B Milk
5 - G&B Creamy Milk

As you can see, the rank is almost reversed in comparison with the price list. The Valrhona divided opinion, with two testers putting it last and the others ranking it highly (though only one placed it first). None guessed that it was the most expensive (I should note that if I had wanted to have a kilo of it, I could have reduced the price per 100g to £2.59). The G&B Creamy Milk behaved weirdly - it didn't seem to roast like the others and kept a milder, neutral flavour.

The amount of cocoa and milk didn't seem to make a huge difference. The M&S has 36% cocoa and a minimum of 26% milk, very similar to the G&B Milk (34%, min 25%), whereas the Lindt has 30% cocoa and a minimum of 20% milk.


The only ingredient that did make a visible difference was the amount of cocoa butter. The series of photos are of the Green & Black's Milk, which goes particularly thick when you roast it. Cocoa butter is the fourth ingredient in its list, compared with the fluid Valrhona, where it is the top ingredient.

Interestingly, the M&S chocolate lists 'caramelised sugar syrup' as an ingredient, which probably added to the effect. Other common flavourings included vanilla and malt (though the Hotel Chocolat has no flavourings, presumably as it's for cooking).

Obviously it's a small, imperfect test, but I think it shows that you can get a delicious result with a variety of chocolates. Perhaps it would have been different if I'd tried other brands or had a gathering of professional pastry chefs and world class chocolate experts around my table (but then when do I ever feed them?).

I think that the caramelisation and salt makes the most difference to the cheaper chocolates, where the conversion of the pure sweetness to a richer, deeper flavour is most needed.


So there you go. A little experiment. I'll be back next week with a recipe that uses some of my rather large pile of caramelised milk chocolate...

For the moment, my tip is to toss a few chunks into a mug then pour steaming hot milk over the top. Leave for a few minutes, then stir or whisk together. It makes glorious hot chocolate.


A few more recipes that use milk chocolate:
2009: Triple Chocolate and Pecan Cookies
2010: Milk Chocolate and Hazelnut Biscuits
2013: Champagne Truffles

Thursday, 24 January 2013

Champagne Truffles


Last weekend, I gave a friend a box of Baileys truffles for her birthday. I've made them a few times - I adapt my favourite Muscovado Truffles recipe by using 190g double cream with 75ml Baileys and light brown sugar. They're a tad softer than the usual ones and melt the moment you bite into them.

As I was rolling them between my cocoa-stained hands, I started thinking about other types of truffle I could make. I want to try some white chocolate and raspberry truffles using the freeze dried raspberries I bought recently.


But first - champagne truffles. The milk chocolate ones, cloaked in a crisp shell with a dusting of icing sugar. I'm particularly fond of them.

After some experimenting, I discovered that you need a champagne/cream ganache filling, rather than a champagne/water one. I thought that the cream might be obscuring the flavour of the champagne - and milk chocolate is already creamy - but it tasted weak without. Champagne truffles need to be rich and luxurious.

I don't drink much these days, so I use alcohol sparingly in desserts. The key is to use enough so you can recognise the flavour but not so much that the alcohol overpowers everything else. If you want a stronger punch you could try replacing some more of the cream with champagne or even add a touch of cognac or brandy.


I also tested the shell with tempered and untempered chocolate. The tempered ones did crackle beautifully when you bit into them but I don't think it's crucial. If you know how then go for it but I don't think it's worth learning just for this. The icing sugar coating means you're not looking for a shiny or streak-free finish anyway.

The truffles are at their best the day they're made. If the chocolate is tempered, they keep in a container at room temperature for about a week (though I've never managed to keep them that long...) and if not, they'll last in an airtight container in the fridge for a few days.


Finally, I know of two methods for dipping truffles.

You can use a fork to lower the truffle into the chocolate, push it around until it's covered, then tap the fork to remove excess. The fancy forks you can buy have fine prongs so the chocolate drips off easily. You can also improvise and bend a few spokes back on an old, cheap table fork or snap them off a plastic one. I find with truffles like these where the filling is quite soft the fork can dig in and ruin the shape.

In the second method, you smear a tablespoon or so of melted chocolate on both of your palms, then swirl the shaped truffle around until it's fully covered. You usually need to do this twice, as it can create a thin coating. But you get to smother your hands in melted chocolate. It's quite a feeling. Need I say more?


Champagne Truffles
(created with the basic truffle ganache ratio in Paul A Young's Adventures with Chocolate)

For the ganache filling:
100g high quality milk chocolate (34-40%)
70g double cream
pinch of fine sea salt
2 tbsp (30 ml) champagne*

To coat and finish:
few tsps of unsweetened cocoa powder
100g high quality milk chocolate (34-40%)
1-2 tbsp icing sugar

Chop the chocolate for the ganache into very small chunks and place into a small bowl (if you're nervous about ganache or have some trouble, look at the ganache foundation post). Weigh the cream in a small saucepan and add the salt. Place over a medium heat and keep an eye on it until it starts steaming. Pour the cream over the chocolate and leave to sit for a minute. Stir until you have a thick, smooth ganache with no lumps of chocolate left. Add one tablespoon of champagne and stir it in as it fizzles, then repeat with the other tablespoon. Cover and chill in the fridge for three hours until set.

When it has set, tip the cocoa powder into a bowl and dust your palms. Take a heaped teaspoon of the ganache and toss it lightly in the cocoa to stop it sticking, then form it into a sphere with your palms (don't worry if it's not perfect). Place onto a plate. Repeat for the rest of the mixture. Place back in the fridge to firm up for at least 30 minutes.

When you're ready to dip, place some baking parchment on a plate and sift the icing sugar into a shallow bowl. Roughly chop the chocolate and place in a bowl set over a pan of barely simmering water. Heat, stirring occasionally, until fully melted. Temper if desired. If not, let it cool anyway - if it's too hot, it'll melt the filling. When it's room temperature, dip the truffles one by one - either by the palm rolling method or with a dipping fork (if doing two coats, set onto the paper then dip again once set - in a cool kitchen they'll be ready by the time you've done the rest). When coated, drop into the icing sugar bowl and roll around until fully covered. Once the chocolate has set up a bit, transfer to the plate. Continue until you've coated all the truffles - if the chocolate starts to solidify, briefly warm it up over the pan of water. If the chocolate isn't tempered, chill in the fridge for 30 minutes or so to fully set. Eat at room temperature.

You will have a little bit of dipping chocolate left (as you need plenty to coat them) - scrape it onto a bit of baking parchment (if it's started to set, warm the chocolate up a bit first) and leave it to cool so you can use it for another recipe.

*I know it's a small amount to open a bottle for. I bought one of those mini bottles so I only had a little left to share. Or you could open a big one and have a party.

(Makes 16-20, depending on size)


A few related posts (the only three I can think of with alcohol in them):
Ginger Bourbon Pecan Pie
Cider Caramel, Sautéed Apples and Cinnamon Ice Cream
Whisky and Dark Chocolate 'The Beautiful and the Damned' Cake

Monday, 28 May 2012

Foundations no.5 - Chocolate Ganache


Ganache is a great playground to experiment in. There are so many ways to personalize and adapt the technique.

The first way is to try different liquid combinations. The gratuitous food porn shot above features a coconut milk ganache. Then there's half cream and half crème fraîche in a white chocolate ganache. Spiced water in deep, dark chocolate sauce. A splash of buttermilk, a touch of tea. The different water and fat contents give a variety of thicknesses and flavours.


Play around with ratios and you can have a pouring sauce, a cake glaze, a slick icing, a truffle and many other things. Add more liquid to thin the mixture and more chocolate to thicken it (funnily enough). Keep the serving temperature in mind - ganache thickens as it cools. It's so versatile.

The flavour will, of course, also depend on the chocolate. I usually use the most expensive chocolate I can afford - but then on one occasion I tried a Dairy Milk & single cream ganache and was utterly addicted (try it in a small pot with a light sprinkle of sea salt). Rules are made to be broken.

In this example I used 150g dark chocolate (72%), 125ml of double cream, 25ml of buttermilk and 1 tablespoon of brown sugar.


There are two ways to incorporate the cream/liquid into the chocolate. The way I've always used - and the faster way - is to heat the cream and then pour it over chopped chocolate, as you'll see here.

At Cordon Bleu they used a second method where you incorporate warmed cream into already melted chocolate. This might betray a lack of sophistication but I couldn't tell the difference between the finished ganaches. Leaving the hot cream sitting over the chocolate for a minute means it starts to melt anyway (which takes the heat out of the cream - if you use melted chocolate the cream needs to be cooler) and means less time and washing up.


Prepare the chocolate and put it into a big bowl - the chunks need to be fairly small (as you can see a few photos above).

Put the liquid and any additions over a medium heat and stir together - usually any sweeteners will be added to the cream. I like a bit of brown sugar when I'm using cream. Heat it until it just starts steaming - I look for little wisps curling out from the edges.


Pour the liquid over the chocolate.

If you wanted, you could infuse the cream (or any other liquid you're using) with spices or other flavours, then strain it into the chocolate bowl.


Use a spatula to push any pieces of chocolate under the liquid that are still poking out. Leave to stand for a minute or so.


Start stirring the mixture in the middle, using small circular motions. At first it'll look like nothing is really happening (as above), but then a rich dark swirl will start to form...


Keep stirring, incorporating more and more of the chocolate into the cream.

I used to use a whisk to make ganache. I think it makes it slightly easier to get any last lumps out - but it does mean you incorporate lots of little bubbles. These are a pain for almost every application of ganache so now I use a spatula.


Keep stirring until the ganache is homogenous. It should be gloriously shiny.

Like custard and ice cream, ganache is an emulsion of fat-in-water. This is why it tastes so rich and creamy, even when you use water. It is also why it can start to split if you mistreat it. As you can see below, it can look a little dodgy around the edges but keep stirring. It should come together.

If it does split, heat a bit more cream up and add it in small amounts, stirring quickly as you go. It should emulsify.

Also, if there are still a few lumps of unmelted chocolate, pour some boiling water into the cream pot and set it over the lowest heat you can. Place the ganache bowl over the top and stir for a minute or two - if the heat is gentle it should melt the chocolate without harming the ganache.


At the end some recipes call for a bit of room temperature butter to be stirred in. I don't usually do this as in my mind it has enough fat already and doesn't make a huge difference. You can also add other things at this point - for instance I added the whisky to the ganache for my Beautiful and Damned Cake.

Cool the ganache a little (for instance if you're using it to ice a cake or pour over something) or a lot (if you're going to scoop truffles out of it).


Four recipes that use this technique:

Honeybee Chocolate Cake
Poires Belle Helene
Muscovado Truffles
Malteser Layer Cake

*

This is the fifth post of my Foundations series. The first post focused on rubbing in to make pastry. The second looked at brown butter, followed by a third on creaming butter and sugar and a forth about icing cakes. The next post, on the 1st of June, will focus on egg yolk custard.

Monday, 31 May 2010

A Nutella Dégustation


Oh Nutella. How much we love thee. My flat consumes an abnormal amount of nutella.

As a tribute to this, when flatmate one was at a chocolate factory near her home in Belgium she bought us a jar of their chocolate spread. We didn't dare open the little jar of 'posh tella' and had a few jars of regular nutella instead. Then flatmate two bought a jar of sainsbury's own to see if the cheaper option was acceptable.

It seemed quite obvious to me - I needed to try out one of the lovely recipes for homemade nutella, and then we needed to have a taste test. A dégustation.


 Homemade nutella is ridiculously easy to make. Just a matter of roasting nuts, de-skinning them and then a lot of pressing the 'on' button on your food processor. You could even buy the hazelnuts ready to go. It's like magic!

I blasted and re-blasted mine but it never lost that slightly grainy texture. I actually think I might prefer it slightly grainy, particularly on toast. It seems pretty difficult to get that smooth spread feel with homemade.


To set up our little dégustation, we invited two friends over (better statistics...), then I put a two tablespoons of each type in a ramekin, with a number below. Each tester had a sheet of paper with each number, a mark out of ten and a space for a comment. At the end they were asked to identify each one.  Each person tested each spread both on a spoon and with a small square of bread. They had some tea and sparkling water to refresh between each tasting. (Yes, I am a food geek.)

Number One was flatmate one's belgian spread. It scored 5.5/10 on average.
Number Two was the classic Nutella. It got 7/10.
Number Three was my homemade version. It also got 7/10.
Number Four was sainsbury's Belgian Chocolate Spread. It was given 6.25/10.

The homemade had the highest single score, with 9/10.  All of the comments about mine noted a slightly grainier texture and a more pronounced hazelnut flavour. Apparently it's also 'more eatable'.  Everybody correctly identified Nutella and the homemade version, though the other two were consistently mixed up - which is pretty interesting considering the supposed quality and price difference. As they all correctly identified my spread, I sense a little bias towards not upsetting me in the marking process...

All in all, it was a lovely evening. I've been told that we should have a second edition with something different. Jam was a suggestion - any ideas?

My favourite way to eat my homemade version so far (others include crumpets, toast, a spoon...) is squished between two digestive biscuits. I'm not entirely sure why it works, and why it works better than traditional nutella, but it does. Something in the nutty flavour and texture with the crunch and taste of digestives just comes together perfectly. It can be a little dry - I recommend a cup of tea. Essay break perfection. 


Chocolate Hazelnut Spread a.k.a. Nutella
(Recipe from The Mini Sam Tan Kitchen)

150g whole hazelnuts
100g good quality milk chocolate
2 tbsp cocoa powder
65g icing sugar
1/2 tsp vanilla extract
a few drops vegetable oil

Preheat the oven to 180C and roast the hazelnuts for about 5-10 minutes, until fragrant and browned. Take out and leave to cool slightly before putting in a tea towel and rubbing vigorously to remove the skins. When they have cooled slightly place in a food processor and blend well until they become a thick paste. Add all the rest of the ingredients and keep blending until very smooth - this takes 10 minutes or so.

Monday, 19 April 2010

Milk Chocolate and Hazelnut Biscuits


When I was younger we used to eat biscuits called Boasters. These are the closest approximation to my memory I've made. Having googled them, it doesn't look like they had hazelnuts, but I swear I remember the taste. The clearest memory I have of eating them is when my mum and I were driving out to Verbier for the winter season when I was thirteen. We stopped at a petrol station in England, just off a roundabout, and bought a pack of Boasters. I always wanted one more than I was allowed.

We always have biscuits on the long, fifteen hour drive. When we drive back the other way from Switzerland we always buy a pack of dark chocolate Petit Beurre from a particular petrol station in France. Creatures of habit. I amuse myself by taking pictures out of the window.


I'm not entirely sure what drew me to the idea of making these today. Perhaps because it's not such a gorgeous day. After a little run of stunning summer days it's overcast today (volcanic ash, perhaps? Heh) but the flowers are still blossoming and the warmth of summer is still hanging in the air. I can look at the photos from the past few days and believe the sun is still shining.


Whatever the reason, I'm glad I made them. They're slightly soft in the middle, crunchy on the outsides and speckled with the distinctive tone of the hazelnuts among the chocolate. Perfect with a cup of tea and a chat.

I'm glad I bought nice milk chocolate to make these - I used the lovely Green and Blacks milk chocolate. I ate a little too much of the chocolate left over...


This was originally a recipe for white chocolate and pecan cookies in the Hummingbird Bakery Cookbook. I switched round the nuts and chocolate and made a few other changes including halving the recipe.  I quite like having a few slightly bitter slips of skin on my hazelnuts so I didn't totally rub the skins off.


Milk Chocolate and Hazelnut Biscuits
(Adapted from the Hummingbird Bakery Cookbook)

125g unsalted butter, softened
100g soft brown sugar
50g golden caster sugar
1 egg
200g plain flour
1/2 tsp baking powder
50g milk chocolate
50g whole hazelnuts

Toast the nuts and rub to remove most of the skins. Chop the nuts and chocolate roughly. Cream the butter and sugars together. Beat the egg in throughly. Sift in the flours and beat until it comes together. Stir in the nuts and chocolate. Get a rectangle of cling film out and scoop half of the mixture onto it. Shape it into a rough cylinder, about 3 cm across. Wrap up with the cling film and give it a roll to smooth it out. Repeat with the other half. Put both into the freezer for a few hours.

Heat the oven to 170C. Take out one or both of the cylinders (they keep in the freezer). Slice them up into 1-2 cm rounds. Place on a lightly greased baking sheet, leaving space for them to expand. Put into the oven for 10-15 minutes or until golden brown. Remove to a wire rack to cool.


ShareThis