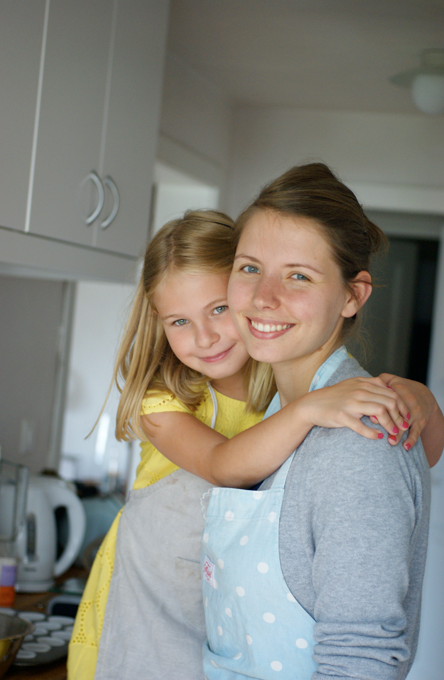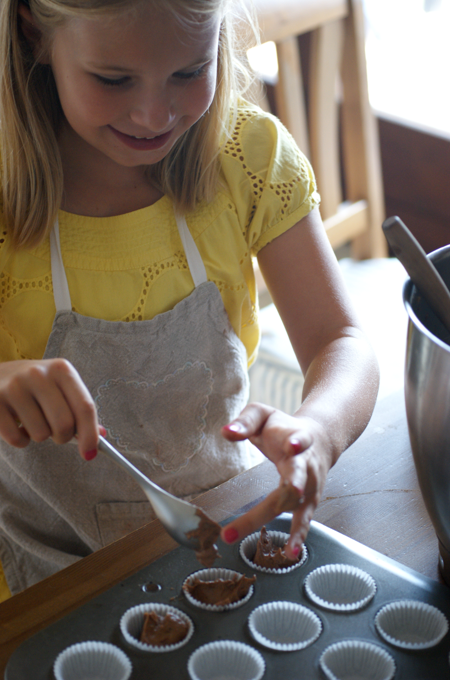
Readers who have been around for a while may remember that last summer I posted about cooking with my little friend Isabella. She's a big fan of this blog - you'll find lots of her sweet comments around, especially on older posts. Over Christmas Isabella's mum asked me if I would be able to make her 10th birthday cake.

At first I thought I might have to make an ice cream cake that could be kept in the freezer as I wasn't sure I'd still be in Verbier. Thankfully things rearranged and I could make her a fresh cake.
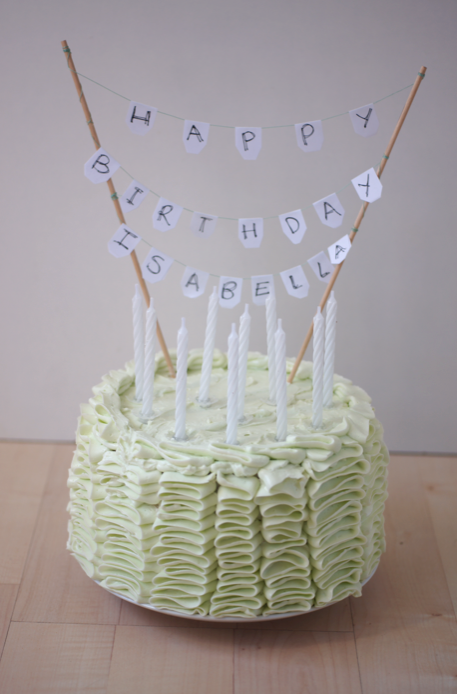
When I was thinking about a design for the cake the first thing that came to my mind was a ruffle cake. I previously made one for a launch party in Oxford (unfortunately I didn't get good photos, so there's no post) but piped much thinner ruffles than normal. I sent Isabella and her parents a photo of one of Melody's ruffle cakes and asked if she liked the idea and for any flavour preferences.
Isabella came back with a vote for ruffles and a very clear idea of flavours: light green, mint flavoured icing and a dark chocolate cake.
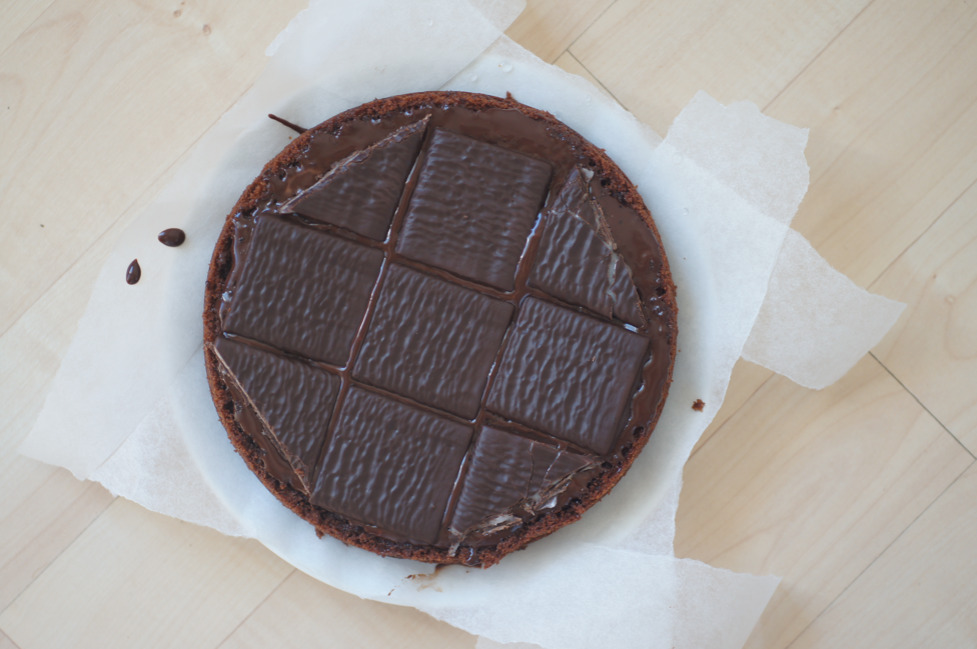
To create this I decided to use the light and easy chocolate cake I used for my Chocolate Simnel Cake combined with a lightly sweetened gooey ganache. I chose a swiss meringue buttercream for the icing because it's delicious and light and works well piped like this. Finally, I added a surprise between each layer of After Eight mints to add texture and a stronger mint flavour.
I had a nightmare trying to source mint flavouring of any type in Verbier - none of the supermarkets sell it. I then thought of creme de menthe but couldn't buy that either. In the end I asked in one of the bars and got two shots worth in a takeaway coffee cup. I quickly boiled it to evaporate some of the alcohol.
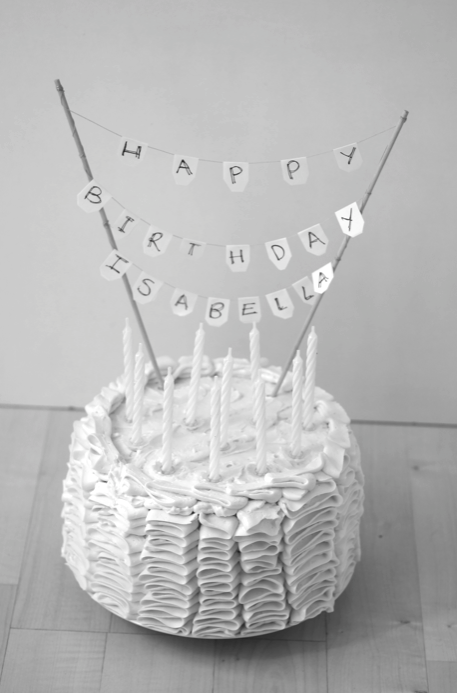
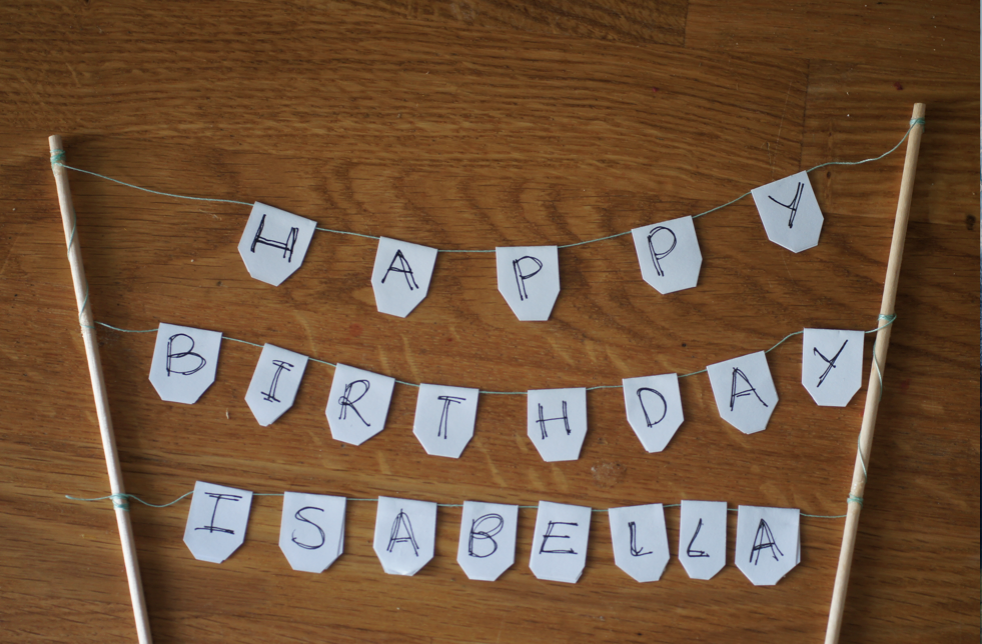
To decorate the cake I made some cake bunting out of two wooden skewers, some plain white paper, pale green thread, glue, scissors and a pen. So much fun.
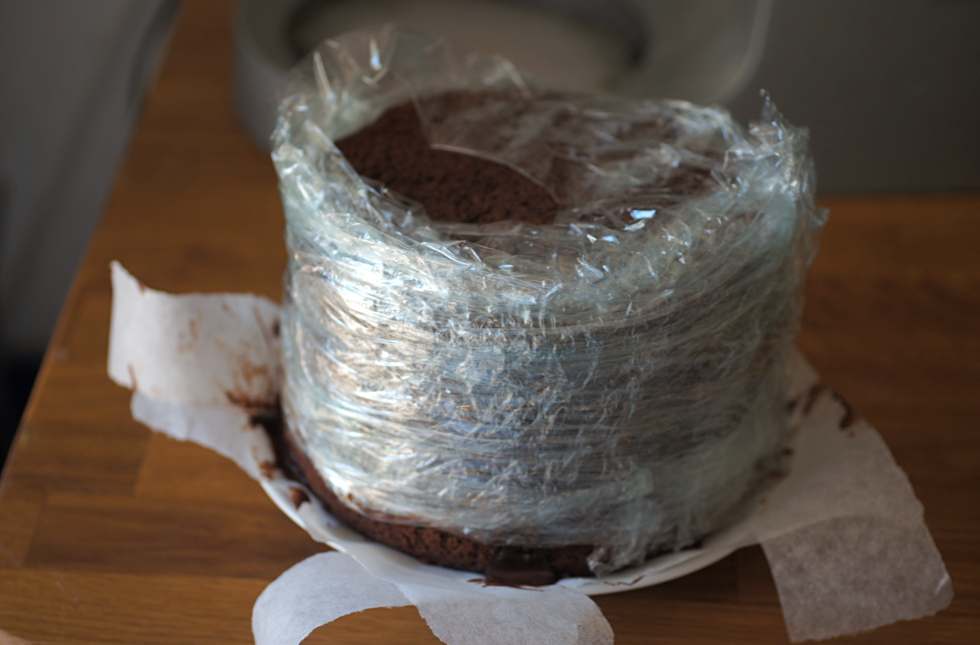
I had two small crises. First the cake appeared to be falling apart when I layered it up. A cling film corset and a stint in the freezer soon sorted it out (see below). Then I started re-whipping my icing, which had been in the fridge overnight and then warmed up to room temp. It curdled and looked disgusting. I knew it did this during the making process but hadn't thought it would at this point. Thankfully the swiss meringue buttercream mantra of Just Keep Whipping worked as always.
My ruffles were a bit wobbly - next time I might lightly mark straight lines into the crumb coat. I also didn't have long to take photos and didn't realise until after that the bottom background sort of clashes with the green (hence black and white at the top - colour below).
Though things ended up a little rushed at the end (I had to leave to catch my flight back to the UK just a few hours afterwards) I was pleased with the result. Isabella seemed pleased when she saw it and they reported that it was delicious and very rich.
*
On another note, photobucket had a long downtime in the past two days - apologies for the state of chaos this site was in. Thankfully everything seems to be back to normal now.
Mint Chocolate Ruffle Cake
(buttercream adapted from Whisk Kid's tutorial, cake adapted from Nigella Lawson's Feast, icing technique from My Sweet & Saucy's video)
For the cake:
200g plain flour
200g caster sugar
1 tsp baking powder
1/2 tsp bicarbonate of soda
1/2 tsp instant espresso powder
40g good quality cocoa powder
180g butter (at room temp)
2 large egg
2 tsp hot water
150ml sour cream
Preheat the oven to 180C/350F. Grease and line two tins - I used 6" but Nigella uses 8" - either is fine. Place all the ingredients into a food processor and run until combined. Scrape down the sides and pulse again. Divide the mixture between the two tins and spread evenly. Bake for 25-35 minutes - a skewer should come out of the middle cleanly. Leave to cool for a few minutes then turn out onto a wire rack to cool.
For the ganache:
100g 70% dark chocolate
100ml double cream
2 tsp brown sugar
Chop the chocolate and place in a medium bowl. Mix the sugar and cream in a small saucepan and heat until it reaches a strong simmer. Pour the cream over the chocolate. Leave for 2 minutes then start to stir until glossy and smooth. Put aside to cool.
For the mint swiss meringue buttercream:
150g egg whites (about 5)
225 granulated sugar
250g butter (must be at room temperature)
4 tsp creme de menthe (or to taste)
2 drops liquid green food colouring
If you're nervous about making this, look at Whisk Kid's tutorial first. When you're ready and have all your ingredients set out, combine the whites and sugar in a medium heatproof bowl and place it over a pan of simmering water. Whisk until the temperature hits 160F and the mixture is smooth (check by rubbing a little between your fingers). Transfer to a stand mixer (or just use a hand whisk with the same bowl) and start whipping on medium-high. Whip for about 8 minutes - it should be really thick and glossy and gorgeous. Check that it is room temperature - if not leave it for another minute or two slowly whisking. Turn the speed back up to medium/high and add a piece of butter (should be about tbsp sized pieces). Whisk until totally incorporated, then add another. Repeat until all the butter is used. At this point if it looks soupy and thin, pop it in the fridge. If not, keep whipping until it is thick and luxurious again - this can take quite a while. When ready, whip in the creme de menthe teaspoon by teaspoon, checking after each addition for taste. Finally add the food colouring (if desired).
For the simple syrup:
50ml water
45g caster sugar
Combine in a small saucepan and heat until the sugar is dissolved. Leave to cool.
To assemble:
1 box After Eight mints (optional)
1 piping bag fitted with a Wilton 104 tip (or similar)
Slice each of the cakes into two, creating the four layers. Line your serving plate with strips of parchment then place one of the cakes in the centre. Brush with some of the syrup. Spoon over 1/3 of the ganache. Top with the mints if desired. Add the next cake layer and repeat. Wrap with cling film and place in the freezer while you make the buttercream.
Use the buttercream to cover the cake with a slightly thicker than usual crumb coat. I also thickly covered the top as I wasn't ruffling the top. Fill the piping bag with the buttercream and secure it with an elastic. With the piping bag upright next to the cake with the thin side of the tip pointing out, start piping the ruffles up towards the top (see Melody's video if confused). When finished, pipe a final set of ruffles around the top. Finally, add any candles etc.
(Serves 10-12)