Showing posts with label coffee. Show all posts

Thursday, 16 May 2013

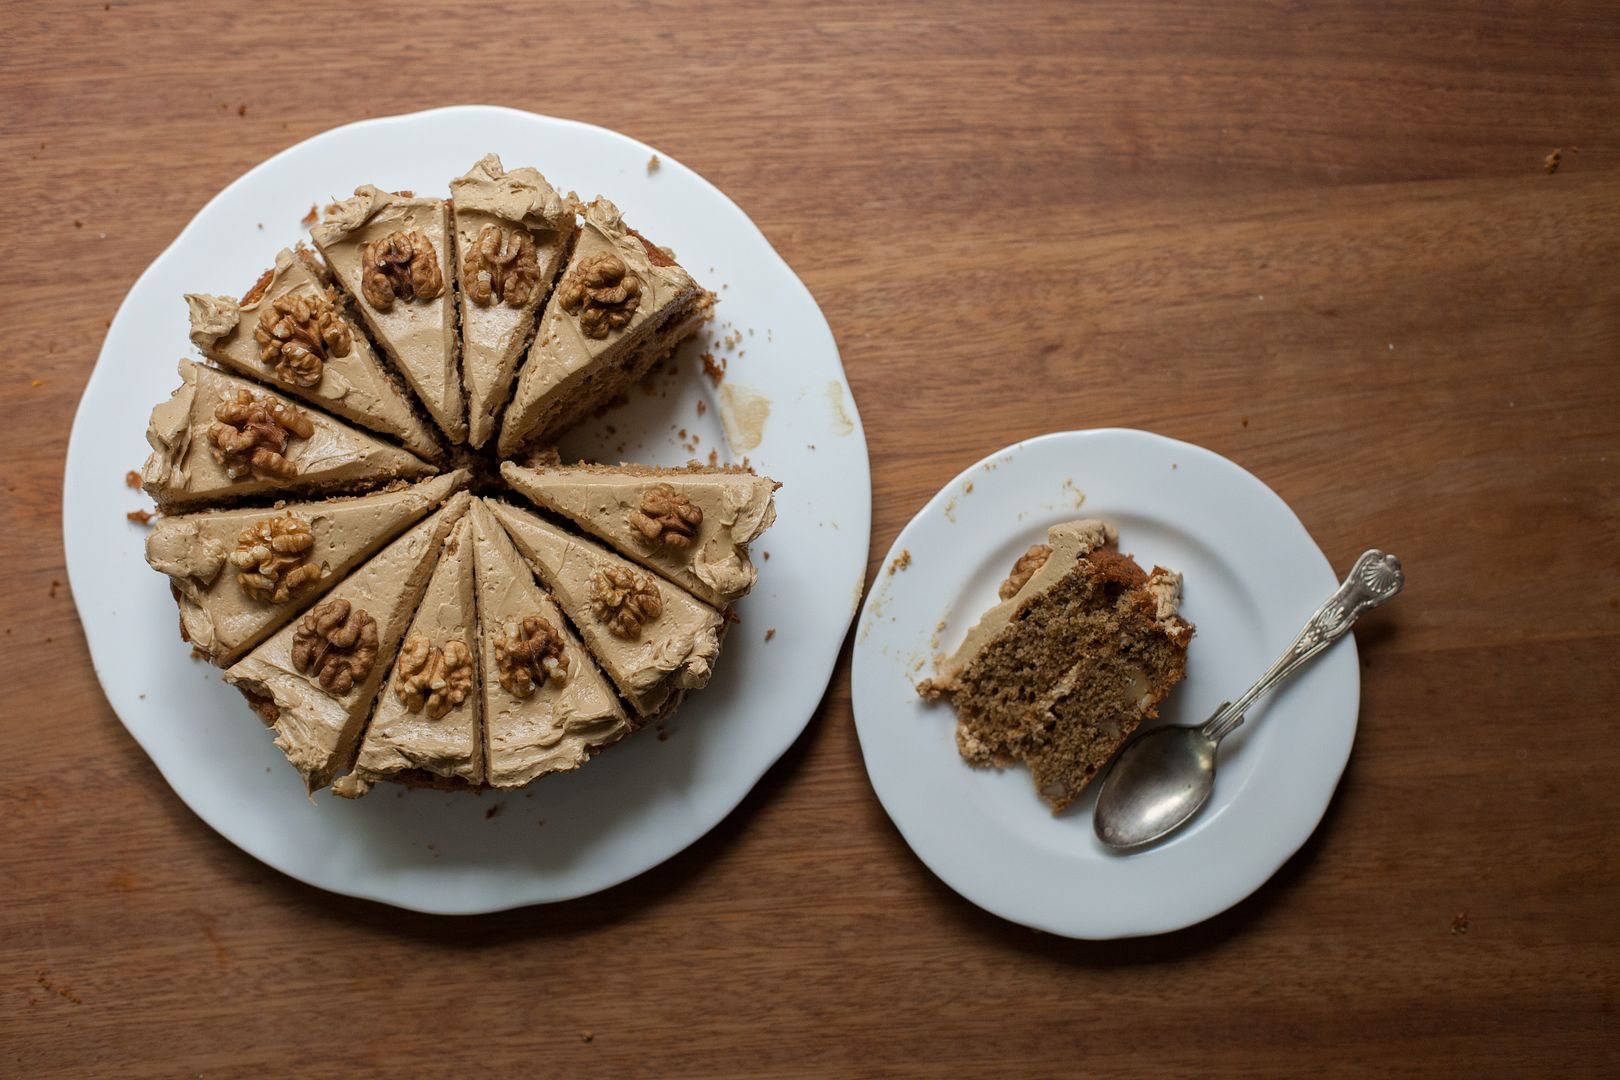
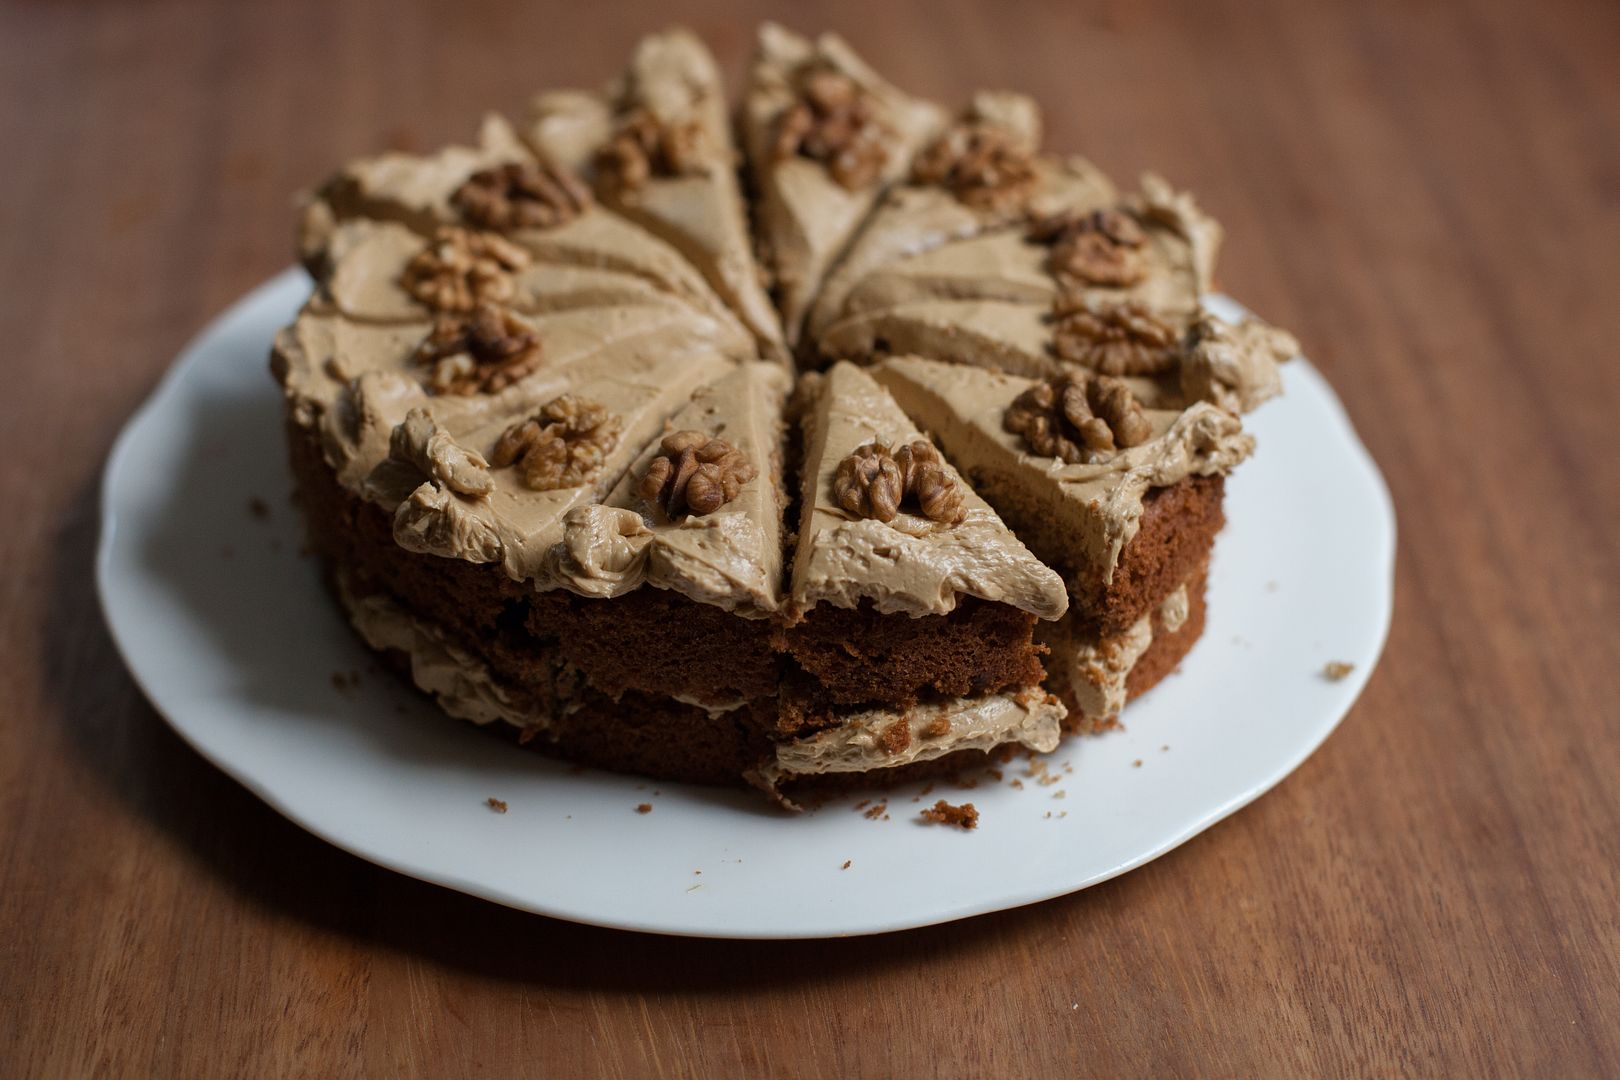
Coffee & Walnut Cake v.2


Four years ago, when I first posted about this cake, I had a tempestuous relationship with the icing.

Behind the scenes, the icing in that post caused a fit of frustrated weeping (which was very embarrassing, as my then-brand-new-now-ex boyfriend was staying with me at the time - and let's face it, I was probably trying to impress him). Luckily I left it mixing and a few minutes later, it had whipped itself back.

Mum and I had been making the cake for years - it was my granny's favourite - but because we didn't understand the reasons and techniques behind the recipe, the icing was always nerve-wracking to make.


Delia calls the icing 'mousseline' (which appears to be a catch-all term for various things enriched with butter or whipped cream) but I think it's more accurate to call it French buttercream. One of our first exam dishes at Cordon Bleu involved French buttercream - it's a lot like Italian meringue buttercream except it's based on egg yolks instead of whites. I didn't realise the icings were the same until I made the cake for the first time in a few years for mum's birthday in April. I also found that my old recipe was too brief and not very clear, so I thought this was a good opportunity to talk about French buttercream and rewrite it.

The first step is getting the syrup to the right temperature. I'd recommend testing with a thermometer because it's easier and the finger test takes time. Having said that, if you don't have a thermometer or want to try it out, it's quite fun. The test for thread stage is to spoon a bit of the syrup onto a plate, then wait for it to cool. Squidge some syrup between your thumb and first finger then pull them apart slowly until you have a gap of about a centimetre - a thread of syrup should stay linking the two.


One of the problems is that different recipes take the syrup to different temperatures. It doesn't help that the temperatures stated for the stages seem inconsistent too - for instance, we were taught that soft ball was 116-122C but McGee says it's 113-116C. Thread, similarly, is 105-110C or 102-113C. Though others go to soft ball, Delia recommends 103-5C for this - I've been taking it up to 110C and that has been working well, so I've settled for that.

The second step is to pour the syrup down the bowl into the whisking egg yolks. I found it quite hard to visualise at first and mum used to get into a tangle by pouring the syrup into the whisk and it spinning everywhere, so I decided to do a little video for you. Excuse the little slip of the pan near the end - I'd recommend using a smaller saucepan with a long handle as they're easier to control.


After that, you leave it to whisk until cool. It's really important that the mixture is room temperature before you start adding the butter or it'll melt and create a mess.

Once it has cooled, you add the butter bit by bit. To illustrate the speed to add it (and because I find watching the mixer going round mesmerising), here's a clip of the middle of the step. Also note that I often squish the cube I'm about to add to give it a last minute bit of warmth and pliability. The butter needs to be room temperature but not melting or greasy.


Once the butter is all in, give it few more moments to whip. Finally, you can add flavourings - in this case, coffee.

If it goes a bit curdled towards the end, this can usually be fixed by whipping it for longer. If not, try putting it in the fridge for 15 minutes then whipping again.

Though the icing is rich, I like it much more than normal buttercream. The bitterness of the coffee and touch of salt cuts through the limited sweetness. It's also very smooth and thick, which is particularly lovely against the crispy-edged cake and toasted walnuts.


When I was making the cake in the photos the other day, I realised I'd run out of unsalted butter when I needed to start warming it up for the icing. I had some salted in the fridge so I decided to try it. The icing finally tasted exactly like I remember it.

It reminded me that mum always used to use salted butter for her baking - partly because that was what was in the fridge - but also because it was apparently harder to buy unsalted when I was little. It made me wonder if something got lost in translation as unsalted became more popular, as many modern baking recipes use unsalted and don't add salt. Perhaps it's because people weren't used to having to add extra salt to sweet dishes as traditionally the butter was salted to preserve it. I guess it's also because of health concerns.

Generally the reason unsalted is preferred is so that you can control the amount of salt. I think a pinch of sea salt improves nearly all baking and desserts. It's useful to have the control as packets vary - my salted butter had 1.8% salt, which is therefore 2.7g in the 150g butter I used. It is quite a bit and while I personally think it tastes amazing in the icing, it would be too much in some other recipes.
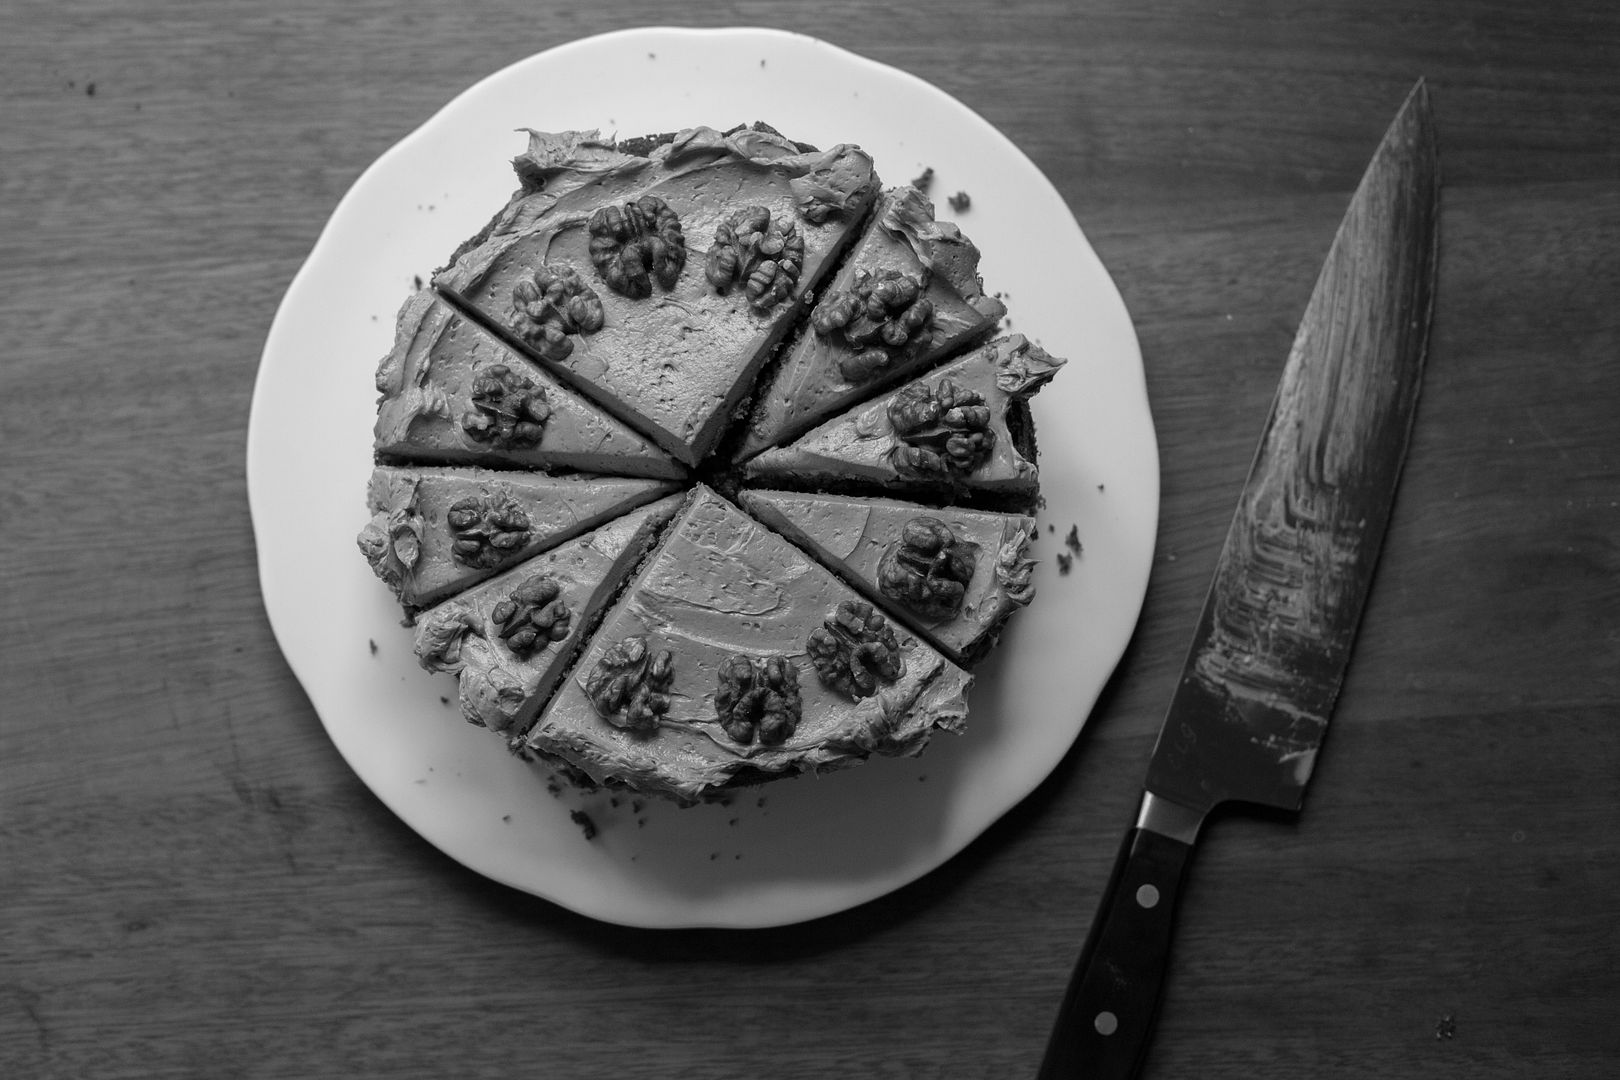


Coffee and Walnut Cake
(adapted from Delia Smith's Book of Cakes)

For the cakes:
60g walnut halves + 12 for decoration
1 tbsp instant coffee* + 1 tbsp boiling water
110g unsalted butter, at room temperature
110g caster sugar
2 eggs
110g plain flour
1.5 tsp baking powder
pinch of fine sea salt

For the icing:
2 egg yolks
pinch of salt (or a little more, to taste, or use salted butter)
60g caster sugar
60g/ml water
150g unsalted butter, cubed, at room temperature
1 tbsp instant coffee* + 1 tbsp boiling water

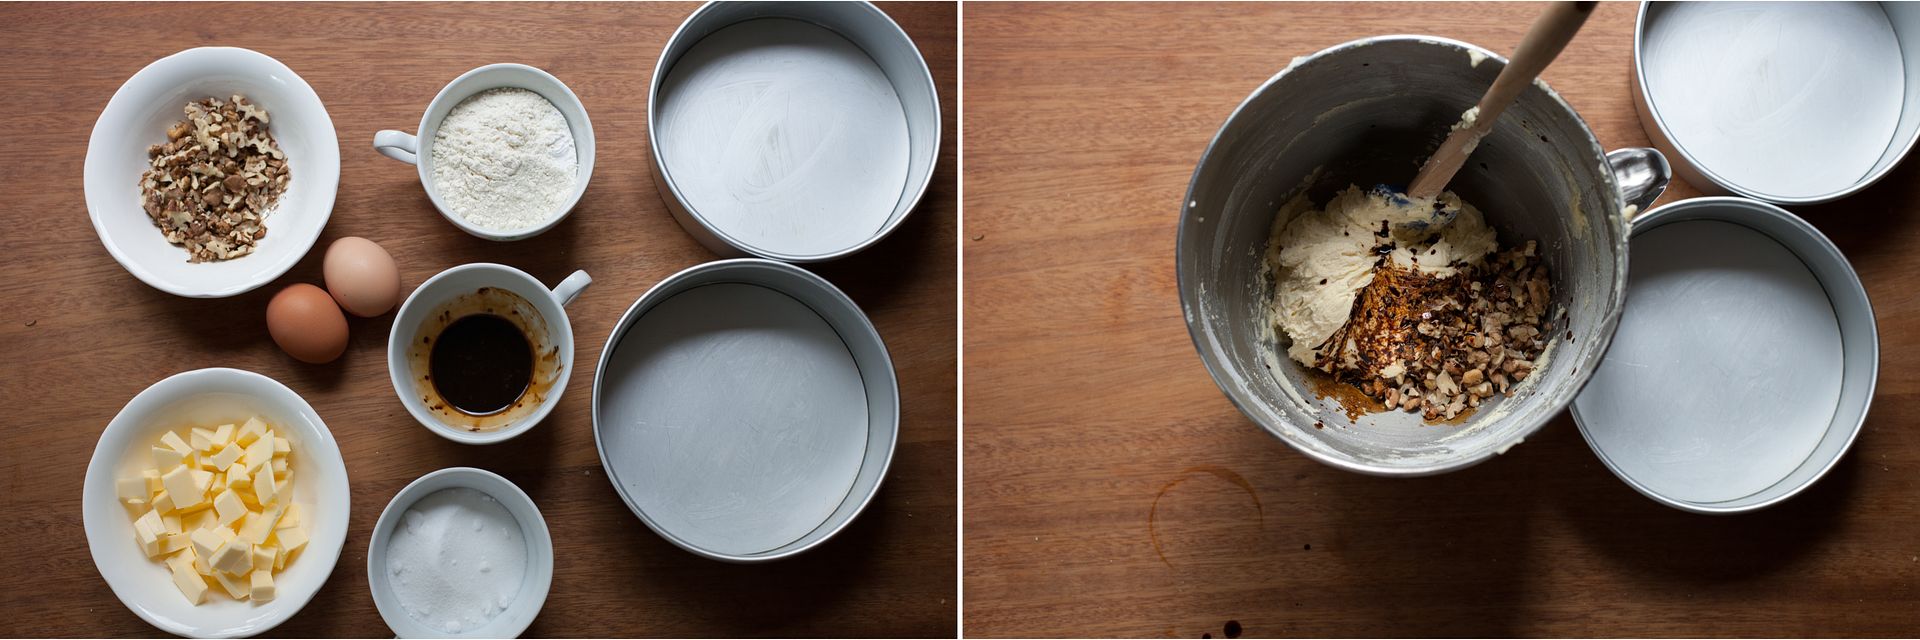
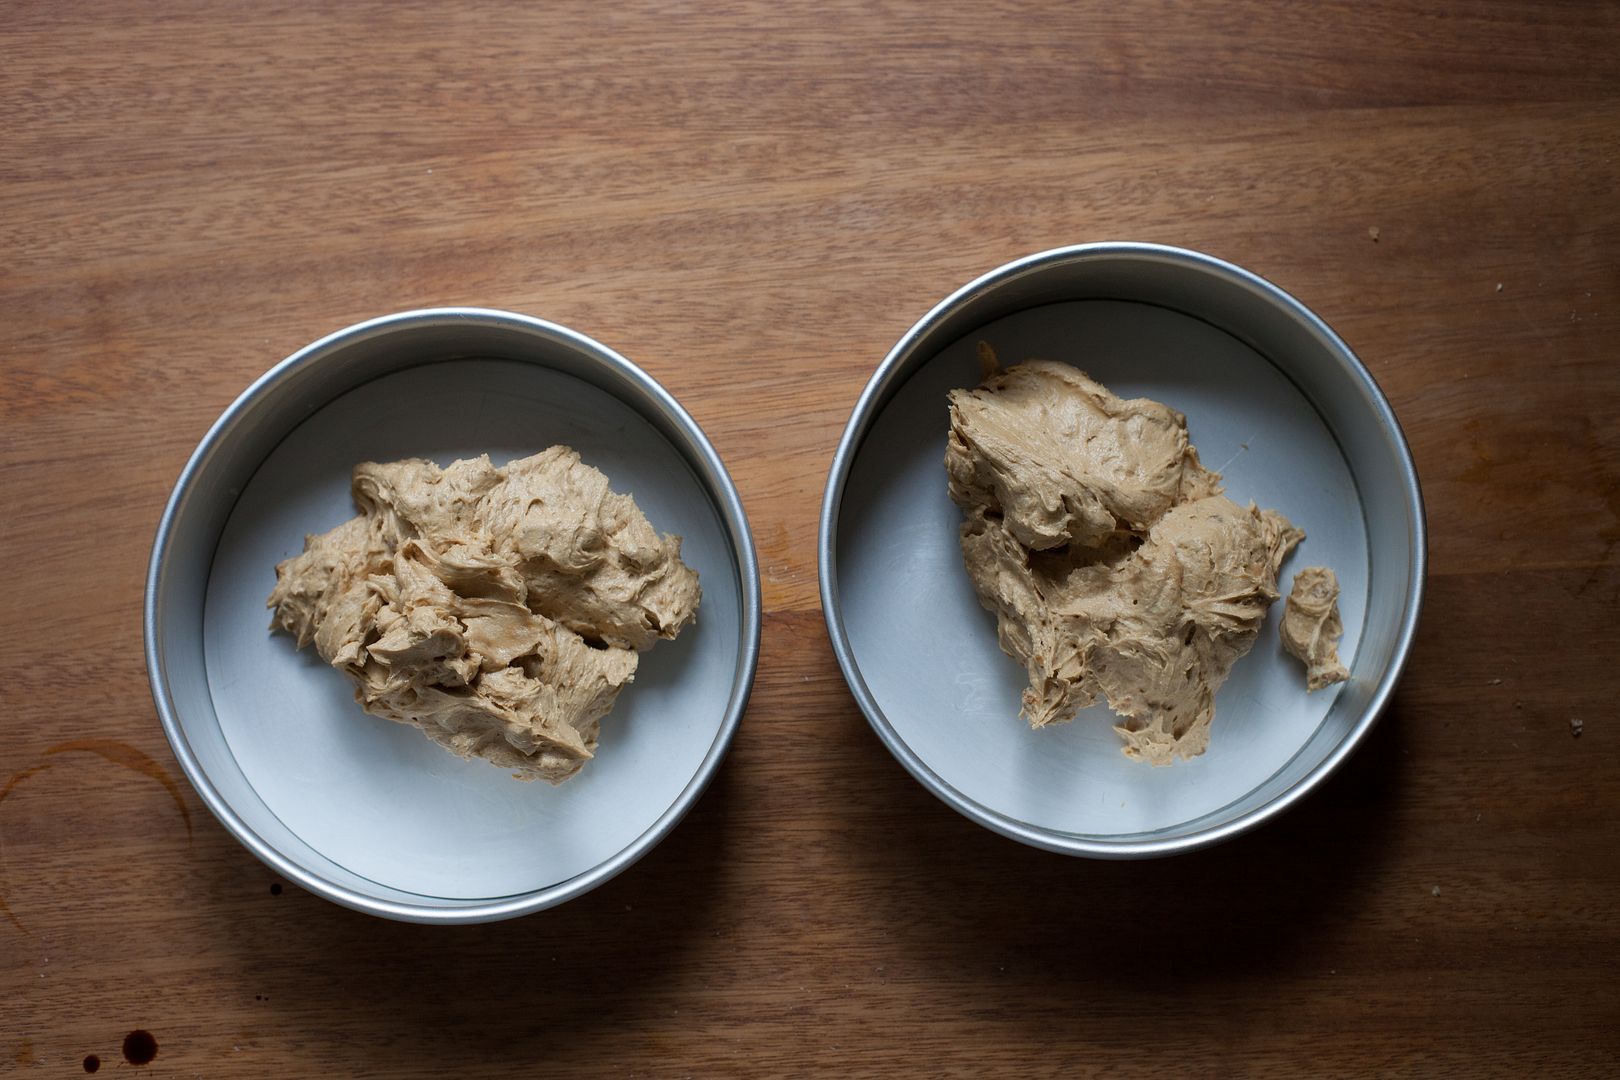
Preheat the oven to 170C/340F. Toast all of the walnuts for 5 minutes then remove the 12 halves for decoration and chop the rest roughly. Grease then line the bottom of two 7" round tins. Combine the coffee and water in a bowl or mug. Cream the butter and sugar together for several minutes until very pale and fluffy. Meanwhile, sift the flour, baking powder and salt together. Beat the eggs lightly together in a jug or bowl then add small amounts to the mixer, beating well in between each addition. When all the egg is incorporated, add the flour and mix on low until combined. Add the chopped walnuts and coffee and fold through. Divide between the tins and smooth out - it will feel like there isn't much mixture but don't worry. Bake for about 25 minutes until a deeper, rich brown and a toothpick can be removed cleanly from the middle. Leave to cool for 5 minutes then turn out of the tins and leave to cool on a rack.

For the buttercream, put the egg yolks and salt into the bowl of a stand mixer with the whisk attached and whisk briefly until broken up and a bit frothy, then turn off. Place the sugar and water into a small saucepan and place over medium heat with a sugar thermometer attached. Once the sugar has dissolved, turn up to medium-high, occasionally giving it a gentle swirl, until it reaches 110C/230F. This takes me about 5-6 minutes (the last 10 degrees are often the slowest). The moment the temperature hits, turn the yolks up to medium speed then steadily pour the hot syrup down the side of the bowl, resting the lip of the pan on the top of the bowl (see video above).

Turn the mixer up and leave to whip until you can't feel any heat in the mixture - this takes about 7 minutes (check if it is cool by touching the outside of the bowl, then if that is room temperature, testing the mix itself with a finger). If it is cool, start adding the butter, which should be soft and pliable but not greasy. Add the butter cube by cube, letting each piece disappear before you add the next. At stages it might start looking weird or curdled but just keep whipping and slowly adding the butter - this all takes about 7 more minutes. When you've added all the butter and have a thick, glossy buttercream, whip in half the coffee, followed by the other half.

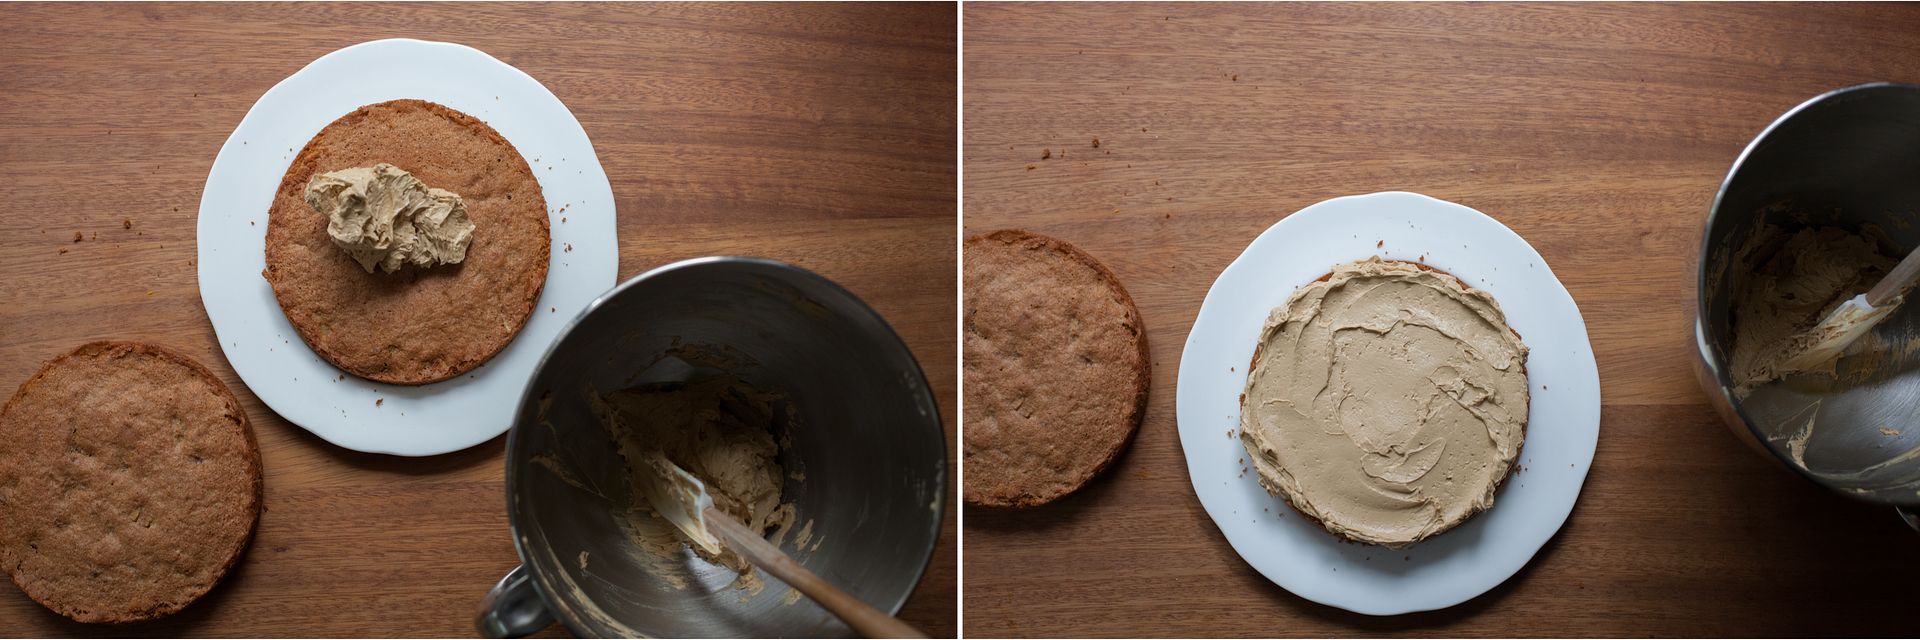
Place one of the cakes on a serving plate. Spread half of the buttercream over the cake then place the other cake on top. Spread the remaining buttercream over the top then decorate with the remaining walnut halves.

(Makes 12 small slices)

* This cake tastes weird to me with anything other than cheap instant coffee as that's what I grew up with. Feel free to try using very strong proper coffee, though I'm not quite sure how you'd get a thick concentrate like this.

Thursday, 14 March 2013

Caramelised Milk Chocolate & Espresso Shortbread


For the past ten days or so - ever since I got back to Oxford - I've been in the midst of one of those patches where every recipe I try seems to go wrong. It drives me up the wall (and, occasionally, drives tears down my face).

Earlier this evening I was reading The Year in Food when I came across Kimberly's description of weeks like these: "Where one week will feel smooth and productive, another will feel like I am trying to herd cats – the recipes are stubborn and lopsided and resist coaxing to the place where I’d like them to go." It inspired me to finally stop procrastinating and herd some words onto the screen.


To be honest, life seems to be full of herding unruly and unpredictable cats at the moment. One opportunity turns up, then disappears, then mutates, then another appears, changes, tangles, clashes and so on. Every opportunity I'm getting at the moment - both food and teaching related - is a challenge and seems designed to push me to my limits and out of my comfort zone.

I know that's a good thing and nothing makes you learn faster - but it doesn't make it any less dizzying or scary. Especially when everything is going wrong, the days are vanishing and the deadlines are looming.


Thankfully caramelised milk chocolate never seems to fail and this shortbread behaved itself impeccably three times in a row, like a little purring cat. Most of my recipes for this chunk of time seem to be finally coming into control too, perhaps taking note from these two.

Yet this obedient shortbread wasn't the first version of this post. My first idea was to make some viennese biscuits - you know, the ones that you pipe into nice shapes then dip into chocolate.

I couldn't find a trustworthy recipe to try out and surprise, surprise, the one I picked didn't go well. They literally resisted being coaxed into the right shape. I stood there squeezing and squeezing on the piping bag full of mixture, trying to make the dough come out. The piping bag became streaked with pale stretch marks but the mixture wouldn't budge.


In the end, I snipped the tip off and formed the biscuits by hand. Once baked, they were bland and boring. My guess is that getting it to a pipeable consistency that won't spread in the oven while maintaining taste is pretty difficult, so I shelved it for a later date. Do you have a good recipe for them? I'd love to know.

So, aware that I really needed something to just work, I went back to my Whole Vanilla Bean Shortbread and adapted from there. When I was tasting all the milk chocolate last week I kept thinking that coffee would go really well with it, so I flavoured it with espresso powder. I haven't tried it with real espresso but I imagine it would work too.

I also tried two more chocolates: Sainsbury's Taste the Difference Belgian Fairtrade Milk Chocolate (£1.39) and Tesco Finest 40% Cook's British Milk Chocolate (£1.28). Both worked well and were cheaper than all of the ones I tried last time. The Tesco one has a totally inexplicable but pleasant honey aftertaste.


I tried drizzling the biscuits with chocolate, spreading it on the bottom and sandwiching. The sandwiches won both on taste and because you can't see the chocolate cloud once it's cooled.

Finally, while I really like making the caramelised milk chocolate and I do think it's worth it, for this recipe I think you could just melt the chocolate and stir the pinch of salt through if you don't have time. It won't be quite the same but I think they'd still be delicious.

The light coffee and chocolate flavours remind me of opera cake - it's such a good combination. These are the sort of buttery biscuits that come in a fancy tin (though, made at home, they're a bit fresher).


Caramelised Milk Chocolate & Espresso Shortbread

For the chocolate:
100g milk chocolate*
pinch of fleur de sel or fine sea salt

For the shortbread:
100g unsalted butter, cold to the touch but not rock solid
50g caster sugar
1 tsp espresso powder
1/2 tsp boiling water
2 pinches fine sea salt
135g plain flour

For the caramelised milk chocolate, heat the oven to 120C/250F. Break the chocolate up and place in a small oven dish. Place in the oven and bake for 5 minutes, then take out and stir until smooth. Repeat every 10 minutes until it has been baking for 65. Stir in a pinch of salt then scrape into a bowl to cool.

Put the butter, sugar, combined espresso powder/water and salt into the bowl of a food processor. Blend until you have a smooth paste. Add the flour then blend until the dough forms clumps (you may need to scrape down once or twice). Tip out onto a sheet of baking parchment then form into a square. Roll out, turning the dough by a 1/4 between turns and trying to keep a square shape, until it is 3-4mm thick. Place on a tray and put in the fridge to chill for 30 minutes.

Preheat the oven to 170C/340F to bake the biscuits. Lightly grease a baking tray. Trim the sides and cut into squares - I use the width of my ruler, which is 3.5cm, and cut along it for a straight edge. You should have about 26 squares with a few odd shaped offcuts (I had 7 partial squares last time). Place onto the tray and into the oven and bake for 9-11 minutes, turning the tray halfway through. Leave to cool for a few minutes on the tray then remove to a rack.

When the biscuits have cooled, pair them up according to size then sandwich them with the chocolate (you may well need to re-melt it to spread it - place the bowl over a pan of simmering water). They keep for a few days in a sealed tin.

(Makes about 13 sandwiches or 26 singles + a few odd shaped ones)

* I used about 60g of the milk chocolate to fill the biscuits but I haven't tested caramelising less than 100g. If you're not caramelising it, perhaps try melting 70g (for a little leeway).


Some more recipes that include coffee:
2009: Coffee and Walnut Cake
2011: Tiramisu
2013: Toscakaka (Caramel Almond Cake)
9RUDQ4NS5A3G

Monday, 20 August 2012

Caffe Latte Ice Cream


However much I enjoy blogging and the regular routine it involves, there are days when life demands to be put first.

Last Monday I was finishing this post, struggling to get it out before my friends arrived the next day. I've been working hard on the proposal (it's out with publishers now!) and the teas (only one spot still available!) and many other things for months and I felt totally drained - especially of creativity. There are several things I've been worried about and when I burst into tears in front of my screen, I realised that I had to just let it go.

I switched off my laptop, put my camera in its bag, gathered my notes and packed it all away. Then I went down to the lake in the valley and swam in the blue-green water that's so clear you can see your toes as you tread water. I watched the silver fish darting around my body and the hot wind move the trees on the nearby mountainside. The water absorbed my stress and I left with a clear mind, ready to be filled with carefree holiday thoughts.


My three friends from university arrived in Verbier the next day. I had stuffed mum's freezer with four flavours of ice cream, a big batch of cookies and a set of chocolate fondants in the days before. There was freshly made blackberry-lemon syrup to go with sparkling water cooling in the fridge, alongside heaps of savoury food.

Over the six days we feasted on waffles dowsed with maple syrup and crispy thin Swiss bacon, french toast with berries, warm blackberry and apple pie (with pastry roses on top) and lots of cold cream, fresh croissants from the local bakery and much more. We ate picnics in shaded forest glades and at 3300m on rocks at the top of Mt Fort. One night I took them for the mandatory cheese marathon, complete with a big pot of fondue and many servings of raclette.

They were truly glorious days, filled with sunshine, laughter, beautiful scenery seen through new eyes and the sort of conversations with old friends that you miss desperately when they are thin on the ground.

I thought it would be difficult to swear off my laptop and phone, to only check my email once or twice a day.  It was easy. Every moment of that little holiday was so enchanting that nothing online could tempt me away.


A few days before the holiday, I decided to practise making ice cream cones. It was a good reminder that baking and wrapping homemade cones is too time-consuming and fiddly to do while my friends were in the next room, having fun without me. So I started playing with the rest of the mix.

There are lots of options. You can spread it evenly into a circle, bake, then press it into a cup or bowl to make a simple basket. You can spread it over the whole tray, then quickly slice it with a sharp knife into diamonds or another shape when it comes out of the oven (I tried cookie cutters, they didn't work). You could add other flavours, like a bit of cocoa powder for chocolate (though I love this mix, it's addictive - I now go heavy on the vanilla paste). Or you can go a bit mental, put it into a piping bag and draw elaborate little cups.

The recipe is here: Ice Cream Cone Mix.


For my four ice cream flavours, I wanted a mix of old and new. I looked back to the archives for three favourites:

Strawberry Frozen Yogurt
Buttered Pecan Butterscotch Ice Cream
Vanilla Ice Cream

Then I made a new recipe that I've been eyeing up ever since it was posted by BraveTart: Caffe Latte Ice Cream. I'm not a huge coffee drinker but if I do have some, I prefer it frozen, or at least chilled. This ice cream is super-smooth and creamy with the perfect coffee flavour - mellow and rich, not acidic or burnt. I want to try it with some more dark chocolate fondants (my inner temptress wants salted caramel sauce too, but my rational side says it's too much).

P.S. Apologies for the slightly off photo quality, I've been having issues - hopefully now I'm home in Oxford I'll have time to sort them out.


Caffe Latte Ice Cream
(adapted from BraveTart, here)

420ml double cream
240ml whole milk
100g whole coffee beans (I used espresso ones)
1 vanilla bean
6 egg yolks
150g sugar
1/4 tsp fine sea salt

Pour the double cream, milk and coffee beans into a medium saucepan. Split and scrape the vanilla bean and add the seeds and pod to the pan. Heat until the mixture reaches a simmer, then take off the heat. Leave to cool, then steep overnight in the fridge (or for a slightly shorter time, but I'd highly recommend overnight).

The next day, sieve the coffee mixture, stirring the beans to make sure all the cream comes out. Discard/wash the beans and vanilla pod as desired. Prepare the yolks, then whisk in the sugar and salt until well combined. Return the cream mixture to a pan, then heat it until it starts to steam. Pour about 1/3 of the hot cream into the egg yolks, whisking constantly. Return all of the yolk mixture to the pan, whisking it in.  Turn the heat on again and stir with a wooden spoon until it thickens to a custard consistency and you can drag a finger across the back of the spoon and leave a clear mark. (For help with making egg yolk custard and the spoon test, see this Foundations post). Sieve the custard into a bowl and chill in an ice bath. Chill in the fridge for at least 2-3 hours (or overnight again) then freeze as per your ice cream maker's instructions.

(Makes around a litre)


Sunday, 18 September 2011

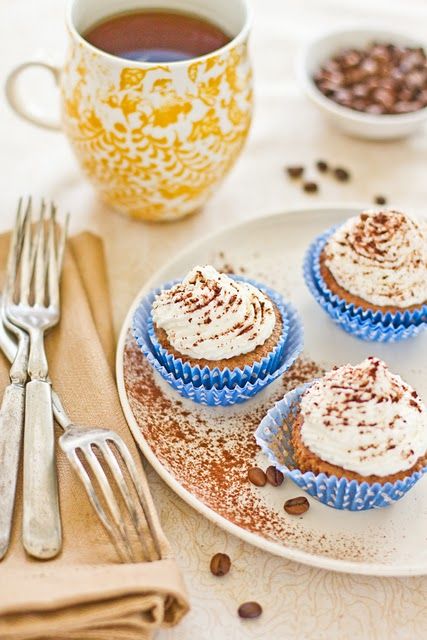
Guest Post: Cappuccino Cupcakes with Whipped Cream Frosting


After finding my new flat and going on a little French holiday, I'm now packing my house up in Oxford. My second guest poster, the gorgeous Sukaina of Sips and Spoonfuls, is now taking over from Steph for the last guest post...

What did you want to be when you grew up? Me..... well, that depended on what age you asked me. When I was around six or eight, my most favorite thing to do was gather all my play china, build a tent out of bed sheets and play families with my neighbor. Funnily enough, I always wanted to be the Mummy who would cook and bake and make exotic things in the play kitchen.


All that changed when I was twelve or thirteen. Summers were spent in London with my grandparents and besides strawberries, trips to Alton Towers and Trafalgar Square, there was also the lure of Wimbledon tennis. I got my first crush........on a tennis player!

I became obsessed with tennis. I bought my first racket, my first white skirt and wanted to be a tennis player. Even a ball girl would have been ok. I spent hours in front of the television and begged and pestered my grandparents to take me to watch a game live.

Then came the modeling years. I was always tall for my age and towered over the rest of my peers at school . My family would tease me that I should become a model and the idea stuck in my head. I spent hours locked in the bathroom trying on my mum's make up and pinning my hair in different styles. I even cut my own fringe and threw the hair out of the window. That phase ended when I forgot to lock the bathroom door and my mum caught me looking like a drag queen.

Finally came the time to choose my 'real' career. I excelled at English Literature at school and loved looking for hidden meanings and messages behind words. However, my parents weren't too keen on me studying Literature at university so I finally settled on Optometry.


And so I have had many such phases in life where I've constantly felt like reinventing myself, learning new skills, craving new aspirations, discovering new talents and.......just enjoying life. I wrote all this because even though I have never met Emma in real life, I am so proud that she is following her dreams and aspirations- to become a pastry chef.

Emma, I wish you all the best. You have achieved so much in a short space and I can see many wonderful things in your future. I hope you enjoy these coffee cupcakes with a light whipped cream frosting. Airy and spongy.......with just the right amount of kick.

Cappuccino Cupcakes With Whipped Cream Frosting
Ingredients:
125 gms butter, room temperature
125 gms sugar
2 eggs
80 ml yoghurt
1/2 tsp vanilla extract
150 gms all purpose flour
2 tsp baking powder
1/2 tsp salt
1 tbs cocoa
50 ml strong coffee
400ml whipping cream
cocoa powder for dusting

Directions:
Heat the oven to 180 degrees Centigrade and line a muffin tray with cupcake liners.
To make the cupcakes, beat the butter and sugar until light and fluffy. Add the eggs, yoghurt and vanilla essence. Add the flour, baking powder, salt, and cocoa. Add 25 ml of the coffee and mix until just incorporated. Fill liners with the batter until 2/3 full and bake for 18 to 20 minutes or until a skewer comes out clean. Drizzle with the remaining coffee as soon as the cupcakes come out of the oven. Frost when completely cool. Sprinkle with cocoa powder
To make the frosting, whip the cream on high speed until stiff peaks form. You can add icing sugar (about 4-5 tbs depending on how sweet you want the frosting) whilst whipping the cream but I left mine as is.  

Recipe adapted from BBC GoodFood Middle East Magazine February 2011. Makes 16 cupcakes depending on size.

Tuesday, 12 July 2011

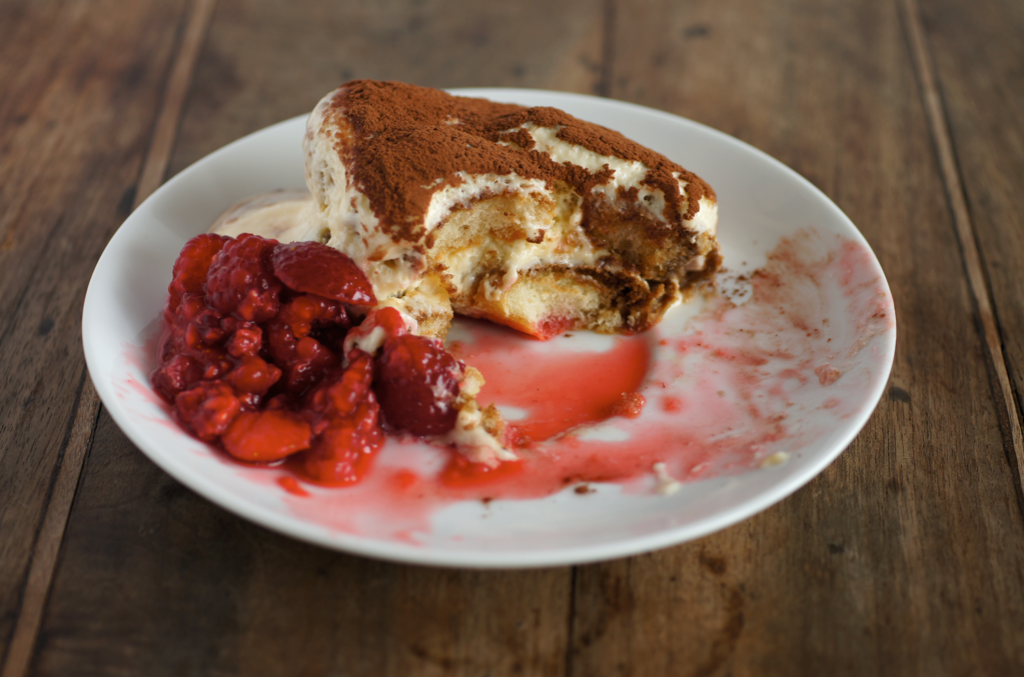
Tiramisu with Macerated Summer Fruits


Yesterday we took a little day trip down into Italy. My uncle Tim has been staying with us in Verbier recently and he decided to take us for lunch at a little place just over the Grand St Bernard Pass as a thank you. It was such a lovely day. We went on two walks with the dogs - one before lunch up at the top of the pass among all the mountain flowers and rocks and then a second afterwards in the green and grassy valley.

We ate a delicious lunch of local dried meats and a variety of pastas. Afterwards I introduced mum and Tim to affogato, one of my favourite light puddings (it's a scoop or two of vanilla ice cream or gelato drowned in an espresso - the perfect creamy end to a heavy meal).

Our trip to Italy brings me nicely to one of my favourite desserts: tiramisu. I made tiramisu for the Daring Bakers before but the recipe was very complicated and slightly too sweet (though I loved making my own marscarpone and savoiardi). Mum was given this recipe on a piece of paper by a lady in Italy last autumn. It has made tiramisu a regular fixture in our house. My uncle Tim has become a little bit obsessed by it and so mum has been making it on overdrive. It's surprisingly addictive.

I made it for my birthday BBQ a few weeks ago and for the first time paired it with a bowl of macerated strawberries and raspberries. A whole new level. I tried the combination for a second time last weekend for a dinner party we were bringing dessert to and it had great reviews again. It's a fabulous recipe I'm sure I will keep on making it regularly for many years to come.


Tiramisu with Macerated Summer Fruits
(exact recipe source unknown)

For the tiramisu:
4 eggs
150g caster sugar
400g marscarpone
350g spongefingers/savoiardi 
300ml strong coffee such as espresso
cocoa powder for dusting

Separate the eggs and place the yolks and caster sugar into a mixer. Whip until pale and thick - the whisk should leave a trail when lifted. In a separate big mixing bowl, beat the marscarpone until smooth. Add 1/3 of the yolk mix and fold until combined to loosen. Add the rest and fold until smooth. Wash the mixer bowl and dry carefully, then whip the egg whites until stiff peaks form. Fold a third into the marscarpone mix, then finally fold the rest in.  Briefly dip each spongefinger into the coffee then place into the bottom of a big serving dish. Keep going until you have a full layer over the bottom. Spoon over half of the marscarpone mix. Make another layer of spongefingers then finally spread the rest of the marscarpone mix over the top. Put in the fridge and chill for at least 4 hours before serving. Just before you serve dust the top liberally with cocoa powder. 

For the macerated summer fruits:
200g raspberries
200g strawberries
1 tbsp caster sugar
1 tsp lemon juice

Place the raspberries in a medium sized serving bowl. Slice the strawberries and add them. Sprinkle over the sugar and lemon juice and lightly stir. Leave for at least an hour, stirring occasionally. 

(Serves 8-10)

Saturday, 27 November 2010

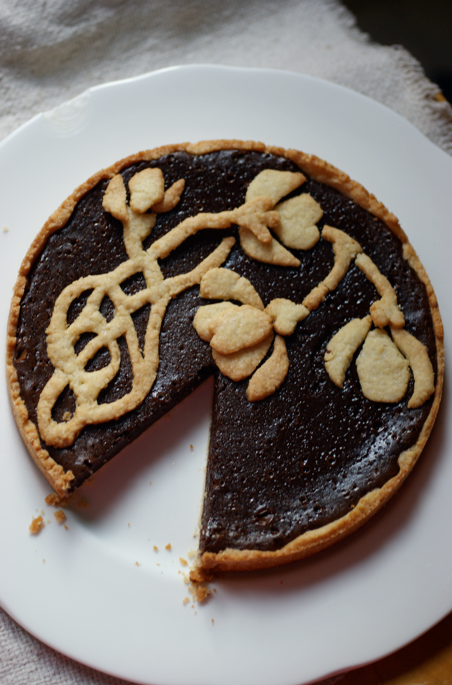
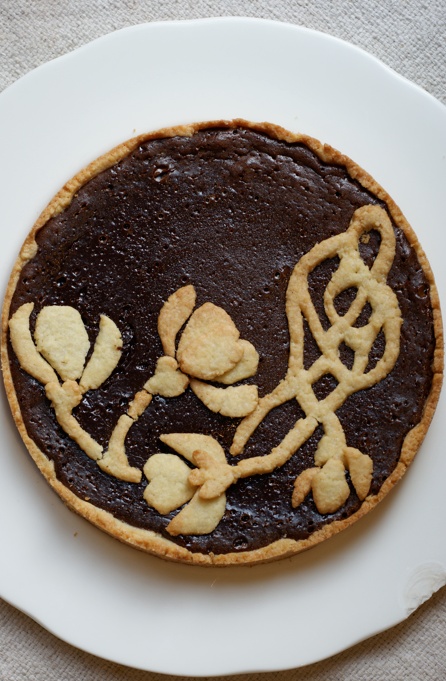
Chocolate Truffle Crostata


This Daring Bakers challenge came at a very busy time, so this isn't too wild. No giant profiterole presents or baked alaska mountain ranges this month. Just a really yummy chocolate tart. 


The 2010 November Daring Bakers’ challenge was hosted by Simona of briciole. She chose to challenge Daring Bakers’ to make pasta frolla for a crostata.  She used her own experience as a source, as well as information from Pellegrino Artusi’s Science in the Kitchen and the Art of Eating Well.


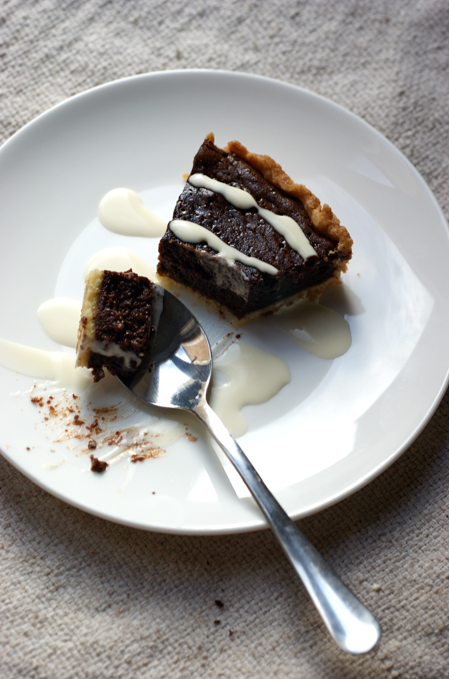
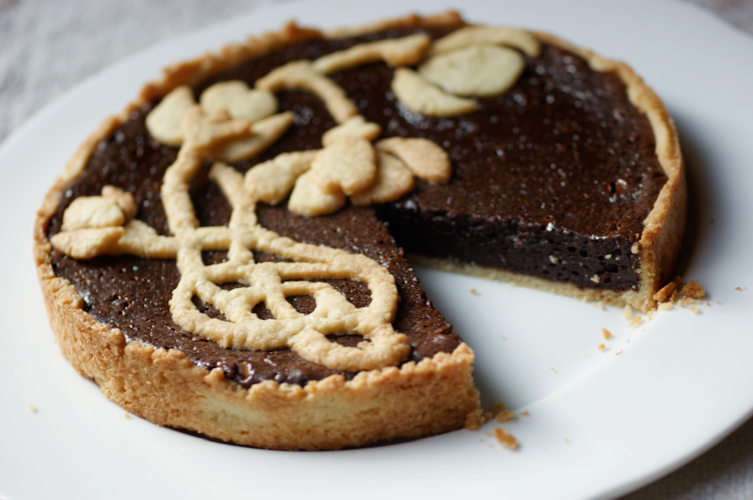
I chose to make the first pasta frolla for my crostata. I had a few ideas for fillings, but in the end I settled on this yummy chocolate truffle filling. I've made it once before and it's a great recipe. The coffee comes through fairly strongly, especially when the tart is cold. I wasn't sure about the pastry when I took it out of the fridge to roll - it had got all sweaty and solid. It came out in the end, though. Perhaps not my favourite pastry ever, but it was fun to do something different. 

Originally I wanted to do a lace design on top of my crostata. Then I came across quite a lot of complications when trying to design it and the pastry turned out to be fairly hard to work with, so I switched to this art deco design. I cut the design out of the rolled out pastry with a knife and then baked the pieces separately, chilling throughly in between. When it came out of the oven I arranged the pieces on the top. Another time I would wait until it had cooled slightly as the top tore slightly in places and I misplaced a few pieces and couldn't move them without causing chaos. 


To find the recipe for the pastry, head over to the Daring Bakers website. The chocolate truffle filling is from Tartelette - I halved it to fill this tart. 

Tuesday, 27 July 2010

Swiss Roll Ice Cream Cake


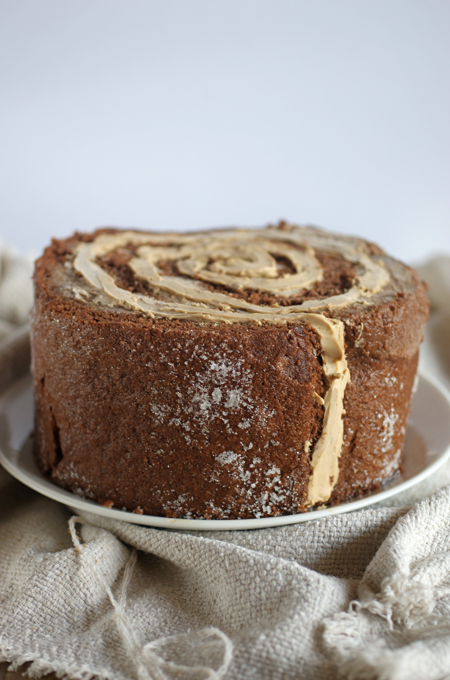
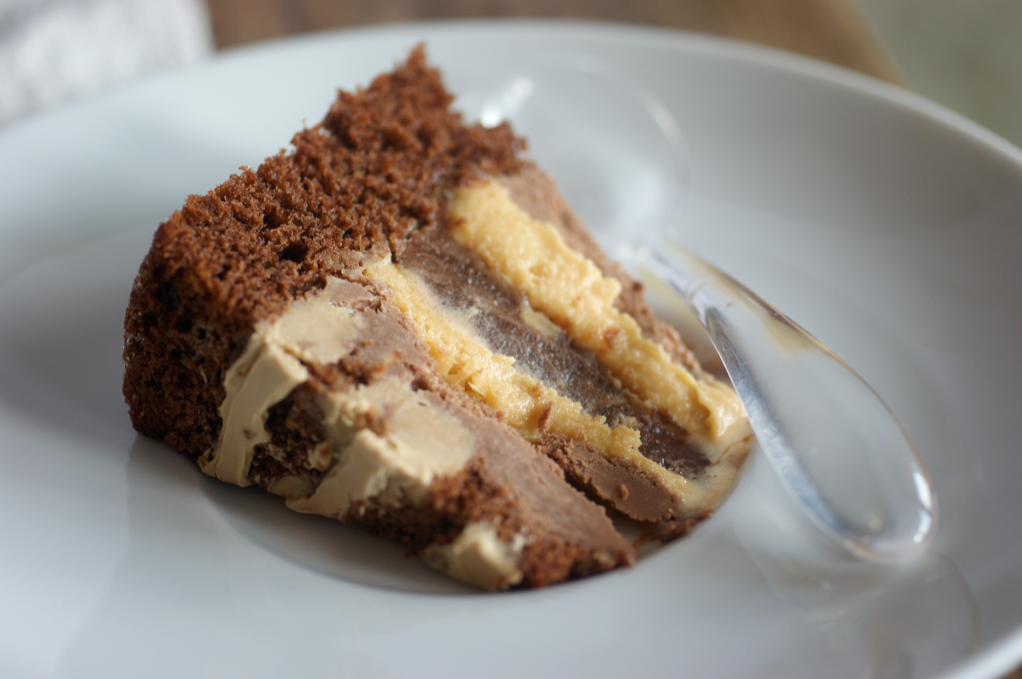
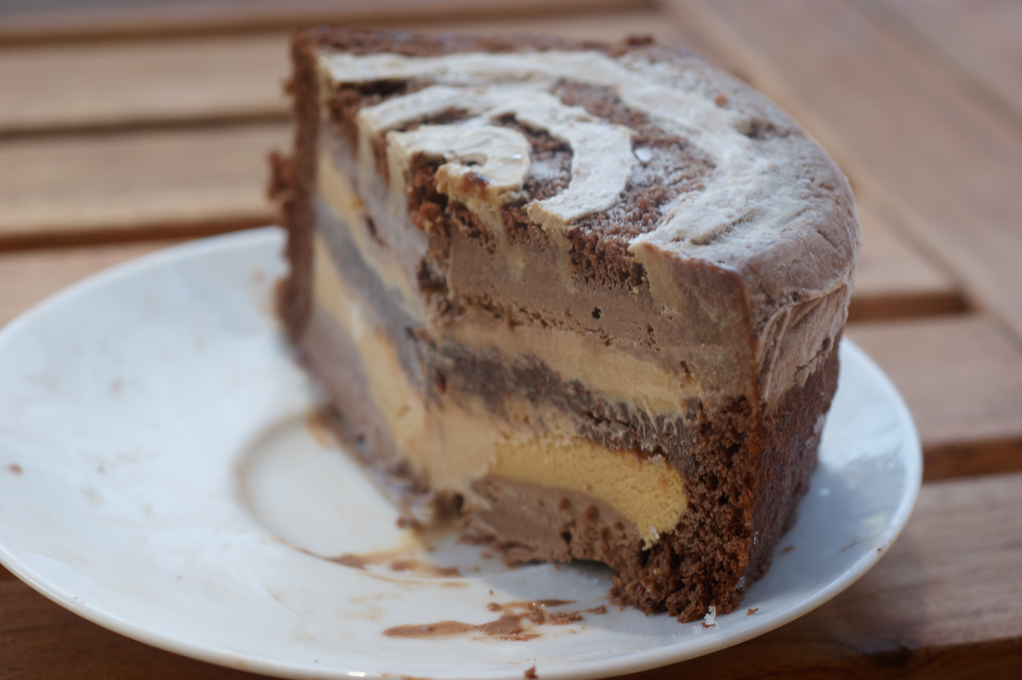
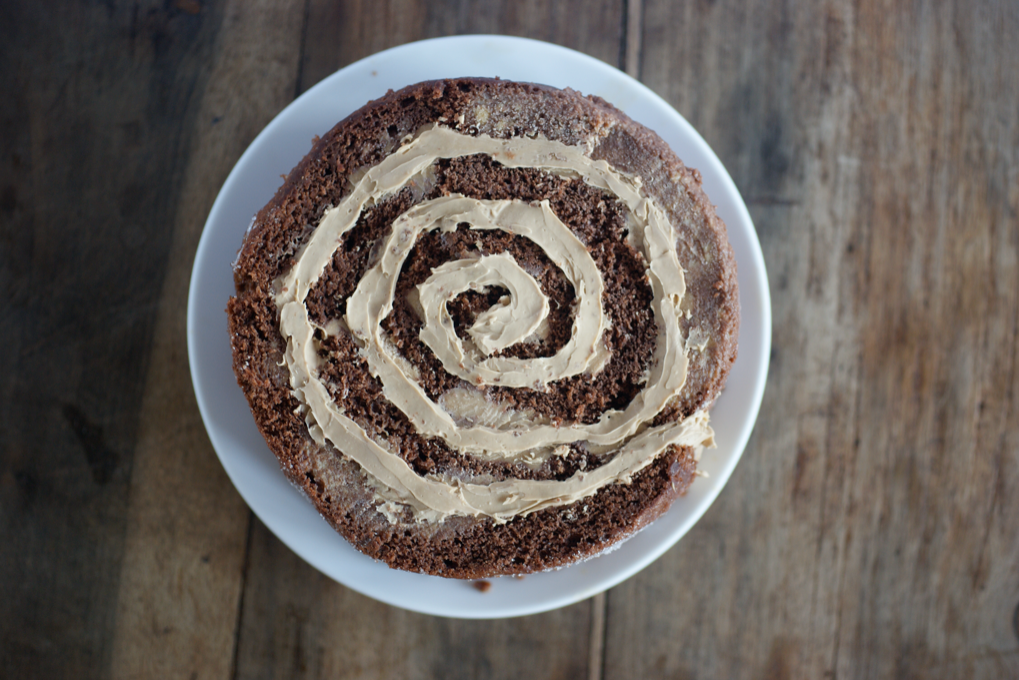
I loved this challenge - though I made more mistakes than I would have liked.  Instead of making a bowl shaped dessert lined with individual slices of swiss roll, I decided to make what looks like one big slice of swiss roll. It's a dark chocolate and espresso roll filled with coffee marscarpone cream...


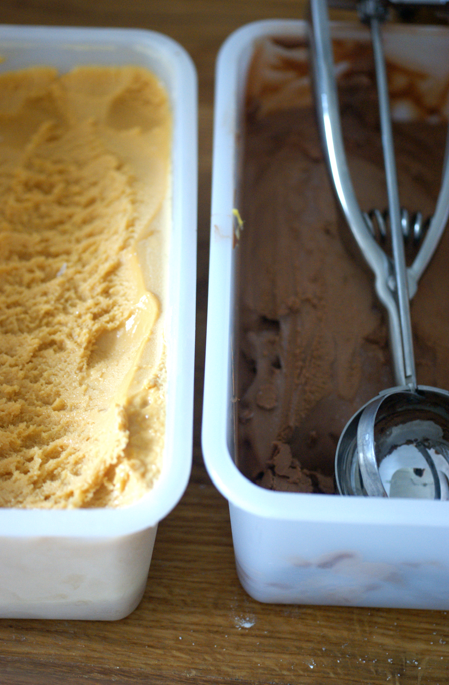
But what's inside? Well, working from the top down, we have dark chocolate and brown sugar ice cream, fleur de sel caramel ice cream, hot fudge sauce with a hint of coffee and then more caramel ice cream and then more chocolate ice cream. Yum. 

(Also, that's sugar from rolling it on the outside, not frost!)

The odd thing about this was that I spent ages planning it and thinking of how I could make sure it rolled smoothly round the edge, how I could make the swirl look perfect on top... and then when it came down to it, I rushed and fudged several things. Very annoying. 


The brown sugar and dark chocolate ice cream is an adaption of the Rich Chocolate Ice Cream I made before. It's smooth and rich without being overwhelming. 

The fleur de sel caramel ice cream is taken from David Lebovitz's blog, here - I didn't have salted butter so I used unsalted and added a whole teaspoon of fleur de sel. I made the whole recipe but half would have more than adequate for this cake.  I contemplated writing the recipe out below, but decided that David's instructions are so good you might as well get them at his site. This ice cream is so so delicious, if a little gloopy for these purposes. Still, yum. Yum. Make it!


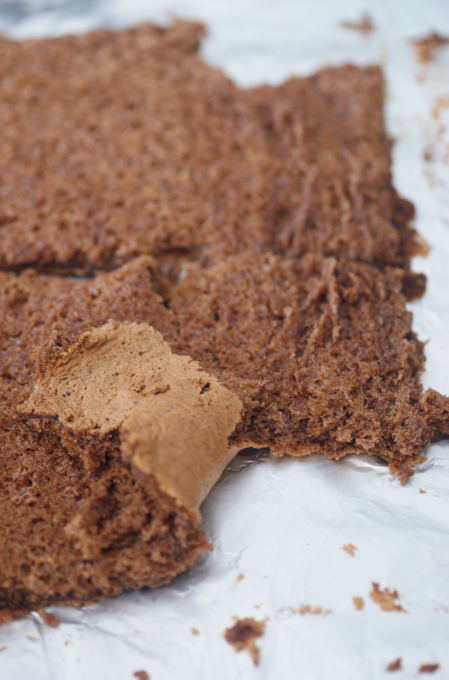
As I was making a chocolate roll, I tried the original recipe from the challenge. Unfortunately it didn't really work for me - it was thin and floppy and didn't taste of much. This was almost definitely my fault, but I decided to go for a different recipe as I didn't have time to mess up again. I went for Delia's Swiss Roll recipe, adapting it by adding cocoa powder and espresso.  I also couldn't face not creaming the butter and sugar first, although it's an all-in-one recipe. It's very different from the DB recipe and much more like a normal cake - it has butter and egg yolks etc. 


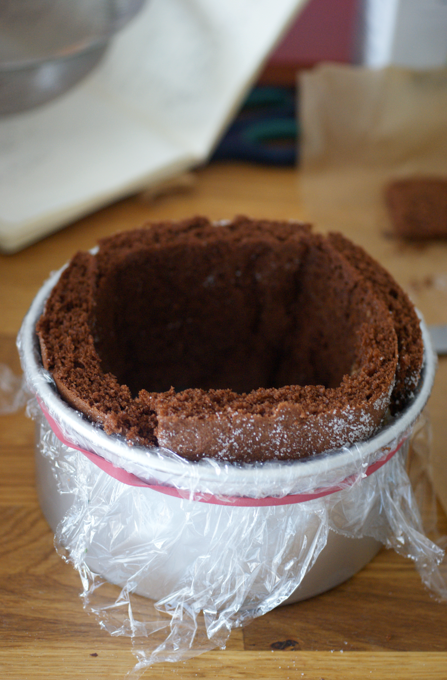
Thankfully this recipe worked out well, though it was a little bit thick. Once I had tipped it out onto the sugared paper, I cut it in half lengthways. Then I rolled it into the cake tin I had prepared with cling film. Unfortunately I wasn't really concentrating and it cracked slightly in a few places. 

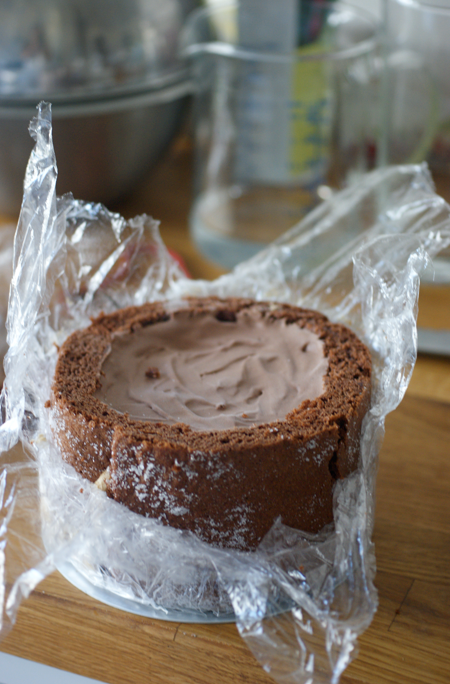
I then cut small strips from the other half and started rolling them around to create the top of the slice, adding the marscarpone as I went.  Then it went into the freezer for a half an hour or so to set before I added the layers of ice cream and the hot fudge, chilling well between each addition. 


Unfortunately, with the first layer of the caramel ice cream, I let it melt a bit too much before spooning (pouring...) it in. It spread through to the bottom of the cake and soaked parts of it, resulting it in not looking as pretty as hoped and my having to use another lot of ice cream as the rest had melted away. It also screwed up the look of the swirl on the top, taking out some of the definition. As a result, I had to pipe/smooth another layer of marscarpone on the top of the cake.


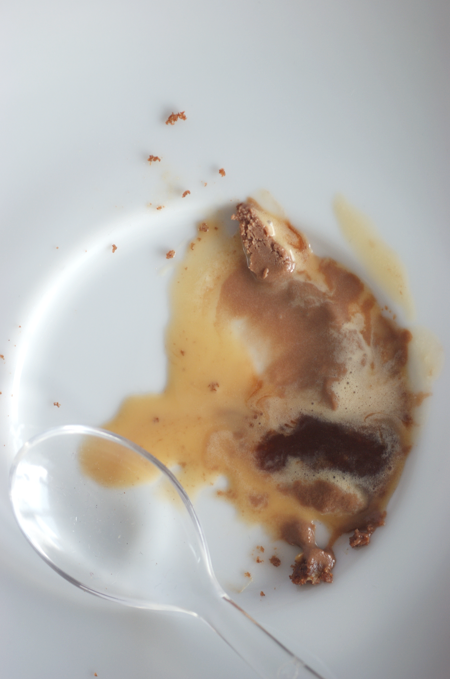
Above was the moment of truth... when I realised how much damage I had done by adding the ice cream when it was too liquid. Rookie mistake, I know. 

Still, this tasted fantastic and I was really pleased with the flavour profile. I'd like it to look a lot neater. All in all, though, a great challenge - I was already making lots of ice cream but I wouldn't have thought of making this without Sunita and the DB's.
The July 2010 Daring Bakers’ challenge was hosted by Sunita of Sunita’s world – life and food. Sunita challenged everyone to make an ice-cream filled Swiss roll that’s then used to make a bombe with hot fudge. Her recipe is based on an ice cream cake recipe from Taste of Home.
Swiss Roll Ice Cream Cake
(Delia, David Lebovitz, my ice cream maker manual and the DB challenge recipes- see details in post)

For the brown sugar and chocolate ice cream, see this post and replace the sugar with brown sugar. 

For the fleur de sel caramel ice cream, see David's post about it, here. 

For the coffee marscarpone:
150g marscarpone
1 1/2 tbsp icing sugar
1 tbsp espresso powder
1 tbsp boiling water

Beat the marscarpone in a bowl a little to loosen it. Sieve over the icing sugar and beat in. Mix the boiling water and espresso powder together then add to the bowl and beat in. Put in the fridge until needed. 

For the cake:
50g softened butter
110g caster sugar
2 large eggs
90 g plain flour
20g cocoa powder
1 tsp baking powder
1 tbsp hot water
1 tbsp espresso powder

Preheat the oven to 200C/400F. Grease an then line a swiss roll tin, making sure it comes up the sides and the paper is well greased too. Put the butter and sugar into a mixer and beat until light and fluffy. Add the eggs and sift in the flour, baking powder and cocoa. Beat until just combined. Mix the hot water and espresso powder and then fold into the mixture. Spread evenly into the tin, making sure it reaches the corners. 

Bake for about 12 minutes or until it is springy to the touch in the middle. Meanwhile place a large piece of baking parchment on a surface and sprinkle with extra caster sugar. When you take the cake out of the oven, loosen the edges from the paper and then flip out onto the sugared surface. Cut all the edges off. At this point, either follow a traditional method with the coffee marscarpone, or start to line the tin with the cake for this ice cream cake. 

For the fudge sauce (half batch of DB recipe):
100g caster sugar
1 1/2 tbsp cocoa powder
1 tbsp cornflour
1 1/2 tsp espresso powder
180ml water
1/2 tbsp butter

Whisk together the sugar, cocoa, cornflour, espresso powder together with the water in a small saucepan. Stir until the sauce thickens - about 2 minutes. Stir in the butter and leave to cool. 

(Serves about 12 to 15 or more - it's very rich!)

Monday, 5 July 2010

Espresso, White Chocolate and Rose Cake


As I walked into the kitchen yesterday, I felt the need for a light cake. A coffee cake seemed like an excellent idea. And so this cake was born - a light but flavourful espresso sponge dripping with a thick white chocolate ganache and topped with a handful of sugared rose petals.


Making sugared rose petals is very easy, if a little fiddly. It's just a matter of painting them with egg white and covering then in fine sugar before letting them dry. It's important that they're not sprayed with chemicals, so picking from your garden is best.

I made mine yesterday while I watched the finals at Wimbledon. Much as I love watching tennis, I felt I could sit on the sofa making these and watch Rafa winning easily at the same time. (Oh how I wish Federer had been there - I was so upset when he went out).


I have to admit to something. I didn't use real, brewed espresso. I used espresso powder that I bought the other day, mixed 1tbsp/1tbsp with boiling water.  I know it's not the real thing, but it worked a charm in this cake.

I had forgotten what an odd looking ganache my favourite white chocolate from Green & Blacks makes. It's almost slightly green and translucent until it cools fully, when it's whiter. So forgive the ganache in the photos for its slightly poorly appearance - I couldn't wait to take the photos and eat some!


Before we knew what had happened, Mum and I had polished off nearly half of the cake. I particularly enjoyed mine with a few fresh raspberries to add a tart element. The sponge is lovely and light and has great flavour, especially combined with the ganache. A success!


Expresso, White Chocolate and Rose Cake

For the cake:
110g butter
60g soft brown sugar
50g caster sugar
2 eggs
110g plain flour
1 1/2 tsp baking powder
1 tbsp strong espresso
1/2 tsp vanilla extract

Preheat the oven to 160C/ 320F. Grease and line the bottom of a 8"/20 cm round tin. Cream the room temperature butter and the two sugars together until fluffy. Add an egg, beat well, then add the other (you may need to add a tbsp of flour in between the eggs). Sift in the flour and baking powder and fold to combine. Add the espresso and vanilla and fold in. Spoon into the prepared tin and bake for about 30 minutes, or until a skewer/toothpick comes out clean. Remove to a wire rack and cool slightly before removing the tin and paper.

For the sugared rose petals:
petals of an unsprayed rose
1 egg white
25g white caster sugar

Carefully pull petals off the rose - I only took 20 or so. Separate an egg and put in a small pot. Put the sugar in a small bowl/pot. Using a paintbrush or pastry brush, lightly cover a rose petal in the egg white. Either carefully press the petal into the sugar or sprinkle it on. Put to dry on a sheet. Repeat for all your petals. Leave to dry for about 30 minutes or until fairly hard before using.

For the white chocolate ganache:
100g good quality white chocolate
30ml double cream
1-2 drops rose water (optional)

Break the chocolate up into small pieces and place in a small bowl. Heat the cream until nearly boiling and pour over the chocolate. Leave for a few minutes then stir until smooth. When it has cooled slightly, pour over the cake and arrange the petals on top.

(About 8 slices)


ShareThis