Showing posts with label custard. Show all posts

Friday, 1 June 2012

Foundations no.6 - Egg Yolk Custard


I'm not sure I can imagine a life without custard. It seeps into so many recipes and cultures. It never stops flowing into trifles and over crumbles.

As well as creating custard to pour lavishly over your dessert, this method (and variations upon it) can be used to make a stirred custard base for ice cream. And that's before we even look at baked custards like crème brûlée, custard tarts, crème pâtissière style concoctions or relatives like lemon curd.

Yet traditional custard can be a bit daunting - all the talk of curdling, lumps and long stirring times often put people off (and, it seems, a rather strong attachment in the UK to custard powder). Being able to make an egg-thickened custard is a great skill to have, which is why I chose it for this series.
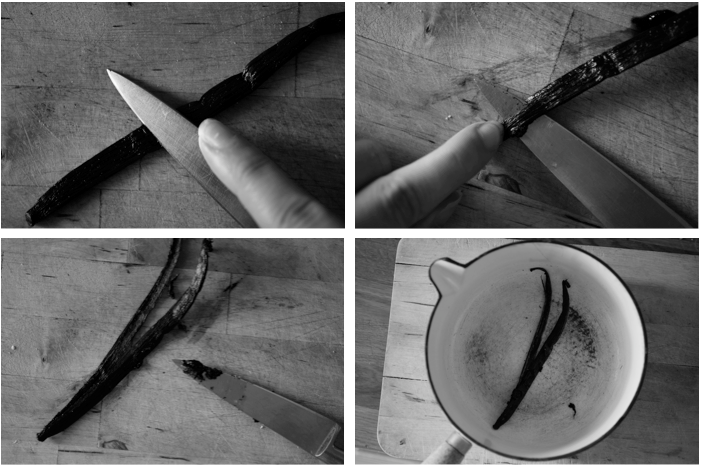

Though you can use vanilla extract as flavouring, there's nothing quite like infusing custards with a proper vanilla pod. Above I've shown my method for splitting and scraping a pod. The photos run l-r, top to bottom.

1/ Take your pod and place it on a chopping board. Hold it down then run your knife along the pod at an angle to flatten it - it may be easier to use the blunt side of your knife.

2/ Insert your knife into the middle of the pod, then pull down along it, splitting it. It can help to press lightly on top of the knife with a finger as it moves.

3/ Run the knife down the inside of each side, removing the seeds.

4/ Add both the seeds and the scraped pod to the pan.


When you want to start making your custard, you need to get everything ready.

For my custard (based on this recipe) I had 300ml milk, 1 vanilla pod, 5 egg yolks, 25g caster sugar and 50ml double cream.

In particular, your yolks need to be in a bowl by the stove (as you can see, I'd run out so a big teacup had to do) with a whisk handy (the first one I tried was too big for my teacup, so do check). It's also helpful to have the cream in a jug big enough to hold all the custard (i.e. not the one pictured...) and to have a sieve on hand.


Add the milk and sugar to the pan with the vanilla pod. Place over a medium-high heat and briefly whisk to release the seeds and help the vanilla infuse.

When it starts to steam, you're ready to temper the egg yolks. Turn the heat off.


Start by whisking the yolks to break them up. Then slowly pour in about 1/3 of the hot milk, constantly whisking the yolks.


Once you've added the 1/3 milk, quickly give the yolk mixture an extra whisk.


Return the yolk mixture to the pan, whisking as you add it. Scrape all the last drops into the pan with a spatula.

Remove the whisk from the pan and exchange it for a wooden spoon (I find a spatula doesn't hold the coating like a spoon, making it hard to test). Turn the heat back on under the pan - a low to medium heat should be enough. I would start low and then increase another time if you're happy - it will take a bit longer but is worth it if you're nervous.
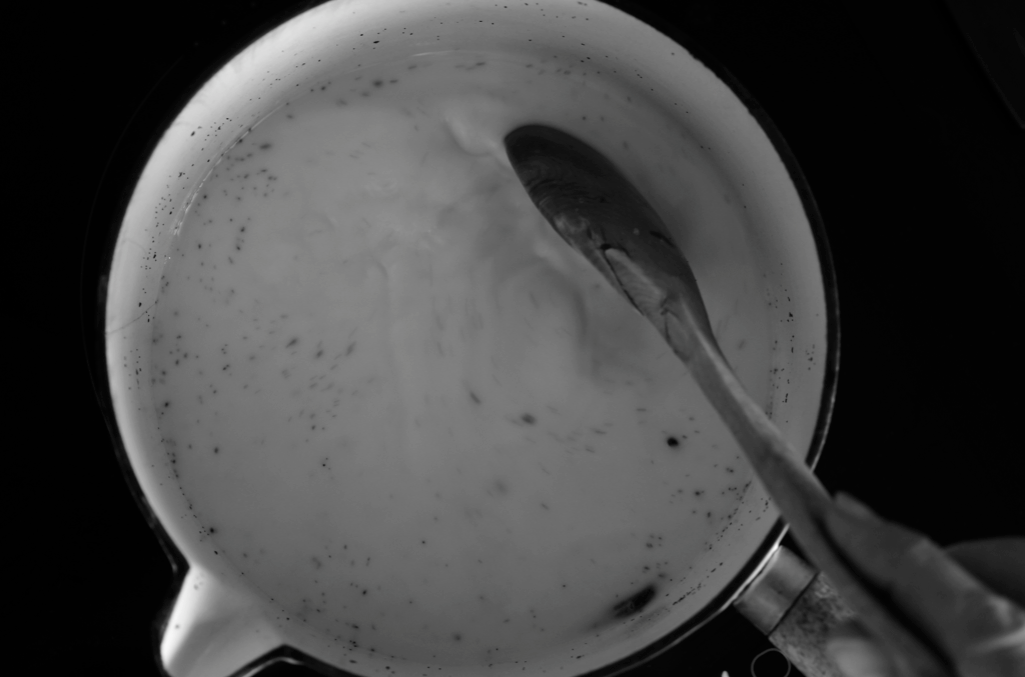

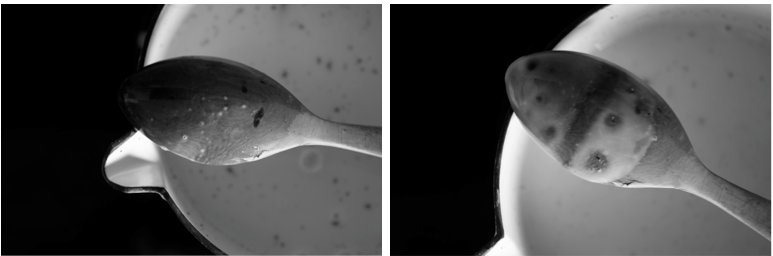
Stir constantly over the heat until the custard thickens, making sure you scrape the corners and bottom to stop lumps forming. When you remove the spoon at first, the custard won't coat the back at all (see below, left).

Once it's thick enough, it will coat the back of the spoon and you will be able to draw a clearly visible line through it, as you can see on the right. (It's not normally blotchy - they seemed to have formed around clumps of vanilla seeds - but it's the thickness you're looking for).

When you're happy with the thickness, strain the custard into the jug containing the cream and stir well. You need to strain the custard to catch the chalaza (the little connecting threads between the yolk and white) and any little lumps that have formed.

The process of straining and the cold cream will also quickly stop the cooking. You can also sit the jug in a bath of ice water - ice cream recipes often include this step. Cover the surface of the custard with clingfilm so a skin doesn't form.

I should note that I generally use a recipe for custard that doesn't call for the blanching the egg yolks and sugar beforehand. Many recipes do and if you're making crème pâtissière or similar, you will need to. I haven't included it above but you essentially just whisk the two together until very pale and thick before adding the milk. Be careful to start whisking the sugar in immediately - if left on top of the yolks the sugar will 'burn' them, forming lumps.


Four recipes that use this technique:

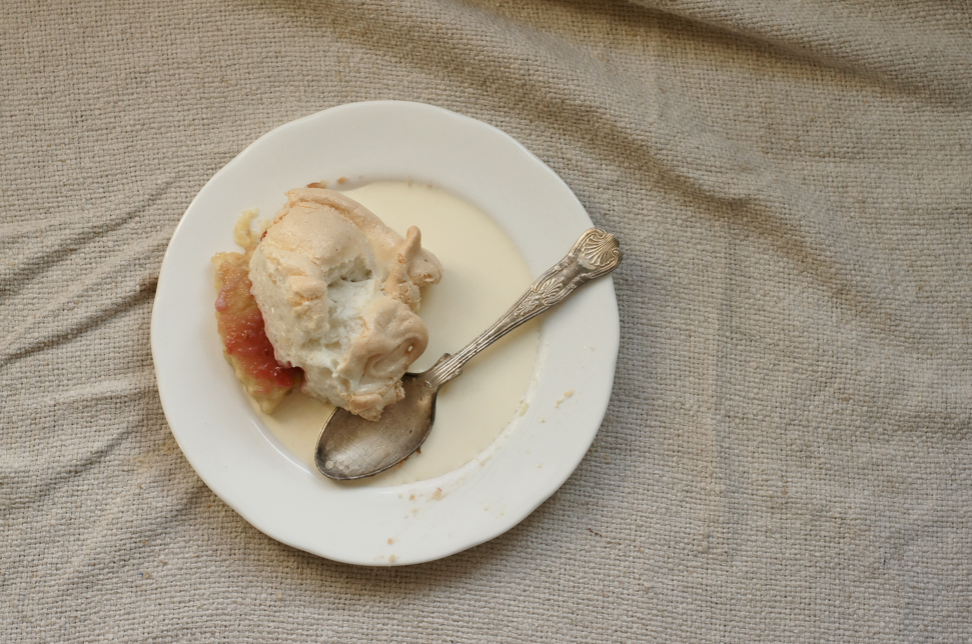
Mixed Berry Meringue with Custard
Buttered Pecan and Butterscotch Ice Cream
Mint Choc Chip Ice Cream
Rich Vanilla Ice Cream

*

This is the last post of my current Foundations series. The first post was on rubbing in to create pastry. The second covered brown butter, followed by a third on creaming butter and sugar, a forth about icing cakes and a fifth looking at chocolate ganache. It will return next year.

Monday, 14 November 2011

Queen of Puddings


Expectation is a funny thing.

It starts off from a rose-tinted idea in your mind. You call it a dream and think of how much lovlier your life will be when exams end or new adventures start. Some of these plans never come to fruition - the warm glow fades before it even happens and you turn to the next brightest flame.

It's not that reality is better or worse, just different.

I wonder why we can't keep that warm glow alive once it becomes reality. Maybe it's just that - reality cannot be perfect and there are always difficult or testing parts, however small. It feels so romantic to say and believe that you're following your dream, but I wonder if it is too much pressure. Maybe the only way to live is to try and focus on today rather than the future.


I couldn't decide which traditional pudding to make for this post, so I put it to the vote on facebook (I've also updated the page and added an album of black and white outtakes from posts). The choices were a baked custard tart (a.k.a. Henry IV's coronation dulcet - I nearly made this just because it mentions that Chaucer was at the feast), a Sussex pond pudding or this, the Queen of Puddings.

Jane Grigson describes the Queen of Puddings as "a pudding that deserves its name for the perfect combination of flavours and tastes, a most subtle and lovely way to end a meal".

How can a pudding live up to "perfect", to being the winner, to being deemed the "Queen"? It's just like an experience living up to the rosy 'dream' we have called it.


The pudding is definitely "lovely" and "subtle". The custard is warm and nubbly from the breadcrumbs (don't skimp on the vanilla and lemon zest as it brings it to life). The raspberry is only a hint, but it adds another layer of flavour. The meringue is pillowy like pavlova inside and crisp on the outside.

The reality is delicious, but it wasn't quite what I was expecting. It's no worse for that.

Time moves on. The dust settles, familiarity forms and habits are set into place. The next 'dream' or 'queen' recipe slips into the previous place, altered by your new experience. The cycle starts again, pushing you forward onto the next plan, the next idea.

I try to live for today, but my dreams and plans for the future are what drives me - striving for something gives me purpose in life. As with most things, a balance is probably the answer. To not wish the present away but hold onto those dreams. To anchor your feet but keep those brightly coloured balloons tightly wrapped around your hand, propelling you forwards.


Queen of Puddings
(adapted from Jane Grigson's English Food)

For the custard base:
75g fresh white breadcrumbs
zest of 2/3 lemon
2 tsp sugar
1/2 tsp vanilla paste or extract
300ml milk
30g unsalted butter, cubed
pinch of salt
2 egg yolks
1 heaped tbsp raspberry jam or jelly
1/2 tsp lemon juice

For the meringue:
2 egg whites
70g caster sugar (I used golden)

Preheat the oven to 180C/350F. In a medium bowl combine the breadcrumbs, zest and sugar. Stir the milk, butter and salt in a medium saucepan and set over the heat. When the butter has melted into a golden film on the surface and the mixture is steaming but not boiling, pour it over the breadcrumbs. Mix together then let it stand for 10 minutes.

Beat the egg yolks into the breadcrumb mix with a spoon or spatula (not a whisk - you don't want to add air). Pour into a shallow ovenproof dish that holds approximately 750ml. Place into the oven and bake for about 20 minutes, or until the custard is set but still wibbles in the middle (you will be baking it again, so err on the side of underdone). Lower the oven to 150C/300F.

Warm the jam or jelly in a small saucepan with the lemon juice, stirring to combine. Sieve if you've using jam with seeds. Spread over the custard gently, being careful not to break the skin.

Whip the egg whites until they are firm and hold soft peaks. Sprinkle half the sugar over the top and whisk to combine. Repeat with the other half and then whip until stiff and satiny. Spoon the meringue on top of the jam and swirl, making sure it meets the sides of the dish. Place back in the oven and bake for about 25-30 minutes or until golden and crisp to the touch. Serve hot alone or with cream.

(Serves 3-4)

Saturday, 30 April 2011

Mixed Berry Meringue & Custard


When I was younger one of my favourite desserts was my mum's apple meringue with custard.

To make it we would walk through our orchard to the best cooking apple tree and pick up a few of the giant green apples. On the way back to the house we would stop at the chicken houses and pick up fresh eggs for the meringue and custard. Then the apples would be peeled and lightly stewed with some lemon peel before being topped with the meringue and placed in the Aga. The custard was made with the leftover yolks.  We don't live at that house any more but the memories stay with me.

This is my new version, though the apple stays close to my heart. You can change up the filling however you like - though it's important that it's on the tart side as the meringue is sweet (hence cooking apples, sharp berries). I like the frozen berry mixes you can get in the supermarket - they're so quick and great in winter when you want a change.

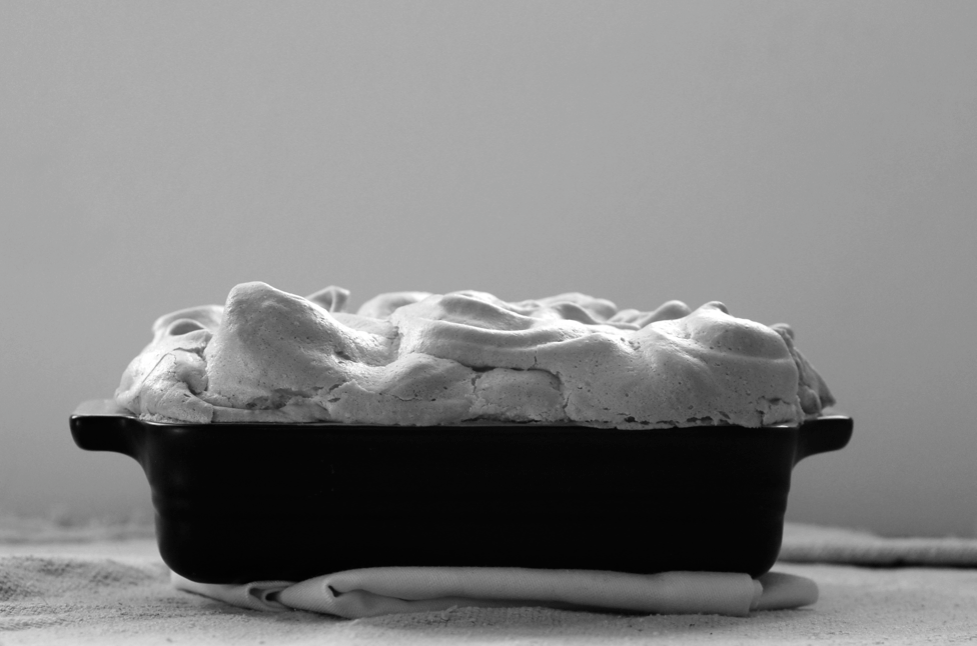
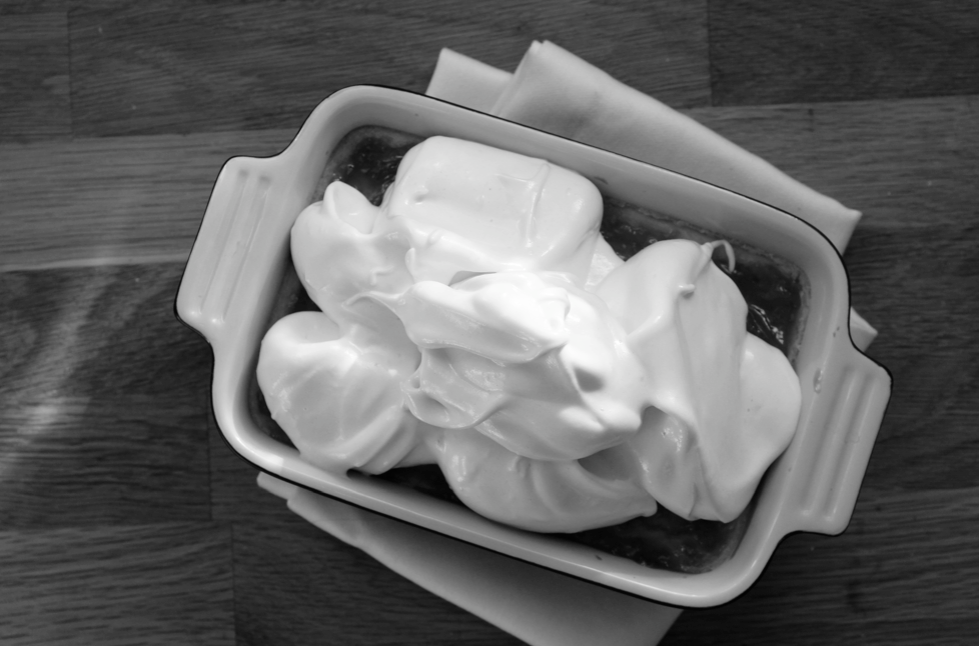
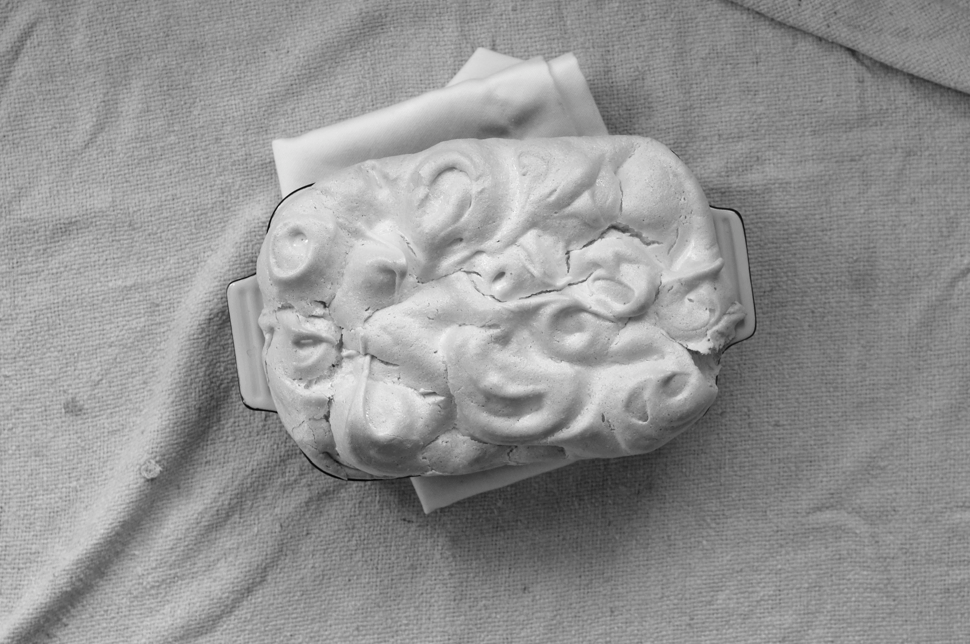
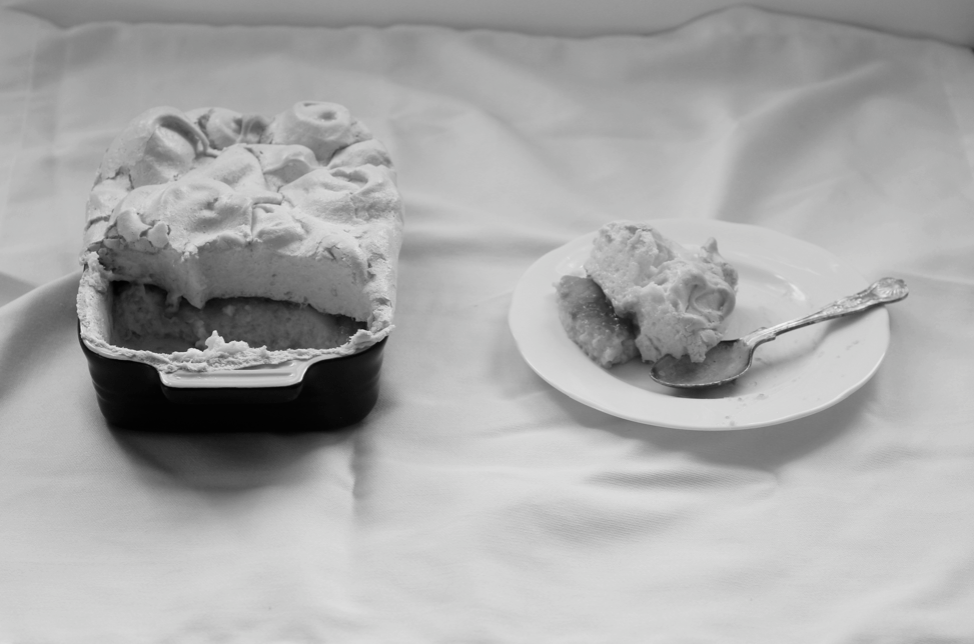
We usually make it in one big dish but I decided to try a smaller one. Turns out that it's pretty pointless as the whole point is that you have lots of custard and there's no space for it in a ramekin. So I transferred it to a big teacup and ate it that way. 

My mum always used to make custard with milk, vanilla, cornflour, a small amount of sugar and a few egg yolks. The version below is much richer and only thickened with yolks. I like both but this recipe is great for a special pudding. 

Custard
(adapted from Annie Bell's Gorgeous Desserts)

300ml whole milk
1 tsp vanilla paste
5 egg yolks
50g caster sugar
75ml double cream

Pour the milk into a pan and bring to the boil. Meanwhile whisk the vanilla, yolks and sugar together. Pour the milk into the yolks, whisking constantly. Return to the pan and put back over the heat. Stir constantly until the custard thickens and coats the back of the spoon. Take off the heat and sieve into a bowl. Whisk in the cream. Place a layer of cling film over the surface and leave to chill until needed. You can heat gently if you prefer warm custard. 

Mixed Berry Meringue
(an adapted family recipe)

For the filling:
1 apple (I usually use cox or braeburn)
200g frozen mixed berries (or fresh in season)
25g dark brown sugar
1 tbsp lemon juice

Peel then chop the apple up into small chunks. Place with the berries, sugar and juice in a saucepan and warm through until the sugar is dissolved. Pour into a baking dish. This can be done several hours before you want to serve. 

For the topping:
2 egg whites
105g caster sugar

Preheat the oven to 160C. Whip the egg whites until they hold medium peaks then add the sugar slowly. Whisk until glossy and stiff. Dollop around the edge of the baking dish and then fill the middle. Make sure the meringue touches the edges. Spike up all over. Place into the oven for 35-40 minutes or until golden and crisp (I slightly undercooked the bigger one above so don't go on that picture). Leave to settle for 10 minutes then serve either warm or cold. 

Sunday, 25 July 2010

une douce pour l'été


I have written before about recipes I have made that have changed my perceptions and changed my course in life. My Pear and Chocolate Loaf Cake was one of these. It made me realise that I could make up my own recipes and they could actually work. It opened up a whole new world of invention.  The Beautiful and the Damned Cake was another.

Now I have realised that baking and creating things with food is my passion and what I want to do with my life, these moments have become even more precious. Every time something flops, I question my choices. Do I have it in me? Will I succeed? From the very first bite, this dessert said yes.


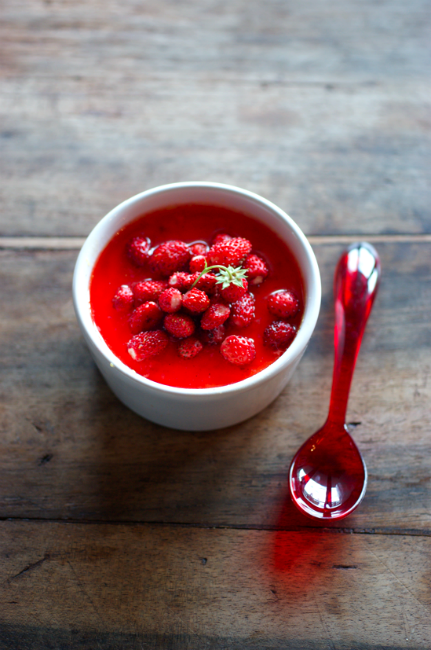
A week or so ago, my mum and I went out for a special supper up the mountain at La Marlenaz. I had a truly wonderful duck dish with local honey and figs for main but it was my mum who won on dessert. She had 'une douce pour l'été' from the specials board, a new addition by the chef. It was, the waiter explained, a creme brulee base topped with raspberries.  It was gorgeous - warm thick creamy custard topped with a raspberry syrup and fresh raspberries. Mum begged me to try and make something similar.

When we came out to go home, there was a rainbow stretching from deep in the valley to high over the mountains - a full semicircle. It was one of the most beautiful things I've seen recently.


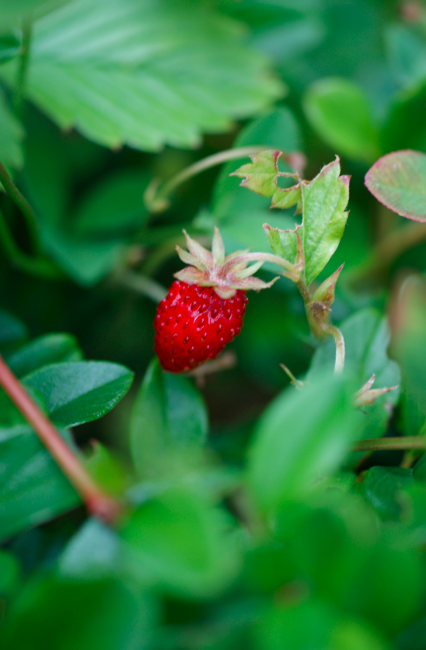
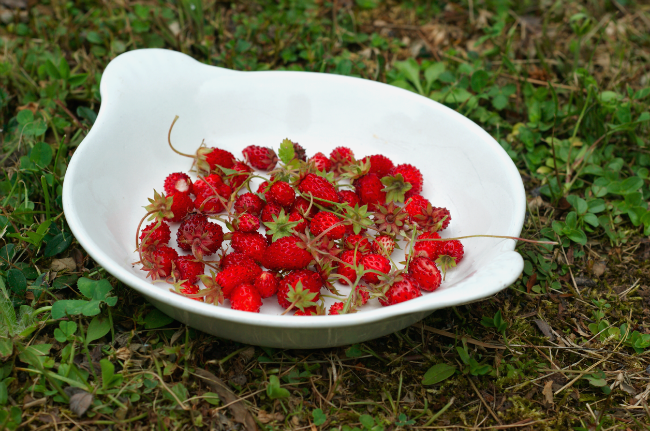
Around the same time, we discovered a bank of wild strawberries just outside our apartment block. I've never seen so many growing wild like this.  By the time I got to picking them yesterday, quite a few had gone over or been eaten by wildlife but I still managed to get a fairly large haul. Wild strawberries are incredible - so tiny and yet packed full of flavour. They have a slightly different taste and smell to regular strawberries, too.

My version of this dessert then started to come together - it seemed like the perfect place to showcase my  precious little strawberries.  I had thought of the original raspberries, blueberries, cherries... all of which I'm sure would be lovely, especially if you don't have wild strawberries.


My only reservation about the dessert we ate at La Marlenaz was that the custard was a little heavy and overly rich for summer.  As a result, I tried to find a fairly light creme brulee base and used fairly thin double cream. Luckily, the first one I chose worked like a dream. I took them out when they were still fairly soft and wobbly.  I added lots of gorgeous vanilla.

For my syrup I used regular strawberries as I didn't have enough wild ones. I added plenty of lemon to keep it fresh and not too sweet.


I spent the whole afternoon grinning like a cheshire cat after eating this. I felt on top of the world - I can do this! This is quite simply the best dessert I have ever made. Possibly the best thing I have ever cooked. The base is soft, creamy and packed with gentle vanilla. The syrup is just wonderful and complements the custard perfectly and the strawberries finish it all off.

I can't really describe this. It all goes to gibberish. I'm just sitting here wishing we still had some in the kitchen.


Mum declared this not only to be better than the restaurant version but the best dessert she had ever eaten. I can't imagine a compliment higher than that.


Wild Strawberry and Vanilla Creams
(custard adapted from Annie Bell's Gorgeous Desserts)

for the syrup:
65g strawberries
20 ml water
1 tbsp lemon juice
few strips of lemon peel
30g vanilla caster sugar (or regular plus 1/2 tsp essence)

Cut the strawberries up into small pieces - I cut mine into 8. Put them in a small saucepan with all the other ingredients. Put over a medium heat, stirring until the mixture starts to bubble and the sugar is dissolved. Reduce the heat to low and cook for five minutes. Remove to a pot and take out the peel. Leave to cool and then put in the fridge to rest, preferably overnight. The next day, strain the syrup, squishing the strawberries lightly.

for the custard bases:
3 egg yolks
1 1/2 tbsp vanilla sugar
1/2 vanilla pod
300 ml double cream (not too thick)

Preheat the oven to 140C (fan)/160C. Chop the vanilla pod up into 1 inch chunks. Put all the rest of the ingredients into a food processor/blender and blend to combine and cut up the vanilla pod. Sieve the mixture into a jug.  Pour into four ramekins or a small dish. Put the dish(es) into a roasting tray and fill the tray with hot (not boiling) water. Place in the oven. Bake until the custards are lightly golden and set, but still have a good wobble - you don't want these overcooked. Mine took about 50 minutes but check from about 30. Take them out of the water and leave to cool slightly. I then carefully scraped the crust off so the texture didn't interfere and the syrup could intermingle.

to assemble:
handful wild strawberries

When the custards have cooled a bit - you still want them warm to serve if possible - carefully pour the syrup over. It may try to dive down a crack but don't worry too much - the fruit will cover it up a bit and it will still taste wonderful. Top with the strawberries and serve.

(Serves 4)

Wednesday, 5 May 2010

Baked Custard Pots


I have a very exciting project making its debut upon the world on Friday. I had a lot of unused egg yolks sitting in my fridge as a result of this very exciting project and wanted to do something nice with them. I came across a recipe for Black and White Custards in Annie Bell's lovely 'Gorgeous Desserts' and decided to play with it.


Instead of making just vanilla and chocolate, I decided to make three types: coffee, dark chocolate and cardamon. I found a pot of cardamon pods in the back of my mum's cupboards while I was at home and I brought some back with me in a little bag. I've never used them before but it is a lovely taste and a gorgeous aroma. 


I was surprised to find that the coffee was my favourite. The texture of the chocolate wasn't quite right and neither was the cardamon. All were good, but I would want to tweak the chocolate and cardamon recipes before making them again.  The coffee was gorgeous - silky, smooth and delicate.

I also worked out how to make walnut shavings with a cheese slicer thing to go on top of the coffee pots. I got very excited it, much to my flatmate's confusion.


Baked Custard Pots

EDIT: I've removed this recipe as I'm not happy with it and haven't had the time to go back and try it again - I wouldn't want you to use up ingredients and be disappointed.

ShareThis