
As a perfectionist, I struggle with icing cakes.
I can never get it absolutely spotless. There's always a slight line, a shallow hollow, an uneven surface or a bald patch caused by an overenthusiastic sweep. Sometimes I give in to the rustic look and swish and swirl the icing into patterns and loops - though, I have to admit, even then I'm always searching for the right look, the 'effortless' but pristine finish.

Even though I'm still never satisfied, I can tell that I've improved a lot over the past few years. A few simple tips and techniques can help to create a slick finish - and anyway (much to my continual surprise) most people don't notice the (glaringly obvious, horrific, can barely look at the cake anymore) flaws in my icing skills when I place a fresh cake on the table. I bet your friends and family are the same.
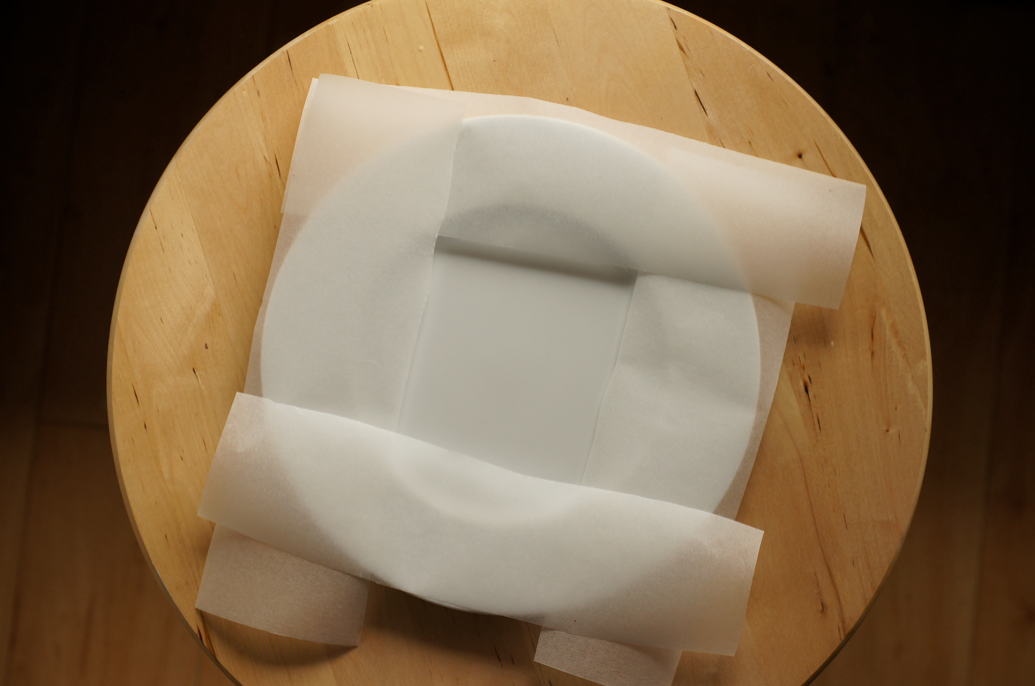
First cut four strips of baking parchment and arrange them on the plate, covering the edges. These stop the crumbs and drips of icing from marking the plate - even if you clean them off they tend to leave a smear.
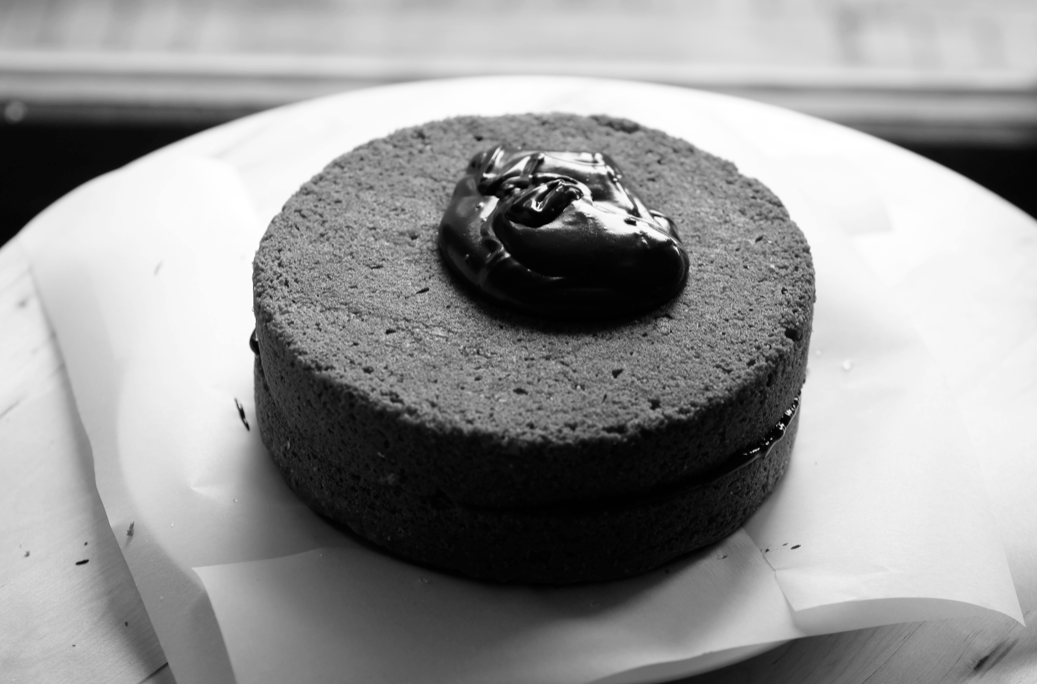
Secure them by placing the bottom layer of your cake in the middle of the plate. Usually you reverse the cake so the bottom of the cake is at the top - it will be smooth and flat from the tin.
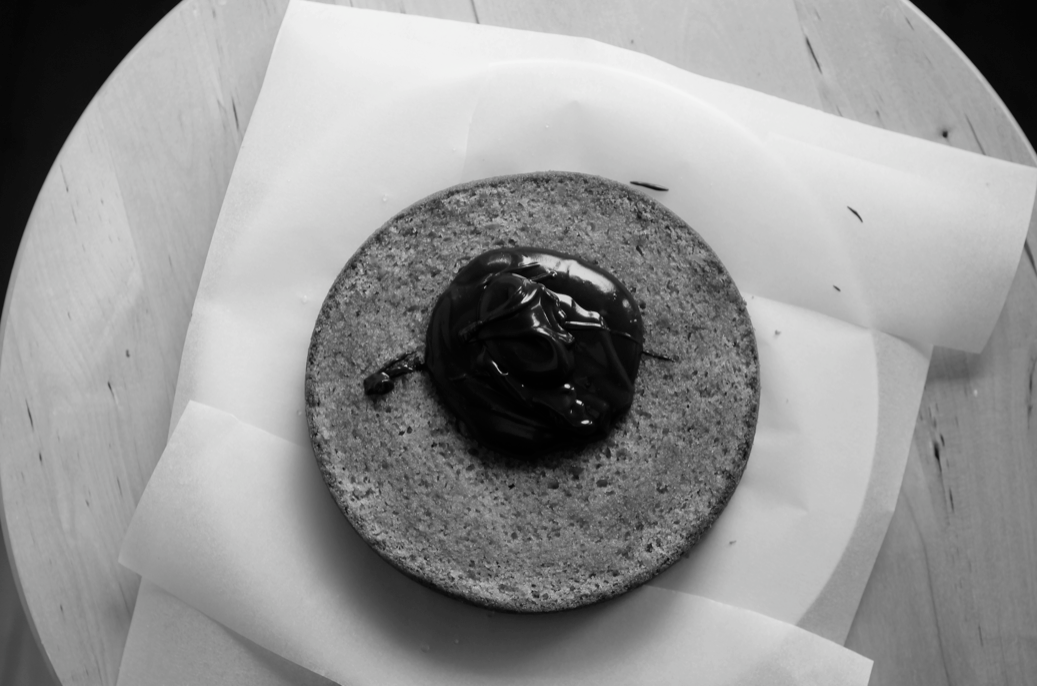
Add a big dollop of filling to the middle of the cake. Use a palette knife to spread the icing evenly over the middle and out to the edges. I often brush each layer with a bit of soaking syrup before I add the icing - this helps to keep the cake moist. You can also flavour the syrup for an extra boost.
Place the next layer on top, trying to align it with the first so it creates a flat surface. Sometimes I lightly score a vertical mark before I split the cake so I can align them perfectly when I reassemble it after filling. Repeat with any other layers, finishing with the smooth top.
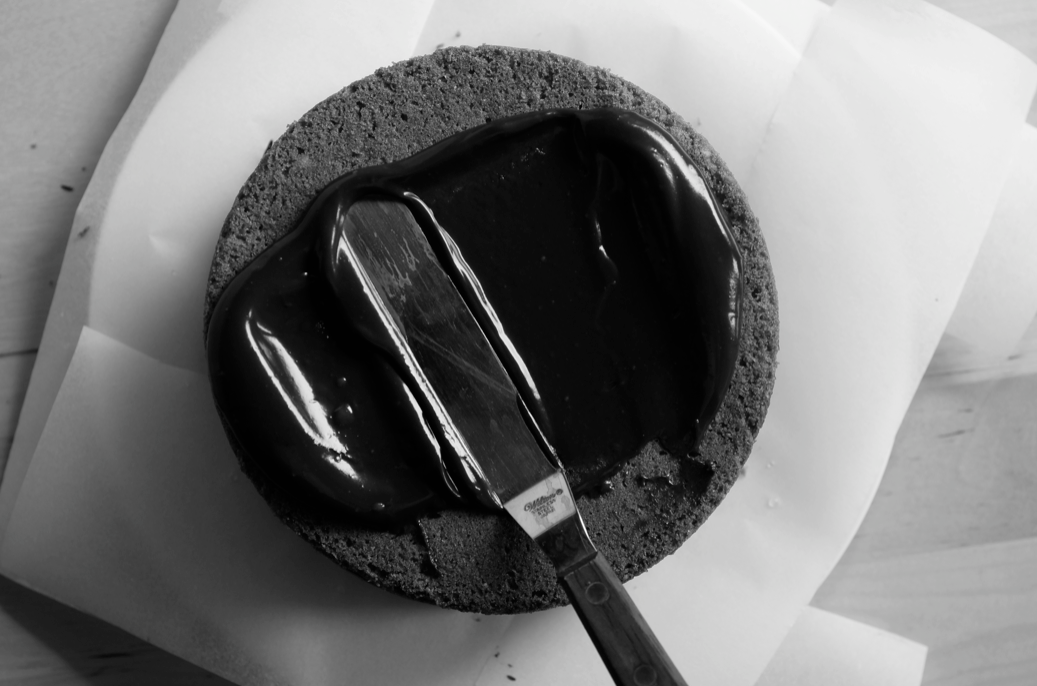
Add another dollop of icing on top to start making a crumb coat. You don't need a huge amount.
The idea of a very thin coat is to secure the crumbs and create a smoother surface for the final layer of icing. It makes it easier to get a professional finish.
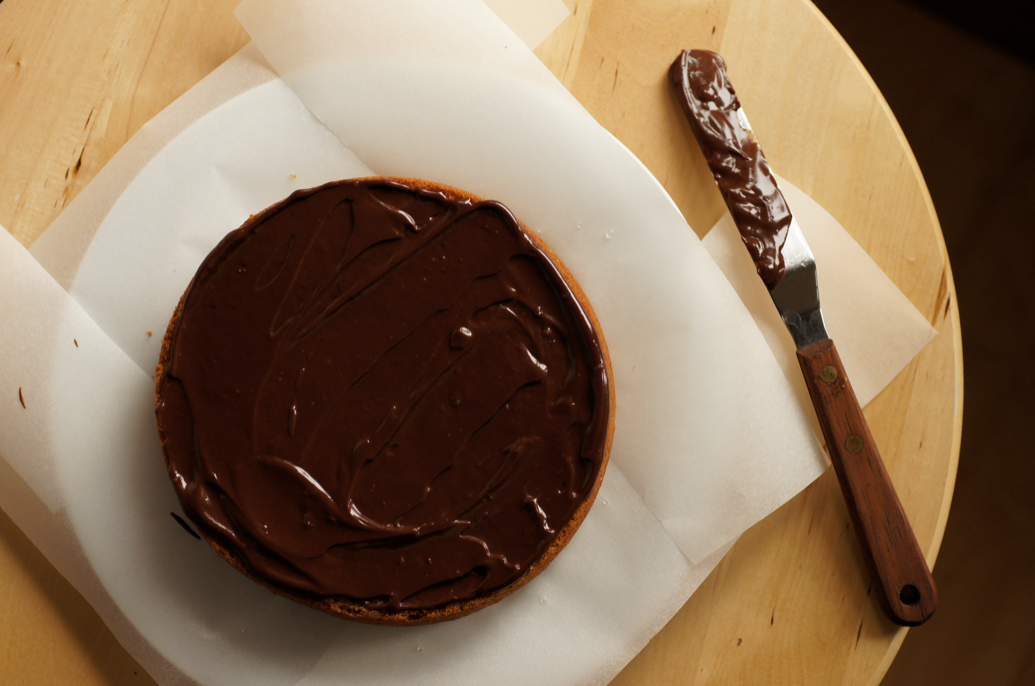
Use a palette knife to spread the icing over the top and down the sides. If you have a cardboard cake board the same size as the cake and put it underneath then you can lift it up - this makes the sides easier to ice, especially if you use a smooth diagonal downward movement. I didn't have a board so I couldn't show you this technique.
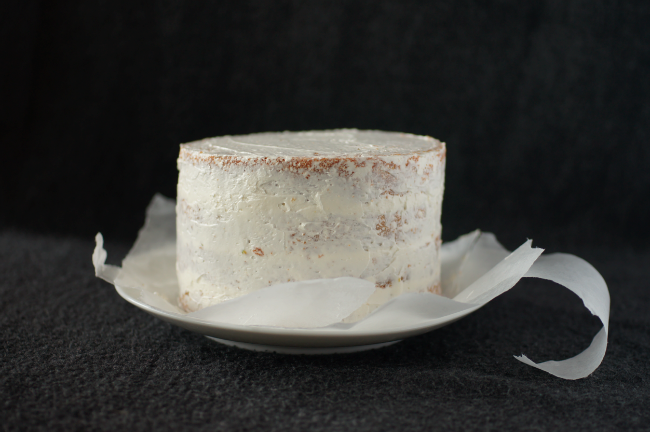
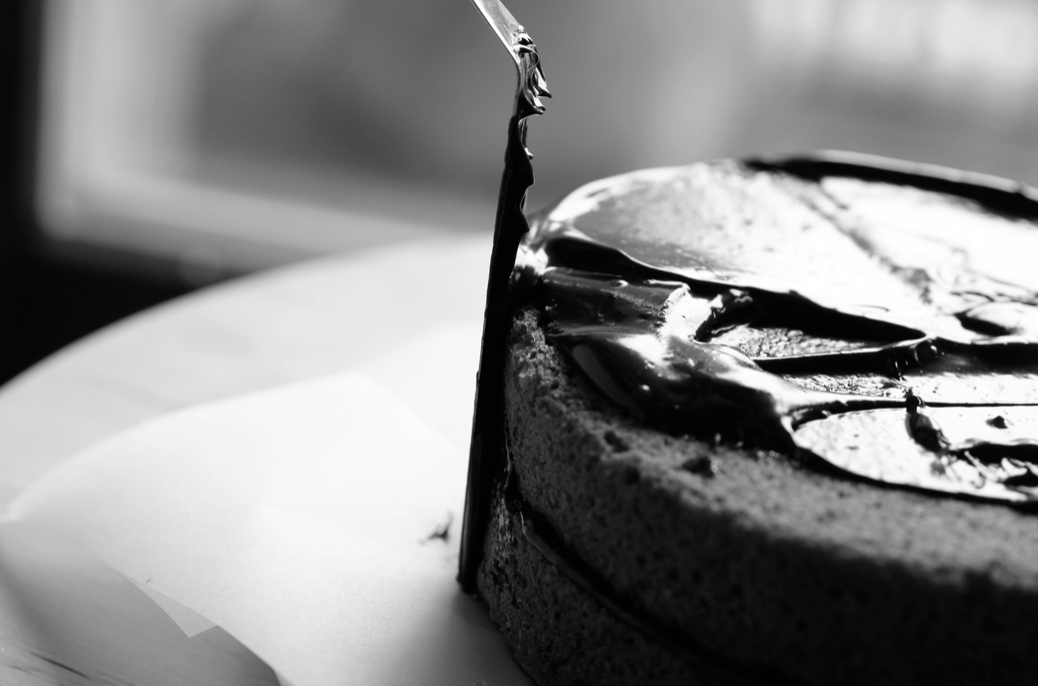
Run your spatula around the sides. Finish the top by pulling a spatula over the top in one sweeping motion, using both hands. When you're masking a cake confident, big sweeps give a better result.
I find that offset spatulas are easier to work with - I like to have a big one and a small one. They're the ones pictured here.
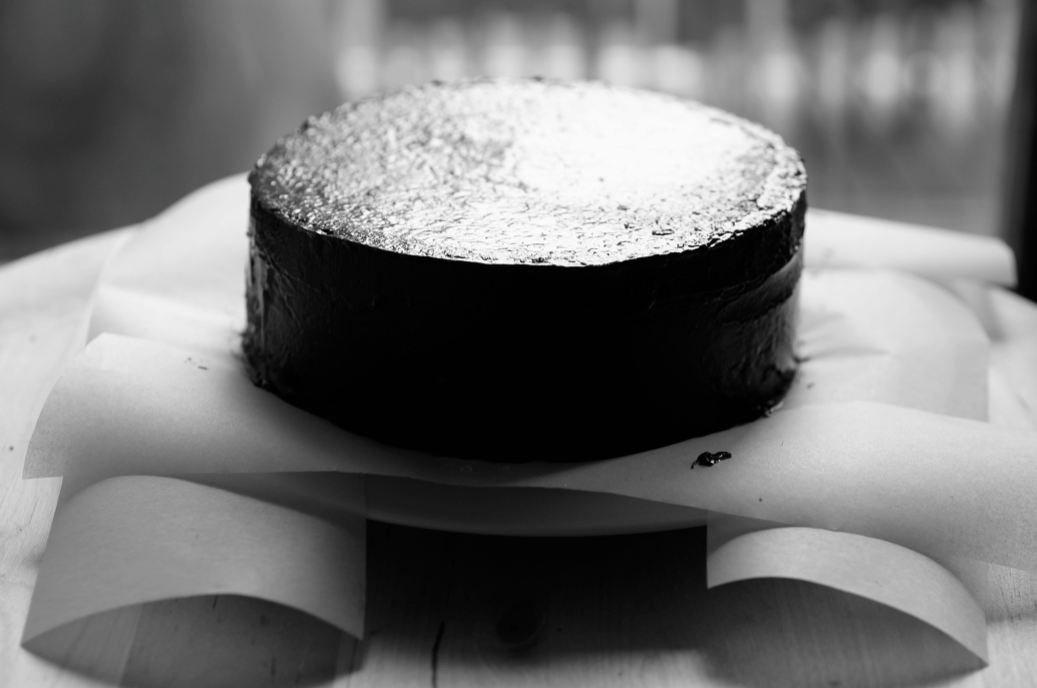
When you remove the paper slips - gently pull them straight out - you might need to tidy a flick or two. If you have the cardboard cake board underneath you can just set it down onto a clean plate.
I took a video of the final coat I put on the cake, which you can see below. I've only shown the crumb coat in the photographs as I didn't have two cakes to ice.
As you can see towards the end, my ganache started to deteriorate as I kept working with it. I had a bit of a dilemma at this point - most other icings can deal with more fiddling and finishing touches, so I kept going for a bit, then chickened out. I probably should have used a buttercream or something more stable to show you but this was the cake I had baked (it's the Peanut Butter and Chocolate Cake). So it's not quite as flawless as I'd like (perfectionism strikes again...) - but you can get the idea.
Four recipes that use this technique:
Rose and Pistachio Layer Cake
Butterfly Fleur de Sel Caramel Cake
Strawberry Cream Layer Cake
Buche de Noel
*
This is the fourth post of my Foundations series. The first post was on rubbing in to create pastry. The second covered brown butter. The third looked at creaming butter and sugar. The next post, on the 28th, will focus on making chocolate ganache...


Thanks soooo much for sharing this! Your foundations posts just keep getting better and better. I'll put this in practice as soon as you post the chocolate ganache. :)
ReplyDeleteLooks fantastic, I love your foundation posts, they're keeping me going during my uni exams! how long do you normally wait between putting on the crumb coat and the final layer? do you have to let the crumb coat set?
ReplyDeleteReally enjoying the foundation posts - had honestly never thought to put the greaseproof paper underneath to stop making a mess of the plate!
ReplyDeleteI struggle with icing cakes too. I feel like it comes down to basic technique and practice, practice, practice!
ReplyDeleteHey, thank you so much, I make delicious frosting and then struggle so much trying to make it look pretty.
ReplyDeleteJust want to say I LOVE your blog and check for updates regularly. You're fantastic at photography and the recipes I've tried have worked wonderfully :) Thank you for all the hard work you put in! I appreciate every bit of it!
so useful and well thought out. i hope more people read this than comment haha...but that is a given!
ReplyDeleteYes, me too. In fact, getting a clean, smooth look is so difficult that I usually go for something a little more rustic, which is fine. After all, if it tastes fabulous, you can forgo a little perfectionism.
ReplyDelete