Showing posts with label foundations. Show all posts

Thursday, 21 November 2013

Foundations no.9 - Using Yeast


When you first saw my Butterkuchen post, did the yeast put you off?

I know several accomplished bakers who shy away from it and as it was also mentioned a few times in my survey, I thought I would write a post trying to demystify using yeast. I'm not an expert at bread making but I do like making enriched breads and, as you can see in my successive Hot Cross Bun posts, I've increased in confidence over the years.


There are several types of yeast you might come across: dried (often called active dry), instant, fresh (a.k.a. cake/compressed) and sourdough starters. For the sweet bread baking I do, I use instant or fresh.

Instant yeast is generally easy to find. You can get it in sachets (often 7g or around 2 teaspoons) or bigger packs. I prefer instant to active dried yeast as you can mix it straight into the ingredients (dried yeast needs activating, usually by mixing it with warm liquids and leaving it for a bit). Instant yeast is formed into lots of tiny rod shapes (as you can see in the photo above) to give a big surface area, which means the yeast starts working quickly once it comes into contact with liquid.

Sometimes the packets have other ingredients - emulsifiers are relatively common, as is the addition of ascorbic acid (a.k.a. vitamin C - some say it increases the rise and/or helps create consistent results, I imagine partly because the optimum pH for yeast fermentation is slightly acidic).

{The photo series below shows a batch of dough rising in my relatively cold kitchen a few days ago - the number in the corner refers to the number of minutes.}


In Switzerland you can buy fresh yeast in the chiller cabinet in supermarkets - even the small ones. It's harder to find in the UK. Bakeries will sometimes give or sell you a small amount but it can be a struggle to find somewhere that bakes on site (surprisingly, one of the best bets is the bakery in a big supermarket). You can also get it online from the Bertinet Kitchen Bakery (they also sell via amazon) - it's delivered in temperature-controlled packaging and I was really pleased with the batch I received last week. It's often sold in small blocks of 42g (you can see one on the right in the top photo). Generally I crumble it into the wet ingredients but it can also be added straight into the dough.

One of my favourite things about working with yeast is the way my hands smell after I've crumbled fresh yeast into the bowl.

To convert a recipe from instant yeast to fresh, triple the quantity (i.e. 7g instant = 21g fresh). Essentially, 10g fresh = 4g active dry = 3.3g instant.


Yeast is a single-celled fungus. There are many species of yeast - the one we use for brewing and baking is called Saccharomyces cerevisae.

Yeast metabolizes sugar in the dough to produce energy for itself. This anaerobic reaction creates carbon dioxide and alcohol:


The carbon dioxide gas is trapped by the dough and inflates it. When you put the dough in the oven the alcohol evaporates - becomes a gas - and therefore also expands, adding to the early rise called oven spring.

This occurs even in a dough where sugar is not added as an ingredient because enzymes in the dough (such as amylase, which we also have in our digestive system) work on the starch, breaking it down into glucose.


Generally, the idea is to use as little yeast as possible to get the rise - a slow rise gives better flavour, partly because of other flavour molecules that develop during fermentation. This is why many recipes call for the first rise to occur overnight in the fridge or use a pre-ferment. If the recipe doesn't tell you to rise the dough overnight and you decide to, you can reduce the amount of yeast (I'd go for half or a third).

Yeast will work fastest at around 38C/100F, but this won't necessarily give you the best result. If you want a quick rise then a temperature of around 26C/80F (a warm place/airing cupboard, perhaps) is convenient - otherwise go for room temperature (usually around 21C/70F) or the fridge.

I've also heard that you can freeze fresh yeast in small pieces to improve the length of time you can keep it. I froze some a few days ago but I haven't tried using it yet so I can't verify it personally. We've always kept fresh yeast in the fridge for 2-3 weeks and dried yeast in the cupboard.

As you can see in the photos, dough can take a bit of time to get going - be patient. It may take longer than the recipe states. The more enriched the dough, the slower the rise is likely to be. Spices (especially cinnamon) can also slow the fermentation - which is why cinnamon rolls usually have the spices in the buttery filling.


So, overall, the three things most likely to cause problems are:

TEMPERATURE
Yeast is a living organism and so, at temperature extremes, it will die (like you or I). The main time this is a danger with enriched breads is if you're scalding milk, melting butter or heating something similar just before you add it to the dough - you need to make sure it cools down (transferring it to a metal bowl and putting it in the fridge will speed it up). I go for body temperature.

SALT
Too much salt or salt that gets directly into contact with the yeast will also cause problems. The key with most recipes is to stir the salt into the dry ingredients before you add the yeast so that the salt is distributed through the flour (so you don't spoon the yeast directly on top of the salt you've just tipped into the bowl). You can also add them to different sides of the bowl.

ALREADY DEAD
If your yeast is out of date, hasn't been used in time or hasn't been stored correctly, it probably won't work. Check the packet date and the amount of time you can use it after opening (for instance, a packet of instant I have states that the sachet must be used within 48 hours of opening). Fresh yeast should be a pale creamy colour, ever-so-slightly damp and smell nice.

***

This is the ninth post in my Foundations series, which explains techniques like making meringue (part one, part two) and brown butter.


Four recipes that use yeast:
Stollen
Butterkuchen
Cinnamon Cardamon Kringel Bread
Blueberry Braided Bread

Thursday, 8 August 2013

Foundations no.8 - Meringue, Part II


This is the second part of my Foundations post on making meringue. Last week I covered the basics of meringue and the French method. The same basic tips apply to Swiss and Italian meringue, which is what we're covering today. Though they might seem a bit scarier, both techniques are useful to have under your belt.


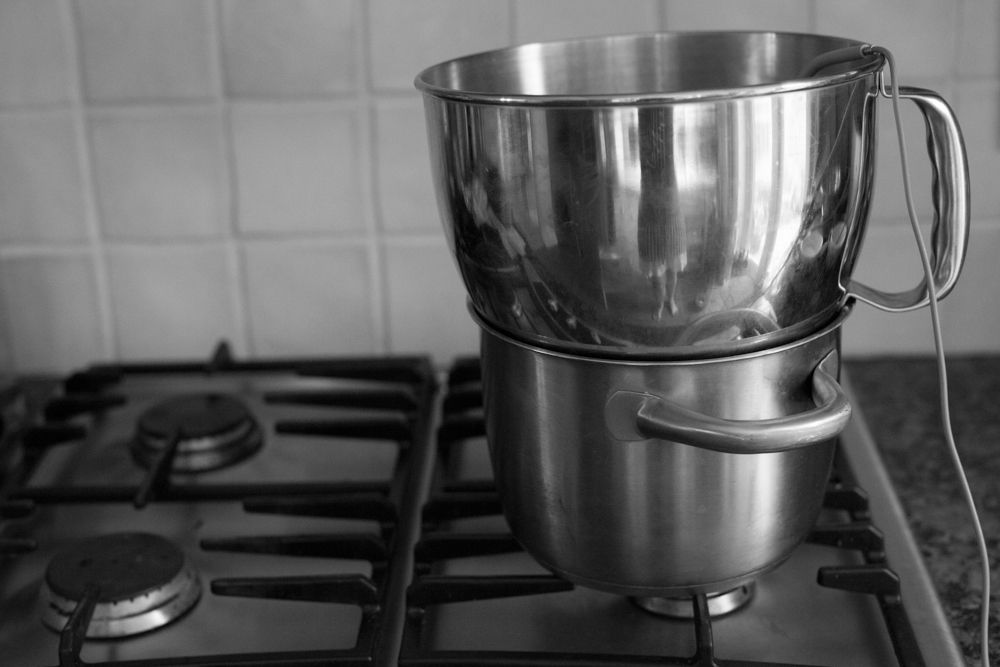
Swiss meringue is made by combining the whites and sugar then heating them over a pan of simmering water - a bain marie - then taking them off the heat and whipping until cool. Along with Italian, it's called a cooked meringue.

One of my favourite things about Swiss meringue is that you can make it with a combination of soft brown sugar and caster sugar. I first discovered this a few years ago when I made the Brown Sugar, Hazelnut and Cinnamon Meringues from Ottolenghi's first book. The recipe uses 35% brown sugar and 65% white caster sugar, which gives a gorgeous caramel flavour.

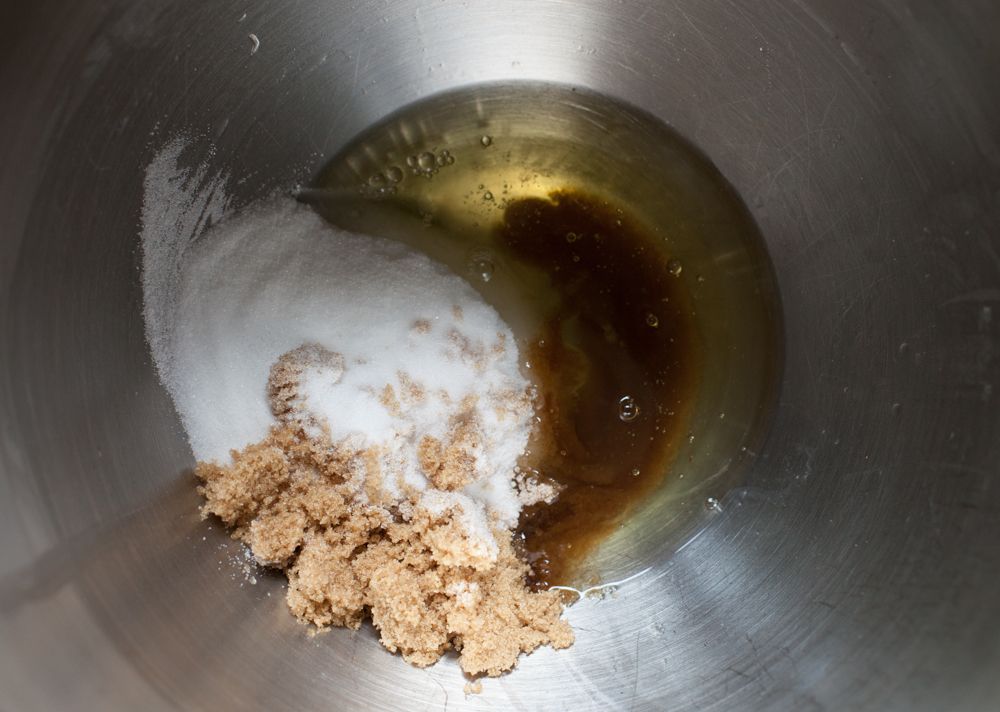
The ratio for Swiss is variable - I tend to use something around 1 : 1.5 (whites : sugar). In the photos I used 82g egg white (from 2 large eggs), 80g white caster sugar and 45g light brown sugar. That's a 1 : 1.5 ratio with the 35/65 brown/white split (I calculated 82 x 1.5 = 123, then 123 x 0.65 = 80, so 123 - 80 = 43, which I rounded up to 45).

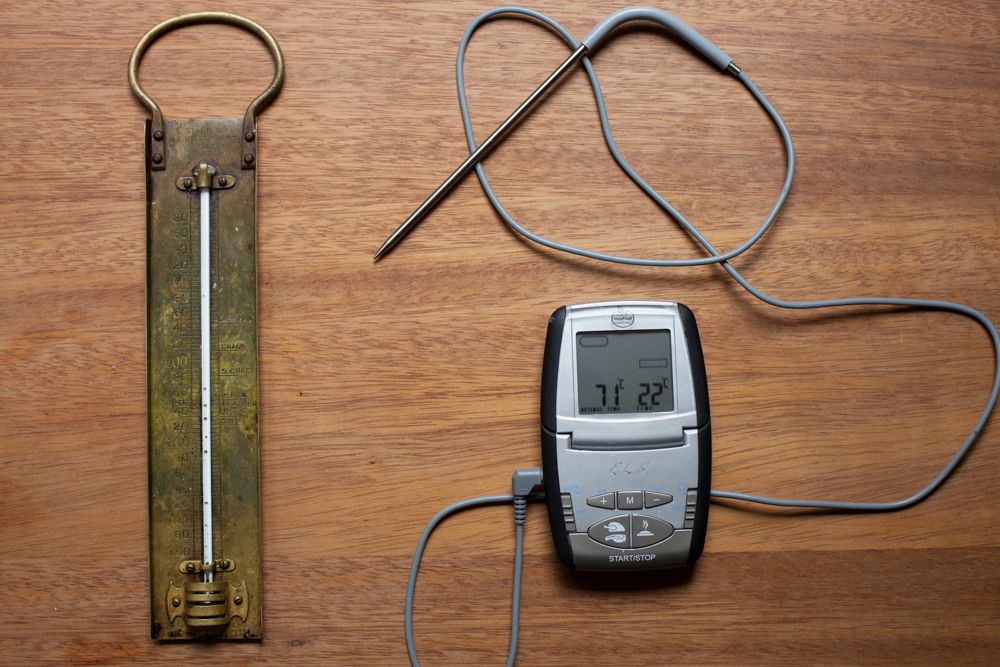
You can use an electric thermometer or a normal one. I have my grandmother's thermometer but I tend to use the electric one as the probe is faster to clean.


The temperature that the whites are heated to varies greatly by recipe. The Ottolenghi recipe takes them to 40C, Cordon Bleu took them to 50C, David Lebovitz takes them to 60C, Whisk Kid and Bakers Royale/Alice Medrich heat them to 70C and McGee says they can be taken up to 75-78C.

So what temperature should you use?

One of the main reasons for taking them up to 70C/160F is that you kill any salmonella present and pasteurize the egg whites. My habit of licking the cake bowl lead to me getting salmonellosis when I was 18 months old - I don't remember it but apparently it wasn't pleasant, so I understand why you might want to be careful.

I haven't noticed any difference in the final product so it depends on how much you're worried about raw egg. Salmonella is pretty rare and personally I'll eat mousse or other things with raw eggs. The only thing you must do is heat it enough that the sugar dissolves fully into the whites (this usually happens at about 40C) - otherwise it's up to you. If you're just checking the sugar, you don't even need a thermometer - you can just rub a bit of the mixture between your fingers.


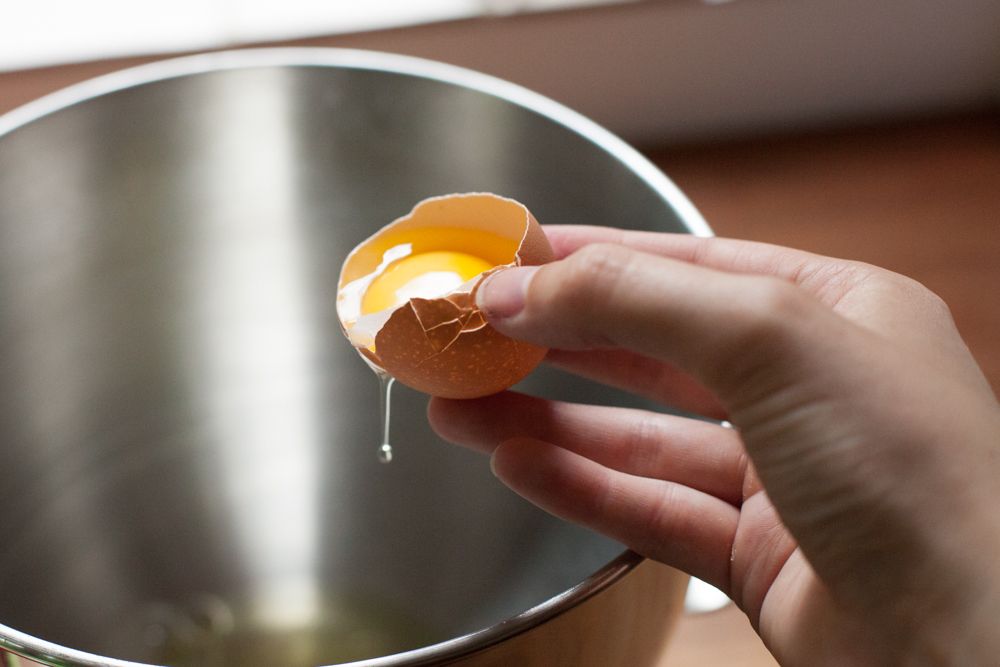
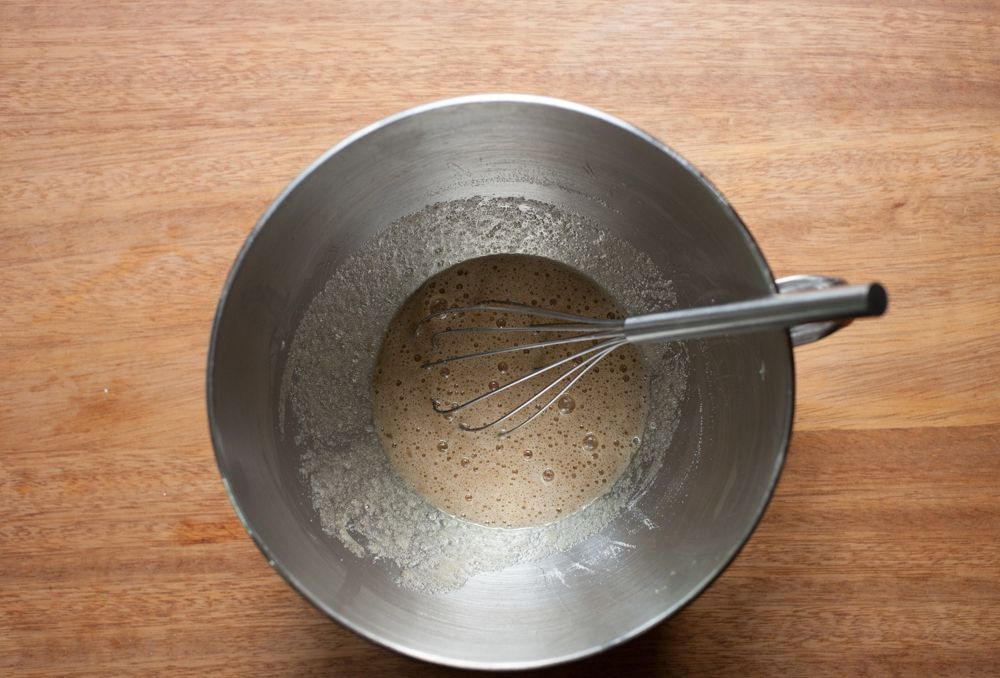
To start, wipe the bowl of a stand mixer (or a normal bowl, if using an electric hand whisk) down with a lemon to get rid of any grease and add a touch of acid (this step is optional, but I always do it). Briefly whisk the egg whites and sugar together to combine them.


Place the bowl over a pot of simmering water and add the thermometer. Stir every now and then (I stir with my thermometer probe). After about 3 minutes, when it's about 40C/105F, it should feel smooth with no gritty bits if you rub a bit of the mixture between your fingers. Either use it now or keep heating until it reaches your desired temperature. It took me 7 minutes in total to get to 70C/160F when I made the batch in the pictures.


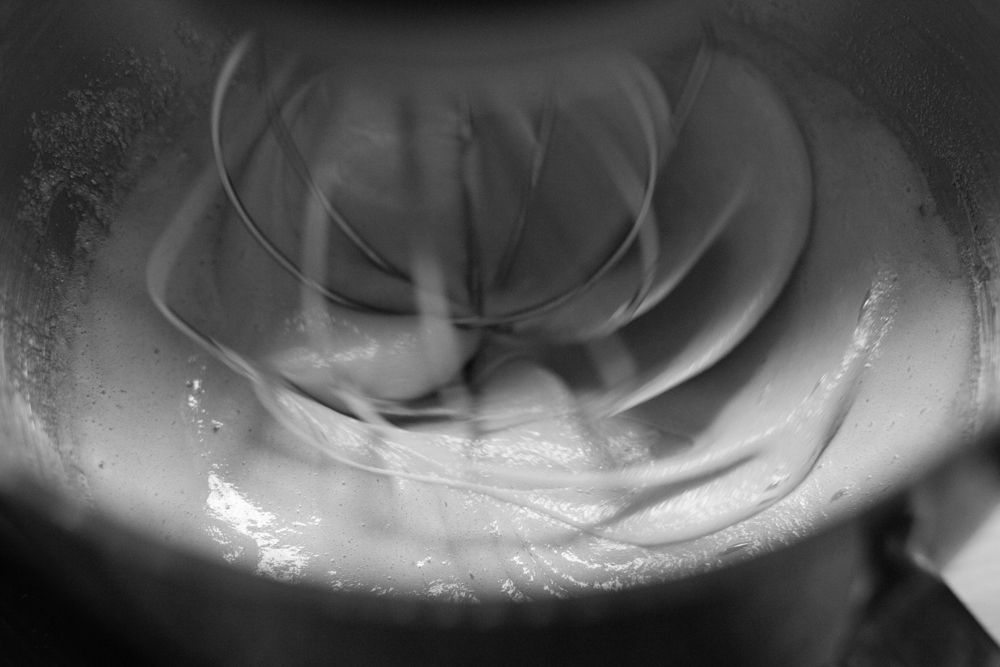
Transfer the bowl to a stand mixer (or use an electric hand whisk) and start whipping on medium-high (I use 8/10 on my mixer).


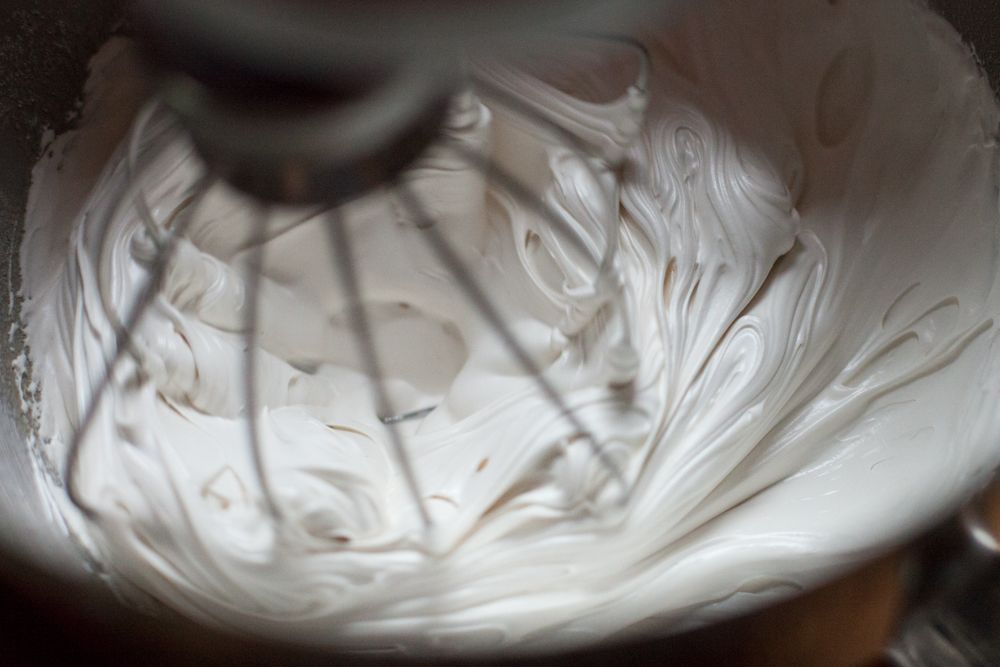
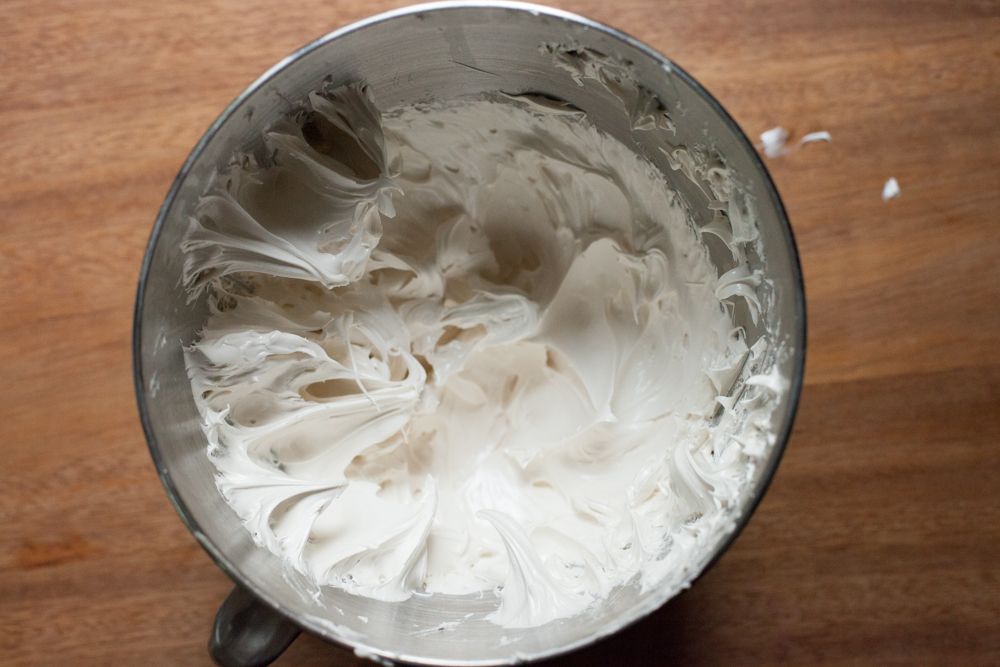
Keep going until the base of the bowl is room temperature to the touch and you have stiff, shiny peaks (see Part I for more description and photos of the peaks). This can take between 6-10 minutes, partly depending on the size of your batch (this one took 7 minutes).

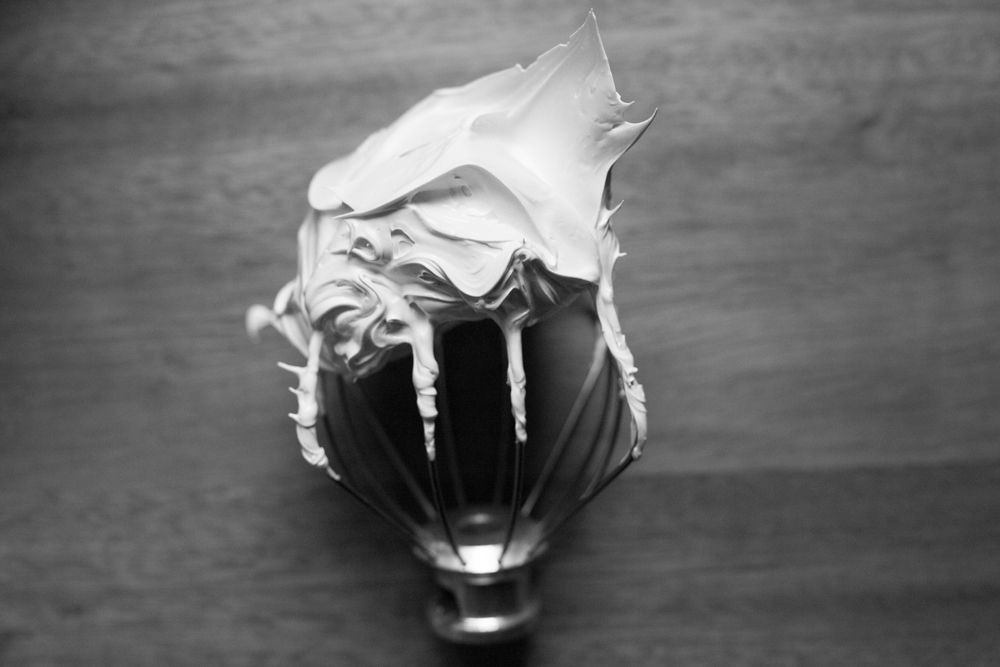
As you can see at the top, the meringue is very stiff and quite dense compared to the French meringue (this is because of the method and the higher sugar content).


The stiffness, stability and safety of Swiss makes it great for piping onto things and blowtorching them - for instance, I used it for the Lemon & Brown Sugar Meringue Tartlets and I once used it to pipe a ruffle cake that I then torched. Unlike French meringue that hasn't been baked, Swiss (and Italian) should hold up for a day or two without separating if it's covered with cling film and kept in the fridge, so it's useful for anything that needs to hold.

There is, of course, the lovely Brown Sugar, Cinnamon and Hazelnut Meringues. You can also make a Swiss Meringue Buttercream by adding butter, as I did for the Rose and Pistachio Layer Cake and for the Beautiful and Damned - it's a brilliant buttercream for layer cakes.


The Italian method creates a cooked meringue by pouring a very hot sugar syrup onto the whisking whites then whisking until cool. While you're heating the syrup to a higher temperature, the whites don't actually reach a high enough temperature to kill off salmonella, so if that's what you're worried about, use Swiss.

You usually see a relatively large amount of sugar to whites for Italian - up to 1 : 2 (whites : sugar). This ratio makes meringue that is sometimes called 'hard' meringue and is the upper limit of the amount of sugar you can add. 'Soft' is sometimes used for the minimum 1 : 1 ratio - as I've noted with French and Swiss, you usually end up using something in the middle.

You also add water to make the syrup. You only need enough water to dissolve the sugar - any more and you'll just have to spend time boiling it off before it comes up to temperature.

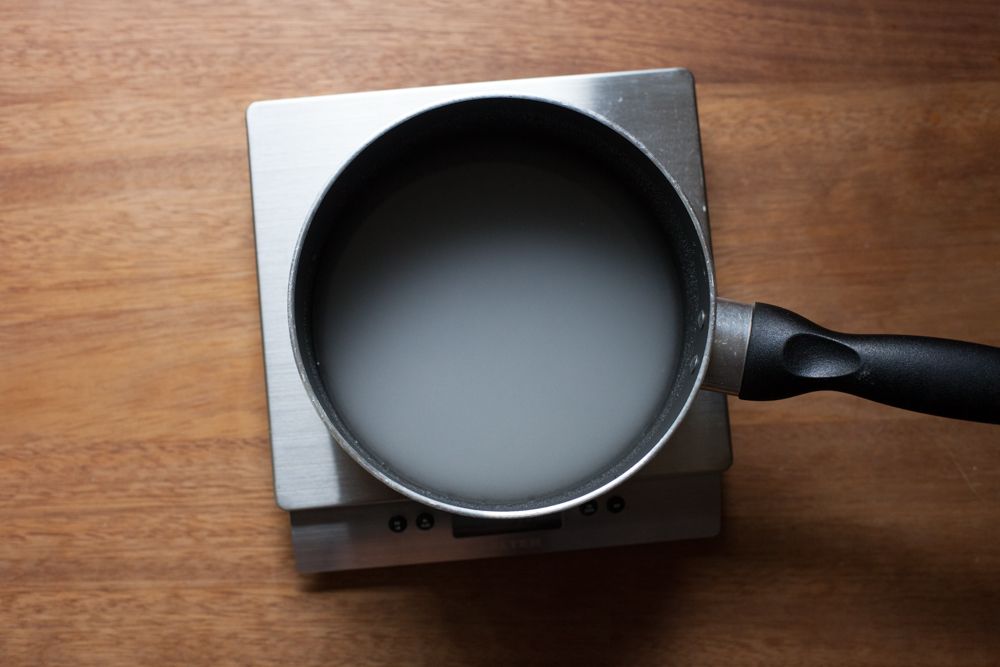
For the photos I used 70g egg white, 140g caster sugar and 90ml water.


Place your whites in a very clean bowl on a stand mixer with the whisk attached. Don't turn them on yet.

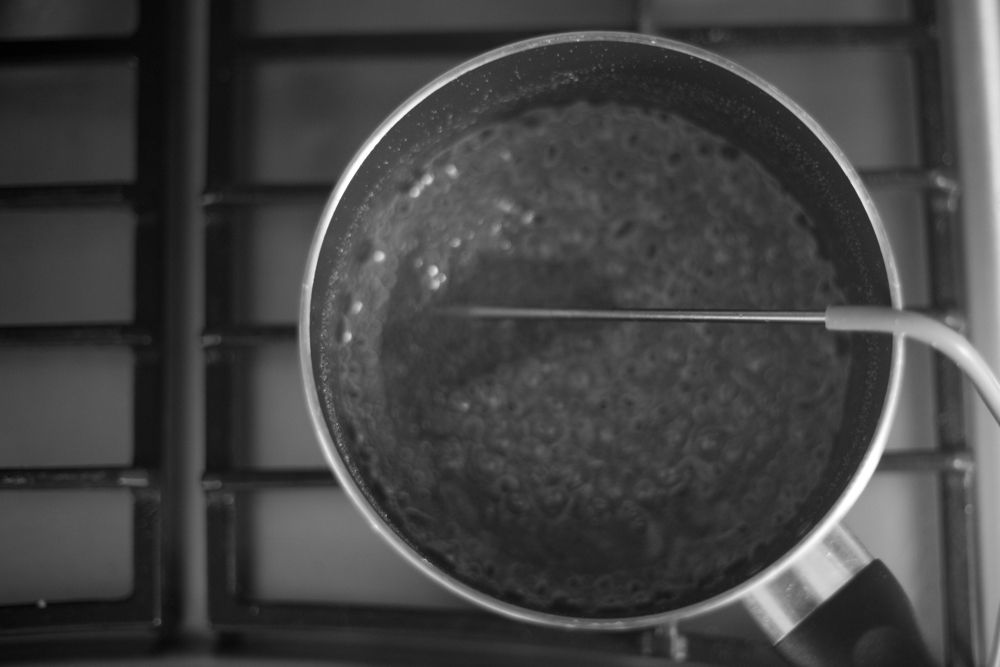
Swirl the sugar and water together in a small pan. Add a thermometer and place over a medium-high heat. If there are sugar crystals on the side of the pan, wash them down with a wet pastry brush.


Once the syrup gets to 105C/220F, start whipping the whites on medium (4 or 6/10). You want them to be a bit stiffer than they are when you start adding the sugar for French, but not over whipped and grainy - somewhere in between soft and stiff peaks. If they get there before your sugar is ready, turn them right down (the other way to do it is to wait until 116C/240F then whack them on high, but I prefer going slowly).

When the syrup reaches 120C/250F, take it off the heat and immediately pour it down the side of the bowl, keeping the mixer whisking on low (2 or 4/10) as you pour.

Though I've used it before, here's a video clip showing how to pour the syrup without hitting the whisk (excuse the small slip of hand, a pan with a handle is easier to deal with):


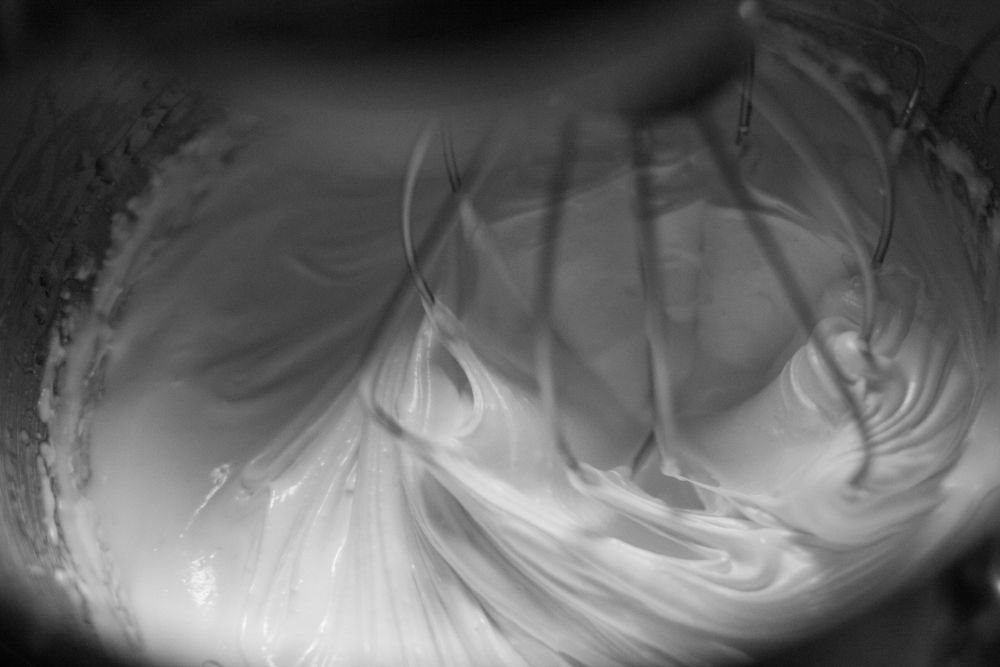
Once you've added the syrup, turn the mixer up to medium-high (I use 8/10) and let it whip. Don't worry if the mixture seems rather soupy, it'll whip up.


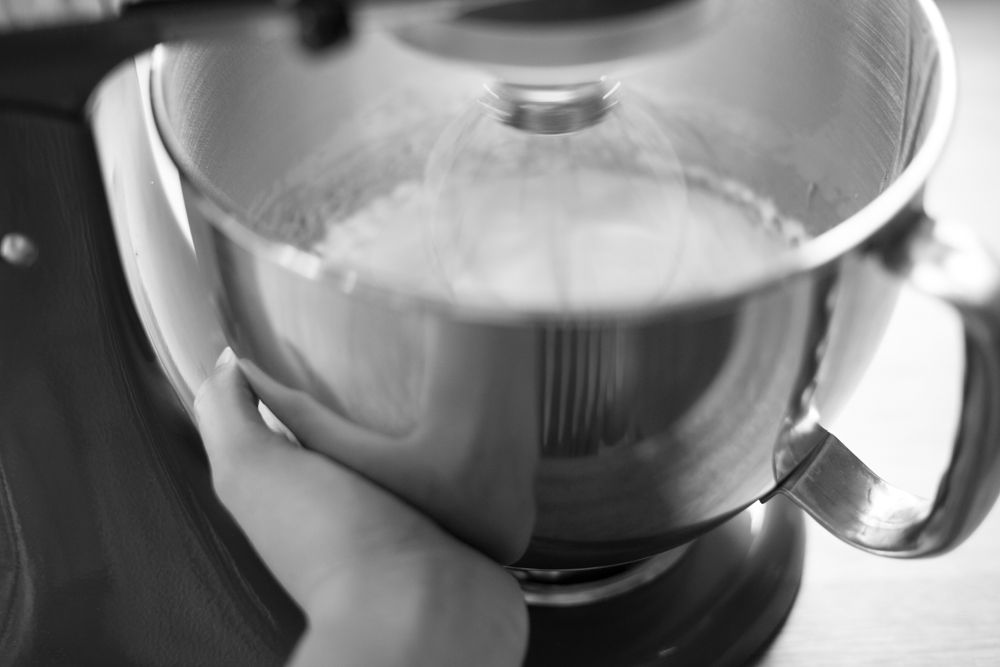
Keep whisking until the base of the bowl feels cool to touch (as below) and the meringue is thick and leaves very stiff peaks - this takes about 6-10 minutes.

I don't use Italian as much as Swiss or French. A few years back when I was interested in macarons I had the most success with the Italian meringue method. The French buttercream I make (the video above comes from that post) uses the Italian method but has egg yolks as the base - though you can also make an Italian meringue buttercream just like Swiss meringue buttercream.


This is the eighth post in my Foundations series - the first half, on the basics and French method of making meringue, is here.

***

Thursday, 1 August 2013

Foundations no.8 - Meringue, Part I


Back when I first started blogging, meringue was one of the things I was scared of making. I bewailed my troubles in an early post on Lemon Meringue Pie, declaring that I didn't know why it was going wrong (if you click through, you can also enjoy my attempt to take photos in the dark with a lamp and a homemade lightbox...). This post is for that past version of myself, standing in the kitchen of my university flat, intensely irritated.

It's also one of the topics that has come up when I've asked for suggestions for the Foundations Series. Meringue is perfect for so many summer dishes - think of all the soft fruit and cream you can combine it with - so it seemed like the right time to tackle it.

Because I want to cover each method, I've decided to split the topic into two posts. This post will focus on the basics of meringue and the French method. Part II covers the Swiss and Italian methods.


The first person to call the glossy combination of egg whites and sugar 'meringue' was a French court cook called Massialot in 1692. Meringue had been made before, however, under different names.

Take a look at the beginning of this recipe from earlier in the seventeenth century - it's easily recognisable as a French meringue:


"Take five ounces of sugar finely beaten, two whites of egg. The sugar must be stroyed in by degrees into the eggs as you are beating them and you must beat them with a spoon a long time. The longer you beat them, the thicker they will be and the whiter..."

A 1677 manuscript receipt book owned by Ivan Day, as seen in Ivan's book, Cooking in Europe 1650-1850.


The recipe is called 'Satin Biscuit', deftly capturing the elegant sheen of meringue.


A few things to keep in mind:

- Make sure your equipment is very clean and free of grease, that you have rinsed it all carefully so no detergent is left and that your whites have no trace of yolk in them.

- It's easier if the egg whites are at room temperature. Older whites are faster to whip, but they're not essential.


French meringue is the simplest of the three meringues. When I first started making it, I made the common mistake of not whipping the whites for long enough, before or after the sugar was added. French can be just as thick and glossy as the cooked meringues.

French often has slightly less sugar than the other types. I usually use a ratio of egg white to sugar of 1 : 1.3. Therefore, if I have 70g of egg white, I calculate 70 x 1.3, which gives me 91g (or 90, if we're being sensible).

In the photos I'm making a mix with 80g of egg white (from 2 large eggs) and 105g of white caster sugar. It's best to use caster or superfine sugar as it dissolves quickly.

Some recipes include lemon juice, cream of tartar, vinegar, cornflour and so on (especially for pavlovas). Generally I stick with the two main ingredients but if you're using a recipe, follow their lead. Adding salt decreases the stability of the egg white foam by interfering with the protein bonding process so I avoid using it, especially at the beginning.


Start with a very clean bowl and whisk (be particularly careful with plastic bowls and utensils). I usually wipe the bowl clean with the cut side of a lemon to make sure. Add the whites to the bowl and have the sugar to hand.

You can make French meringue in a stand mixer, with a hand mixer or with a normal whisk (though be prepared to have an aching arm). I usually make it in a stand mixer so I've put the settings I use below.


Start whisking the whites slowly then increase the speed. I start at 4/10 then move to the 6/10 setting on my mixer. They will start to froth up.

As you whip egg whites, two things happen: air bubbles are incorporated into the liquid and some of the egg proteins begin to unfold as they are tugged around by the whisk. The proteins gather at the surface of the bubbles and begin to bond, creating a network around the bubble walls, holding the gas and liquid in place.


Keep going past the big bubble stage (two pictures up) until you get a foam with tiny bubbles (above). When you lift the whisk out it should leave soft peaks that flop over and don't disappear back into the mix. This usually takes about 40-60 seconds on 6/10.

Watch carefully as you don't want to overdo it - you can't rescue curdled, clumpy whites. Don't panic and add it too soon, either, or you'll reduce the volume, lightness and stability of the foam as the sugar interferes with the unfolding and bonding of the proteins.


When you've reached the tiny bubble stage, start adding the sugar slowly in several additions, whisking all the time.


Scrape the sides of the bowl down then turn the mixer up (I use 8/10). At this stage the sugar is dissolving - if you look at the picture above, you can see the granular texture, and you can feel it if you rub a bit of mixture between your fingertips.

Once the sugar has dissolved, it makes the liquid into a thick syrup, which slows drainage from the bubble walls, preventing their collapse and making the mixture more stable.


Even once the mixture starts to look glossy (as above) you still need to keep whipping.


After a bit, the meringue starts to thicken up and turns a bright, snowy white. The picture above shows the meringue at the soft peak stage. Some recipes call for you to use the meringue at this point, but for most you keep whipping.


Finally, you reach stiff peaks. When the whisk is pulled slowly out, the mixture should stretch like a ribbon between the bowl and the whisk. When it's pulled away, the meringue peak should stay strong, like a little mountain. From the point you add the sugar, this usually takes about 2-3 minutes on 8/10.

To make simple meringue nests, pile the meringue into heaps on a lined tray (this mix makes 6 to 8), use a spoon to make a dip and then bake for 60 minutes at 100C/210F. Turn the oven off and leave to totally cool (I usually do this overnight). Transfer to an airtight box if you're not serving them immediately. This makes the sort of nests I like with a crispy, creamy crust and a squidgy, chewy interior.

This is the eighth post in my Foundations series - the next part of this post covers Swiss and Italian meringue.


Three more ways to use French meringue:
Strawberry Meringue Cake
Eton Mess
Raspberry Pavlova Ice Cream

Tuesday, 28 May 2013

Foundations no.7 - Rough Puff Pastry


Perhaps I'm odd, but I find rolling out puff pastry relaxing. There's something quietly satisfying about rolling back and forth, shaping, dusting, brushing and folding the smooth, cool dough. The whole process is calming - a bit like kneading your frustration into bread, but in a gentle way. As one of my chefs used to say, you have to treat her like a lady.

Puff is admittedly much easier to pick up in a supermarket, but as well as the therapeutic benefits, I think it tastes much better freshly homemade. Quite a few of the supermarket brands - certainly all the ones I could find yesterday - are made with margarine instead of butter and need several preservatives so they can sit on the shelf. If you're making it fresh, you only need four ingredients: flour, butter, water and salt.


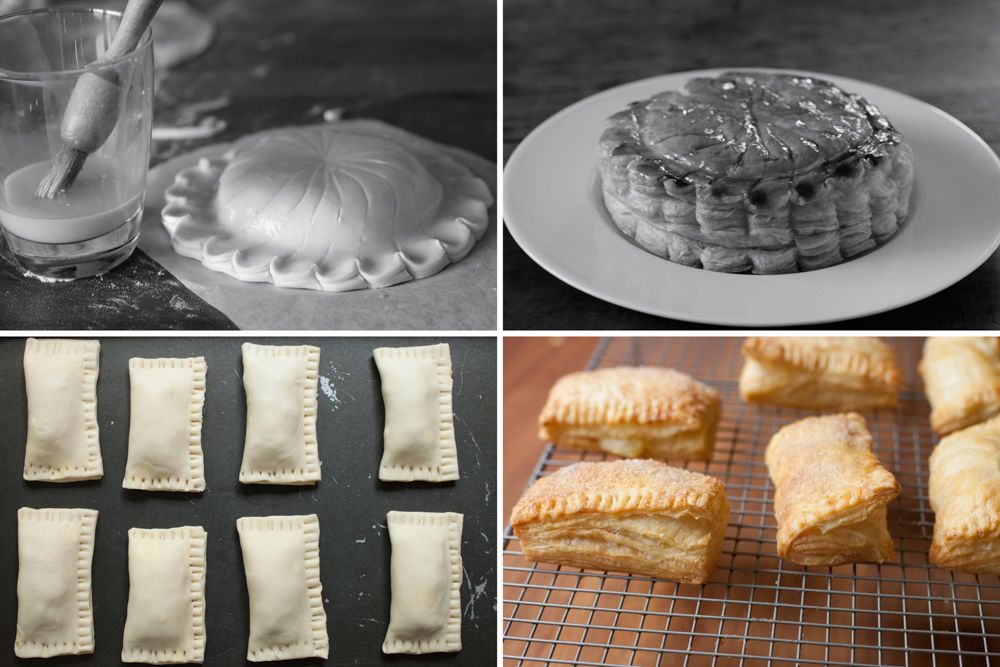
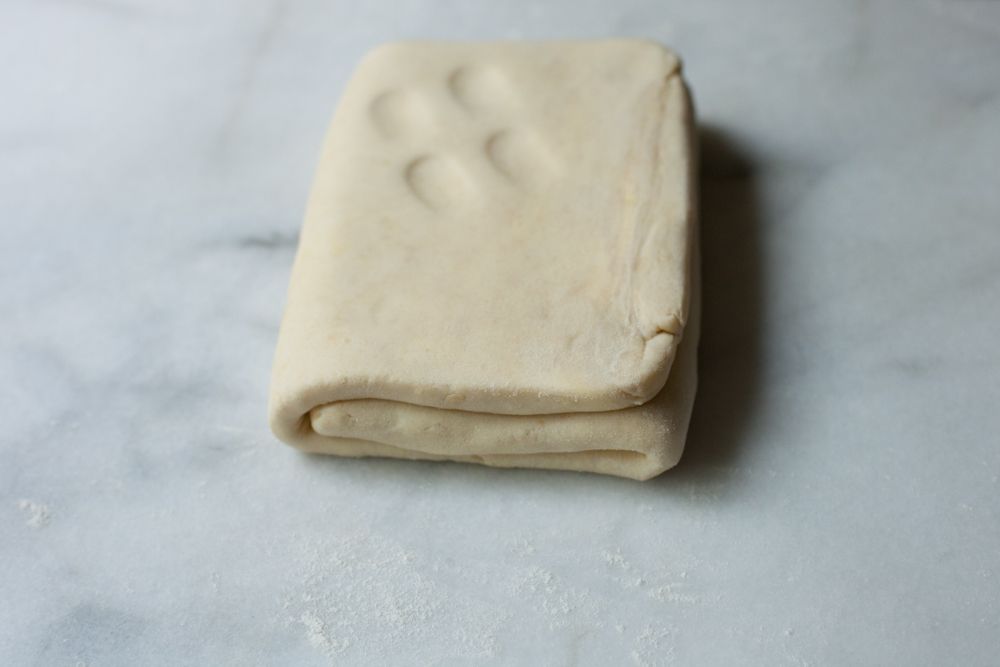
Rough puff is a term that covers a range of methods of making a puffy pastry that rises less than classic puff pastry. At one end you have flaky shortcrust, which barely rises. This method, at the other end, gives about 75% of the rise of classic (the pictures above show the rise I've got from this puff). I rarely bother to make classic now - I don't mind a rough edge to something that is meant to be homemade and I think this gives a great result for less work. Though I admit that it's still time consuming, rough puff doesn't take much active work - I reckon, aside from chilling time, it's about 20 minutes.

Puff pastry is a laminated dough, which means that you create lots of layers of incredibly thin pastry sandwiched with layers of fat. It's hard to tell when laminated pastry was first made, especially as pastry knowledge was generally assumed rather than written down in cookbooks. According to Karen Hess, the first recognisable recipe for puff pastry was recorded in The Good Housewife's Jewel, written by Thomas Dawson in 1586. Danish pastries and croissants are also made from a laminated dough, but they evolved to include yeast and other ingredients such as milk.

Classic puff has 729 layers that are about a hundredth of a millimeter thick once you've given it six turns (or, to be accurate, one inclusion and 5 turns). After one single turn of the rough puff you have 3 layers, then 9, then 27 - so if you do four turns you'll get 81, or five will give you 243.


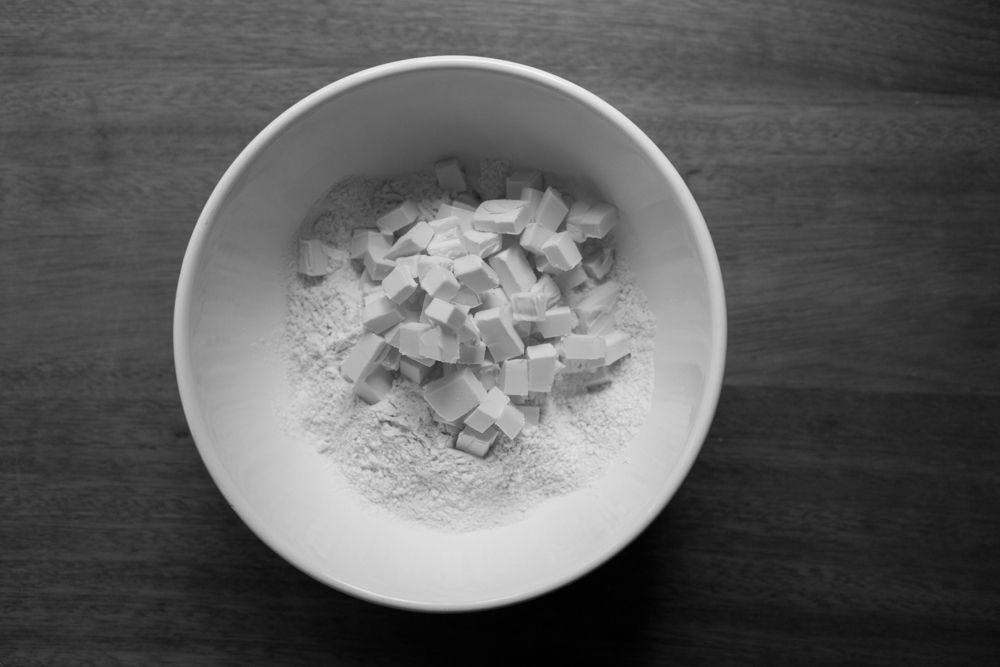
To start, sieve the flour and salt into a bowl. Chop the cold (but not totally rock solid) butter into smallish chunks and add to the bowl.

The ratio is usually the same weight of flour and butter, half the weight in water and 1 tsp of fine sea salt per 500g of flour (I originally found this ratio in Michel Roux's Pastry). I normally use 250g plain flour, 250g unsalted butter, 125ml ice cold water and 1/2 tsp fine sea salt. This makes about 630g of pastry. I usually use plain flour but some recipes call for strong or bread flour to aid the gluten development in the layers.


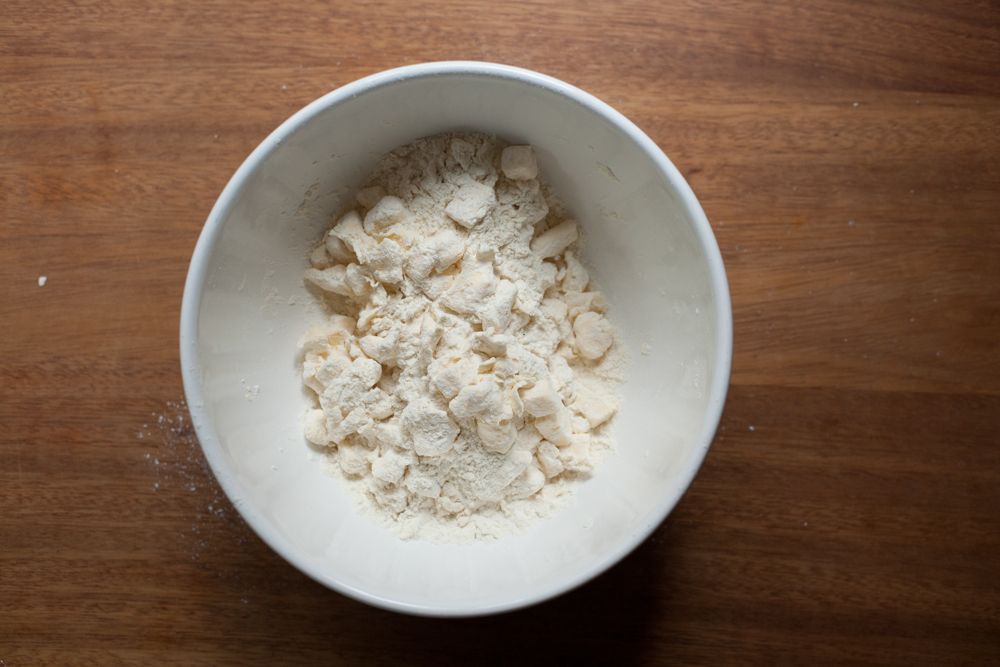
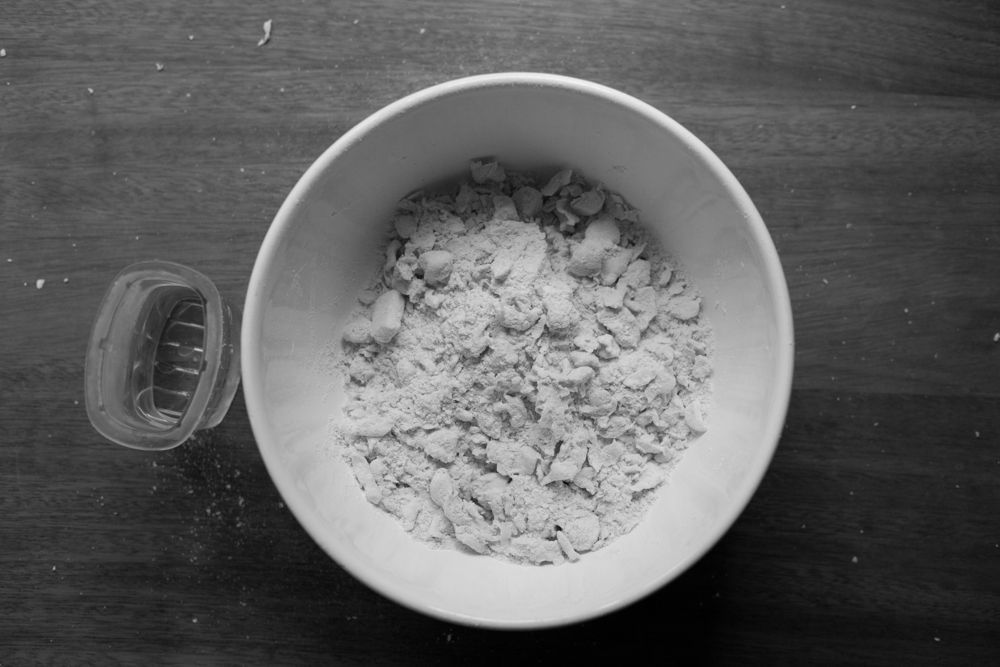
Combine the flour and salt in a bowl. Rub the butter into the flour with your hands using the same technique as regular pastry (see this foundation for a video and more), except that you want to leave lumps of butter. You do still need to rub about a third of the butter in fully, though, and you don't want the chunks to still be solid cubes (just squish them a bit). Keep going until you have something that resembles this:


When it's ready, add the cold water and bring together into a dough, then pat into a square, wrap in cling film and chill for 30 minutes. The video below shows how I do this.

Just so you know if you've never played one, my videos don't have sound - I find it intrusive when I'm just trying to look at the process, be quiet or play my own music. They're essentially moving pictures. I do them in one take from one position and don't edit much (on that note, please excuse my head bobbing into frame in the one below). I hope that it shows the process as it really happens so you can a get a clear image of what to do. If you're reading this via email subscription, the videos don't show up for some reason - you'll need to click through to the web version.



After chilling, you can do the first turn (as in the video below). Lightly flour the surface then roll the dough out evenly, keeping it as rectangular as possible - gently pat and form the sides to help keep the shape. You want a rectangle of roughly 40 x 20 cm. Don't let the pastry stick to the surface - slide your fingers underneath to check and dust again if needed. If a bit of butter opens on the surface then dab a bit of flour on it.

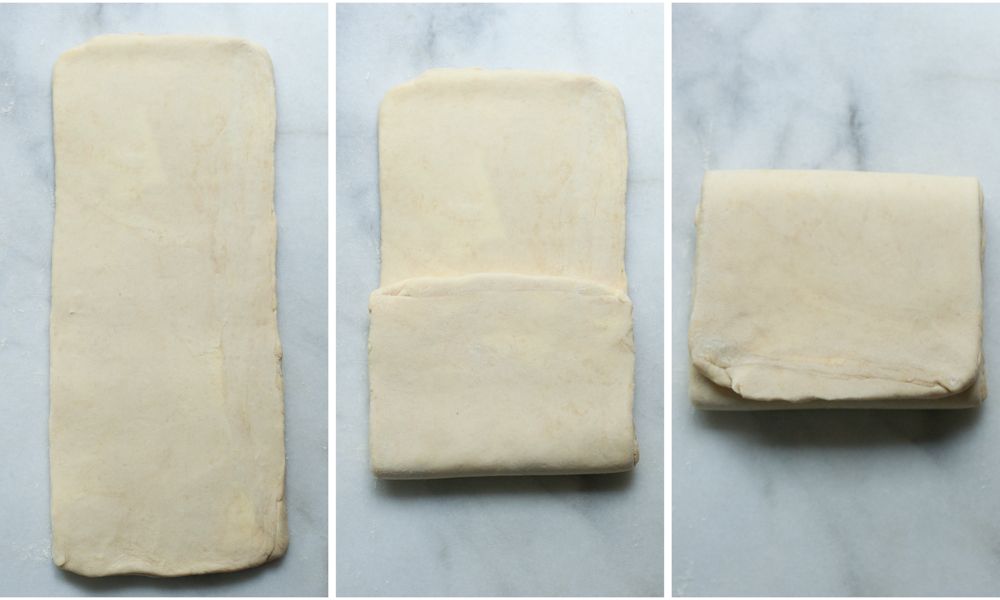
To do the turn itself, brush off any excess flour with your fingers or a soft pastry brush. Fold the bottom 1/3 of the pastry up, brush the flour off, then fold then top 1/3 down so you have a neat parcel (see the top photo in the post - it's a bit like folding a letter). The edges should line up. Use a finger to make an imprint on the dough to keep track of the number of turns. Wrap in cling film and leave to chill for 45 minutes.

I always make my turns like this - they're called single turns. There's also something called a book turn, where you fold both sides in, then bring the two double sides together, but I find it easier to focus on one type.


After the dough has chilled, do the second and third turns straight after one another (unless the dough feels warm, soft or sticky, in which case you should chill in between). Repeat the rolling out and folding process (though I usually roll to 35 x 15cm after the first turn, creating a block of 10 x 15cm) then do the same thing again. The video below shows a single turn. Always keep the spine of the block on the same side when you roll out - I have mine like a book, so the open side is on the right and my finger imprints are on the top left. The dough should start feeling silky and smooth.

Once the dough has rested for another 45 minutes, do a forth turn (which you can watch below). You can leave it at four but I often do another, as I find I get better results with five.

You need to rest the dough regularly to make it easier to work with. As you combine or roll out the dough the gluten strands are stressed as they're pulled and worked into a new shape. They adjust and relax as they chill, which means the dough is less elastic and therefore easier to stretch again as you roll it out. The butter also hardens, which helps the lamination.


Chill for at least an hour before you roll it out to use it. Don't roll the puff too thin - about 5mm seems to be the minimum. Always cut the pastry with a sharp knife and remember to stack any offcuts up flat so that the layers remain aligned. Don't egg/milk wash the sides of the pastry or let it drip down or it'll bind the layers together.

When you finally subject your laminated dough to heat, the fat in between the layers of dough melts first. Then the water in the dough begins to evaporate, creating steam, which expands in the gaps left by the melted fat. The fat stops the steam from escaping, so the dough layers push up and apart from the pressure of the steam. Finally the puffed dough structure becomes rigid, creating the finished texture, which will shatter and crackle as you bite into it.

This is the seventh post in my Foundations Series - I've decided to sprinkle a few in amongst my recipe posts this summer.


A few ideas for how to use your puff:

Galette des Rois - The reason I make puff every January. I think it's a bit of a shame I only make this once a year - you could always break tradition and make it now.

Pear Tart Tatin - I'd love to try this recipe again, I haven't made it in years.

Palmiers or Elephant Ears - I usually make these with any offcuts. I sprinkled a couple of pinches of freshly ground cardamon over a batch just about to go into the oven last week, which was lovely.


*


Finally, the Poires au Chocolat 2013 survey has now closed.

As promised, a few of my favourite stats:
- 762 readers completed the survey
- two-thirds had made a recipe
- of the 2/3, just under 60% had made three or more recipes.
Friday, 1 June 2012

Foundations no.6 - Egg Yolk Custard


I'm not sure I can imagine a life without custard. It seeps into so many recipes and cultures. It never stops flowing into trifles and over crumbles.

As well as creating custard to pour lavishly over your dessert, this method (and variations upon it) can be used to make a stirred custard base for ice cream. And that's before we even look at baked custards like crème brûlée, custard tarts, crème pâtissière style concoctions or relatives like lemon curd.

Yet traditional custard can be a bit daunting - all the talk of curdling, lumps and long stirring times often put people off (and, it seems, a rather strong attachment in the UK to custard powder). Being able to make an egg-thickened custard is a great skill to have, which is why I chose it for this series.


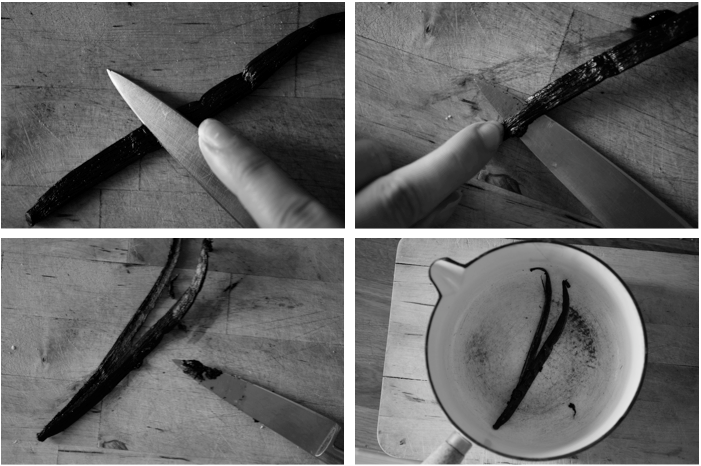
Though you can use vanilla extract as flavouring, there's nothing quite like infusing custards with a proper vanilla pod. Above I've shown my method for splitting and scraping a pod. The photos run l-r, top to bottom.

1/ Take your pod and place it on a chopping board. Hold it down then run your knife along the pod at an angle to flatten it - it may be easier to use the blunt side of your knife.

2/ Insert your knife into the middle of the pod, then pull down along it, splitting it. It can help to press lightly on top of the knife with a finger as it moves.

3/ Run the knife down the inside of each side, removing the seeds.

4/ Add both the seeds and the scraped pod to the pan.


When you want to start making your custard, you need to get everything ready.

For my custard (based on this recipe) I had 300ml milk, 1 vanilla pod, 5 egg yolks, 25g caster sugar and 50ml double cream.

In particular, your yolks need to be in a bowl by the stove (as you can see, I'd run out so a big teacup had to do) with a whisk handy (the first one I tried was too big for my teacup, so do check). It's also helpful to have the cream in a jug big enough to hold all the custard (i.e. not the one pictured...) and to have a sieve on hand.


Add the milk and sugar to the pan with the vanilla pod. Place over a medium-high heat and briefly whisk to release the seeds and help the vanilla infuse.

When it starts to steam, you're ready to temper the egg yolks. Turn the heat off.


Start by whisking the yolks to break them up. Then slowly pour in about 1/3 of the hot milk, constantly whisking the yolks.


Once you've added the 1/3 milk, quickly give the yolk mixture an extra whisk.


Return the yolk mixture to the pan, whisking as you add it. Scrape all the last drops into the pan with a spatula.

Remove the whisk from the pan and exchange it for a wooden spoon (I find a spatula doesn't hold the coating like a spoon, making it hard to test). Turn the heat back on under the pan - a low to medium heat should be enough. I would start low and then increase another time if you're happy - it will take a bit longer but is worth it if you're nervous.


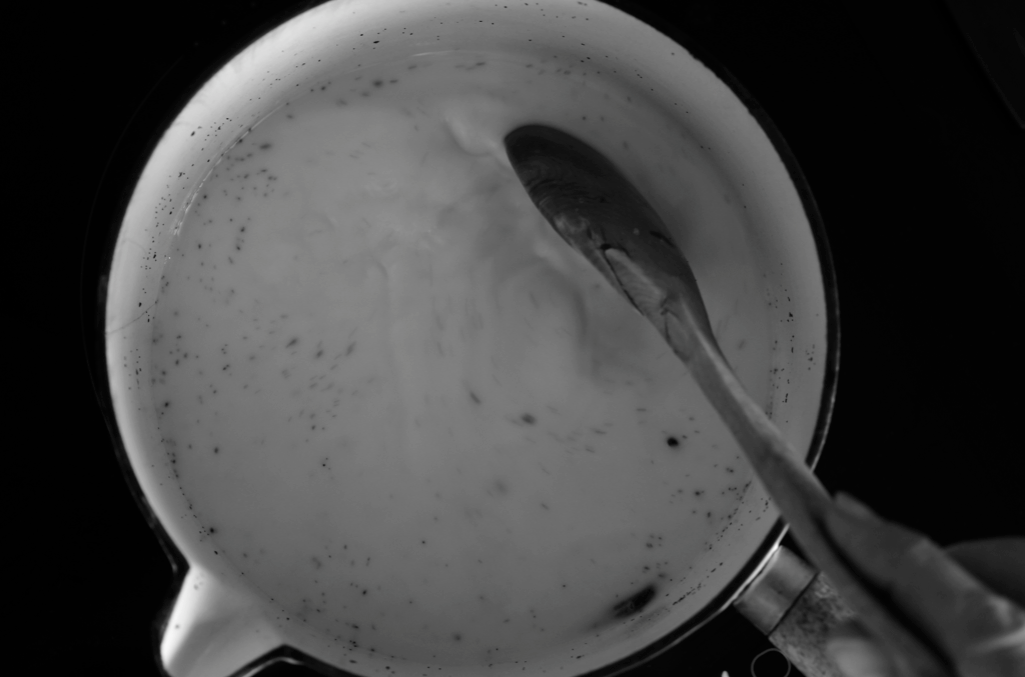
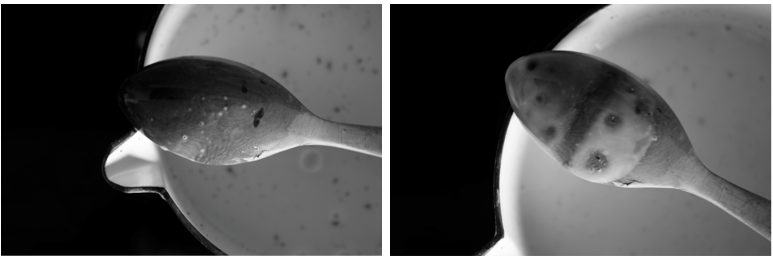
Stir constantly over the heat until the custard thickens, making sure you scrape the corners and bottom to stop lumps forming. When you remove the spoon at first, the custard won't coat the back at all (see below, left).

Once it's thick enough, it will coat the back of the spoon and you will be able to draw a clearly visible line through it, as you can see on the right. (It's not normally blotchy - they seemed to have formed around clumps of vanilla seeds - but it's the thickness you're looking for).


When you're happy with the thickness, strain the custard into the jug containing the cream and stir well. You need to strain the custard to catch the chalaza (the little connecting threads between the yolk and white) and any little lumps that have formed.

The process of straining and the cold cream will also quickly stop the cooking. You can also sit the jug in a bath of ice water - ice cream recipes often include this step. Cover the surface of the custard with clingfilm so a skin doesn't form.

I should note that I generally use a recipe for custard that doesn't call for the blanching the egg yolks and sugar beforehand. Many recipes do and if you're making crème pâtissière or similar, you will need to. I haven't included it above but you essentially just whisk the two together until very pale and thick before adding the milk. Be careful to start whisking the sugar in immediately - if left on top of the yolks the sugar will 'burn' them, forming lumps.


Four recipes that use this technique:

Mixed Berry Meringue with Custard
Buttered Pecan and Butterscotch Ice Cream
Mint Choc Chip Ice Cream
Rich Vanilla Ice Cream

*

This is the last post of my current Foundations series. The first post was on rubbing in to create pastry. The second covered brown butter, followed by a third on creaming butter and sugar, a forth about icing cakes and a fifth looking at chocolate ganache. It will return next year.

ShareThis