Showing posts with label yeast. Show all posts

Tuesday, 24 June 2014

Yeasted Waffles


I used to have two problems with making waffles.

First, by the time I'd got up, mixed the batter, left it to rise and then actually made the waffles, I was ravenous. I don't like waiting around for my breakfast. Second, I didn't like the way that they a/ went limp quickly and b/ had to be served as each one was ready to avoid a/. Despite the problems, I still made a lot of waffles whenever I was back in Switzerland (and therefore in close vicinity to mum's waffle iron).


Last week I got my own waffle iron as a birthday present. It's a stovetop one that sits on my gas hob. I've been practicing nearly every day since (I think the batch this morning was the 9th) and I think I've finally worked out how to cook with it. It seems that every type and even model of waffle maker is quite different - I think you probably have to retouch your recipe and technique every time you try a new one (though I think the bulky electric ones are easier to use and get good results with).

With my new waffle enthusiasm, I set about solving my two problems. I knew the first could be solved by an overnight rise in the fridge, though adjusting the amount of yeast and deciding on the optimum amount of rise took some time. I thought the second might be solved by a warm oven. It turns out that you need a medium-hot oven, but it does work, creating lovely crispy edges. I haven't tried it with a bigger batch (I was so used to making this recipe I forgot to double when I had my friends to stay this weekend, much to my despair) and I'd be a bit worried that the first ones might get a bit too crispy, but it's worth a try.

I like mine with very crispy streaky bacon, some banana or strawberries and lashings of maple syrup (despite the fact that apparently fruit and bacon is weird?). I've also recently discovered the purer pleasure of a bit of salted butter melted over the top with some maple syrup. What do you like with your waffles?


Yeasted Waffles

30g unsalted butter
125g plain flour
1 tbsp brown sugar
a few pinches of fine sea salt
3/4 tsp instant yeast (about 3.5g or half a normal packet)
1 large egg
200ml milk
1 tsp vanilla paste

The evening before, make the batter. Place the butter in small saucepan and melt. Keep heating until the butter foams up and and the flecks go brown (see foundation if you're not used to brown butter). Pour into a bowl and put into the fridge to cool. Sieve the flour, brown sugar and salt into a big mixing bowl, then stir in the yeast. Make a well in the middle and add the egg, then whisk in, bringing some of the flour into the centre. Add the milk in several additions, whisking as you go. Once you have a smooth batter, whisk in the vanilla and the cooled brown butter (can be warm but not hot to the touch). Cover with clingfilm. Leave to rise at room temperature for half an hour or so then place in the fridge overnight.

The next morning, take out the mixture (it won't have doubled in size but it should be full of bubbles) and preheat the oven to 180C/350F with a baking tray inside. Let the mixture warm up a bit as you organise toppings, make a pot of tea and preheat the waffle iron. Make according to the instructions on your waffle iron, placing each one straight into the oven as it's done. I get 4 ladles of mixture from this recipe (don't stir it and lose the bubbles). Set up your plates etc while the last one crisps then serve immediately.

(Makes 4 waffles, usually serves 2, 4 at a push)


Three other breakfast recipes:
Dutch Baby (a.k.a. puffed pancake)
Seville Orange Marmalade
Homemade Granola

Thursday, 22 May 2014

Plaited Milk Bread


I have some exciting news: in September, I start the Cambridge Graduate Course in Medicine! It's a four year accelerated course for graduates of other degrees (medicine is usually a 5-6 year undergraduate course in the UK but there are a handful of graduate courses too). It's not out of the blue, though I imagine it might seem so from the blog.

I'm really delighted to have this opportunity and I hope you'll stick with me through this change and as I become a doctor. Blogging is important to me and I want to continue so it shouldn't make too much difference to this space.


This is a lovely recipe that I've been making for a year or so. It's lightly enriched with a glossy crust and a soft, cream coloured interior. It's great as bread and toast (especially with butter and jam) and also for dishes that use stale bread like french toast and bread and butter pudding (and the recipe coming next week).

It's a simple three strand plait, just like the one I had in my hair for the majority of my childhood. You could also try a more complicated plait with this recipe - I'd love to have a go at an eight strand à la vintage Bake Off.


Finally, the Poires au Chocolat 2014 Survey is still open - I'd be very grateful if you could fill it out. If you don't add any comments, it only takes about 30 seconds. To take it, just click here.


Plaited Milk Bread
(adapted from Signe Johansen's Scandilicious Baking)

250ml milk (whole or semi-skimmed work)
50g unsalted butter
250g white bread flour
250g plain flour
50g caster sugar
2 tsp fine sea salt
7g instant yeast (1 sachet usually)
1 large egg

Place the milk and butter into a small saucepan and heat until the butter has melted and the milk is steaming (scalding the milk helps soften the bread). Pour into a bowl (a metal one will help it cool quickly) and place into the fridge to cool down.

Sieve the bread flour, plain flour, sugar and salt into a mixer bowl. Stir together then sprinkle in the yeast and stir it in too. Briefly beat the egg up then remove a teaspoon to another bowl (to use as egg wash later). Check the milk has cooled down to blood temperature or less. If it has, add the milk and the egg to the bowl and stir together until you have a shaggy dough. Knead on the mixer with the dough hook (I use 6 on my KA) for 5 minutes until the dough is silky and elastic. Cover the bowl with cling film and leave to rise in a warm place - it generally doubles in size in roughly 1hr 15 - 1 hr 45 minutes.

When it has risen, scrape the dough out of the bowl and divide into three pieces - they should be around 300g each. Roll each piece out into an even rope that's about 30-35cm (roughly 12-14") long. Place them next to each other heading away from you (i.e. looking like I I I) and squish the top ends together, so you have a tripod. Pull one of the outer strands over so that it rests between the other two. Repeat with the outer strand on the other side and so on. When you get to the end, press the strands together and tuck both ends under the loaf (like this). Transfer to a large, lightly greased baked sheet. Cover with a clean tea towel and leave to rise again for about 40 minutes to an hour - if you poke it gently with a finger the indent should stay visible without springing fully back.

Meanwhile, preheat the oven to 200C/390F (fan). When ready, add about 1/2 tsp of milk to the extra bit of egg and carefully and gently brush the loaf all over. Place a dish of boiling water on the bottom rack of the oven and then place the bread in the top half of the oven. Bake for 10 minutes then reduce the temperature to 180C/350F (fan). Bake for an additional 15-25 minutes or until the bread is a shiny and deep brown and sounds hollow when tapped on the bottom (I slightly overbaked the loaf in the photos by mistake, but only just). Remove to a wire rack to cool fully before slicing.

(Makes one large loaf)


Three more posts about yeast:
Foundations no.9 - Using Yeast
Blueberry Braided Bread
Butterkuchen

Thursday, 17 April 2014

Hot Cross Buns v.5


"Morel, as usual, was up early, whistling and sawing in the yard. At seven o'clock the family heard him buy threepennyworth of hot-cross buns; he talked with gusto to the little girl who brought them, calling her "my darling". He turned away several boys who came with more buns, telling them they had been "kested" by a little lass. Then Mrs. Morel got up, and the family straggled down. It was an immense luxury to everybody, this lying in bed just beyond the ordinary time on a weekday. And Paul and Arthur read before breakfast, and had the meal unwashed, sitting in their shirt-sleeves. This was another holiday luxury. The room was warm. Everything felt free of care and anxiety. There was a sense of plenty in the house."

Sons and Lovers, D. H. Lawrence, 1913, Chapter 7 (describing Good Friday).


After last year, I wanted to look at another element of the history of hot cross buns. I did start looking at the Elizabeth I decree a few weeks ago but sadly it seems I've run out of time (I blame the ebook). I have made some buns today, though, and I thought the Sons and Lovers quote was worth sharing.

The things I did differently this year:
- Switched the caster sugar for brown sugar.
- Put the dough in the fridge overnight for the first rise.

I also experimented with using a gluten free flour mix for the crosses, to see if it stopped it clumping up a bit. It wasn't a good idea - it was hard to pipe and went a bit weird in the oven.

The recipe from last year still stands - rather than writing it out with so few (and not especially big or essential) changes this year, it seems simpler to direct you back: Hot Cross Buns v.4.


Finally, Poires won the Best Use of Video award at the SAVEUR Best Food Blog Awards 2014! Thank you so much for your votes - I never thought I'd win a Readers' Choice award. They're flying me to Las Vegas for the awards party next month, which should be an excellent adventure.

To celebrate, I made a little video of the bun shaping process I use (the one I explained with words and pictures in v.3). Normally I avoid direct sunlight for photos & videos but the buns needed to be shaped so I thought I'd go outside my comfort zone a little. I'm not sure I like it but I can't really resent a sunny spring morning.

Thank you, once again, for your support - it means a lot.


The other versions:
Four
Three
Two
One

Friday, 13 December 2013

St Lucia Saffron Buns


Today, the 13th of December, is St Lucia's day. In most parts of Scandinavia, these saffron buns - also known as Lussekatter or Lussebullar - are made to celebrate.


Lucia of Syracuse was one of the earliest Christian martyrs, killed by the Romans in AD 304. Lucia - Lucy in English - is the patron saint of the blind and her celebration is one of light and hope at the darkest point in the year.


Each country has a different St Lucia song about light and darkness. Here's the first stanza of the Swedish song in English (from Sweden.se, which also has more information and photos of the celebrations):

"The night treads heavily
around yards and dwellings
In places unreached by sun,
the shadows brood
Into our dark house she comes,
bearing lighted candles,
Saint Lucia, Saint Lucia!"

John Donne wrote about Lucia's day and light too:


"‘Tis the year’s midnight, and it is the day’s,
Lucy’s, who scarce seven hours herself unmasks;
The sun is spent, and now his flasks
Send forth light squibs, no constant rays;"

A Nocturnal Upon St. Lucy’s Day – John Donne, c.1627.


Having looked at some more pictures of Lucia buns today I've realised that I should probably be shaping them by coiling the ends round to give a curlier 's' shape. Having said that, I've become rather fond of the way I've been tucking the ends underneath and their slightly awkward shape once they've been baked.


There isn't enough saffron in my recipe to turn the colour of the dough more than a creamy pale yellow but I didn't want to add more (it's so expensive and I don't like a strong saffron flavour) or use food dye. I tried cranberries and raisins to stud the bread but I loved dried cherries the most (as suggested by Signe). The cherries plump up from the moisture in the dough and have a spicy flavour that works beautifully.

I really love these buns - they're soft and tender inside, with a delicate sweetness and a crisp, shiny crust. They've warmed my cold hands and brightened many of my dark December mornings.


St Lucia Saffron Buns
(inspired by Scandilicious Baking by Signe Johansen, Trine Hahnemann and The Great Scandinavian Baking Book by Beatrice Ojakangas)

180ml milk
10 strands of saffron
60g unsalted butter
10g fresh yeast/4g instant yeast
300g plain flour
30g caster sugar
1/2 tsp fine sea salt
1 egg + 1 for eggwash*
16 dried cherries (or raisins, cranberries etc)

Heat the milk and saffron in a small saucepan until the milk starts to steam and bubble. Pour into a bowl/jug to steep and cool. Place the butter in the milk pan and heat until melted - leave to cool in the pan. If you're using fresh yeast, when the milk has cooled to body temperature crumble the yeast into the milk and stir. Place the flour, sugar and salt into the bowl of a stand mixer and stir together with a spoon. Stir the instant yeast into the dry ingredients at this point if you're using it. Pour the milk, butter and one beaten egg into the bowl and stir together until it starts to form a dough. Put onto the machine and knead on medium-high (I use 6 on my KA) for 5 minutes (do time this). The dough should be slightly shiny, elastic and coming away from the sides of the bowl - it's quite a wet dough. Cover with cling film and leave to rise for 75 minutes or until doubled (you can also leave it in the fridge overnight to rise).

Scrape the dough out onto a floured surface and give it a few gentle folds to knock out some of the air. Divide the dough into 8 (around 75g each) and place the dough pieces under a clean tea towel. Take one out and roll and shape it into a rope about 7"/18cm long then put it back under the towel to rest while you shape the others. Get a baking sheet and line it with baking parchment. Take the rope you formed first and shape into an S by curling each end round. Place onto the baking sheet and cover with another clean tea towel. Repeat with the other seven. Leave to rise covered in the tea towel for 15 minutes and preheat the oven to 180C/350F.

When they've risen, push a cherry into the middle of the swirl at the top and bottom of each bun, pushing deep into the bun (or they pop out). In a small bowl, beat the other egg with a pinch of salt. Brush the buns with the egg wash, carefully covering all of the sides and down into the dips. Place into the oven and bake for 16-20 minutes (mine are usually perfect at 18), turning half way if your oven bakes unevenly - they're ready when they're risen, deep golden brown and sound hollow if you tap them on the bottom.

Remove to a wire rack to cool for a few minutes - eat while they're still hot. They keep for 3-4 days in a sealed bag or box - reheat for 5 minutes in a hot oven before eating after the first day. They also freeze well.

(Makes 8 buns)

*I know using egg wash is a pain as you don't use much but these buns look so much better shiny and brown - I tend to use the remaining egg in scrambled eggs or something similar.


Three more recipes that include milk:
Coconut Cream Cake
Pancakes with Lemon & Thyme Sugar
Vanilla Ice Cream

Thursday, 21 November 2013

Foundations no.9 - Using Yeast


When you first saw my Butterkuchen post, did the yeast put you off?

I know several accomplished bakers who shy away from it and as it was also mentioned a few times in my survey, I thought I would write a post trying to demystify using yeast. I'm not an expert at bread making but I do like making enriched breads and, as you can see in my successive Hot Cross Bun posts, I've increased in confidence over the years.


There are several types of yeast you might come across: dried (often called active dry), instant, fresh (a.k.a. cake/compressed) and sourdough starters. For the sweet bread baking I do, I use instant or fresh.

Instant yeast is generally easy to find. You can get it in sachets (often 7g or around 2 teaspoons) or bigger packs. I prefer instant to active dried yeast as you can mix it straight into the ingredients (dried yeast needs activating, usually by mixing it with warm liquids and leaving it for a bit). Instant yeast is formed into lots of tiny rod shapes (as you can see in the photo above) to give a big surface area, which means the yeast starts working quickly once it comes into contact with liquid.

Sometimes the packets have other ingredients - emulsifiers are relatively common, as is the addition of ascorbic acid (a.k.a. vitamin C - some say it increases the rise and/or helps create consistent results, I imagine partly because the optimum pH for yeast fermentation is slightly acidic).

{The photo series below shows a batch of dough rising in my relatively cold kitchen a few days ago - the number in the corner refers to the number of minutes.}


In Switzerland you can buy fresh yeast in the chiller cabinet in supermarkets - even the small ones. It's harder to find in the UK. Bakeries will sometimes give or sell you a small amount but it can be a struggle to find somewhere that bakes on site (surprisingly, one of the best bets is the bakery in a big supermarket). You can also get it online from the Bertinet Kitchen Bakery (they also sell via amazon) - it's delivered in temperature-controlled packaging and I was really pleased with the batch I received last week. It's often sold in small blocks of 42g (you can see one on the right in the top photo). Generally I crumble it into the wet ingredients but it can also be added straight into the dough.

One of my favourite things about working with yeast is the way my hands smell after I've crumbled fresh yeast into the bowl.

To convert a recipe from instant yeast to fresh, triple the quantity (i.e. 7g instant = 21g fresh). Essentially, 10g fresh = 4g active dry = 3.3g instant.


Yeast is a single-celled fungus. There are many species of yeast - the one we use for brewing and baking is called Saccharomyces cerevisae.

Yeast metabolizes sugar in the dough to produce energy for itself. This anaerobic reaction creates carbon dioxide and alcohol:


The carbon dioxide gas is trapped by the dough and inflates it. When you put the dough in the oven the alcohol evaporates - becomes a gas - and therefore also expands, adding to the early rise called oven spring.

This occurs even in a dough where sugar is not added as an ingredient because enzymes in the dough (such as amylase, which we also have in our digestive system) work on the starch, breaking it down into glucose.


Generally, the idea is to use as little yeast as possible to get the rise - a slow rise gives better flavour, partly because of other flavour molecules that develop during fermentation. This is why many recipes call for the first rise to occur overnight in the fridge or use a pre-ferment. If the recipe doesn't tell you to rise the dough overnight and you decide to, you can reduce the amount of yeast (I'd go for half or a third).

Yeast will work fastest at around 38C/100F, but this won't necessarily give you the best result. If you want a quick rise then a temperature of around 26C/80F (a warm place/airing cupboard, perhaps) is convenient - otherwise go for room temperature (usually around 21C/70F) or the fridge.

I've also heard that you can freeze fresh yeast in small pieces to improve the length of time you can keep it. I froze some a few days ago but I haven't tried using it yet so I can't verify it personally. We've always kept fresh yeast in the fridge for 2-3 weeks and dried yeast in the cupboard.

As you can see in the photos, dough can take a bit of time to get going - be patient. It may take longer than the recipe states. The more enriched the dough, the slower the rise is likely to be. Spices (especially cinnamon) can also slow the fermentation - which is why cinnamon rolls usually have the spices in the buttery filling.


So, overall, the three things most likely to cause problems are:

TEMPERATURE
Yeast is a living organism and so, at temperature extremes, it will die (like you or I). The main time this is a danger with enriched breads is if you're scalding milk, melting butter or heating something similar just before you add it to the dough - you need to make sure it cools down (transferring it to a metal bowl and putting it in the fridge will speed it up). I go for body temperature.

SALT
Too much salt or salt that gets directly into contact with the yeast will also cause problems. The key with most recipes is to stir the salt into the dry ingredients before you add the yeast so that the salt is distributed through the flour (so you don't spoon the yeast directly on top of the salt you've just tipped into the bowl). You can also add them to different sides of the bowl.

ALREADY DEAD
If your yeast is out of date, hasn't been used in time or hasn't been stored correctly, it probably won't work. Check the packet date and the amount of time you can use it after opening (for instance, a packet of instant I have states that the sachet must be used within 48 hours of opening). Fresh yeast should be a pale creamy colour, ever-so-slightly damp and smell nice.

***

This is the ninth post in my Foundations series, which explains techniques like making meringue (part one, part two) and brown butter.


Four recipes that use yeast:
Stollen
Butterkuchen
Cinnamon Cardamon Kringel Bread
Blueberry Braided Bread

Thursday, 7 November 2013

Butterkuchen


Butterkuchen means 'Butter Cake' in German. It's part of a family of sheet cakes (called Blechkuchen) that are often made with yeasted dough. This is one of the simplest.

More poignantly, Butterkuchen is also called Freud-und-Leid-Kuchen or 'Joy and Sorrow Cake' because it is often served at weddings and funerals in North Germany. I think the name shows beautifully how entwined food is with our celebrations, our emotions and our lives.


When I decided to make a Butterkuchen I wasn't sure where to start. If I'm looking at making a recipe where I either have no idea who to trust or there are so many authoritative recipes that I don't know where to begin, I turn to a method I developed a few years ago for choux pastry.

First, I found six recipes, three in English and three in German: One, Two, Three, Four, Five, Six.

I then typed each ingredient into a spreadsheet, making conversions and translations as I went. From there I divided each ingredient weight by the flour weight in each recipe (i.e., for no.1 below, sugar was 30/250 = 0.12) so that I had a ratio (I sometimes use eggs as the starting point too). This means I can directly compare the proportions in each recipe.


Instead of working out the average proportion for each ingredient I tend to have a look and decide on a sensible value, taking into account my general preferences and outliers. For instance, with the sugar for the dough, I chose 0.1 after looking at 0.12, 0.28, 0.11, 0.12, 0.12 and 0.1, as I tend to err on the side of less sugar and 0.28 seemed out of line.

I then decided on a size for the recipe based on the ingredient I started with (i.e. flour). For this one I chose to make a small sheet, as it's much better when it's fresh and warm from the oven, so I went for 250g of flour. I then multiplied up the remaining ingredients (i.e, for the sugar, 0.1 x 250 = 25g).


Finally, I work out a method from comparing the recipes and my experience with similar recipes. I then adjust the ingredients and method if needed as I test. This one worked perfectly the first time, so I just tested it twice again to check it was consistent.

A few of the recipes I found included cinnamon in the topping but I decided to focus on the butter, almonds and vanilla. Vanilla is often included in the recipes as vanilla sugar sachets but I was in a luxurious mood and decided to rub the seeds from half a vanilla bean into the sugar for the topping. I think it's worth it - the flavour and smell is wonderful and the flecks look very pretty in the sugar crust.


This is a really enjoyable recipe to make. There's something incredibly satisfying about poking the holes in the soft dough and then filling all of the dents with the little chunks of butter. It's also absolutely delicious - buttery, crisp, crunchy, nutty and almost like a doughnut.


Butterkuchen
(created as explained above)

For the dough:
125ml whole milk
50g unsalted butter
250g plain flour
25g caster sugar
1/2 tsp fine sea salt
1 1/4 tsp fast action dried yeast
1 egg

For the topping:
60g white caster sugar
1/2 vanilla pod*
75g unsalted butter
60g flaked almonds

Put the milk and butter into a small pan and heat until the butter has melted and the milk is steaming. Pour into a bowl (preferably metal) and place in the fridge or freezer to cool. Once the milk has cooled to warm, whisk the flour, sugar and salt together in the bowl of a stand mixer. Sprinkle in the yeast and whisk in. Lightly beat the egg then add it and the milk to the bowl. Stir until the dough comes together. Attach the dough hook and knead for 4 minutes - by the end, the dough should be smooth and elastic. It's very sticky at this point but don't worry. Cover with cling film or a clean tea towel and leave to rise in a warm, draft-free place until the dough has doubled (about 45-60 minutes).

Dust a work surface with flour then tip the dough out onto it. Dust the top with flour then roll out to an even rectangle of about 28 x 20cm (11 x 8"). Transfer to a greased, rimmed baking sheet. Cover with a clean tea towel and leave to rise for about 20-30 minutes - it won't rise a huge amount, but when it's ready a poke should leave a clear indent.

Preheat the oven to 200C/390F. Weigh out the sugar into a small bowl. Split the vanilla pod and scrape the seeds into the bowl. Rub the seeds into the sugar until they're evenly distributed. Cut the butter up into tiny cubes. When the dough is ready use a finger to poke lots of dents in the dough (pushing down to the bottom but not making a hole - see picture above) - you may need to dip your finger in the sugar if it starts sticking to the dough. Place a small cube of butter in each of the dents. Sprinkle the dough evenly with the vanilla sugar, then the almonds.

Bake for about 17-20 minutes, turning at 10 minutes, until the dough has risen, bronzed and the almonds are golden-brown all over and caramelising. There might be butter in the tray - don't worry. Once it has cooled a little, you should be able to tap it and get a hollow sound. Leave to cool until warm, then slice up. Best eaten while still warm or very fresh. You can freeze it and reheat it but it's not quite the same.

(Makes one slab, about 12 slices)

*You could use vanilla sugar instead, though I love the way the seeds look and the amount of flavour they give. You can make a batch of vanilla sugar from the scraped pod when you make this and use it next time (or for something else, of course). If you don't have vanilla sugar or a pod, you could add 1 tsp of vanilla paste, or failing that, extract, to the dough, though it won't have the same effect.

(Updated 20/07/15)


Three more recipes for sweet yeasted breads:
2011: Super Chocolate Cinnamon Rolls
2012: Chelsea Buns
2013: Cinnamon Cardamon Kringel Bread

Thursday, 15 August 2013

Blueberry Braided Bread: A Guest Post


My post today is over on The Pastry Affair, a gorgeous baking blog written by Kristin Rosenau.

Kristin started out as an astroparticle physicist. Then, in 2010, Kristin left physics to work as a baker (she's pretty good at it... Hello, Nutella Espresso Rolls.). She worked as a full-time baker for two years, tutoring on the side, then changed course once more, to go back to graduate school to become a physics teacher. As you can imagine, I've followed her journey with great interest as the parallels between our lives played out across the ocean.

While Kristin goes through a few more life changes, she asked me to write a guest post. I made this soft, sweet braided bread with blueberry compote and cream cheese filling and got a bit carried away with braiding metaphors. You can find the post, recipe and photos of the finished braid here.


Three recipes of Kristen's that I'd love to try:
Chocolate Chunk Ginger Cookies
Pumpkin Espresso Bread
Toasted Almond Cookies with a Dried Fig Filling

Monday, 15 April 2013

Cinnamon-Cardamon Kringel Bread


Every time I make this bread, two memories pop up.

The first time I tested this idea, I was listening to the radio online. Someone had linked to the programs - I think on twitter - and I'd clicked though, curious. As they describe, "We spent five months at Harper High School in Chicago, where last year alone 29 current and recent students were shot. 29. We went to get a sense of what it means to live in the midst of all this gun violence, how teens and adults navigate a world of funerals and Homecoming dances." It's split into two halves: Part One and Part Two. Guns and gun crime weren't even on my radar as a child or teenager. I know nothing else about the show but the programs have stayed with me.

It's not just the words or their lives that have stayed with me, but the way I felt, listening quietly as I wove the dough together. It's as if I entwined my heavy heart into the recipe and I can't disentangle the strands.


Then, before I went out to Switzerland a few weeks ago, a few of my friends came to stay to celebrate a friend's birthday. I'd made the bread a few times in the weeks after listening to the radio and I wove it together again, taking the series you see below, the morning everyone was arriving. I ran out of time to bake it and had to throw it into the fridge to rise overnight. We ate it for breakfast the next day, hacking off slice after slice as we drank our tea and chatted.

I miss having lots of good friends in Oxford. All but one of my friends from university have moved away and are spread out over the UK. I miss the community of university, even though I know it wasn't as rosy as my memory tells me. It was so good to spend that weekend talking for hour after hour after hour - to get past catching up on the basics of our new lives and onto other stories, onto childhood memories and new questions.

So now the bread is infused with two very different - but both strong, both emotionally evocative - memories.


Tip dough out onto a floured surface / Coax into a square / Roll out into a rectangle / Smear with butter and sprinkle with sugar and spices/


Roll up from the long side / Cut carefully into two / Weave the strands together, cut side up / Pull round into a circle, weave the ends together and seal.


This recipe started with Ottolenghi's Chocolate Pecan Krantz Cake. As I mentioned in that post, I wanted to try a cinnamon roll version using the shaping technique but changing the recipe. When I got around to making it, I added cardamon and I decided to try and loop it around into a circle.

My main problem was trying to get the baking right - the first time I underbaked the loaf and I slightly burnt the edges twice. In the end I settled on a high starting temperature then a decrease for the rest of the baking time, which seems to work well.

After making a few versions, I saw a very similar idea on Pinterest and discovered that the loaf has a name and a history. It's called a kringel and it comes from Estonia. I first saw the pictures from this post, which I followed to this one.


Every time I make it, it looks a bit different - here's a blurry picture of my first loaf. The other reason the two photos above look a bit different is that I was experimenting with spelt flour. Both of the times I tried spelt, the dough was wetter and didn't rise as much. I think I prefer the texture of the loaf made from normal bread flour, though that might just be because it's what I'm used to. The photo below shows a slice of both loaves - the spelt is on the bottom (the normal one is only part of a slice). I might fiddle a bit more with the spelt version - I do quite like the flavour.

This bread has become one of my favourite breakfasts. I particularly like it toasted with some salted butter. Sometimes I even add a slather of jam (my favourite is raspberry and redcurrant) or marmalade.

*

The past few weeks have been a bit rough and I know a few things have been a bit erratic (especially replying to emails and posting on time). Hopefully things will calm down now I'm back in Oxford and I'll get back into a rhythm.


Update: I've written about this recipe for Food 52 and after re-testing it, I've updated the recipe below too.

I've combined the butter & cinnamon sugar for the filling so the layers of the roll stick together - it makes the shaping easier (as you can see below - the full set of new photos is on Food 52).


Cinnamon-Cardamon Kringel Bread
(no specific source but owes general sweet bread knowledge to Peter Reinhart and Signe Johansen)

For the dough:
250ml whole milk
75g unsalted butter
450g strong white flour
70g caster sugar
1/2 tsp fine sea salt
10 green cardamon pods
7g fast action yeast (normally 1 packet)
1 egg

For the filling:
60g unsalted butter
40g caster sugar (or brown sugar)
2 tsp ground cinnamon
1/4 tsp fine sea salt (or use salted butter)

Take the butter out of the fridge for the filling to let it soften. Put the milk and butter for the dough into a small pan and heat over medium until the butter has melted, then turn up and scald (bring just up to the boil). Pour into a bowl and pop into the fridge to cool (this can take some time).

Crush the cardamon pods with the side of a knife and remove the seeds, then finely grind the seeds. Combine the flour, sugar, salt, cardamon in a mixer bowl and stir, then add the yeast and stir again. Beat the egg up lightly in a bowl. Once the milk has cooled to body temperature, add it and the egg to the bowl. Stir until you have a shaggy dough then put on the machine and knead with the dough hook for 4-5 minutes until the dough comes away from the sides and passes the windowpane test. Cover the bowl with cling film and leave to rise for about 45 - 75 minutes until the dough has doubled in size (you could also do this rise overnight).

Turn the dough out onto a lightly floured surface then roll out into a rectangle of 30 x 40cm (12" x 16"). Beat the soft butter, sugar, cinnamon and salt together. Spread the mixture over the entire surface of the dough. Roll up from the long side, then use a serrated knife to split the roll lengthways (it doesn't fall apart as much as the pictures - I was trying a different filling technique). Transfer to a sheet of baking parchment (I forgot to do this during the photo series above - if you do too, just carefully lift it onto the paper later). Weave the two strands together with the cut side up. Bring the ends together then press together to make a ring. Cover with cling film and leave to rise for about 30 minutes until puffy (if you press it with a finger, it should make a dent). You can also place into the fridge overnight to rise slowly - take out to warm up ten minutes before baking.

While it rises, preheat the oven to 180C/350F. Use the parchment to shift the ring onto a tray. Put into the oven and bake for ten minutes, then reduce the temperature to 160C/320F. Bake for 25-35 minutes until the ring is risen, deep brown and sounds hollow when knocked. Remove to a wire rack to cool. Keeps fresh for a day, toasts for a few days, freezes well.

(Makes one large loaf)

{updated March 2014}
UPDATE 30/11/17: Just adjusted the baking time range as mine baked a bit faster.


Three more posts with cardamon or cinnamon:
Cardamon Orange Pound Cake
Apple Cinnamon Layer Cake
Super Chocolate Cinnamon Rolls

Friday, 22 March 2013

Hot Cross Buns v.4


If you flip to the 'Bun: Hot Cross Bun' entry in the Oxford Companion to Food, you'll find the idea that the Saxons ate buns marked with a cross in honour of Eostre, a goddess of light, and that her name was transplanted to the Christian festival of Easter.

It sounds fascinating. Yet the only vaguely contemporary mention of Eostre is in Bede's eighth century 'De temporum ratione' (a.k.a. The Reckoning of Time). Chapter 15 describes the Anglo-Saxon names for the months of the year - April is called Eosturmonath, after Eostre "in whose honour feasts were celebrated". Bede notes that her name has transferred to Easter, "calling the joys of the new rite by the time-honoured name of the old observance". (ed. Wallis, 1999). In this - the only mention of Eostre - there's no description of the contents of the feasts or of crossed buns.

As this is part of the time period I studied (though I really focused slightly later), this whole idea started nagging at me, especially when I saw how often it's repeated. Where did it come from?


According to the OED's etymology section for 'Easter', some scholars believe Bede made the goddess and the name connection up. I don't think I agree - it seems odd for Bede, a devout monk, a famous biblical scholar and a historian, to invent a claim that Easter had any association with paganism. We have a small number of surviving manuscripts from the period so it's perfectly feasible that other references were lost or never recorded. The OED's alternative claim for the history of the word sounds convincing - but that doesn't mean Bede made Eostre up.

During the conversion of the English, the Christians tried to adapt the existing structure of worship to the new religion. The idea of the transference or merging of a festival - and, within that, food - therefore seems possible. This concept of adaption and exchange is recorded in Pope Gregory's letter to Abbot Mellitus in 601, which was preserved by Bede in his Ecclesiastical History. Pope Gregory writes that they should not destroy the existing temples but clear them, destroy the idols and turn them into churches, so the people can worship at the place they are accustomed to. Instead of sacrificing oxen to their pagan gods, the people should kill the oxen for a Christian feast.

After all, "there is no doubt that it is impossible to efface everything at once from their obdurate minds; because he who endeavours to ascend to the highest place, rises by degrees or steps, and not by leaps." (ed. McClure, 2008).


Next, I had a look through my books on medieval food to see if I could find any relevant information. I couldn't find anything, so I sent an email to my beloved-tutor-now-friend asking if she had any ideas about where I could look. She pointed me towards the rest of chapter 15, where Bede mentions that Solmonath (February) "can be called 'month of cakes', which they offered to their gods in that month" (ed. Wallis, 1999). As the cakes were given as offerings to 'their gods' in general, Eostre was probably included. The division between bread and cake would not become clear for centuries, so it's not too much of a stretch to imagine the cakes were what we would call loaves or buns. But where does the cross come from? Did the buns become associated with Good Friday because of their existing cross or were they made to fit the occasion?

I haven't found the answer to the cross questions, but I think I've found the possible origin of the Oxford Companion's claims - an article in the New York Times from 1912, Who were the first to cry 'Hot Cross Buns?'. Along with the Saxon claims, it includes the Greek and Roman versions that the book mentions (that I haven't seen elsewhere), including the amazing note that two small loaves were found plainly marked with a cross in Herculaneum (destroyed and preserved with Pompeii in AD 79). It's worth noting that many people slash their loaves twice before baking them without thinking of the significance of the symbol - the bakers of Herculaneum or the Anglo-Saxons could have done the same.


I want to keep digging to find the answers (though, of course, it could easily be a figment of a long lost imagination), so - as with the recipe - I'll come back with any updates next year. I hope you don't mind me getting geeky about this (though I feel like I'm on slightly shaky ground - I know enough for it to be shameful if I get it wrong, but not enough to be sure of it). I love revisiting the buns every year, moving forward step by step, as Gregory advocates. Here are the other versions: three, two, one.

This year I have:
- Doubled the fruit and added some extra cinnamon.
- Decided to use dried yeast as it's easier to find (though you can adapt it back if you can get fresh yeast).
- Switched the water for milk and added a touch of extra liquid.
- Altered the cross mixture so it's a bit thicker, so they look a little bolder.
- Lowered the oven temperature a bit.

I also tried soaking the fruit in hot water (before I changed to milk) but I discovered that as it kneaded, the softened fruit was smashed into the dough until it basically disappeared. I've found that it can do this even without soaking, so for the buns in the pictures I tried kneading it on the machine until ready, then hand kneading the fruit in. I can't decide if half the charm of the buns is the way some of the fruit becomes part of the dough or not. I think I might try half at the beginning and half at the end next year.


Hot Cross Buns v.4
(heavily adapted from Delia Smith's Complete Cookery Course)

For the dough:
225ml milk
50g unsalted butter
450g strong white bread flour
50g caster sugar
7g instant yeast
1 tsp cinnamon
1/2 tsp ground ginger
1/2 tsp fine sea salt
1/4 tsp freshly ground nutmeg
5 whole cloves, ground (optional)
1 egg, beaten
100g sultanas
100g currants

For the candied peel:
1 orange
1/2 lemon
100ml water
100g granulated sugar

For the crosses:
1 tbsp plain flour
2 tsp water

Pour the milk and butter into a small pan and place over medium heat until the butter melts. Turn the heat up until the milk starts steaming (this scalds the milk, which makes the dough softer). Pour into a bowl to cool (I often put it into the fridge to speed it up if I've already made the candied peel).

Use a vegetable peeler to take big strips of peel off the orange and lemon - try to have as little white on the inside of the strip as possible. Chop into 2-3mm little squares, stacking a few strips together for speed. Place them in a medium pan and add 3-4 cm of cold water. Bring up to a strong boil and let bubble for a minute or so until the water is bright yellow. Strain into a bowl, then add more cold water and the peels to the pan and repeat. Repeat for a third and final time, leaving the peel in the strainer. Throw out the bitter yellow water.

Combine the 100ml of water and sugar in the pan and heat on medium until the sugar has dissolved, swirling every now and again. Turn up the heat a little and add the blanched peel. Occasionally brush a little cold water around the sides to stop the sugar crystallizing. Let it bubble away until the peel is translucent, about 8-10 minutes. Let cool for five minutes then drain the peel off from the syrup, reserving both.

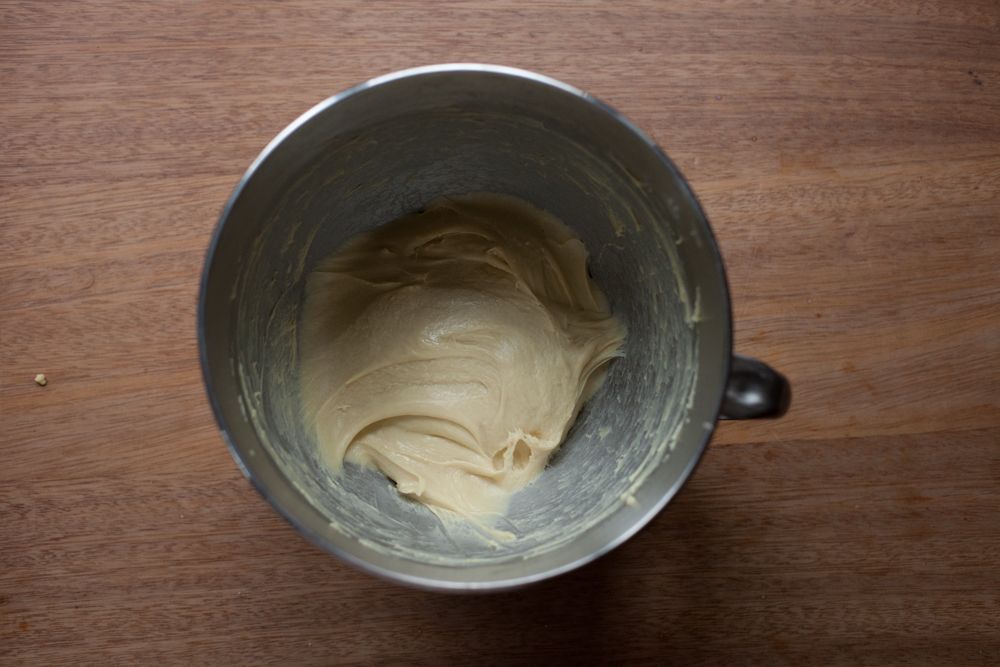
Sift the flour, sugar, yeast, cinnamon, ginger, salt, nutmeg and cloves into the bowl of your stand mixer (or a mixing bowl if making by hand). Stir the peel into the milk (this stops the peel clumping). Add the sultanas, currants, peely-milk (it should be around room temperature or less or it'll kill the yeast) and beaten egg into the bowl. Stir with a spoon until the mixture comes together. Attach the dough hook and knead for 6 minutes (if making by hand turn out onto floured surface and hand knead) until smooth and bouncy - it should pass the windowpane test. Place the dough into a big, lightly oiled bowl, cover with cling film and leave to rise in a warm place until doubled (usually about 1hr 15 mins in my rather warm kitchen - can be quite a bit longer if it's cold but time develops the flavour so don't worry - you can also leave it to rise in the fridge overnight).

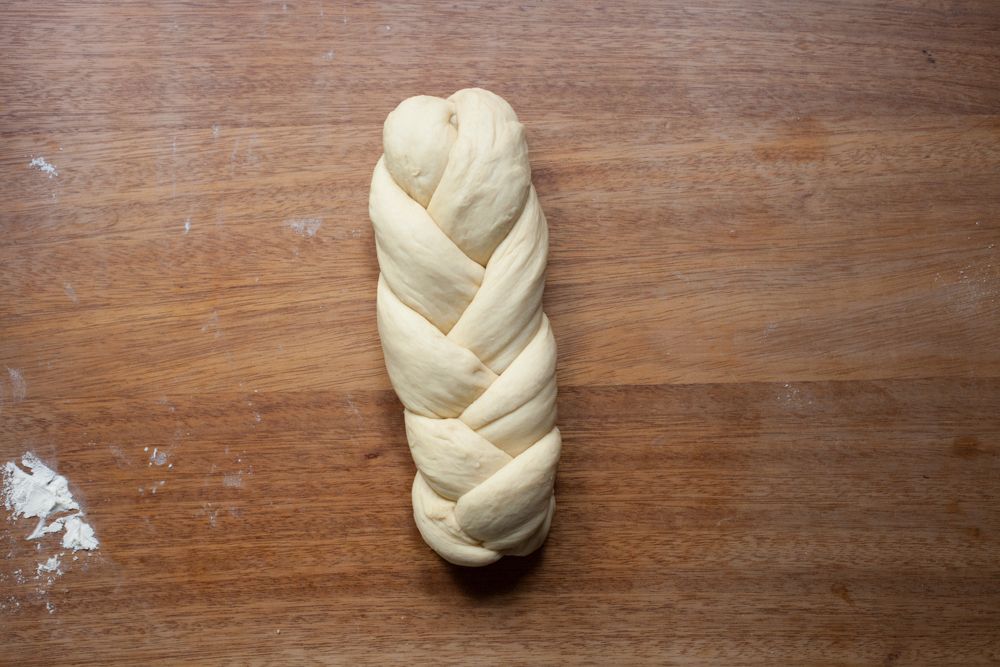
Turn the dough out of the bowl onto a lightly floured surface. Cut the dough with a sharp knife into 16 pieces and place them under a sheet of cling film. Roll into balls one by one, keeping them under the cling film when you're not shaping (see v.5 for a video of the technique). Line a tin with baking parchment then arrange the buns on the sheet. Cover again with cling film and leave to rise for 45 minutes until puffy. Preheat the oven to 200C/390F.

Combine the flour with the water to create a smooth, thick paste (you may need to add a few extra drops of water) then scoop it into a piping bag. Unwrap the buns and pipe the paste over each bun in the cross pattern. Bake for 15-20 minutes until golden brown and hollow when tapped. Brush the reserved peel syrup over the buns then remove to a cooling rack.

Serve split, toasted and topped with lots of salted butter. They freeze very well - I usually split them with a serrated knife then toast from frozen but you can defrost them first too.

(Makes 16)

Edit 27/03/16: This year, I took out the cloves, which was good - less effort for no obvious loss. I've put them as optional above.


Three more recipes that use dried fruit:
Apricot & Fig Tea Loaf
Chelsea Buns
Fig & Hazelnut Crumble Bars
http://www.bloglovin.com/blog/1796585/?claim=c4yxn9tnep3

ShareThis