Showing posts with label puff pastry. Show all posts

Tuesday, 28 May 2013

Foundations no.7 - Rough Puff Pastry


Perhaps I'm odd, but I find rolling out puff pastry relaxing. There's something quietly satisfying about rolling back and forth, shaping, dusting, brushing and folding the smooth, cool dough. The whole process is calming - a bit like kneading your frustration into bread, but in a gentle way. As one of my chefs used to say, you have to treat her like a lady.

Puff is admittedly much easier to pick up in a supermarket, but as well as the therapeutic benefits, I think it tastes much better freshly homemade. Quite a few of the supermarket brands - certainly all the ones I could find yesterday - are made with margarine instead of butter and need several preservatives so they can sit on the shelf. If you're making it fresh, you only need four ingredients: flour, butter, water and salt.
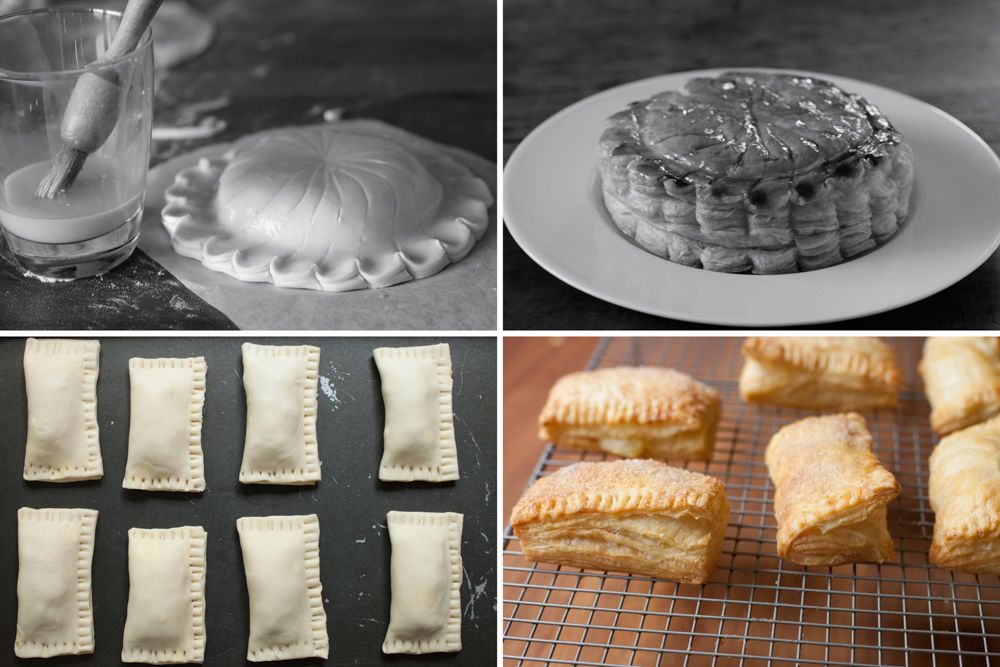


Rough puff is a term that covers a range of methods of making a puffy pastry that rises less than classic puff pastry. At one end you have flaky shortcrust, which barely rises. This method, at the other end, gives about 75% of the rise of classic (the pictures above show the rise I've got from this puff). I rarely bother to make classic now - I don't mind a rough edge to something that is meant to be homemade and I think this gives a great result for less work. Though I admit that it's still time consuming, rough puff doesn't take much active work - I reckon, aside from chilling time, it's about 20 minutes.

Puff pastry is a laminated dough, which means that you create lots of layers of incredibly thin pastry sandwiched with layers of fat. It's hard to tell when laminated pastry was first made, especially as pastry knowledge was generally assumed rather than written down in cookbooks. According to Karen Hess, the first recognisable recipe for puff pastry was recorded in The Good Housewife's Jewel, written by Thomas Dawson in 1586. Danish pastries and croissants are also made from a laminated dough, but they evolved to include yeast and other ingredients such as milk.

Classic puff has 729 layers that are about a hundredth of a millimeter thick once you've given it six turns (or, to be accurate, one inclusion and 5 turns). After one single turn of the rough puff you have 3 layers, then 9, then 27 - so if you do four turns you'll get 81, or five will give you 243.
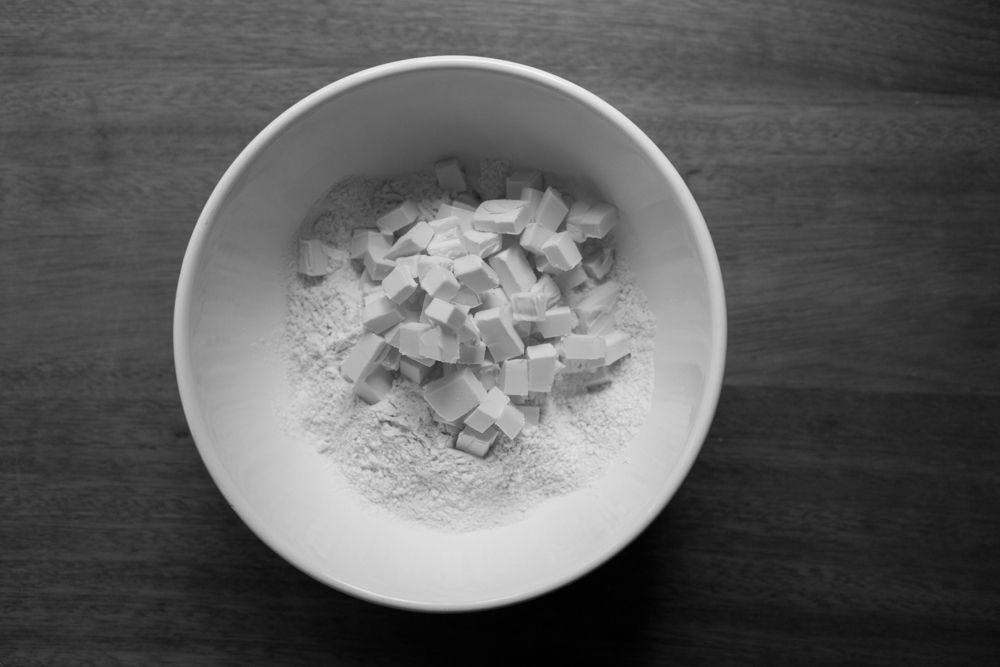


To start, sieve the flour and salt into a bowl. Chop the cold (but not totally rock solid) butter into smallish chunks and add to the bowl.

The ratio is usually the same weight of flour and butter, half the weight in water and 1 tsp of fine sea salt per 500g of flour (I originally found this ratio in Michel Roux's Pastry). I normally use 250g plain flour, 250g unsalted butter, 125ml ice cold water and 1/2 tsp fine sea salt. This makes about 630g of pastry. I usually use plain flour but some recipes call for strong or bread flour to aid the gluten development in the layers.
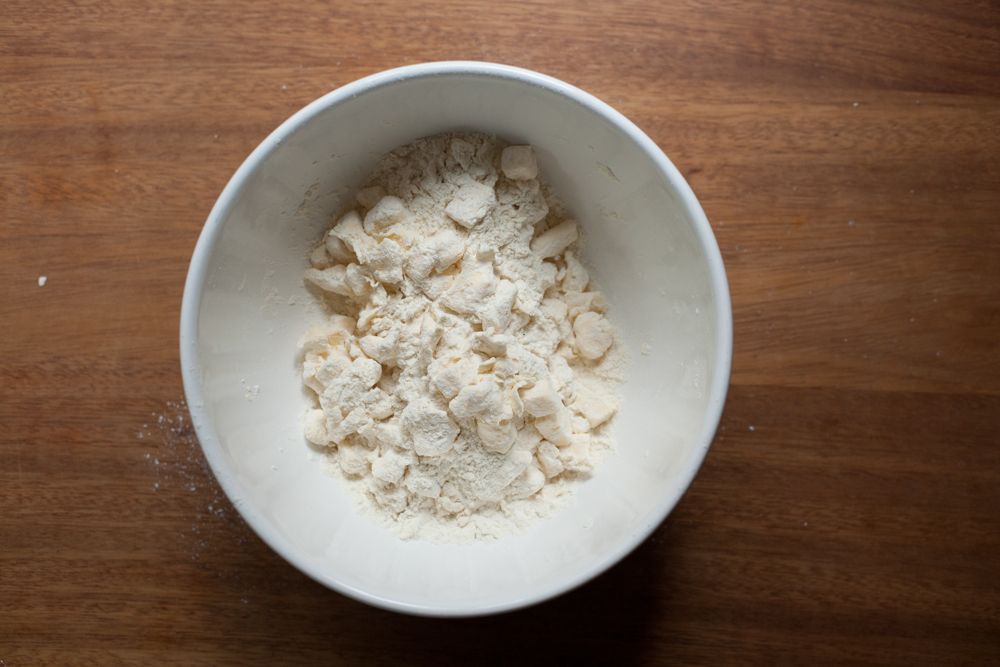


Combine the flour and salt in a bowl. Rub the butter into the flour with your hands using the same technique as regular pastry (see this foundation for a video and more), except that you want to leave lumps of butter. You do still need to rub about a third of the butter in fully, though, and you don't want the chunks to still be solid cubes (just squish them a bit). Keep going until you have something that resembles this:
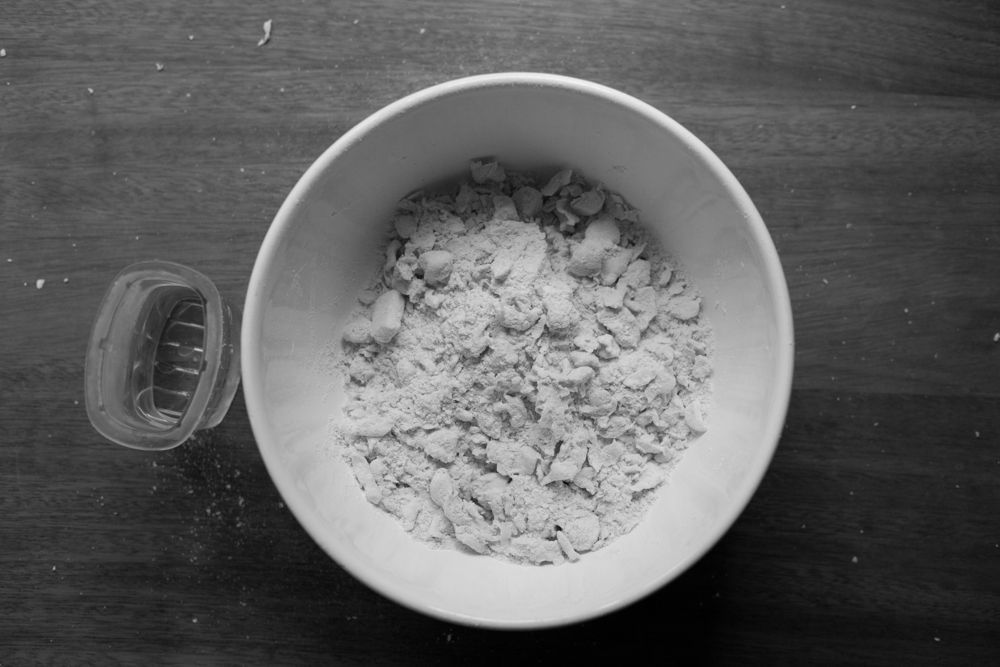


When it's ready, add the cold water and bring together into a dough, then pat into a square, wrap in cling film and chill for 30 minutes. The video below shows how I do this.

Just so you know if you've never played one, my videos don't have sound - I find it intrusive when I'm just trying to look at the process, be quiet or play my own music. They're essentially moving pictures. I do them in one take from one position and don't edit much (on that note, please excuse my head bobbing into frame in the one below). I hope that it shows the process as it really happens so you can a get a clear image of what to do. If you're reading this via email subscription, the videos don't show up for some reason - you'll need to click through to the web version.


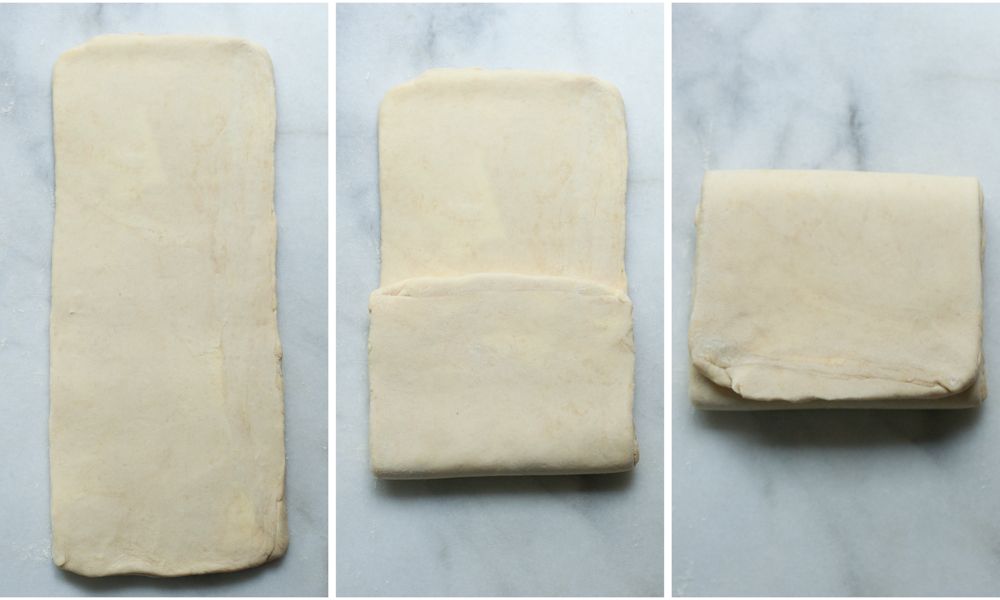
After chilling, you can do the first turn (as in the video below). Lightly flour the surface then roll the dough out evenly, keeping it as rectangular as possible - gently pat and form the sides to help keep the shape. You want a rectangle of roughly 40 x 20 cm. Don't let the pastry stick to the surface - slide your fingers underneath to check and dust again if needed. If a bit of butter opens on the surface then dab a bit of flour on it.

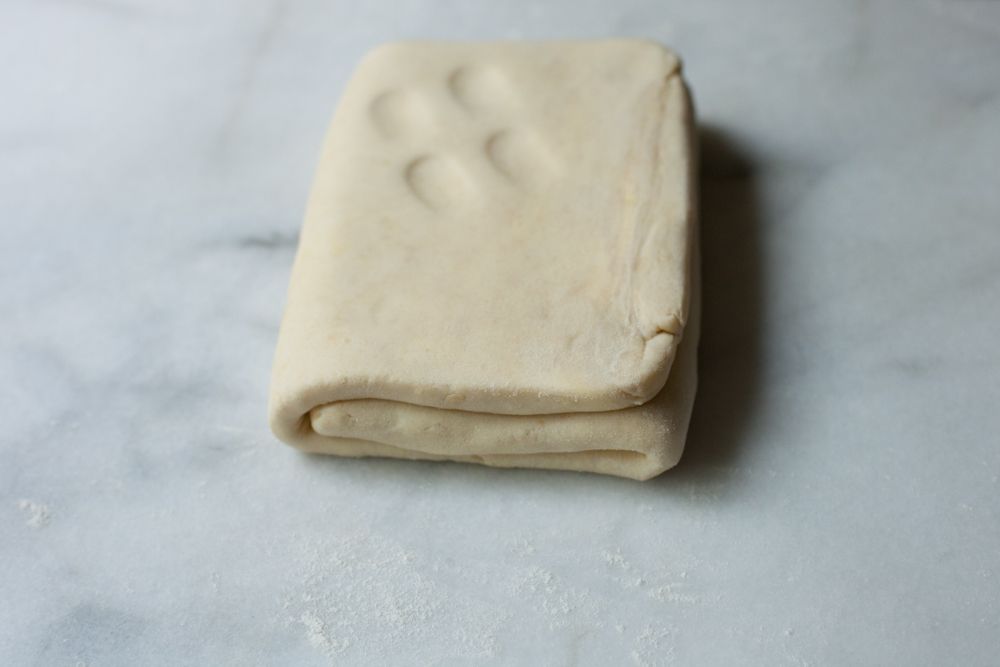
To do the turn itself, brush off any excess flour with your fingers or a soft pastry brush. Fold the bottom 1/3 of the pastry up, brush the flour off, then fold then top 1/3 down so you have a neat parcel (see the top photo in the post - it's a bit like folding a letter). The edges should line up. Use a finger to make an imprint on the dough to keep track of the number of turns. Wrap in cling film and leave to chill for 45 minutes.

I always make my turns like this - they're called single turns. There's also something called a book turn, where you fold both sides in, then bring the two double sides together, but I find it easier to focus on one type.


After the dough has chilled, do the second and third turns straight after one another (unless the dough feels warm, soft or sticky, in which case you should chill in between). Repeat the rolling out and folding process (though I usually roll to 35 x 15cm after the first turn, creating a block of 10 x 15cm) then do the same thing again. The video below shows a single turn. Always keep the spine of the block on the same side when you roll out - I have mine like a book, so the open side is on the right and my finger imprints are on the top left. The dough should start feeling silky and smooth.

Once the dough has rested for another 45 minutes, do a forth turn (which you can watch below). You can leave it at four but I often do another, as I find I get better results with five.

You need to rest the dough regularly to make it easier to work with. As you combine or roll out the dough the gluten strands are stressed as they're pulled and worked into a new shape. They adjust and relax as they chill, which means the dough is less elastic and therefore easier to stretch again as you roll it out. The butter also hardens, which helps the lamination.


Chill for at least an hour before you roll it out to use it. Don't roll the puff too thin - about 5mm seems to be the minimum. Always cut the pastry with a sharp knife and remember to stack any offcuts up flat so that the layers remain aligned. Don't egg/milk wash the sides of the pastry or let it drip down or it'll bind the layers together.

When you finally subject your laminated dough to heat, the fat in between the layers of dough melts first. Then the water in the dough begins to evaporate, creating steam, which expands in the gaps left by the melted fat. The fat stops the steam from escaping, so the dough layers push up and apart from the pressure of the steam. Finally the puffed dough structure becomes rigid, creating the finished texture, which will shatter and crackle as you bite into it.

This is the seventh post in my Foundations Series - I've decided to sprinkle a few in amongst my recipe posts this summer.


A few ideas for how to use your puff:

Galette des Rois - The reason I make puff every January. I think it's a bit of a shame I only make this once a year - you could always break tradition and make it now.

Pear Tart Tatin - I'd love to try this recipe again, I haven't made it in years.

Palmiers or Elephant Ears - I usually make these with any offcuts. I sprinkled a couple of pinches of freshly ground cardamon over a batch just about to go into the oven last week, which was lovely.


*



Finally, the Poires au Chocolat 2013 survey has now closed.

As promised, a few of my favourite stats:
- 762 readers completed the survey
- two-thirds had made a recipe
- of the 2/3, just under 60% had made three or more recipes.

Thursday, 5 January 2012

Galette des Rois


I love foods that have a story and a tradition.

Galette des Rois or King Cake is made to celebrate Twelfth Night or Epiphany on January 6th. The cake changes according to region and country - this is the version from northern France. A bean, or fève, is always hidden in the galette - though now this is often a small collectible figurine.

Tradition goes that when you cut the cake, the youngest person present hides under the table. The cake is cut into the right number of pieces, then the youngest calls out who gets each piece. The person to find the hidden bean is the king for the day, hosts the next year and gets the crown. They get to pick a queen, who wears the other crown.


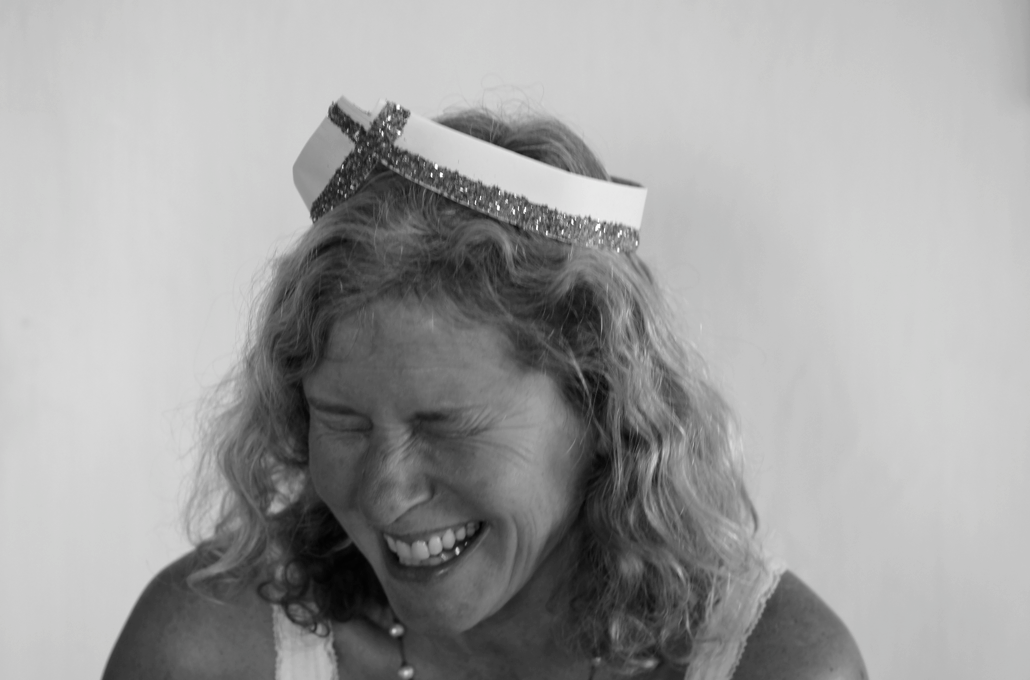
As I wasn't buying a galette, I needed crowns. I got out the paper, spray paint and glitter and had a wonderful time playing about.

I went a little bit crazy with the glitter. Most of the flat sparkles now if you catch it in the right light.


After I'd finished I made mum model them for me. Whenever I do this, she starts making funny faces and then we both end up crying with laughter. Good times.


I was going to buy some puff instead of making it. Sadly the only stuff I could find in the supermarkets was made with vegetable fats instead of butter. No good.

Instead I decided to try out Michel Roux's rough puff recipe from Pastry (you can find it online here). I was really pleased with the results - quicker and easier than classic puff and it turned out beautifully. Definitely a good recipe to have. I think I'm going to make some palmiers for mum with the spare chunk. I've tried to explain the technique for making the pretty edges to the galette in the recipe - we learnt how to do it last term.

Edit 2013: I have now written a step-by-step Foundations guide to making rough puff pastry (which is what I used here).


This recipe stood out for me as it didn't involve pastry cream. I've never been a big fan. Then last term we made it so many times and used it in so many ways - we were all totally sick of it by the end. I'm sure there'll be plenty more this term but I wanted to avoid it while I could.

I also followed Clotilde's suggestion of using some ground hazelnuts in the creme - I'm so glad I did. They add a lovely extra dimension.

I have to admit I wasn't convinced that this was going to be particularly tasty. I was very pleasantly surprised - it was totally delicious. Flaky and buttery with a complex nutty middle. Definitely worth trying.


Galette des Rois
(adapted from Chocolate and Zucchini)

For the creme d'amande:
65g unsalted butter, soft
65g caster sugar
50g ground almonds
15g ground hazelnuts
1/2 tbsp cornflour
pinch of salt
1 tsp flavouring of choice*
1 eggs

To assemble:
500g quality puff pastry
1 egg yolk
1 tbsp milk
1 tbsp icing sugar
1 tbsp hot water
2 beans or ceramic figures
2 crowns

Beat the butter in a stand mixer (or by hand) until very soft and creamy. Mix the sugar, almonds, hazelnuts cornflour and salt together in another bowl, then tip in. Mix until combined. Add the flavouring and beat again. Finally add the eggs one by one, making sure they're well distributed before you add the next. Transfer to a smaller bowl and put in the fridge to firm up for an hour.

When you're ready to make the galettes, take the puff pastry out of the fridge (make sure it's well chilled) and divide into four. Put two chunks back into the fridge. Roll out one of the pieces until it's roughly a 7"/18cm circle. Using a plate or the bottom of a cake tin, cut out a 6"/15cm circle with a sharp knife and place onto a piece of parchment paper. Roll out the other piece and cut a slightly bigger circle - 6.5"/16cm or so.

Combine the egg yolk and milk to make an egg wash. Brush the edge of the smaller circle with it, being careful to not go over the edge (can stop the layers separating). Spoon about two heaped tablespoons of creme d'amande into the centre (within the egg) and smooth out into a disc. Place the ceramic/bean on top and press in (it's best around the edge so it doesn't get caught in the knife when you cut it, like this). Drape the bigger piece of puff over the top and smooth out any air bubbles on the creme. Press it in and up so that the two edges align and the curve is tight to the creme underneath. Press to seal.

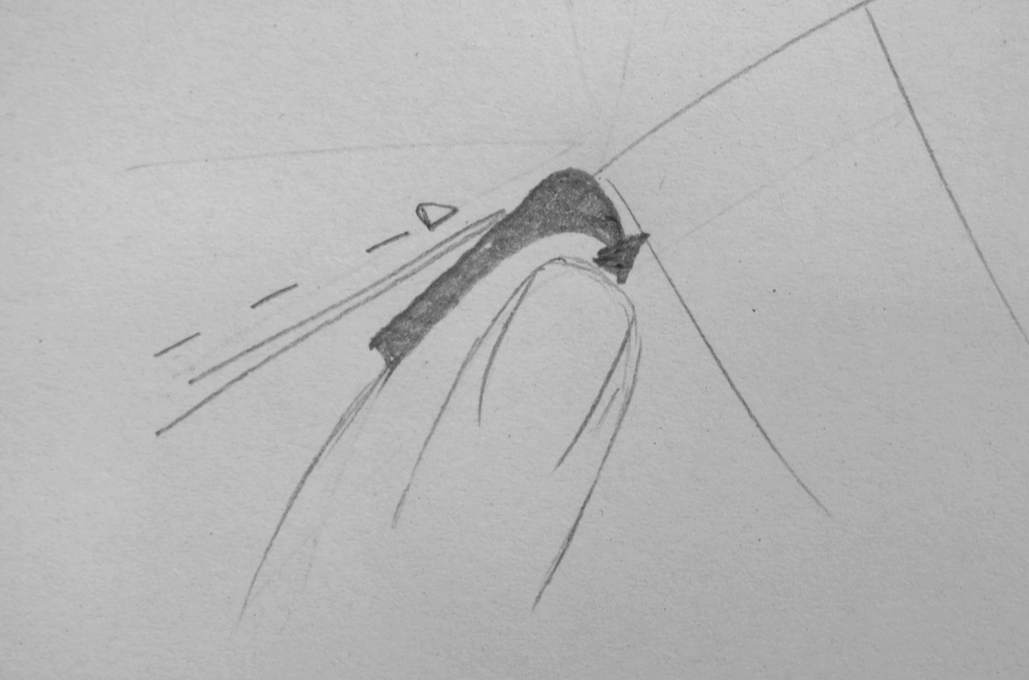
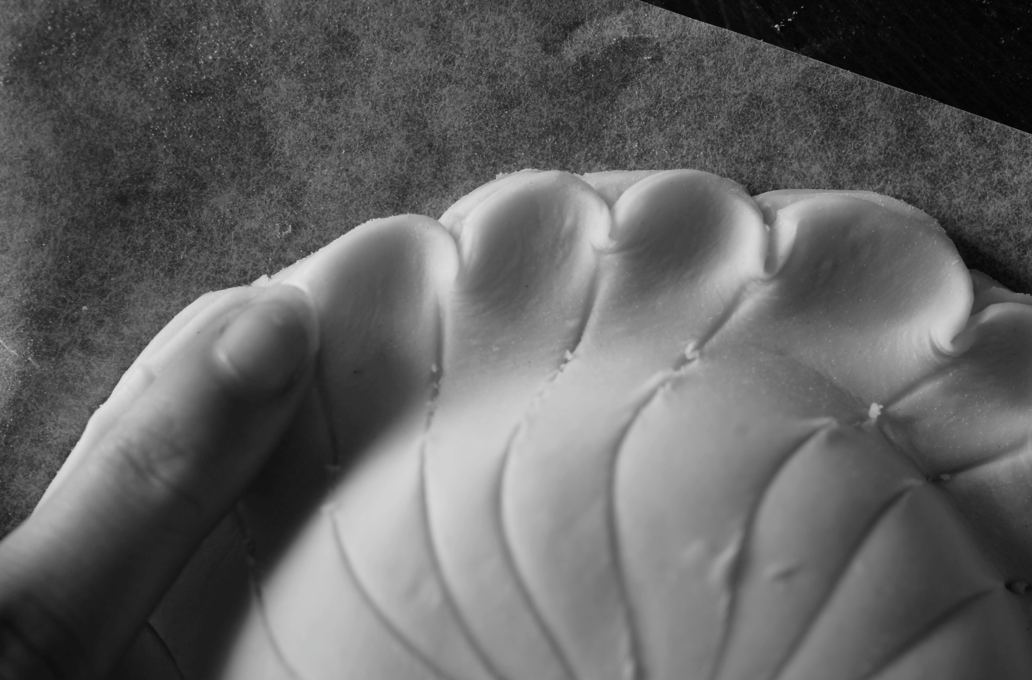
Use the blunt side of a knife to score a pattern in the top, running down from the centre to the edge in a curve. Turn the galette as you go, making until you have a full circle. Crimp the edges by placing your finger onto the pastry at an angle and curling the knife around it (see diagram and photo). Carefully brush the top with egg wash, avoiding the edge again. Use the point of your knife to make five holes in the top - in the middle and then four more (helps the puff to rise evenly). Place onto a baking sheet using the parchment. Put into the fridge to chill for an hour. Repeat with the other 2 pieces to make the second galette. At this point you can freeze them for later.

Preheat the oven to 180C/350F. Bake the galettes straight from the fridge for 30-40 minutes until puffy and deep golden brown. Just before they come out, combine the icing sugar and hot water. Remove from the oven to a wire rack, then immediately brush with the glaze. Leave to cool (I placed a bit of kitchen towel underneath as they were a bit buttery on the bottom).

* You can use orange blossom water, the liquor of your choice (rum, brandy etc) or vanilla extract.

(Makes 2 small galettes - each serves 3-4)


Three more Christmas recipes:
Mince Pies
Stollen
Bûche de Noël

Thursday, 20 January 2011

Palmiers


I can't quite believe it has been fifteen days since my last post. I've been very busy but more than that I've been finding it hard to write. Usually this happens with essays rather than posts. With essays I just have to push through but this time it was nice that I could just step back for a few days.

Some really exciting things have happened in this break. I can't explain everything, but suffice to say that  my baking has taken a step towards the professional. Not only have I got some exciting new projects but a few days ago I was accepted onto the patisserie program at a culinary school I won't mention until everything is finalised...


Over the holidays I decided to make my own puff pastry. I loved the whole process - all the foldings, rolling out and resting. It does take time but it was a great learning process. Especially at the moment I don't have time to make it often, but I look forward to being able to once my finals are over.

I'm not going to type out the recipe I used for the puff below, but I used Tartelette's recipe here in conjunction with the pictures from her gluten free version. It worked wonderfully.


The final push that got me to try making puff was how much my mum loves palmiers (or as our local bakery calls them, coeur de france). They're incredibly simple to make and really delicious. I think the best bit is how the sugar caramelises on the bottoms of each one. It's not really a recipe - more of a technique. Have a look at Joy's comprehensive photos if you're confused at any point.


Palmiers
(adapted from Joy the Baker, here)

1 block of all-butter puff pastry (I used about 300g)
plenty of granulated sugar (perhaps 200g or so)

Line a big tray or two with greaseproof paper. Sprinkle a work surface liberally with the granulated sugar. Place the puff into the middle and sprinkle the top with a little more. Start rolling it out into a rectangle with a thickness of about 3 - 4 mm. Keep adding sugar as you roll it out to stop it sticking. Starting from the short end of your rectangle, start rolling it up until it reaches the middle. Repeat for the other side. Wrap this roll in clingfilm and chill for an hour (the sugar can liquify a bit - this is OK).

Preheat the oven to 200C/400F. Take the roll out of the fridge and slice with a sharp knife into 1cm thick slices. Place onto the lined sheet (you can dip the tops/bottoms in extra sugar too). Bake for 12-17 minutes until they are golden brown, checking carefully. You may need to rotate the tray halfway through. If you've greased your pan, remove the palmiers to a wire rack after a few minutes. If lined then you can leave them to cool on the tray.

Store in an airtight tin/box, best on the first day once cooled - start to get stale at 3-4 days.

(I made about 16 out of 1/4 of my puff)

UPDATED 26/11/17 - I made these with my homemade rough puff from this foundations post and used caster sugar instead of granulated. I also rolled up from the long edges so I had smaller ones with less of a swirl. I used about 200g (1/3 of the rough puff recipe) and made about 16 smaller ones. I've also previously tried sprinkling a bit of ground cardamon over the sugared dough before rolling up before, which was lovely. Next time I'm going to try a touch of salt on top before baking.


ShareThis